Inject Yourself into the AI and Make Any Image With Your Face! (100% FREE Method)
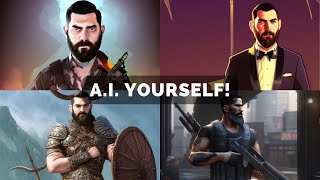
Matt Wolfe walks through DreamBooth on Colab to inject your face into AI images. Prepare 20 face photos at 512×512, train for 1000-2000 steps (takes about 37 minutes), then generate images by replacing celebrity names in prompts with your unique keyword. Use guidance_scale 5-15 and experiment with seeds to vary results.
Questions this video answers
About 20 images (example: 16 headshots + 4 waist-up).
512×512 pixels (resize and crop to square).
"photo of MrEflow" (author uses Mr. Eflow / MrEflow as the keyword).
person (replace default 'dog' with 'person').
Recommended range ~1,000–2,000; author used 2,000 (notes that overtraining can degrade likeness).
Chapters
What's up, everyone? Matt Wolf here, AKA E Flo. In this video we're going to talk about AI art and how you can generate images with your face on them. You can generate anything you can imagine. Just look at all these images I've put my face on. You can do anything like this once you know how to do what I'm talking about. I've literally generated hundreds of these. Put my face on everything. And you're going to be able to do that too right when this video's over. So let's go ahead and dive right in. Now, before you get into this, you're going to want about 20 images of yourself. In my specific example, I have 16 close in headshots and about 4 from the waist up. You want to try to get your face from as many different angles, different backgrounds and wearing different clothes as possible to really help train the AI. Now, all of these images should be exactly 512 by 512 pixels. You want to resize them and crop them so that they all are at that 512 by 512 aspect ratio. And then I rename all of the files as the prompt that I'm going to use to make my name show up more on that in the video. So once you've got your 20 or so images, first thing you're going to want to do is come to this long URL here. I will make sure the URL is available in the comments or the blog post below this video so, so you don't have to remember it. And once you're on this website, to start, you're just going to follow the steps on the screen. So first step, we're going to click this play button next to check type of GPU and VRAM available. Run anyway and let it do its thing here. That took, you know, just a couple seconds here. That step is done. We're going to come down to install requirements right here. We're going to click on Play next to install requirements. All right, so once these install requirements are done, this took about 47 seconds. Going to move down to the next step that says log into Hugging Face. So what you're going to want to do is you're going to want to click on this link here that says visit the model card and then you're going to need to sign up for a Hugging Face account. So go ahead and click Sign up, follow the instructions to sign up and then once you are signed up to Hugging Face for free. Now once you're signed up, you're actually going to want to close this tab completely. Come back to this page again. Click on this model card link again so that you're opening this link again. But while you're logged in, so make sure you're logged in. When you get to this page, there's going to be a button down here at the bottom to accept the terms and conditions. Make sure you click that button. That's why you clicked on this link again and open this page in a new tab. You need to click on the button to accept the terms and conditions. If you do not accept the terms and conditions, the process won't work. It won't work until you've checked that box. So make sure you check the box now. I've already checked it because I've run this a few times. Once you've checked that box, you're going to come up to the top right where your little profile icon should be. Click on it and come down to Settings. Under Settings, click on this Access tokens button. Go ahead and create a new token. The name really doesn't matter. It can be anything you want. I'm just going to put example and then you want to change the role to right. Go ahead and generate your token and it's going to give you a new code here. Go ahead and click this button to copy the code. Come over to your Dream Booth tab here and paste this code right here next to the hugging face token. Once you've pasted this code in, go ahead and press Play on this and it's going to make sure your API is properly plugged into the project. That takes less than a second. Now we're going to come down to this next step. Install xformers from pre Compiled Wheel. Go ahead and just click this play button and let it run. And that took about 12 seconds. So now we're going to scroll down to the settings and run. There's a button here that says Save to G Drive. I like to select that. If I save this to Google Drive, it makes it easier for me to reuse my trained images in the future. Under model name, we're going to leave that the same. We're not going to touch that output directory. This is going to be the area where it outputs the trained model that this is going to create. It's going to create a file with all of the details about the model so that you can use it again. So I'm going to call this Mr. E flow model no spaces. And then I'm going to go ahead and run this and it's going to make you connect to Google Drive to make sure that it can use your folders here. We're going to go ahead and allow this and it's going to take a few seconds to create these proper folders in the proper places. And you can see that took about 15 seconds there. So we're going to keep on scrolling down here to where it says start training. And we need to change a little bit of this code up in here. So next to instance prompt, this is going to be the prompt you're going to use to get it to pull in your face. So for example, if I was making an image of Mark Cuban in space, eating a burrito, wearing a cowboy hat, and I want to replace that image and not have Mark Cuban's face, but my own face, I need a prompt keyword to use in place of Mark Cuban. So my example, I use Mr. Eflow, that's my Twitter handle and my handle everywhere. You don't want to use something that's a common word. You don't want your code word to be Mark. Right, because there's a million marks out there. You want it to be something fairly unique. So my instance prompt, I'm going to put photo of Mr. Eflow and then I'm going to replace dog with person because I'm a person and not a dog. The class prompt, that's just the class. I put person here, so I'm going to replace dog also with person. The instance data directory, this is where we're going to upload those 20 square 5 by 12 images. We're going to upload that to this directory here. So I'm just going to call this Mr. Eflow and then the class data directory, I'm going to call Person. Then we're going to go ahead and click Play and it's going to create those various folders for us real quick. Didn't even take a full second. And now we're to the point where we're going to upload our images. All right, so you can press Play here and it'll give you an upload box to upload images. But what I found to be the faster way is if I come over here to this folder on the left side of the screen, click on this, open up the data folder, open up the Mr. Eflow folder here. And I'm going to put my files that I'm going to train right inside of this Mr. Eflow folder. So I'm going to go ahead and open all these files that have already pre cropped, select them all And I'm just going to drag and drop them over into this Mr. E flow folder. It's going to remind you uploaded files will get deleted when the runtime is recycled. That's fine. Now we've got all of our images uploaded here. You can see all 20 are uploaded. So I don't actually have to press this play button. I can skip this play button. We've already uploaded. This is the point now where we actually start to train our images. This is the point where we actually need to let it do its work in the background. This is the part that's going to take a good 30 minutes in the background. All right. But we do need to change some settings real quick here. We're going to go all the way down. We're going to leave everything mostly the same next to num class images here. I'm going to set this to 12 max train steps. This is basically how many times do you want the AI to go over these images over and over and over again to figure out what the model looks like. Now there is a sweet spot here. I find that anywhere between 1,000 and 2,000 seems to work. The more, the bigger the number, the longer it's going to take to process. But 2000 seems to have worked the best. In fact, I even did one where I trained it at 4,000 and the images, the final product came out worse than when I Change it at 2000. So you can over train these images and get it to a point where the face no longer looks like yours. So I've noticed that the max train steps between 1000 and 2000 seem to work. I've heard some rules of thumb that you want to multiply how many photos you're uploading by 100. So if you're uploading 20 photos, multiply that by a hundred, you got 2,000. That rule of thumb seems to have worked well for me when I've done this. So I'm going to put max train steps at 2000, the save interval. I'm also just going to put that at 2000. And then when this is all done processing, it's going to run some example images from you for you. Now, when it runs the example images right now it's going to give you an example image of ZW X dog. It's not going to know how to process that. So we need to change that to the prompt that we created earlier. So for this one, I'm going to change that to photo of Mr. E Flo Person. That way when it generates my samples, it's going to generate them using my face. All right, now I'm going to go ahead and click this play button. And this is the part that actually takes some time to process. So the video is probably going to pause while I process this and then we'll come back when it's all done. But I'm going to go ahead and press Play now. You're going to watch it start to do some work in the background and a bunch of text is going to show up. Now, there is one thing about using this Google website to process all of this is if you step away for too long, the site will time out and you'll have to start all over from scratch from the beginning. So while this is processing, you actually kind of want to scroll up and down the site here a little bit. You got some of these little arrows that will open and close boxes. You want to open and close stuff here. This is going to take a good 30 to 40 minutes, sometimes even upwards of an hour to process all of this. So just make sure that you're active on the site. What I tend to do, scroll around a little bit, open and close stuff. Then I'll go watch a YouTube video for like five minutes and then I'll come back, scroll around a little more, open up some stuff. But you probably don't want to step away from your computer while you're doing this. You want to kind of do other stuff while it's processing, come back to this page, make sure you're opening and closing stuff, make sure the page doesn't time out on you. All right, so I'm going to go ahead and let this run. I'll let you know how long it took when I come back. But for now, we're just, we're going to let it roll for a bit. All right, so that process is finished. Now you can see up here it took about 37 minutes to run all of that and to train my images. So the next step after we've done that is next to this weights directory. I'm just going to go ahead and leave it blank and press Play. It's just going to kind of set a default directory where it's going to put the finished products. And then I'm going to go ahead and click this play button to generate a grid of preview images just to make sure that everything's looking the way I would expect it to. So these are all AI generated images using my likeness and the photos that I uploaded, do they all look pretty close to me? I would say yep, they're all, you know, all pretty good. Some interesting outfit choices, but they look good. All right, so we're going to scroll on down here. Convert weights to ckpt. This is a file that you'll use if you want to use your training data again in the future. So if you're going to want to use this trained model so that you can create images out of this trained model in the future, you're probably going to want to run this conversion and download the file that it generates. So I'm going to go ahead and run the conversion real quick. All right, so that took about 23 seconds, and you can see that it saved it into my Google Drive under this folder here. So now I can find this model file again. I'll be able to use it again in the future. So. So next you're going to go to this inference click play on here, Let it run this script. All right, so that took about 37 seconds to run that script. And now we get to the fun stuff. So this random seed here, this could literally be any number. This is just a random number that the code uses to generate your images. So you can generate some images with a random seed number. If you don't like any of the images that came out, you can change the seed number with to a different number and see if you like the images that it generates that time. I'm going to go ahead and leave it as this default seed for now and click play. That took less than a second, and now we can type a prompt to generate some images of ourselves. So in this prompt, I'm going to use my keyword that I created earlier, photo of Mr. Eflow. And then we want to put person after it. You can also change the word person to woman or man if you want, and you'll get slightly different variations of the images. So all something to test. I've found that so far the best images I've gotten have come when I use the term person versus man or woman when I generate my images. So I'm going to put photo of Mr. Eflow person. So now it knows that it's going to inject me into this image and then I can add whatever I want. So wearing a top hat, on the beach, eating a potato, you can enter a negative prompt here. So if you want to make sure it doesn't include something specific, you can put that here. Number of samples. This is how many sample images it's going to generate for you. The bigger the number, the longer it's going to take for it to generate Them four seems to be like a pretty good number. This guidance scale, it seems like if you put the number somewhere between five and 15, you get the best images. If you go too far beyond that, they start to look like, really kind of dull. You go too far below it. The images seem to not have that much detail. So anywhere from 5 to 15 seems to work. You could play with this number and get different styles of images. I'm gonna go with nine. And then you can change the height and width. If you don't want to output a square image, you can change your aspect ratio here. I'm gonna go ahead and just leave it on 512x512 for right now. And then I'm gonna click play. And now it's going to run and generate some images for me. So it took about 39 seconds to generate these four images. Let's see what it's got. So this is the first image it generated of me in a top hat on the beach. And that's a potato on a plate. There's another one of me on a beach.
And you can see what it generated. I don't know what's going on with this one, but those do look like a plate of potatoes. A giant plate of potatoes. Now you're probably wondering, those don't look like those crazy cool, stylized images you showed me at the beginning of this video. How do I make them look like that? Well, there's a really cool little ninja trick to get images that look like that. So let me show you that real quick. If you go to this site, Lexica Art, this is all images that were generated with this same stable diffusion program. And you can actually see what prompts they use to get the images. So. So one of my favorite things to do on this site is to type in a celebrity name. And I like to look up a celebrity's name because then it's really easy to just replace that celebrity name with my own name. So, for instance, let's just do, I don't know, Tom Cruise, first name that came to my mind. So let's go ahead and search Tom Cruise. Now you can see a whole bunch of images that were generated with AI of Tom Cruise. So if I like a style of any of these images, I can go ahead and copy exactly what they did and replace the name Tom Cruise with Mr. Eflow Person. So let's find a really cool stylistic image here. So let's say I really like this one, a portrait drawing of Tom Cruise drawn by Robert Crumb. So I can go Ahead. And I can actually copy this entire prompt. You can see some other images that were generated using that exact same prompt. I can copy this prompt here, come over to Dream Booth, and in the prompt, paste that exact prompt, and then it gives me a seed number. I can actually copy this seed number, replace it with this one. Go ahead and press play so that it processes that seed number. It's got a guidance scale of 7 and dimensions of 512 by 512. So let's change our guidance scale here to 7 and the dimensions to 512 by 512. And we've got a portrait drawing of Tom Cruise drawn by Robert Crumb. So let's go ahead and replace Tom Cruise with Mr. Eflow person and see what it spits out at us. All right, so it took about 35 seconds this time. Let's see what it gave us. So here's a handful of drawing sort of images. Let's say I'm not really a big fan of the way any of these came out, and I want it to generate some more. Well, simple. I can go and change this seed right here to any random number I want. Let's just go for 2069, press play so that it adds that seed into it. And then maybe I want to change the guidance scale a little bit and see how that affects these images. Press play again. I've changed two variables here, but left the prompt the same. Change the seed number, change the guidance scale. Let's see how drastically just changing those two things change changes the output of what I get. All right, so that took about 36 seconds. And you can see here's some more drawings in various styles. This time it kind of made them all in black and white. Let's say I want it to be color. I can go and add that to the description. A portrait drawing of Mr. Eflo person drawn by Robert Crumb. Let's just go ahead and add colorful to the end and see how that changes things. All right, so here's what it got. It looks like some sort of campaign poster. Colorful drawing. You know, here's some interesting variations. And if I want to save them, I just right click save image as and save it to where you want to save your images. And that's really all there is to it. Now you can literally put your face on anything you want and any style image you want. Great for YouTube, thumbnails, profile pics, NFTs, whatever you want to do with them. Hope this video was helpful. I'm going to be creating a lot more videos about AI in the future, so check back for more. See you later.
More from Matt


AI News: Dots, GPT-6.1 Sol, Sonnet 5.5, Gemini 4, and everything you need to know