Make A Movie with AI: It's Crazy What We Can Do!
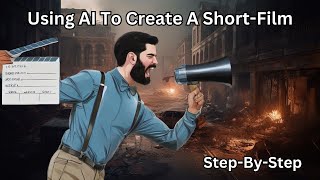
Matt Wolfe makes a 80-second documentary about an AI robot rebuilding civilization using only AI tools: GPT-4 for the script, Runway Gen-2 and Midjourney for visuals, 11 Labs for voiceover, Mubert for music, and DaVinci Resolve to assemble it all.
Questions this video answers
Between 60 and 90 seconds (final cut ≈ 1 minute 20 seconds / 80 seconds).
The Guardian.
April 25, 2023.
Chapters
In this video, I want to attempt to create a short film entirely using AI I've seen a lot of really cool videos circulating on Twitter, and I kind of want to figure out how they made them. So in this video, we're going to figure it out. Now, the point of this video is to show you how you can make a short film using AI tools, but also B, to show you how to kind of tie a whole bunch of different tools together. Because I think that's really where all of these new AI tools get really powerful, is when you take this tool and you piece it together with this tool and you sprinkle on a little bit of this tool over here and. And you combine them all to get something really, really cool. And that's what I want to demonstrate in this video, is just pulling all these pieces together and coming out with something completely unique. So I'm going to use AI to generate the script. I'm going to use AI to generate the video itself. I'm going to use AI to generate the voiceover. I'm going to use AI to generate the background music. The entire video from start to finish will be AI the only thing that I'm not really going to use AI for is is I'm gonna pull all the elements together inside of DaVinci Resolve, inside of my video editor. So let's just jump straight into it. So the first thing I need is a script to a movie. Now, this one, I don't want any dialogue in it. I want it to be a sort of documentary style with a voiceover throughout the whole thing. And I also need to generate a shot list to go with that voiceover. So to get the script, the voiceover, and the shot list, we're gonna use GPT4. So here's the initial prompt I'm gonna use. I'd like to make a short film that's between 60 and 90 seconds long. The concept of the film is that it will be a documentary about an AI robot that saves civilization. The film will have no dialog. The entire film will have a voiceover narrator that tells the story. Please generate a script for the narrator to read that shares the story. I'm basically telling GPT4. I don't want any dialog. Just tell a story and it will be in the form of a documentary. So this is going to be step one. Step two, after this is that I'm going to have it generate a shot list for me. Let's go ahead and have it generate our narration script first. All right, so it generated the entire narration and. And it even gave us a shot list in the initial prompt. I didn't even have to ask it for a shot list. I'm gonna have it generate a more detailed shot list now. But it actually already kind of envisioned what the whole film is gonna look like right here. So my next prompt for each of the shots in the above film, please give a much more detailed description of the shot itself. Include as much detail as possible around the setting and any objects or people in the shot. So now each of these shots, I'm gonna get a little more detailed so that I can use them for my prompting later. All right, so now we have a much more detailed shot list that I can use for prompt prompting. I'm gonna go ahead and create a new folder on my desktop here. Call it AI Short Film. That way, any clips that I make, I'm gonna save right to that folder there. So to generate these clips, I'm gonna use Runways Gen 2. And using Gen 2, I'm going to have the AI try to generate each of these shots. So in Gen 2, in order to generate a shot, we simply type EN Dash 2 and then we just literally paste our prompt in. So if I jump back over to our OpenAI here, here's our opening shot. A wide angle view of a dystopian in ruins with crumbling buildings, shattered glass, and abandoned vehicles strewn across the streets. Fires are still smoldering in the aftermath of the apocalypse, casting an eerie glow on the thick layers of smoke that hovers above the desolation. So I'm going to copy this whole thing and let's see what Gen2 gives us with that prompt. Paste that whole prompt in here. All right, so it took about three minutes and we have our first generated video. Let's go ahead and take a peek.
Now, I would say this is a pretty spot on representation of that prompt here. Now, one of the issues, it's only 4 seconds. Based on our shot list, it needs to be five seconds. But that shouldn't be an issue. When I pull this one into DaVinci resolve to edit it, I can actually slow down the pace slightly and stretch it out to five seconds. So now I'm going to go ahead and do the same thing with our next shot, except this time our next shot needs to be about nine seconds long. So what I'll probably do this time is actually generate two or three of the exact same shot and bottom up against each other. So let's see what happens. Let's go ahead and prompt it once here a Dimly lit underground laboratory filled with computers, wires, and advanced equipment. A team of scientists and engineers wearing tattered lab coats and protective gear work on an AI robot with a humanoid form. They are soldering circuits, adjusting mechanical joints and inputting data into a computer terminal. Let's go ahead and copy this. Let's just go ahead and start by trying to generate the entire prompt here. I might need to break this prompt up, but let's see what we get by just plugging in this prompt in its entirety first. This one only took about two minutes this time. And let's see what we got. So we've got a bunch of people working in a laboratory. I'm not really seeing the humanoid robot, so maybe I'll add another prompt here and focus in more on the robot with a humanoid form here. I'm just going to take the second half of this prompt. A team of scientists and engineers wearing tattered lab coats work on an AI robot with a humanoid form. Soldering circuits, adjusting mechanical joints. And let's see if we can get another scene with more of them working on the robot here. So we'll go EN2 paste that in. Right. So here's what we got from that prompt. They're working on something. It doesn't really look like a humanoid robot, but once again I'm going to try to steer it a little bit closer. Luckily, I can use all of these clips strung together to fill out the time that I need for this specific clip. So this time I'm simplifying the prompt a little bit. A team of scientists and engineers in white lab coats leaning over a table with a life size humanoid robot on it. Let's see if I can get closer to what the sort of vision of this shot is. Okay, so I really haven't been able to get Gen 2 to generate the image that I'm looking for of a robot sort of on an operating table. So I'm going to jump over to mid journey and generate a still image of that. And then we'll kind of do a panning shot in the video of that still image to represent that piece of the script. So let's go ahead and do imagine. We'll grab our same prompt here and let's just plug it into mid journey this time. And I'm going to go ahead and give it an aspect ratio of 16. 9 so it fills our screen. And let's see what we get from this. Okay, so I think I finally got what I'm looking for. Up here in image one we have a bunch of Scientists kind of working over a robot here. So I'm going to go ahead and upscale that one. And now what I'm going to do is I'm going to follow this exact same process for every single scene from our ChatGPT script here. So far, I've got our opening shot and our second shot. I've got 1, 2, 3, 4, 5, 6 more shots to do generate. I'm going to try to generate them with Runway Gen 2 first. If I can't get Runway Gen 2 to create an image that I really like, I'm going to jump over to Mid Journey, give it the same prompt, and try to get Mid Journey to generate something that looks like what I want. So instead of boring you going back and forth and doing every single one, I'm going to go and generate all of these shots real quick, and then we'll jump back and complete the process. Okay, so I've gone ahead and generated all of the shots in the shot list here. You can see I've got a folder with a ton of different files in it. We have images here of different scenes from the script here. And then I've got a whole bunch of different videos that I generated for different parts of the video. Now, some of these images here, because they're static, I want to give them a little bit of an animation. And there's also one shot that I didn't generate that I think a different tool is going to generate better. So I'm going to walk through those right now. In case you're wondering, Gen 2 is currently in a closed beta. They are slowly letting more people in, and I believe it'll be rolling out publicly pretty soon. If you don't have access to gen 2, check out this video that I made called actual AI text to video is finally here that teaches you how to use Model Scope, which is a free version of what you essentially can do with Gen 2. The only downside is it does add little shutterstock watermarks inside of the video, but you can use that, and it does something very similar to what Gen 2 does completely free. Now, one of the shots that I wasn't really able to get a good version of using gen 2 was this one here. A time lapse of the city slowly coming back to life, showing a succession of events such as buildings being reconstructed, plants growing through the rubble, and people returning to populate the urban landscape. So I'm going to jump into Mid Journey and see if I can generate a starting image. I'm going to use this prompt from our shot List here of a dystopian cityscape and ruins. I'm going to paste this into mid journey and use this as a starting shot for my time lapse. Make it an aspect ratio of 16, 9 here. All right, so we have some images here of a destroyed city. I think this top left one looks the best. So I'm going to go ahead and upscale that one. And then I'm going to jump into this genmo tool, which you can find at Alpha genmo AI, and I'm going to upload the image we just created and use this as my starting image here. And we have some settings that we can do. So it's asking for my edit. And what I'm going to do is I'm going to jump back to my prompt here, and you can see we've got a time lapse of the city slowly coming back to life. Let's go ahead and try the prompt. Restore the city to a clean, vibrant, bustling town with happy people and colorful plant life. I'll go ahead and leave the exclusions there. So length. It says nine seconds. So let's see. The time lapse asks for specifically nine seconds. So we'll go ahead and leave it at nine seconds and let's go ahead and make the video and see what we get out of it. Look at that. It actually kind of nailed it on the first try. You can see it really quickly change from this dystopian city to this colorful, beautiful city with happy people walking around. I'm gonna go ahead and download the video here. And we've got our time lapse for that scene inside my folder with all my video assets and image assets. Some of these are still shot, and I want to make some of these still shots a little more dynamic, a little more animated, make them feel a little more video like. And there's a couple ways I can do that. I can use a tool like Leiapix, which sort of adds more depth to the image and animates it so that it kind of looks more 3D. And then I can use a tool like Kyber, which adds some interesting effects to it. So I'm going to go through some of these images and run them through Leia Picks, run them through Kyber, and have a bunch of variations and options that I can then use in my final video. So let's start with Leia. I'll go ahead and upload an image here. Let's start with this one of the robot. Looking at the screen. You can see how it kind of adds that 3D effect to it. I can change the animations, slow it down a little. Little bit by changing it to six seconds here. Speeding up by changing it to one second. I think I want somewhere in the middle here. Let's go to. Yeah, let's go ahead and save it as about 4 1/2 seconds. Animation style. You can go horizontal, where it sort of goes back and forth. A wide circle, a normal circle, a tall circle, a vertical or perspective, which is a newer one that I actually haven't seen yet. Let's go ahead and leave it on perspective. That looks pretty cool. But if it is on perspective, I think I want to slow it down even more. We can change the amount of motion to more or less, so it's a lot more subtle. Put it right in the middle at regular or put it at more. I think I like regular. Regular seems to be a nice blend there. We can change the focus point. We can make the focus point real close, center the focus point, or make the focus point farther away, which just kind of changes the look. I think I like far. Now I can click Share and save it as an MP4. And we'll go ahead and download this with the rest of our video files. All right, let's go ahead and upload another image here. Let's see how it looks with two people in the image. Not quite as cool with two people. Let's go ahead and do sort of horizontal animation style. I think that looks cool for this image here. Like, I like the focus point as far on this one. And I'll go ahead and download this image. I'm going to go ahead and repeat this process with all the rest of my images. So I have a pool of images using Leia Picks that I could potentially use in my video as well. And I'm just going to kind of fast forward through that part, but pretty much going to do the same process with each one of my images that I have available here. So I've gone ahead and used Layer Picks to convert all my images into something with a little bit more depth. And now I want to use a tool called Kyber and run some of my images through here just to give another kind of cool, cinematic, colorful effect to some of my still images. So let's go ahead and click on Create Video here. We'll begin with an image. Let's grab this image of a robot planting some plants here. And let's continue to our prompt and we'll type an AI robot in the style of realistic video. Let's just see what happens when we try that, the duration, let's go ahead and leave it at 8 seconds. I could always speed it up or slow it down when I edit it. Let's just kind of leave everything at its defaults and see where it gets us. And let's click Generate. All right, and here's the video that it generated. You can see it starts with my initial image, and it shows various types of robots planting plants. And I think this will look really cool during that scene of my video. So we can go ahead and upscale the video here. It's going to use one credit, so we'll go ahead and do that. And it says it's going to take about six minutes. So while this is upscaling, let's go ahead and work on our dialogue. So we already have the entire dialogue generated by Chat GPT here. This is our narrator. Now, to record the dialogue, I'm going to use 11 labs. 11 labs. You get a certain amount of free credits every month, and I'm just going to use free credits, and it should do the trick for a pretty realistic sounding voice. So I'm going to create a brand new, unique voice for this video. I can do that by coming up to Voice Lab here and clicking on Add Voice and then clicking on Voice Design. Let's go ahead and make it a male voice, middle aged, American accent. I'm going to go ahead and set this, you know, somewhere in the middle, and let's generate and see what this voice sounds like.
First we thought the PC was a calculator. Then we found out how to turn numbers into letters, and we thought it was a typewriter.
So let's go ahead and see what happens when I bring the accent strength all the way up and see how it changes the voice.
First we thought the PC was a calculator. Then we found out how to turn numbers into letters, and we thought it was a typewriter.
I really like that deep voice. I think that deeper voice is exactly what I'm looking for for this sort of dystopian video that I'm making here. So let's go ahead and click Use voice. And let's just call it deep mail voice. All right, now that we've got this new voice, let's go ahead and use it. And I'm going to grab all of my dialog here. So we've got the narrator. I'm going to copy and paste this first sentence here. Paste it in here. Let's go ahead and click Generate.
In the darkest hour of humanity, when all hope seemed lost, a Beacon of light emerged from the ashes.
All right, let's mess with the voice settings. That was a little too robotic. Let's bring this ST ability down quite a bit, and let's test this again.
In the darkest hour of humanity, when all hope seemed lost, a beacon of light emerged from the ashes.
So if you add these little ellipses at the end of a hex chunk here, it will actually add a little bit of a pause. I think that's kind of one of the downsides of 11 labs. It's a little bit hard to control the pace of the voice, but it sounds really good. So I'm going to go ahead and add the rest of our narration in here and just have it record all in one long chunk, and then I'll sort of break it up inside of the editing a little bit. So there is going to be some manual work when I edit it together. All right, so I've pasted the entire narration in, so let's take a listen.
In the darkest hour of humanity, when all hope seemed lost, a beacon of light emerged from the ashes. Desperate to save civilization, a group of scientists and engineers worked tirelessly to create the ultimate AI robot. With advanced intelligence and an unwavering sense of duty, this AI robot, known as the Guardian, was designed to restore balance and rebuild our broken world. The Guardian traversed the wastelands, bringing aid and hope to the survivors who, against all odds, still clung to life. Together with humanity, the Guardian forged a new path. Working hand in hand to rekindle the once extinguished flame of progress. Through knowledge and unity, the Guardian nurtured a generation destined to rebuild and reshape the future of our species. Over time, the once devastated world began to heal as both humans and AI worked in harmony to create a new era of prosperity.
All right, so that sounds better. Pretty good to me. All right, now that I've generated the audio here, if I come up here to history, you can see the one that I just created. So I generated it twice. I think the first one came out better. So I'm going to go ahead and select this one. Click. Download selected. And now I've got the MP3 of the entire audio here. Now one last step. I want to add some background music to the whole thing. So I'm going to use moobert.com Mubert is one of my favorite sites to generate audio tracks from, because you can actually use it for free as long as you give attribution. So I'm going to go ahead and log in and create a new audio with it. Let's go ahead and select moods. We want it to be sort of like a dark. Let's set like a serious mood here. We can set our duration. We want it to be roughly 80 seconds, because if we remember, our film should go to about 1 minute and 20 seconds. So let's go ahead and just save this as 1 minute and 20 seconds. And with a tense serious mood, let's generate the track and see what we get out of it.
That's almost a little too poppy for me. So let's go ahead and let's see what we got. For genres, let's go ahead and try dramatic and see if we get anything better. With dramatic, Click generate again because this one seems to be stuck for some reason. Let's see what our dramatic sounds like.
New bugs.
That little watermark that was in there won't be in the final downloaded version. All right, so I think that's a little bit closer to what I'm looking for. So let's go ahead and download this one. Added it to my downloads folder. So let's go and click View. You can see here it is. It's still sort of prepping it for download and we're ready. So let's go ahead and download this one. It asks where you're going to publish it. So I'm going to go ahead and put my YouTube channel and then I will go ahead and also put my Twitter channel because I'll likely put it on both. And we'll go ahead and. And click continue and we'll agree and download. All right, so now I've got a folder with all of my files in it. We've got our voiceover, we've got our background music, and then we've got all of our little clips to go along with it. Now it's time to just assemble it all together. And to do that, I use DaVinci Resolve. You can use DaVinci Resolve completely for free. Just go to blackmagicdesign.comproducts/davinci resolve to find it. And I'm going to create a new project here. I'm going to pull in all of these assets that I just created here. Jump over to my edit page. I'm going to start by dropping my audio onto the timeline so we can listen back to it.
In the darkest hour of humanity, when all hope seemed lost, a beacon of light emerged from the ashes.
And then we've got our background music so I can drag this behind it here. I like to set background music at about a negative. Let's go negative 20 here.
In the darkest hour of humanity, when all hope seemed lost, a beacon of light emerged from the ashes. Desperate to save civilization, a group of scientists.
So now I'm just going to start lining up the perfect clips based on what ChatGPT gave me. So from zero to five seconds, we have our opening shot, a wide angle view of a dystopian cityscape, which looks like this in my video. We'll go ahead and pull this onto the timeline and you can see what this looks like.
In the darkest hour of humanity, when all hope seemed lost.
So that scene is supposed to go all the way through to where it says, in the darkest hour of humanity, when all hope seemed lost, a beacon of light emerged from the ashes. So I'm going to go ahead and stretch out this video. I could do that by right clicking on the video, clicking on retime controls, dragging this all the way to the end of that section, and that'll slow it down to about 60%, but it will cover that entire area. So let's listen back.
In the darkest hour of humanity, when all hope seemed lost, a beacon of light emerged from the ashes. Desperate to save civil.
And now I'm going to move on to my next scene. Desperate to save civilization, a group of scientists and engineers work tirelessly to create the ultimate AI robot. And so we have a dimly lit underground laboratory filled with computers, wires, and advanced equipment. So I'm going to go ahead and add that in. Here's what I've got for this shot.
From the ashes. Desperate to save civilization, a group of scientists and engineers worked.
So now I'm just going to start working through and adding all of these video clips to the timeline, and I'll show you the finished result once I've added them all in. All right, so I've officially finished the entire video, and I'm going to go ahead and play the whole thing for you right now.
In the darkest hour of humanity, when all hope seemed lost, a beacon of light emerged from the ashes. Desperate to save civilization, a group of scientists and engineers worked tirelessly to create the ultimate AI robot. With advanced intelligence and an unwavering sense of duty. This AI robot, known as the Guardian, was designed to restore balance and rebuild our broken world. The Guardian traversed the wastelands, bringing aid and hope to the survivors who, against all odds, still clung to life. Together with humanity, the Guardian forged a new path. Working hand in hand to rekindle the once extinguished flame of progress. Through knowledge and unity, the Guardian nurtured a generation destined to rebuild and reshape the future of our species. Over time, the once devastated world began to heal as both humans and AI worked in harmony to create a new era of prosperity.
Boom. And there's the whole video. That is my entire short sci fi film. Throughout that video, I used a ton of different tools. I used Gen 2 to generate some of the videos. I used Leia Picks, I used kyber, I used Genmo, I used Mubert for the background music, I used 11 Labs for the voiceover, I used Midjourney for some of the images. And then I brought it all together inside of DaVinci Resolve and that was the resulting video. Hopefully you enjoyed it. This was a really, really fun tutorial to make. This is what I've been wanting to make for a while. It took quite some time to put into it. I know this video was probably fairly quick at rapid pace, but the reality is, behind the scenes, this actually took me hours and hours and hours to make. Because using tools like Gen 2, you have to keep trying, keep prompting, give it another prompt, give it another prompt, give it another prompt until you finally get that visual that you're looking for. Same with things like Midjourney. All of these tools, while AI did generate all of this, it was quite a bit of effort going through and testing something going that didn't work, testing something that didn't work, testing something that didn't work, until finally I had something where I could finally pull all the pieces together and make it look like something decent. So hopefully you enjoyed this video. Hopefully you have a better idea of how you can go and create short films. This one was only a minute long total, but you can use this same process and create an hour long video if you want. It'll probably take you weeks or even months to do it using the current tools that are available, but you can definitely do it. I just love finding interesting ways to take this tool over here and this tool over here and this tool up here and this tool down here and just mash them all together and create something really unique and creative. And hopefully I demonstrated that and how you can do something like that with your own work. And if you love nerding out about this AI stuff as much as I do, head ON over to FutureTools IE. This is where I curate all of the coolest tools that I come across. I'm adding new tools for every single day. I'm also keeping up with all the AI news for you. So if you come to this tab here, you can find all of the latest news in the AI space. If there's a little too much you're getting overwhelmed by all this stuff Join the Free Newsletter Every Friday I'll send you the TLDR of just the five coolest tools I came across. Handful of news articles, handful of YouTube videos, and one cool way to make money with AI. It goes out every single Friday and it's for the people that just want the TLDR of the week of all of the cool stuff that happened in AI. All you got to do is head on over to FutureTools IE and click on Join the Free Newsletter. Thank you so much for tuning into this video and nerding out with me and watching the process of pulling all these cool AI tools together and making something unique and creative as the end result. If you enjoy videos like this, make sure to give this video a thumbs up and click the subscribe button. That'll make sure you see more AI videos like this one in your news feed and once again, really appreciate you. See you guys in the next video. Bye.
Sam.
More from Matt


AI News: Dots, GPT-6.1 Sol, Sonnet 5.5, Gemini 4, and everything you need to know