MidJourney Got An Upgrade - Version 4 Is Much Better Now
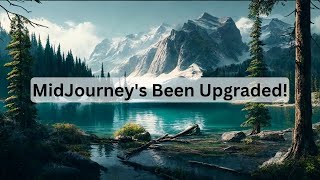
Matt Wolfe walks through MidJourney's version 4 update, which adds new aspect ratios like 16:9 and 9:16, two style variants (4a and 4b), and a blend command. He demos how to use multi-prompts with weights and separators to control what the AI generates.
Chapters
Midjourney just rolled out some awesome new updates that really make the platform so much more valuable. And in this video, I want to break it down. Now, the first thing that I noticed was that Midjourney's documentation section just got a major overhaul. You can notice it's a lot cleaner and they've made it a lot easier to find the commands that you're going to want to find. If you head over to docs.midjourney.com you can find the new documentation page. And if you open the user guide and then come to the command list, you can actually see an easy list of all of the commands that you can use inside of Midjourney. So can you. If you come over to the parameter list, you can find an easy list of all the additional parameters that you would add to the end of your Mid Journey prompts. Now, before I get too deep into this video, I do want to say that some of the stuff I'm going to talk about isn't actually brand new, but it's stuff that I haven't talked about in previous videos. However, what is brand new and the thing that I'm most excited about is that Midjourney version 4 now has more aspect ratios. So you can actually generate images at a standard 16 by 9 or 9 by 16, which is probably the most common aspect ratio you're going to want to generate at, because that's what most computer monitors and most smartphones use. You can also do ultra wide aspect ratios of 2:1 and 1:2. Up until now, you've only been able to do these different aspect ratios in MidJourney's versions 3 and lower. And in Mid Journey 4, you're only able to do an aspect ratio of 1 to 1. You know, a perfect square or 2:3 or 3:2. If we scroll down to the bottom of the parameter list section, they actually have a nice handy little grid that shows you what's now available in Midjourney version 4. So the Max aspect ratio, as you can see, is, is now 12 or 2 1, which is ultra wide or ultra tall. They also have two different style settings. They have style setting 4a and style setting 4b. By default, it's set on style setting 4b, but you'll get variations by changing the style from 4a to 4b. If we come up to the command list up here, there's actually a new command called blend. Now, the blend command actually does the same thing that would happen if you were to just take an image URL and paste multiple image URLs in like it worked in the past, but now you can also use the blend functionality you want and get the same result. If you watch my previous videos where I show how to mix multiple images inside of Mid Journey, it's the same functionality, just a new command to do the same thing. So first off, let's take a peek at the feature that I'm most excited about now, which is the new aspect ratios. So let's go ahead and add a prompt here. Let's do imagine. I like to do short prompts as I've shown you in previous videos and I also like to mix in emojis. So let's do the Galaxy. And then I like to add RGB because it adds a lot of color to it. And then I also like to add this rainbow emoji. And then let's just add aspect ratio:16.9. Before it would have told me that I can't use aspect ratio:16.9 with version 4, but now it's available and look at these beautiful images that it came up with. These are super cool and they're the perfect size now for a desktop background or iPhone or Android background because they're in that perfect 16 by 9 aspect ratio. Now let's check out the super tall aspect ratio. Let's go imagine and let's just use the word chaos and then go aspect ratio 1, 2. And this is what Mid Journey gives us in that tall aspect ratio. And I could zoom in on them and you can see they're these crazy tall poster like images. Let's do a wide landscape, make it almost look like a panoramic photo. Let's go imagine a beautiful green forest with a lake and snow capped mountains in the background. And then let's do aspect ratio to one and that'll give us a nice wide sort of almost panoramic image. And look how awesome those came out through this wide landscape. In fact, let's go ahead and upscale and take a closer look. Let's take number two up here. And this came out just awesome. Now it looks like it's lacking some details. It looks a little, almost like blurry inside the image. So I'm going to go ahead and do the beta upscale redo here. And there we go. That looks so much better. Now remember I said MidJourney 4 has two different versions and this is using version 4B by default. Well, let's see what happens when we use version 4a and see how it changes up the picture a little bit. So I'm going to go ahead and grab the exact same prompt here, I'm going to copy it. So I'm going to go ahead and type imagine and I'm going to paste that same prompt in there. But at the end I'm going to add style 4A. And let's see how that changes things up. Now, as that processes, let's take a look at how Midjourney themselves describes the styles 4a and 4b. They say Midjourney Model version 4 has two slightly different flavors, with slight tweaks to the stylistic tuning of the model. Experiment with these versions by adding style 4a or style 4b to the end of a v4 prompt. Style 4b is the current default and does not need to be added to the end of the prompt. Now, in terms of what the difference is, it's just a different flavor. So it's just going to look a little bit different. And let's just see how it comes out and check those out. I mean, they're still beautiful. They're still awesome, awesome images. They just have a different style to them. Let's upscale this top left one and see how that looks. And there we go. It really, really looks good. I think I need to do an upscale again because it still looks like it lost some of the details. So let's go ahead and do a light upscale redo and see how that comes out. And there we go. All that detail is back in there and it just looks awesome. So this is the style version 4a. Style version 4b. You can tell they're definitely based on the same prompt, but a totally different image. Once again, this is style version 4b. Style version 4a. Now, the last thing that I want to talk about is this concept of multi prompts. This is something that I haven't seen talked about much, but is very important. To get the image that you're looking for. You can add colon, colon between two words to sort of separate them. You can see in their example here, if you just put hot dog, you'll get an image of, well, a hot dog. But if you put a prompt of hot, colon, colon, space dog, you get a dog that's hot. Here's some more examples. A cupcake illustration is what you'd expect from a cupcake. But if you separate cup with the two colons and then cake, you get a cup with a cake in it. And then if you separate cup and cake and illustration, you get even different results here. So this is something that's also really, really fun to play around with. So let's try something like imagine Space Mountain. Now, as expected, we kind of got something that looks like something out of Tomorrowland from Disney's and the Space Mountain Ride. Now let's go ahead and do Imagine space. Put our two colons in there and then put the word mountain. Let's see how that changes things up. And check these out. Now we have mountains in space. I know a lot of people in the past have had issues where they're trying to get a specific image, but it's thinking they're trying to prompt something else. Well, adding this little separator inside of your images may be the key to getting the exact image you're looking for. For let's try one more. Let's do Imagine Wallflower and let's use one of our new aspect ratios. Let's go aspect ratio 9, 16, which is going to give you more of that smartphone vertical shape. And here you can see we get a representation of clearly a person. Now if we take this exact same prompt, I'm just going to copy it up here and let's go imagine paste it back in. But now let's separate wall and flower with two colons and a space. Let's see what it generates this time. Now we get a completely different image from it and we can even add weights to this. So if I co copy this once again paste it into my prompt, I can do wall two, flower one, and let's see what happens with that. I'm giving the wall a weight of two and the flower a weight of one, meaning that I want the wall to be more prominent in the picture. And once again, we have something completely different with a focus on the wall and a flower. Almost the exact same prompt with slight differences. Wall and flower with some waiting, Wall and flower without waiting and wallflower. So just some cool extra things that you can play around with inside of mid journey to get the exact result you're looking for. When it comes to midjourney, it's all about prompt engineering. And the more little tricks like this that you know, the closer you can get to that exact image that you want. People always ask me about my YouTube thumbnails and how I get them to look the way they do. This is it. It's just focused on the prompt engineering and figuring out these little tricks that get you that exact image that you're looking for. If you enjoy this kind of stuff, make sure you head over to FutureTools IE. This is the website where I curate all of the cool AI tools that I come across, all of the cool prompt guides that I come across for Mid Journey and just all of the stuff that I nerd out about on the YouTube channel. Well, if you hang out on Future Tools, you'll find it before I ever make videos about it, because I'm making videos about the stuff that I'm coming across and putting on Future Tools. So check it out. It's @FutureTools IO. The site's completely free. It's really just my way of constantly keeping my finger on the pulse of all of the cool AI tools so that you don't have to. And then I make videos about the cool stuff that I come across when I'm building the website. So FutureTools I. Oh, cool. Cool. Hope you enjoyed this video. If you did, make sure you press subscribe down there and that, like, button and the bell and, you know, do all the things that the other YouTubers tell you to do. Just do it for my channel because that would help me and be kind of cool. All right, thanks so much for tuning in. Hope you enjoyed this one. Hope you got some cool Mid Journey tips out of it. See you guys in the next one. Bye.
More from Matt


AI News: Dots, GPT-6.1 Sol, Sonnet 5.5, Gemini 4, and everything you need to know