MidJourney Has Competition (And It's Free To Use)!
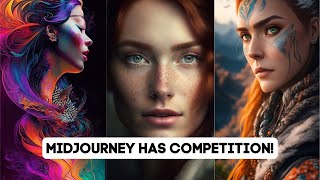
Leonardo AI offers 150 free daily credits and multiple built-in models that could compete with Midjourney. It includes an AI Canvas for expanding images, ControlNet for precise control, and lets you train custom models on your own images.
Chapters
Now, when it comes to AI art, Midjourney is probably still the king when it comes to realism. But there's another AI art tool that's gaining more and more momentum. And in my opinion, it is the one tool that is most likely to give Midjourney a run for its money really, really soon. Now, of course, I'm talking about Leonardo AI. And as of right now, Leonardo is still in wait list mode, where you enter your email, you get on the waitlist. However, they are letting people in off the waitlist at a really rapid pace. So. So if you get on the waitlist today, you're likely to get access to Leonardo within a few days. Now, Leonardo initially started as a platform to develop game assets, and if you look at their homepage, it looks like that's still the angle they're taking where you can create items, environments, helmets, buildings, concept art, et cetera. However, it's really morphed into an AI art platform that could do it all. Leonardo lets you use existing models that are already built in. You can use a lot of the models you've probably already heard of, like stable diffusion 1.5 and deliberate, but you can also train your own models where you upload a bunch of images of a style that you'd like to recreate and then recreate more images in that style. So let's go ahead and jump in and take a tour of what Leonardo has to offer. So, as of this recording, Leonardo gives you a free 150 credits every single day to use. You can see I've already used a handful of my credits today, so I'm at 128 left with a free account. You get 150 tokens, which will let you generate up to 150 images. But different things that you do inside of the platform require different amounts of tokens, so you could use them a little bit faster than the that. And I'll walk you through the various things you can do and how many tokens most of them use. So right up here at the top of Leonardo, you'll notice a bunch of different models that are available in there, including their own Leonardo diffusion model, which is probably my favorite model in the platform because it's really deep colors with deep contrast, and it reminds me of the type of images you would get out of Mid Journey. It's using a technology called offset diffusion, which just tends to give you darker, more contrasty images. And this Leonardo diffusion model is unique and proprietary to Leonardo right now. They also have a ton of really popular stable diffusion models that you can use like Dreamshaper version 5, Deliberate 1.1, Dreamshaper 3.2 and some other custom models that were developed by the Leonardo team. Like the character portraits, pixel art, isometric fantasy, isometric sci fi buildings, cute animal characters. There's just a ton of models that you can play with. There's also a community feed where you can see what other people have generated and get inspiration and even see the exact prompts that were used to get a certain image. So for example, I could click on this image, I could see the exact prompt that they used, I could see the exact negative prompt that they used, the resolution they generated in the guidance scale, the seed, and theoretically if I enter all of these details into an image, I should get something pretty identical to this image. You also have a personal feed of images you've generated. You can see I've generated some various pixel art images, some various cyberpunk cityscape images, and a bunch of various samurai images that to me came out very similar to the types of images you would expect from something like midjourney. I also really like to create these isometric little rooms. So I created my own model in here for isometric rooms. If I look at one of these, you can see that it's using a base model of stable diffusion version 2.1. But the fine tuned model is called Tiny Rooms, which is a model that I trained into Leonardo diffusion, which we'll talk about in a minute. Now, in order to prompt images with Leonardo, I can come back to our home feed here and and then click on one of the models that we want to use. So let's say I want to prompt with this Leonardo diffusion model, I can click on generate with this model and it'll take me over to our AI generation tool here. Over on the left we have a bunch of options. You can select the number of images you want to generate. Over on the right you'll see how many tokens it'll use. So right now if I want to generate one image at 1024 by 1024 it will use two tokens. Now if I bring this down to 512 by 512 you can see one image will generate one token. So if I want to generate a whole bunch of images at 512 by 512, I can generate up to 150 of these a day using one token each. If I click on four to generate four at a time, you see it will use four tokens. Over here, the larger I upscale the dimensions here, the more tokens it will use. So now if I go to 1024. By 1024 you can see four images will use seven tokens and it grayed out the option to make 5, 6, 7 or 8. You can only generate up to four images at this resolution. They have options for prompt magic, which puts some additional Leonardo styling on the images. And they have the option to turn on high contrast here, which does exactly what it sounds like. It'll make the image higher contrast. You can also change the strength of the prompt magic here. This is something you can experiment with. Test different strengths with prompt magic turned on to see how the outputs differ. We can change the aspect ratio here. So if we want the Images to be 16, 9, we can change that. And then it changed the number of images we can generate. Now we can only generate two, and this will use three tokens. Different generation settings are going to use a different amount of tokens. So just be aware of that. As you're generating images, keep an eye on how many tokens you're using based on how you adjust settings over here, we'll generate two images using four tokens. The guidance scale. This is how closely it's going to follow your prompt. You'll notice it gives you a little warning here as you up the guidance scale. That says a guidance scale that's too high or too low can produce unwanted results. So they recommend using a guidance scale of around 7. So I usually just kind of leave this at the default. Now they do have ControlNet built in, meaning I can upload an image and it will try to model the sort of pose of that image. However, that doesn't work on all models. If I hover over this, you can see that it only works with stable diffusion 1.5. So if you do want to use control. Net, you need to come up here to Leonardo Diffusion. Change this to stable diffusion 1.5. You're not going to get that Leonardo diffusion styling on it. But now we can enable Control. Net by uploading image here and then turning on control. Net. We'll take a peek at that in just a second. Let's switch it back to Leonardo Diffusion here. There's also an option for tiling, which will repeat the same pattern over and over again. So theoretically, if you take a whole bunch of the tiled images and push them together, they should be fairly seamless. You also have the option to do image to image, where you can add an image plus a prompt and it will sort of blend the two together to get an image you're looking for. There's Also image prompt, which is similar to what you might get inside of midjourney, where you upload an image and it kind of uses some of the colors and some of the, the composition, but it's not going to get you as close of an image to. If you were to use an image to image prompt, you can add negative prompts by flipping this switch here. So anything you don't want in the image, you can add as a negative prompt. Now, underneath the hood of this is really stable diffusion. But stable diffusion is notoriously a little more difficult to write prompts for than something like midjourney. And let's say you're not really a prompt engineer for stable diffusion. You don't really know how to generate good images with stable diffusion. Well, they do have a prompt generation option down here where we can click this, enter a base prompt. Let's say I want to generate a wolf in the woods, and then I can click Ideate and it will actually write some more detailed prompts for me to use. So you can see from just a wolf in the woods, it generated these prompts. A majestic white wolf howling at the moonlight, surrounded by a dense forest of evergreens. A lone wolf stalking through the shadows of a moonlit forest, its eyes glowing in the darkness. A pack of wolves running through a snow covered forest, their fur glistening in the moonlight. A wolf standing atop a rocky outcropping, surveying the forest below with piercing gaze. And if I just copy this right here and paste it up into my prompt, I can click generate and let's see what we get out of it. And here's what that came up with. And when we look at this image, it gives us a whole bunch of different options. I could click this to remove the background for two tokens. I can do a creative upscale, which it says can improve the images during upscale. There's Upscale Image Alternate, which you can use if you don't like the way that the creative upscale looked, it'll give you a different detail. There's HD Smooth Upscaler and there's HD Crisp Upscaler. So you can just pick which upscaler you want to use. It will upscale it to a lot larger image. Each upscaler will do it in a different sort of style. Now, one feature that I really love about Leonardo as well is that they have a canvas tool. So if I click on this button to edit in Canvas, I can pull this into a canvas and I can actually have it generate more of the image that's off the screen. I could have it generate other stuff in the image itself. So, for example, I can draw a mask, make this mask larger. Let's kind of add a mask up in here. And then I can say birds in the sky. Move my selection area up here and click Generate. And now if I move this out of the way, you can see it actually added onto the picture more, added more clouds, added more sky, and it added some birds flying in here. Now if I come over here and let's just say rocks and bushes, because that's kind of what this is right here. And click Generate. Without adding a mask, it should just add more to the image over to the side. Now, the first one it generated, it doesn't look very great. That's not really what I want at all. But it gives me some alternatives. So if I click to the right here, you can see this actually looks more like it blends with the picture. If I click over again, this also looks better. And so does this one. So only this first one was kind of funky, but it actually figured it out in these other variations where you can see it kind of continued this ridge line here. It continued these bushes that we have here. So if I clicked Accept on this one, you could see it's building more onto this picture. And I could zoom in, zoom out, and continue to add to this picture by just moving this square around and prompting more of what I want. So if I come down here, I can generate again. And you can see it made this boulder bigger with more bushes. I can see if I like one of these other options better. I think the second one here probably blends the best. Move my square out of the way and you can see it continues to generate and build off of that initial image that I made. So let's go ahead and exit the editor. And now that I'm back at my home feed, I can get back to the image generation by clicking on AI Image generation down here. And now let's test the Control Net features. So let's go ahead and switch it to stable diffusion 1.5, because that's the model that ControlNet works with. Now, to use ControlNet, I need to upload an image that I want to model the pose of. So I have this image here of this person pointing. I could go ahead and drag this image down in this little box down here. And you notice once there's an image in the Image to Image box, I can now select Control. Net and turn it on. I can use the pose, the edge, or the depth of the image. I like to use depth. And then let's generate a New prompt, man pointing and smiling. And let's have it generate, generate some ideas for us. Let's see what happens if I do an enthusiastic man pointing to the future with a cheerful expression. Copy this. Put this up into our prompt here. Go ahead and turn on Leonardo style. I'll generate this at smaller dimensions so I'm using less credits. And we'll generate four images this time. And we'll use our Control Net depth to image here. Let's generate four images. Now you can see it generated four images of a goofy looking man pointing that way. But because this image has a different aspect ratio, it kind of squished these images. So if we change the aspect ratio down here to 16, nine and let's go ahead and generate these again, it should look a little bit better and match our aspect ratio of our original image a little bit better. So there you go, a little bit closer. I'm sure eventually we'll be able to use Control Net in combination with some of these other models like Leonardo Diffusion and get some better looking images. But right now you can use stable diffusion 1.5 with control net to model the existing poses and things like that. Now another really cool thing about Leonardo is that you can actually train your own data set in here. So you can see I created this tiny rooms data set where I uploaded a bunch of images of these little isometric tiny rooms here and trained a model that makes similar images to this tiny room. And to do this, all you have to do is just upload a bunch of images that look similar. Leonardo behind the scenes will try to find the similarities between these images and make it so you can generate more images that look similar to that. And what's cool about this is it opens up the community to generate a ton of models. So these are the models that were created by Leonardo themselves. But if I come up here and click on community models, you can just see all sorts of models that were created by users of Leonardo. Somebody created a South park model. Somebody created a model that looks like it was based off of Bored Ape Yacht Club. There's a scribble art model that somebody made and fantasy animals. And there are just tons and tons of models that other people have made that they can give you access to to play around with. Now when you do create your own model here, let's say I come to training and data sets. Click on new data set. I'll just type test model, create the data set. I can upload a bunch of images here or I can find other images that I really like. On Leonardo and add them all to the model and build a model based on images that other people have made. So let's say I really like this style. I can add these to the data set and maybe these to the data set, maybe some of these to the data set and they have this kind of cool watercolor look to them. Now I can train a model based on images that I just found on Leonardo and liked. If I click on train model, I have a bunch of options here and once the model is trained, I can choose whether or not I want make it public. So if I don't want the model be public and anybody to use it, like I trained it on my own face or something, and I don't want just anybody to be able to generate images with my face, I can set the model to private and it won't. Enter this Community Models tab here. Now, something else that's really cool about Leonardo is remember this AI canvas tool that I mentioned earlier? You don't have to just use AI generated images. I could come over here, click on upload image, click on from my computer, and let's just use this image of a gorilla. This is an actual real image. This isn't an AI generated image. I can come to the canvas tool here, select this area here, just put my box around it so that it overlaps my original image plus a little bit extra area. And then type a green forest landscape, click Generate and it will try to generate more of the landscape from the original photo. And it gave me four options here, so I can click through them and see which one matches the best. I'd say this number four matches the best here. Click Accept. And then if I move my square off of it, you can see it kind of continues the image here. Let's go over here. Let's do more green forest landscape up to the top right here. I could look through my various options that it gave me. I'd say that looks pretty good there. And you can see it continues the picture. If I come over here, bring my square into this image here, this area, go ahead and click Generate and you can see I can accept this one here. And there we go. It kind of continued. Now there's a big tree sort of in the foreground here in front of this gorilla that wasn't in the original image. Now, when I talked to the founders of Leonardo, I've had a few calls with them now, they described what they're trying to build here and is the Photoshop of AI. So over time you're going to see More and more features get built into this. Anything you can imagine, you can just build inside of Leonardo. If you have a starter image, you could continue to add on to it. You can add other AI images into your existing image. You'll be able to upscale them in various ways. There's not really any other better way to describe it other than it will eventually be the Photoshop of AI. Now, another really cool feature of Leonardo is that it does have this texture generation where you can upload a 3D object. Like, I just uploaded this 3D character of a male that I found on free3d.com. I just grabbed this free 3D object, downloaded it, uploaded it into Leonardo here. However, this is still an alpha and I haven't totally figured this out yet. I haven't gotten it to work very well. I need to do some more playing around with it myself to figure out how it works, because all of the textures I've generated so far have just come out making it look like a shiny, colorful object. This prompt was a male cyborg with circuitry, and I just got shiny blue. This prompt here was detailed Batman, trying to give him a Batman texture, and I just got a shiny black texture. So haven't quite figured this out yet. Need to play with it a little bit more to figure out what sort of generations get me what I'm looking for. But this will be really cool once I understand how it works. So that's my tour of Leonardo. Midjourney is probably still the best out there in terms of realism. Leonardo, as far as, like artistic. Artistic styling, it is really, really close. Like, I love the types of images people are getting from this Leonardo diffusion model. They remind me of what I was getting out of Mid Journey version four, which was a really stylistic, beautiful version of Midjourney that I really loved. Now we can do images like this inside of Leonardo using Stable diffusion. And again, right now you get 150 credits a day to use, which is very generous. I've been playing around with this for quite some time today, and I still have 80 credits left on the day. It's stable diffus under the hood, but in my opinion, it's probably the best user interface for Stable Diffusion, their AI canvas, which over time will be the Photoshop of AI. It's just game changing. I mean, this is a tool that I use pretty frequently now to generate some cool AI images. And you'll see me using this a lot more as I dive into various challenges and tutorials on making games and 3D movies and stuff like that. In the future of this YouTube channel, Leonardo and Midjourney are going to be the two AI art platforms that I go to that and of course I still like to use automatic 1111, the local install of Stable Diffusion. I still use that a lot. But this is just so much quicker, so much easier, has a lot of amazing models built in. And this AI canvas tool and this texture generation tool, these to me are just next level. So super excited to see how these get developed out. I just love the art that this generates and it's very capable of generating very realistic art as well. So another fun AI art tool for us to play with. I absolutely love it. Leonardo is amazing. If you get into Leonardo and create any images with them after watching this video, tag me on Twitter, share them on Twitter and tag me share them in the AI art section here of the future tools Discord. Let other people see what you're making with Leonardo and I'm super excited to see what you come up with. In my opinion, this is the tool that would be the front runner to past Midjourney in capabilities any minute now. So if you're not messing with Leonardo, go check it out. You can find it at Leonardo AI. Again, it is wait list right now, but they are opening up waitlist spots really, really rapidly. So it'll likely only be a matter of days before you're inside using Leonardo from the time you sign up to the waitlist. So go check it out. And if you love Nerd, not about cool AI art tools and just AI tools in general, check out FeatureTools IO. This is where I curate all the cool AI tools that I come across. I also curate all of the AI news that I come across. It's probably the most up to date news resource for the world of AI on the web. You can find it over at FutureTools IE News. If that's too much for you, you just want the TLDR of the Week. Every single Friday I send a free newsletter. Come to the website, click Join the free newsletter. I'll send you just a handful of news articles, five cool tools that I came across this week, a few YouTube videos, and one cool way to make money with AI. I send it out every Friday. It's the TLDR of the AI space for the week. You can find it over at FutureTools IE and click on Join the Free Newsletter. Thank you so much for tuning into this video. I really, really appreciate you. I just crossed 300,000 subscribers on this YouTube channel and I can't thank you enough for supporting this channel. It means so much to me, and I couldn't be more excited to share this kind of stuff with you almost every single day. I've kind of had to back off. I'm doing about three videos a week now. But I absolutely love making this content, and I love that you love this content, so. So if you enjoy videos like this, make sure you give this video a thumbs up and subscribe to this channel. I'll make sure more videos like this show up in your YouTube feed. All right. Really appreciate you. Thanks again for tuning in. See you guys in the next one. Bye.
More from Matt


AI News: Dots, GPT-6.1 Sol, Sonnet 5.5, Gemini 4, and everything you need to know