AIUX - Create an iPad Wireframe and Mobile Safari Icons
Matt D. Smith walks through designing an iPad wireframe and mobile Safari icons in Adobe Illustrator. Learn the UX design techniques and Illustrator tools needed to build these from scratch.
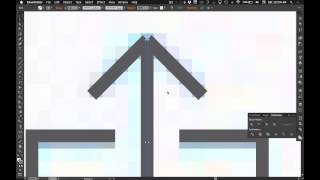
Hey everybody. Welcome to Aiux, a series about rapid UX design with Adobe Illustrator. I am your instructor, Matt D. Smith and today we're going to walk through how to create an iPad wireframe and mobile Safari icons. Alright, so in our, in one of the previous videos I walked through how to create this iPhone wireframe and this mobile Safari title bar here. So I'm going to use bits and pieces of this to recreate the iPad mobile Safari. But you can see there's a couple of new icons here that have shown up and so I'm going to borrow some of these pieces and redraw some of these. And also I'm going to show you how I've created a smart object out of this URL. Well, it's actually called a symbol but similar to a smart object. And so I can change this to another URL and then it updates in both the iPhone title bar and the iPad. So I'm going to move this out of the way and bring this over here. Actually I'll just go right over here, this lovely picture of the striking Rob Ford. But what I'm really interested in is this iPad title bar. Alright, so I, I've got my thing here, my reference. So I'm going to go to the Opacity panel, change this to like 40%. And now I'm going to, with this selected, I'm going to hit Command 2 to lock it in place. And so now I'm going to zoom in, select the rectangle tool with the M key. That looks to be about 64 pixels. So I'm gonna go click here in the Corner and do 768 by 24. Whoops. That was supposed to be 64. Alright, so with this shape selected, I'm gonna hit the default, change it to black and white and then knock out the fill so I can see what I'm doing here. And also for consistency's sake with the iPhone over here I'm going to go ahead and grab this is inside of a symbol. So I'm going to double click to get back inside of that. And you can see when you double click inside of a symbol it shows you where you're at up here. So now you can see when I draw my selection tool around all of this, you can see the individual shapes. So I'm going to command C, copy that thing, double click to get out and then come back over here. I'm going to paste this stuff up here for reference. So now I want to make sure this stuff gets aligned to a pixel grid. So everything's nice and sharp. So right here under the transform palette, going to make sure this object is aligned to a pixel grid. Alright, so we've already got our carrier name and our little wi fi bar right here. So I'm just going to copy that and option drag it over here so I don't have to recreate it. And if you want to see how I recreated this little icon, check out that iPhone Safari title bar video. Go ahead and grab this time. Put it over here as well. Go ahead and grab the battery life as well. I'm just grabbing these and option dragging to copy them and then sticking them in place. Alright, so now do this. Go ahead and grab this stuff here, this refresh icon option, drag this stuff down. Alright, and so right here is one of the, I think one of the best features of Illustrator and that's the direct selection tool. So I'm going to activate that by hitting the A key. And now you can see I lined it up over here, I lined up the input field. Now I can just draw a selection around the right edge of this input field and this icon and grab one of these points and just drag it over here, right in there, and then line this up in the middle. So there we have all of our duplicated items in place. And now all we have to do is draw these icons. Alright, so there's a couple different ways to draw these simple arrows. One of the easier ways is to hit backslash for the line tool and then just click and drag right from the one of the points and hold shift to maintain a 45 degree angle and just let it go there and then click in the same spot for your next one and then drag until your smart guide is lined up with the the other point. Alright, so now you've got two shapes here, one here, one here. You can see there's like this little weird wedge here. And that's happening because these are two separate shapes and you can see the edge there. So one quick and easy way to do that to get rid of that is hit your A key, select both of those points and hit command J which will join those anchor points. And now if they're right on top of each other when you join them, it just becomes one anchor point. So now instead of two separate lines, this is one line and it's its own little object now. So now I can option drag this over, hover my cursor on the corner and rotate it 180 degrees and just put it in place like that. The other way to create these Little arrows is just to draw a square and rotate it and then kind of put it in place and then you can scale it down and then once you have it there, you can hit the A key and then select the point that you don't need and delete it and you pretty much have the same effect. Just for consistency sake, I'm going to copy that one again and put it in there. Make this background the same stroke color. Alright, so our the forward arrow is usually muted a little bit. So I'm going to make that like 50% opacity but use the same fill color or the stroke color rather in case I ever need to change that master color. All of these are drawing from this global color. Oh, they're not actually I don't have it set as a global color yet. But if you set these as a global color and then you changed it later, they would all update and I'll save that for another video. Alright, so moving on to this bookmark icon, there's a couple different ways we could create this. I'm going to start off by just drawing this rectangle and then I'm going to click with the Direct select tool so I can see the path. And then I'm going to hit the P key to get my pen tool. And you can see now there's a. I'm right on this line so I'm going to add an anchor point and then I'm going to go back to the A tool, the A key. Rather I'm going to drag this up to here. So just added a point and I drug that up. So now I'm going to hit the P tool again. And while the P while the pen tool is selected, when you hit command it'll change to the direct selection tool. So I'm going to hold command and click that point. And now I'm going to hold option which will allow me to pull these handlebars from the point you can see if I pull them way out here. That's you can manipulate that corner so you hold option. With the pen tool selected, hold option, click and drag out. You can hold shift to make sure it doesn't get a little bit weird. Hold shift and just drag out until it's right over that arch that you're trying to recreate. Now we could do the same thing on the bottom draw and add a point, pull this up and do our same thing. But if we want it to be exactly the same as the top, then the easiest thing to do is just get your direct selection tool, select all these bottom points and delete it. And that was off. So now we can just take this arch and option, drag it down here so we have the same thing mirrored. And now just like with this, these two lines over here that we joined, now we're going to select these two points and hit with the direct selection tool and hit command J to join those points and then we're going to do the same thing for these. Alright so now we have our shape and we're gonna take our selection tool and option, drag it over here. And now we have our icon. Now you can see that there's some weird sharp points here. It's kind of like very jagged and that's not the best. So what we're gonna do is select all this, go to the stroke panel, make sure the options are showing and then you can see right here it says corner. And we're going to go instead of miter join we're going to do round join. So you can see once we click that these get cleaned up a lot nicer and they just look better. So now I'm going to select both of these shapes and hit command G. So anytime they get selected it treats it as kind of one grouped object. Alright, so we're gonna move on to these other ones over here on the right now share the add and I don't know the name of that but we'll draw it. Alright, so we'll start with this one. Hit the M key for the rectangle tool, draw the shape and because we chose rounded corners, now this one's getting rounded corners and I don't want that. So I'm gonna go back to miter. Alright, so there's two different ways to do this. This little gap right here for the share icon we can either change to the pen tool and add two points and then one in the middle and then delete it. That's one way to do it. But Now I'm not 100% sure as to how far this point is for this one and this one is to that one. So it's a little bit. You'd have to do some more work, some clean up work to make sure those are even. One of the easier ways to do it is to hit the M tool again and create a little shape. And then you can select both of these and align them to make sure they're both aligned. And we're going to go down here and make sure we're still aligned to pixel grid. You can see how the shape just changed a little bit. So now I'M going to make this shape one pixel wider. So I can tell that it's off. So now I can tell that this is right on, right where I need it to be. So with these two shapes now in place, I'm going to go to the pathfinder and hit minus front. And so now I've got this cutout that's perfectly even because we aligned it before. And now I'm just going to select these two points with a direct selection tool and delete them. And we have what we need. Now, some reason this is looking off, so I'm going to measure it with the line, the line tool. So I'm going to draw a little line there and then option drag this. So yeah, you can see, but I ended up having to redo this anyway. I'm just going to select this point and pull it over. But now I can see what I really need to do is pull both of these in. There we go. So now that I have this shape in place, I'm going to hit backslash again and draw a straight line for the arrow. And then I'm going to click right on this point a new line. I'm going to hold shift to keep my 45 degrees and do the same thing again. Hold, shift, keep the 45 degrees till my smart guide lines up with the other side of that arrow. Alright, just like before, we have this weird little gap that we can fix by just joining those two paths. But now we have this path right in the mix and we don't want that in the way. We don't want one of these to accidentally get joined to the middle. So what I'm going to do is select that and move it down by just shift and nudging it down with the arrow. Now I can select these two command J to join those and move that back up. Then we can select all of it again and it's still aligned to pixel grid. So now I can select it all. Hit command G and we're done. That icon. Alright, this one pretty straightforward. Just hit the line tool with that selected. Just going to go option shift, nudge and then I'm just going to shift nudge back. I made a copy and then it. I brought it back over and now I'm going to just rotate it 90 degrees. There we go. Alright. And these just draw a square. Going to option shift, drag this square here and then I'll just add some points here. Since we haven't really done that yet. You can see I tried to add a point, but what it really did Was it created a new line. It's not what I wanted. So I hit Command Z. You have to select that path with the Direct select tool before it will allow you to add a point to it. So that's what I'm going to do. I added two points here. I'm going to delete this point with a Direct select tool and I'm going to select these shapes. Alright? They're aligned to pixel grid, so now I can just make sure they're one pixel away for that icon. Now I can select both of these and hit Command G. So now I have a little group of this icon. Need to group that one. So that's one icon or you know, one object for the one icon. And that looks like I've got everything covered. So now I'm gonna hit command option 2 to unlock this photograph or this, this reference image. I'm gonna delete it out or you know, you could just move it over just to make sure. Now it looks like this icon is a little fuzzy right here for some reason because I'm looking and I'm at 100%. Sometimes they will look fuzzy if you're at a weird zoom level. But when you're at 100%, it should look nice and sharp. Like this one here looks sharp. But this one you can see. I thought I checked it, but you can see now. Align to pixel grid is deselected. So I'm going to go ahead and choose that, make sure that it still looks good. It does zoom back out to 100%. All this looks good except for this bookmark icon. It's not aligned to pixel grid so I'm going to do that and that looks good. So zoom back out. Don't need this anymore. Zoom to 100% so you can see now everything's nice and crisp. The only thing that you might want to do, I'm going to go ahead and I'm going to group this entire thing with the exception of the time, the URL and the input field and that icon. I'm going to group all of this. So now what I really want to do is the reason I didn't group these is because I want them to all these particular objects to be in the center. So I can just make sure they're center aligned. Except they're all grouped. You can't use the align tool unless you double click into that shape. So it looks like it was pretty good. You can see that it nudged a little bit. But it's always good to make sure that things are aligned. This Looks like it come down a little bit. Just kind of clean it up a bit. Alright, so now everything's looking good. I'm going to go ahead and select it all again. Hit Command G. Now you can hit Command G as many times as you want to and it kind of keeps creating group after group. It's kind of like a nested folder system. And then you can hit, with all of this selected, you can hit Command Shift G over and over and over and over to make all of these become completely ungrouped again. You can see it even ungrouped these two pieces of icon. I'm going to go back and group these again. Looks like it even ungrouped my battery. My little battery got off. Sometimes when you have a rounded corner and then you force align the pixel grid, sometimes some of your icons can get a little bit wacky. So I'm just going to redraw that one real quick. You can. I just drew this rectangle and then deleted the old shape out. I command X for cutting that shape out and I'm going to delete this out. So if you Command Shift V instead of Command V, it'll paste it in place. So I'm going to add my corners back to that battery. Command G to group that. Alright, so now select all this again, Command G and I have a group. And then once you're done with that, you can open up your symbols panel and then just drag this into here and name it iPad Safari title bar. Oops, I've already named the other one that, so I'm actually going to delete what I just did and drag in my iPad Safari title bar. Alright, so the last thing, it's already over there. So the last thing to note though is I've got. What I did with this URL was I just took the text field and I dragged it over here and I named it the URL. So now I can just pull out this URL as a symbol. I can copy it and option drag it. And so anytime I change this symbol, every instance gets updated. And so I just copied that symbol and I put it inside the URL bar for both the iPhone and the iPad. So that's a fun little way to keep that. Just change it one time and update everything. Delete these out of here. Just double clicking to get into that shape. Alrighty. Well, that concludes our video for today. If you have any comments or questions, I personally invite you to leave them below or hit me up on Twitter. I'm MDs and I hope you have a wonderful.










