AIUX - Sitemap Creation Walkthrough
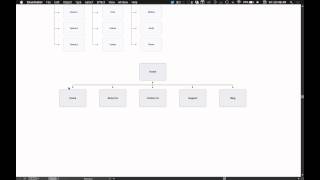
A walkthrough of building a sitemap in Adobe Illustrator, with keyboard shortcuts and techniques to speed up your workflow. The creator breaks down the design process step-by-step so you can follow along and understand each move.
I'm going to do a follow up video to this site map which I posted earlier that has that. It shows me designing this and it's sped up two times and I put a little bit of description in the blog post, but I got some feedback that it would be more helpful to see what I was actually doing. So I'm going to do that for you now. All right, so I start off with for these rectangles and if I select one and hit the V key, I can see these are 130, 200 by 130. So I'm going to choose the rectangle tool by hitting the M key, clicking once. I'm going to do 200 by 130 and then hit the V key again. To change from the rectangle tool, click off of it. So now you can see I've got my shape just like before. So with a shape selected, you can hit the A key to bring up. Essentially you're choosing the Direct select tool. Whenever the Direct select tool is chosen, you get these corner options as opposed to when you hit the V key, which is the regular select tool, you don't get the corner option. So hit the A key and change the corners to 10 pixels. By holding Shift and clicking that arrow there again, you could change that to whatever you wanted to. Alright, and so for the, for the text on there, just hit the T key. For text, click once, type home. Typically in Illustrator, if I do that again, so if I hit the T key and do home, I'm holding command and then clicking to exit the kind of text entry mechanism. The other way you can exit that is you can type and then Command return will also exit that. But that's one of the shortcuts that I'll use to quickly do that. And that's really what I'm trying to show in these videos is everything in Illustrator I use with a shortcut, I have a quick key for every single little step. And that's, I feel like it's, it lends itself to just really fast, really fast work. So I'm going to go ahead and make that larger. Hit Command shift C to center that text. I'm going to hit V and these keys, these quick keys are going to pop up as I'm recording. So I'm going to try to stop saying it every single time. All right, so now I've got that. I'm going to select both of these and group it by hitting Command G. And now I can hold, I can click or I don't have to click I can hold option and when I option drag, hold shift to maintain the path, then I can copy it like that. So now if I want one over here, just move it over there and then I'll option drag and then let go. And now that that's happened, without clicking or anything else, I can hit command D a few times to repeat that. So now I've got these. So I'm going to just hit the T key, change the text real quick for these blog. Alright, so now I'm going to align this. I'm going to select these two objects and do left align. That will always kind of bring over whichever side is anchored. Like if I did right align here, it would bring contact us over to home. If I did center line, it would just kind of center those. So I want contact us to stay where it is. So that's why I'm doing left align. Alright, so now I'm going to hit the backslash tool to bring to give me my line tool. I'm going to make a line. And so I've made a line, but you can see that it, it has given me zero stroke and zero fill. So now that I click off of it, you can't see it. But if you hit command Y, you can see the line is there. So what I'm going to do is just select the line and then I'm going to hit this default fill and stroke area which gives it a black stroke. And then from there you can choose stroke from the kind of tool panel and then go down here to the arrow heads. And I'm going to choose one side to be a little dot and then one side to be an arrow. So now you can use your direct select tool to select that anchor point and you could drag it up or drag this down. When I'm doing this, usually I'll try to line them up and then do like a shift nudge to kind of move them 10 pixels away from the object that it's facing. All right, so now that that's done, I'm going to hit the line tool again to draw my horizontal line. All right, so now that's in place, you can hit tab to hide your windows there. I'm going to just option drag this over here and then I'm going to hit the direct select to bring that down to match that. But I don't need that arrowhead there. So I'm going to change this to none. Alright, so now that that's there, I can select this option drag to the center and now I can just Hit command D to do that to duplicate those. And since I've already got one in the center, I can delete that one. And then this might slightly be off. So you can kind of fudge that a little bit. And if you wanted it really, you know, if you really wanted all these to be perfectly aligned, you could go over here and do the distribute horizontal centers. And then you'd have to kind of go and double check. So that's good. So there you go. There's these. And now to create this little guy here, I'm gonna. You could redraw this, but it's just as easy to kind of copy 1. Use the direct select tool to select one of the points. And then when I'm. I'm gonna use the pen tool by hitting the P key to select this point, and then it's going to kind of activate that end of that line. And now I'm going to drag over here and click again direct select to put it on the side of the object and then shift nudge to move it over. Now you can see that because I've. I've added to a point on that side that it's shifted the row, the rotation of the arrow and the, and the dot. So I can go over here to the arrowheads and I can swap. Swap those pretty easily. So now just going to drag that down a little bit. I'm going to hit the P key again and add another little side over there. It shifted on me again, so I'm going to switch it. And for these, for the kind of, the subsections, you can either option drag this thing down or, you know, redraw one. Sometimes, you know, it just kind of depends on do you want to redraw it or do you want to just manipulate one you've already got? I can't remember what I did in the first one, but for this one I'll just. Whoops. Okay, so I'm trying to click here to select this shape, but it keeps pulling on the line there. And the reason it's doing that is because I've got a fill selected. If I change the color, you'll be able to see. So every time I'm clicking here, it's dragging that. So if you run into stuff like that, just remove the fill and then now you won't be able to select inside of that without choosing the path. So I'm going to select the top anchors of this shape and then shift, nudge, shift, nudge, shift nudge, and shift nudge. That'll make it A little smaller. And now I'm going to change this to a dashed stroke to make. To kind of give it a lower level feel. And I'm going to align this. A lot of the time I'm wireframing and designing these sitemaps, I kind of rely, instead of working within a grid, I will just rely on equal spacing between objects. So I will bring this up and align it and then shift nudge like that's 20 pixels. That's 30, 40. It looks like up here I did like probably 30 pixels. So yeah, just kind of eyeball it to see what looks right for your project. I'll do three shift nudges which equals 30 pixels. Alright, so I'm going to go. So you can do this two ways. You can either option drag and then 1, 2, 3. Option drag 1, 2, 3. That's one way you could get more. But if you wanted to be even more quick, you could choose this object and you can hit the regular selection with the V tool and you can see that the height is 110 pixels. So if I want each of these to be spaced out 30 pixels, then I can hit Command Shift M to bring up the move dialog and I can do 140 vertical distance and then hit the copy command and that will move it where I need to. And now I can just hit Command D over and over to duplicate all of these. So we don't need that many, but you can kind of get the idea. So now we just need the arrows for these other two. So I'm going to grab one of these that already has the arrow on one end and no dot on the other. Just kind of align it right there. I can select these two objects to align left align. And then another cool thing is you can select these individual points on different objects and use the Align tool and it will kind of align those points for you. So I can drag that down. So now you can see that's how I've created these guys up here. And with that created now I can grab these three objects along with the line and hit command G to turn that into a group. And then I can option drag that over here and then hit Command D to continue that. You can see my spacing is a little bit off with these. So you can tighten that up by selecting all of these and distributing it. So it looks like that was pretty good. I see this one wasn't. There we go. That one wasn't on the. On the edge. There we go. So that is how I designed the site map. Hope this one was more useful than the sped up version. As usual, you can download the files at the blog post aiux co and thanks for watching.










