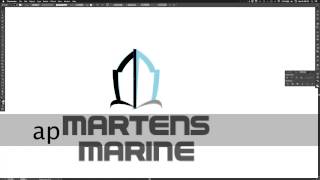
Learn how to convert a raster logo into vector shapes in Adobe Illustrator using ellipses, rectangles, the Pathfinder tool, and the pen tool. The tutorial walks through shaping, grouping, reflecting, and coloring each element to build the final design.
Alright, so I've got a client logo here that I need to convert to a vector shape. And to do that first I'm going to just look at the object to see where the circles and the squares and the diamonds would be. And that's one of the easier ways to convert a raster image into a vector image. Especially for a logo like this, there's no real need to try to redraw it with a pen tool. When you can see here that I've got a couple of ellipses that I can draw and then put these rectangles around it and then use the pathfinder to subtract those shapes. So I'm going to give both of the circles a fill, subtract the smaller shape and then with these rectangles, I'm going to select each one of those individually and have the pathfinder subtract that shape. And so now that that's done, I can duplicate this. Well, actually, let's do the first side, the full left side first, since it'll be a mirror image. So just like before, the shape on the left is, can be created with two different ellipse tools or ellipse shapes rather. So I'm going to create those and knock out the front shape with the fill, knock out the front shape with the Pathfinder tool rather. And then again, I'm drawing these rectangles here just because I want to knock out this shape right at those lines. And it works best if you can convert everything to be the same style. Either everything needs to be all stroked or everything needs to be all filled. Field works best for this scenario. And then this little shape down here, you could probably try to do it with the, with the ellipse tool. But sometimes if the shapes are a little funky, you might want to bust out the pen tool. And it's always best to go to the far extremes and then have longer handlebars. You can hold the option key while the pen tool is selected to, to move one anchor bar, one handlebar at the time. So I'm gonna get that set and then grab the option, hit the option key to pull that anchor kind of up where I needed to go, make a little wave, little splash for the boat. It's not the best logo in the world, but it is a client logo and sometimes you have to, sometimes you need it to be vectorized. Alright, so I'm going to make a, just a rectangle here to kind of recreate these wedge shapes. I'm going to grab just that one anchor and nudge it over. I'm going to maybe move this shape down a little bit more. Alright, so I've got that. I'm going to select it all and group it and then I'm going to duplicate it over there. Hit transform. Just right click transform and reflect. Now I can just kind of slide that in place. Alright, I'm going to move this out of the way. Hit command Y to view the outline just to make sure everything's lined up. Looks like my rectangle got a little bit misplaced. I'm going to double click into that group and then nudge that back over so it's left aligned with that kind of arch shape. And then once that's back in place, there we go. Can double click out of the group and then move the whole group back over so it's aligned right there. So that's the basic shape. So now I've got these two different sides here and I'm just going to add some color. So I'm going to select all of the same color area and then use the pathfinder to combine those shapes. That way I can just create one shape. That way I can change the color with one click. Instead of changing each individual item's color. Use the eyedropper tool for those and move these waves to the front within that groove by just hitting Command shift right bracket. And that is pretty much it.