ABCs of Airflow
In this 2026 YouTube training, HVAC technician Mike Plezia teaches the "airflow before charge" principle to HVAC Is Life members. He explains why verifying unrestricted airflow—through clean filters, coils, and properly operating fans—is essential before adjusting refrigerant charge. Using a personal story of a frozen evaporator and a filthy condenser, he shows how airflow restrictions distort suction and head pressures, subcooling, and superheat, leading to misdiagnosis and over‑charging. The lesson details diagnostic signs for restricted condenser and evaporator coils, step‑by‑step checks (filter, coil cleanliness, fan direction, amp draw, TXV operation, duct integrity), safe refrigerant metering (add/remove a few ounces at a time), and the importance of a repeatable diagnostic sequence. Plezia emphasizes systematic troubleshooting, double‑checking all components, and seeking support when needed, while encouraging interaction through the HVAC Is Life Facebook group and his contact channels.
Chapters
What's up everybody? It's Mike Flasia from the HVAC Is Life Facebook group. Um, so happy to be with you today to share tonight's Monday Night HVAC, uh, lesson on the ABCs of system diagnosis. So I don't know about you, but when I was a younger tech, I definitely had this, this concept just nailed into my head. Over and over again, airflow before charge. And it's like, just, it would not stop. My, uh, my boss, the owner of the company, I mean, just, just absolutely every day I would hear from him, did you verify airflow? Did you check the filter? Did you make sure the condenser is clean? Are the fans running? Are the fans clean? Or, you know, are they running the right direction? And, um, you know, it's something I will never forget, can never forget. And I'm sure many of you would agree, it's just, it's just been driven home to us so strongly. So, you know, I'm a technician from central Illinois. I'm actually getting ready to go into more of a product support role for a manufacturer of equipment, and I'm really excited about that. Unfortunately, as we get older, sometimes our joints and things don't— want to cooperate as much and operate at the same pace that our brain wants to. So, um, had an opportunity to get out of the field, so I'm getting ready to transition to that. Um, but yeah, I asked Willie if it'd be okay if for the HVAC Is Life group if we could do a weekly training. And, uh, you know, he went ahead and gave me the go-ahead. And so I'm happy to be here. And, uh, you know, at the end, I'm going to have email contact information and stuff. If you have suggestions or thoughts you'd like to share, other lessons you'd like to see covered, or just ways that you think this could be better, definitely let me know. I definitely need your feedback and will take it to heart and try to apply it to the best of my ability. Or hey, if you just want to say hi. That's cool too. So what is ABC? And before we unpack that, I just want to go ahead and make sure we are on the same page with, with our kind of where we want to go. Okay, as the instructor, I just want to make sure that I have done a good job and taken— rather, made good use of your time Listening to me. And, you know, so I've laid out a few different objectives. One is I hope that at the end of this lesson you will understand airflow and understand that it must be verified before adjusting refrigerant charge. This is absolutely imperative that we do not change refrigerant charge until we make sure that our airflow is, is clean and unrestricted. And, um, you know, once— rather, uh, yeah, not until we've verified good airflow should we really trust our refrigerant readings, and therefore we really shouldn't be adding any charge. Recognize the signs of condenser and evaporator airflow restriction. So we're going to go into a little bit of what that looks like. The effect that it has on subcool, superheat, your pressure readings, and the overall performance of the machine. Things that you're going to want to look out for if we have an airflow restriction. You're going to want to be able to understand how airflow affects subcooling and superheating. So— I'm sorry, subcool and superheat. The, um, the truth is that it's not just, you know, low airflow means that it doesn't get as hot or cold in the room as it's supposed to. No, it actually has an impact on the way that the pressure is presented in the refrigerant. Um, you'll learn why overcharging damages systems. Now, you may know why that is already, but maybe if you're a newer tech or something, or you've been just doing this for a while, never really considered considered it. There's a reason why we want to be cautious with overcharging a system. And then finally, um, the final objective is I, I really want to make sure that everyone here is thinking in terms of developing a repeatable diagnostic sequence. So when you walk into a job, you know what you're going to do first, what you're going to do second, what you're going to do third, so on and so forth. So that, excuse me, so that you can take predictable steps, be efficient, and not have to worry about, oh, did I, uh, did I, you know, check that thing or did I not? Um, did I test that capacitor or did I not? Um, and, you know, lessens the trips back and forth to the truck, back and forth inside and outside. Um, it just makes us better and stronger to follow a diagnostic sequence. Um, so funny story, when thinking about this particular lesson, um, my, uh, my mind was flooded with memories, or maybe traumatic flashbacks, uh, depending on how you, uh, think about it. But, um, one of my early service calls, I got called out to a house that the homeowner just bought this house, they just moved in It was early, I think it was like early June, so it wasn't really that hot out yet. It was one of the first warmer days that spring, and the homeowner was saying that the system just wasn't keeping up at first, but now she noticed that there is water pouring out of the unit downstairs in the basement, and it's just blowing air. It's not—
Cooling.
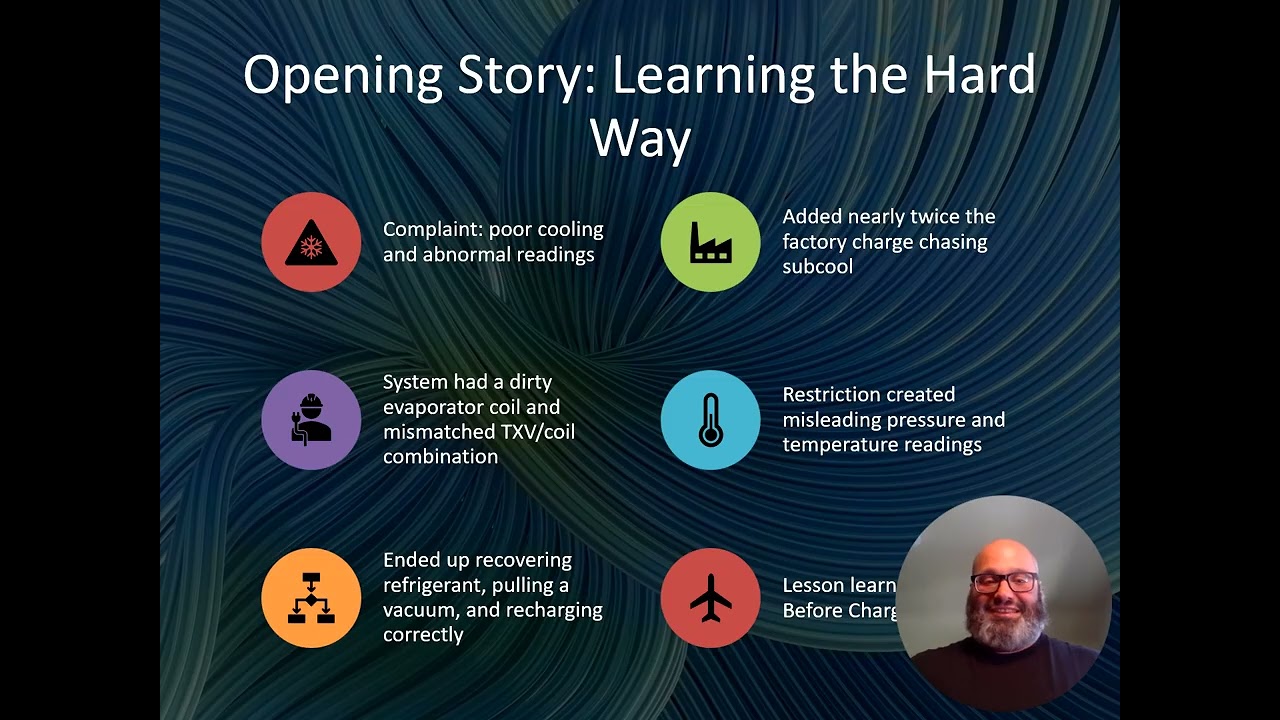
So I get there and of course I find that the evaporator is just completely frozen over and, you know, couldn't really do much with that. So, um, the, the drain also was broken, so I went and fixed that so that it was draining instead of just pouring water everywhere. It was actually draining through the, through the drain piping like it was supposed to. Um, Basically left the blower motor running and just said, "Hey, I'm gonna have to come back. This thing needs to thaw out. I can't really do anything with a system that's completely frozen solid." Well, came back the next day, and you know I'm getting my discharge, my suction discharge suction. Sorry, suction saturation temperature is right around. 40 degrees, and I'm like, it's a little low. Maybe, you know, I have a little bit of refrigerant. And did not change the suction pressure at all. So I'm adding a little more refrigerant, still not changing. What I'm not noticing is the head pressure is continuing to rise as I'm adding refrigerant. So long and short is I ended up adding roughly what would account to double the dang factory charge. So if it was like a 5-pound factory charge, you know, I added another 5 pounds. And by the way, I ended up having to pay for that 5 pounds myself. Um, and my boss, the owner of the company, came out and actually helped me out. And, and we discovered that, you know, the condenser coil was just absolutely jam-packed full of filth. It was just filthy as could be. So we cleaned that out, and then we ended up recovering all the refrigerant, pumped it down, then recharged to, uh, to factory charge. Got, got it running right, but we couldn't get subcool to be quite within that about 10-degree threshold. I don't remember, I don't remember exactly what the factory Uh, was on the condensing unit. But as it would turn out, there were more issues with that system, uh, than just a dirty condenser anyway. So, but I'm not going to get into that today. The— but suffice it to say that I probably could have gotten that system at least cooling for the family that same— that on that second trip, had I cleaned the condenser coil. And that was the thing that, you know, and for the next like probably a year after that one service call, every single call I got, he would ask me, did you clean the condenser? Even if it was just, you know, a capacitor. And you know what, I even got into the habit of pretty much cleaning the condenser every service call. I got really good at taking the top off the condenser, you know, hose it down from the inside out, put it back on, you're good to go. Um, so, you know, pretty much everybody ended up getting Everybody that I went to ended up getting a, uh, an included, uh, complimentary condenser cleaning. The, uh, obviously it wasn't really free because they were still paying labor, but, but, uh, I get we used to charge separately for the condenser cleaning too. But, um, no, I would just, I, you know, just because I had heard it so much with condenser clean, with condenser clean, that, um, you know, I just can't shake that now. I'm, I'm OCD about clean coils, man. And clean filters. But, um, if I would have just noticed how dirty that condenser was, I could have saved a lot of time, frustration, and money by simply hosing out the condensing coil and then attaching my gauges. Um, in fact, that's, that's why I've, I've said Especially on social media. Sometimes some of the HVAC groups, you'll see, you know, younger techs, you know, hey, here's a picture of my digital gauges, you know, what do you guys think is going on with this system? And, you know, sometimes there are helpful replies, sometimes they're just sarcastic replies, you know. And I've, I've gotten to the point where I just, I respond, did you clean the coil? Is the condenser coil clean? Um, because if not, don't even trust those readings, man. Uh, they're not worth— they're not worth a dang. Just, just, uh, I've, I've told technicians, and kind of metaphorically, not literally, um, you know, don't even get your gauges off the truck if you haven't cleaned that, or checked to verify that condenser coil is clean and that the furnace filter inside has been recently changed. Now obviously you should probably hook up your gauges pretty early in the service call, but at least just from the standpoint that that refrigerant reading, although helpful, isn't really that reliable if we do not also take into account airflow. This is why again we say airflow before charge. It's a relationship. It is not just simply airflow and charge, but they work together. So kind of like a relay race, you know, you think about the air as the first runner. It's handing the heat load or the baton off to the second runner, which is the refrigerant. The refrigerant then is taking the baton and running it outside the condensing unit, and then the outside air, then the third runner, is taking the baton and rejecting that heat out into the atmosphere. So it's not airflow and charge, or it's not airflow or charge, as if they're two separate things. It's almost a dance. It's a choreography. It's this balance between the two that allows the modern refrigeration system to work. So again, as I said, airflow— or yeah, lack of airflow in a refrigeration system can cause inconsistent— or not inconsistent, but unreliable numbers. Where it concerns your pressure readings. So in other words, you can't determine whether you are low on charge or overcharged, uh, by simply hooking up your gauges on a system that has dirty coils. Um, and it's not just dirty coils, by the way. There are other airflow restrictions that we'll go into, but it just, it just, it suffices to say. That incorrect airflow can fool you. So trusting just your refrigerant readings without taking into account how well the air is passing over the coils can deceive you into thinking that you're low on charge. The old, you know, the, the running joke or old adage is, oh, you know, it just needs a little more Freon. Um, and the truth is that often it doesn't. Need any refrigerant. A lot of times you don't need to add any charge. In fact, um, a lot of times the system is overcharged because you'll have, uh, Sir Hacks-A-Lot in his, you know, pickup truck with his magical tool bag showing up and, you know, throwing in some, some gas, uh, because that's the universal fix-all. And then he'll take his $50 Cash from the from the homeowners, and he'll be down the road never to be heard from again. So a lot of times the system is actually possibly overcharged, but you're not seeing it because you're not getting good airflow across those coils. So what our refrigerant readings can tell us when we have a restricted airflow situation is they can indicate for us the severity of airflow restriction. They can, they can confirm to us where the restriction is. Is it in the condenser or is it in the evaporator? It can kind of point us in a direction. So to say that our refrigerant readings aren't reliable when we use Or rather, when we have restricted airflow, is mostly correct, but not 100%. It is helpful in that it can help us in diagnosis. So here's, for example, you have a 410A system, which the system I was— I brought up in my confession of my own, you know, prior ignorance. That was a 410A system. For the most part, again, it was it was a jerry-rigged hodgepodge of everything. It was a Frankenstein, and I don't know. But anyway, the the refrigerant that we put in it and that it had in it was 410. So for that reason, I'm using 410 as an example. So here, our readings are indicating. A restricted condenser coil. What is it about our readings that's indicating that? Well, for one thing, we have slightly higher than normal suction pressure, and we have really high head pressure. Okay? So when we look at our gauges, if we see that our head pressure is high, one easy way to think about that is where is the heat leaving the system? It's leaving the system at the condenser. So head pressure is condenser, right? So if we see that the head pressure is high, that means we're stacking refrigerant, liquid refrigerant, in the condenser. So if we're stacking liquid in the condenser, then that means that there must be an airflow restriction in the condenser. Why? Because the condenser is supposed to be rejecting heat. One interesting symptom of that is that the condenser itself will feel hot. That seems kind of counterintuitive, right? If airflow is restricted, then why would the condenser feel hot? Well, it's restricted in that it's not allowing air to flow through the fins. Air is still flowing around the coil and around the cabinet and going through the cavity inside. And it's being heated up by all that hot stuff. And if you put your hand on that compressor while everything's running, I bet you it'd be really hot to the touch. In fact, maybe hot enough to burn you. So all that heat is just building and building and building, and as it heats up, you have higher pressure. As higher— as pressure increases, more and more liquid is going to stack in that condenser coil And that's where we run into potential dangers such as refrigerant floodback into the compressor. Um, so that right there, just the head pressure alone, if you disregard the suction pressure, just the head pressure alone is enough of an indicator that, hey, something's up with the airflow across this coil. So that's where I would be taking an amp draw of the motor, verifying that my fan is turning the right direction. Um, I'd be checking amperage on the compressor, and I would definitely be making sure that I get a suction line temperature and a liquid line temperature, because I want to make sure that my gauges are reading, you know, what are reading accurate, and the temperatures inside the pipes are actually being reflected. Uh, to go with the pressures that I'm reading. So, um, so yeah, obviously this thing should be running hot and it should be really evident that, that we are not getting airflow across the coils. Um, one other thing I've done is if you put your hand over the, um, over the top of the condensing unit and you feel the air coming off of that— now in normal operation it's going to be pretty warm. Because you are still rejecting the heat from the house. But, you know, if you put your hand over it and it's like uncomfortably hot, like you could bake bread on top of that thing, um, yeah, you probably have a restriction in the condenser coil. So not to be too repetitive here, but just more for the sake of your own note-taking If you're following along, some of the signs that you have a restricted condenser coil are, again, high head pressure, elevated subcooling, high compressor amp draw, condenser fan motors running hot. It may even also be running in reverse. Hot discharge line temperature, poor heat of rejection outdoors, invisible stuff, crud, junk, and muck in the coil. So in the same way, a restricted evaporator coil has its own unique set of signs and symptoms. Again, low suction pressure, low head pressure, high superheat— excuse me, high subcooling and low superheat. So basically, because airflow is restricted, refrigerant is not able to evaporate and less heat Heat is absorbed in the coil. So basically, it's it's as if the the runner with the baton is just going right past the second runner, and the refrigerant's just sitting there like um okay, you forgot to give me the baton, dude. Or it's just not even getting to the coil through the coil at all because maybe the coil is restricted. But again. If you're seeing your, your suction pressure and your head pressure out of line like that, um, you know, where they're, they're both kind of low. And in fact, again, this can fool you into thinking, oh, we're low on refrigerant, look at that. That's, you know, so the saturated pressure on that suction side is only 40 degrees, right? So that's going to tell you you got a 40-degree coil. Well, you know what? What temperature roughly do you want an indoor coil? Probably 50, 55, right? Um, yeah. Let's add a little gas. See what happens. Well, why is my head pressure so low? You know, let's take our superheat readings. Okay. Why is my subcooling so high and my superheat is low? So what? What's going on here?
Why?
You know, why are things so out of whack? If we're low, then we should be low on both sides, right? We should be consistent, but we're not. So there's another clue for you. We have something inconsistent. So again, you know, just when you see your refrigerant pressures out of whack, that they don't look right in terms of consistency, in terms of just being way high or way low. That's where you want to really stop and look at airflow, which again, it shouldn't take you long to come to this determination that, hey, something's up with the pressures. That's indicating I've got an airflow restriction. So let's double-check and make sure that we have good airflow throughout the house. So again, for the note-takers, for you know just kind of your own reference. Just some of the key touch points or, uh, or symptoms of a restricted evaporator coil. Again, your suction pressure is going to be low, not super low necessarily, but just a little low. Your superheat's going to be high. You have low evaporator temperature split. You might have some ice accumulation on the coil or sweating, but by the time you get there, if you— if ice accumulation has already started Then that coil is probably already frozen completely. It's not just some frost building, it's, it's a block. Again, weak airflow from the supply registers. Why? Because the evaporator coil is before— or rather, is between the fan and the registers. So if air can't get through that coil, it's just not getting to the registers. A little bit might because some is going to blow around, but— It's pretty much not getting, getting to the vents. Um, your blower motor is going to be operating hot because it's trying to push against a wall. Um, so obviously amp draw is going to be high as well. And again, the filter or coil are going to be visibly impacted, uh, possibly but not necessarily always. Again, there could be a motor failure, there could be a damper closed. If there's a return blocked. So the coil itself might not actually be restricted. It could be something that's not allowing air to come into the return and then enter the coil to begin with. So again, just—
If you've cleared all the restrictions, the system is completely clean and has a brand spanking new filter.
Superheat or subcool around 10 degrees. Make sure that all capacitors are good. You're gonna have suction pressure, you know, right around 120, discharge, you know, exactly 335.
And that all fans are rotating in the right direction and somewhere around—
and blades are clean. Once you've determined all that— When I made these graphics, these are—
Then your system should settle down.
These aren't exact numbers.
You don't have to be 338 discharge when you 14 PSI, 410A system.
You know, 117 PSI, you're working 339. Right around 10 degrees.
Discharge, you're probably okay.
Subcool or superheat, depending on— Using analogs, you're probably not—
So around 120, almost 340-ish.
But basically, this indicates you have strong airflow.
Pressures. All yours.
Let's see, if you had like operating efficiently, probably the most frequent—
Fans are turning in the right direction and they're combusting. You have stable pressures, metering device is not restricted, everything is good. Or they'll not even ever touch the thing because they don't understand what it's doing. Um, you know, usually that's going to be your problem child. So typically, you'll— after cleaning the machine and powering it back on, refrigerant pressures are gonna Go a little wonky at first because you're still dealing with a lot of latent heat trapped in the, uh, trapped in the refrigerant. But you know, you've also now got a wet coil, so the machine's kind of losing its mind for a minute there. Once the coil dries and everything kind of has some time to stabilize, then you're going to start to see refrigerant values Within a normal range, high side pressure is going to drop. Low side pressure is going to come back up to a normal range. Typically, in a residential system, you're going to want you know forty, forty-five, maybe fifty degrees saturated temperature. But but you know I'm not going to debate you know what what a good delta T is. During this particular module, um, and I don't know if that's even really a worthwhile debate, but suffice it to say that once the system is clean and you've verified all electrical and mechanical operation, you should start to see your refrigerant values settle down fairly quickly. It might take a good 15 to 20 minutes, but they will. If you should find that you're still low on refrigerant Add just a little bit at a time. Meter in just a little extra at a time. Don't open that thing up wide and just let the river flow right in because you don't want to risk floodback. But you do want to just add a little at a time, wait a minute, let it distribute, let it settle, and then, then You'll see that your refrigerant pressure values are going to come to a normal range. But what you don't want to do, again, as I said, sorry, you can throw a shoe at your computer, symbolically throwing it at me, but you don't want to just crank open your gauges and let it flow.
And you're the hero.
You have ensured that the system is clean, airflow is completely unrestricted, everything is working electrically and mechanically, every capacitor is within spec, amp draws are perfect, you've got 0 volts across the closed contactor, everything is running like brand new again. You will at first see your pressures go a little wonky because think about it, you've still got a bunch of latent heat in the refrigerant.
Your evaporator—
excuse me, your condenser coil is now soaking wet and the system is going to respond in, you know, well, much the same way that you're suddenly being tossed a basket of flaming chainsaws.
You're not going to know what the heck to do with it.
But after a while you figure it out, and so does the system. And give it 15 minutes, 20 minutes, and you'll gradually see your suction pressure and your liquid pressure begin to drop into a normal range. In this instance, it's a 410 system, so right around 120 and 338. Basically, you want your evaporator coil to be around A little over 40, maybe 45. I wouldn't even really get mad at 50. Um, and really that partially depends on your ambient heat and other stuff that I'm not getting into, uh, for within the scope— it's just not within the scope of this particular lesson.
But basically, once everything's back in order, you can now get a reliable read.
If you see that your pressures are a little on the low side and you want to start adding refrigerant, now is the time to do it. And when you do it, you want to add refrigerant slowly, a little bit at a time. A couple of ounces is really enough.
Just see what it does.
Let it sit there for a couple minutes. Okay, add a couple of ounces and just see what it does.
Add a couple more ounces.
Okay, is it rising?
Okay.
Add a couple more ounces and then stop.
Don't just crank your gauges open and let the refrigerant flow because you're going to risk floodback, especially again if that system is still in a recovery stage.
You don't want to risk wrecking a compressor which is still actually fine right now, um, because you got a little excited about your refrigerant trigger finger.
Um, What you want to do again is just a couple ounces at a time. Maybe you know now you certainly don't want to add you know half pound, pound. I mean think about it as a proportion of the total system charge.
You've only got maybe at most five pounds in a residential system. So the last thing you want to do is put in you know twenty percent of that in one go. You want to let it drink, but you want to let it sip slowly a few ounces at a time. And again. Let it sit and let it circulate and let it come down, and you'll see that those values will eventually rise. Now is actually a really good time to spray some bubbles on the— on and around the service ports and just kind of generally look around.
Do I see oil staining?
Do I see anything out of the ordinary? If not, then you're probably good.
You can go ahead and just let her drink.
And, uh, I'm sorry, I'm gonna say let her eat because I— we're not adding refrigerant at this point. But just, you know, let her, uh, let her sit and, and you'll see that she's going to keep running in that good range until she satisfies.
Once she satisfies, then, you know, you can take off your gauges and Get your, uh, get your ticket closed out with your customer, go back to the truck, and then before you pull off, just, you know, do a little celebratory driver's seat dance. And, uh, that's a great way to end a service call. So when we talk about how a lack of airflow will affect refrigerant pressure and how it can fool you. What we're really kind of looking at is how does it affect superheat? Because again, your subcool and your superheat values are a much more accurate means of determining proper charge than simple refrigerant system pressure. So then obviously we would expect if the refrigerant is is not either capturing the heat or it's not rejecting the heat, or perhaps both, because both coils could actually be restricted, um, then we would expect superheat also to be affected. So in essence, low airflow on the evaporator coil is going to affect superheat by increasing the number. It's going to be high. So suction pressure is going to drop, and then that's where we're going to find ice accumulating, or frost, or, or sweating on the lines, or it could be excessive condensation. Either way, we're going to see an increase in superheat if the evaporator coil is restricted. In the same way, if the condenser is restricted, we're going to see a rise in subcooling. So basically, because the airflow is restricted, heat can't be rejected, so it just— the head pressure just continues to rise. The condensing unit is going to feel noticeably hot. Subcooling is going to increase. Refrigerant, liquid refrigerant begins backing up at the condenser, and then eventually it's going to reach a point where it's all the way back to the evaporator, and that's no bueno. And that— now you're sucking in liquid refrigerant, and that's where you end up with a— the— with compressor innards that look like shattered glass. And that's, that's just not Not something you ever, ever want to see. If you haven't seen it, there are some good YouTube videos and pictures online you can check out. Perhaps if I rewrite this lesson one day, I might add some pictures. But yeah, no, trust me, it's catastrophic. If you want to imagine what catastrophic failure looks like, a slugged compressor is about the best, uh, is about the best picture. Um, but the danger here is you've got stacking liquid refrigerant in the condenser, and this is where a lot of technicians will erroneously add refrigerant because the suction temperature looks slightly low, but it's already got too much refrigerant in the condenser and it's just going to keep Holding refrigerant in the condenser. So that's where, like I said, with, with my system that had the dirty condenser and I kept adding refrigerant, if— man, I don't even know how high the suction— or excuse me, the liquid side pressure was. But I bet now if I'd have seen it, I would have been kind of scared. Um, because, because, uh, yeah, I mean, I'm just adding adding to an already overflowing cup. And that's not a good idea. I can tell you that much. So obviously, a restricted condenser can lead to severe overcharge conditions. With a restricted evaporator, yes. The blower motor could eventually burn out and overload, but it would take a heck of a lot more time running under load for that to happen versus a compressor. It just needs 1 second of liquid refrigerant being brought into the low side for it to shatter. So yeah, the— Plus the expense of replacing a compressor versus A blower motor. If it's a machine that's out of warranty, obviously you're talking about the entire condensing unit. But basically, basically, yeah, you don't, you don't want to do that. But your, your subcooling is going to increase when you have low airflow across the condenser. So what happens if you have a clean evaporator, you have a clean condenser, but you're still getting these outlandish refrigerant values? Well, that's where, you know, you should have from the beginning been checking, um, that the blower motor and condenser fan are clean. You, you want to make sure that you're you had already you already should have checked amp draw readings on all three motors. You should have made sure that you have proper direction, that fins on the blower wheel and that the the fan on the fan blades on the condenser fan motor are not bent or broken in some way, and you want to verify proper rotation. This is also a time to. Double-check, because again, you've already checked, right? You did already check all these things. Yes, I knew you did. You're so freaking awesome. You're the best ever. Uh, this is the time when you're gonna double-check to make sure, are my returns actually clear? Um, you know, I have found a dresser in front of a return. I found a kid's big dollhouse covering an entire return. People put furniture over them. Um, I had a family that had all of the upstairs Supply vents shut, which okay. I mean, just people do all kinds of interesting things, and this is the point at which you know did I miss a return? Maybe there's two returns. Maybe there's a third even. You know, is there a piece of ducting that's maybe collapsed or or maybe has hole in?
In it.
I've seen ducting that's completely been corroded through, and it's, it's not carrying air anywhere except for the air that's just sitting in there, the atmospheric air. But this is where you want to, as a former boss once told me, check the checker. Just make sure that you're going through all of the steps that you already took and rechecking everything, you know, your capacitor microfarad values, your amp draw values, make sure your rotation speed is right. Pull that squirrel cage and make sure that it's not caked with dust and the fan wheel's not caked with dust. Um, you know, make sure that, uh, is there a lot of play when you— if you move the motor shafts, uh, laterally in the same direction, uh, up and down basically? Um, is there any play side to side? You know, is anything out of line from a normal motor in the fan motors? You know, you can even check the TXV. Is the TXV opening? If you take the bulb off the suction line and you put it in the palm of your hand, what happens to your pressures? Does it change? If it does, then your TXV is probably operating. If it doesn't move, then you might also have a bad TXV, which Yes, airflow restriction absolutely can end up killing a TXV. But yeah, you just— again, this is where you want to double and triple check all of your steps to make sure that there is nothing restricting airflow. So if the coils are clean, you've got good airflow, everything's fine, your refrigerant pressures still aren't quite right, TXV is working, um, you know, that's the point at which you might want to go ahead and grab a can of refrigerant. So again, just another list to add to your checklists. Um, just want to make sure. And then on a commercial unit too, what about fans and pulleys? You have a loose, uh, pulley, a belt Do you? I have seen one recent one. I had a commercial rooftop unit where the blower motor, the outside case of the blower, the motor was working fine. Okay, there was nothing wrong with this motor. What was wrong was the actual outer body of the motor cracked at the at the point where it attached. to its integrated cradle. So basically the cradle was welded to the body of the motor. So I had to replace the motor. It ended up being like a $2,000 motor for the customer, but the motor was fine. It was the dang sheet metal outside, the skin of the motor, that was the problem. Um, so yeah, I mean, all kinds of oddball things, man. Um, you You want to just check everything. The thing is, if you're gonna at this point grab your refrigerant can and add charge, the thing that I want to caution you on is just proceed with caution. And when I say proceed with caution, what I mean is don't go cranking open your gauges and just letting the river flow right into the system. What you want to do is meter in maybe an ounce or 2 at first. See what your gauges do. They should— something should change. Give it a minute or two, let it kind of equalize, add another couple of ounces, and keep following that until you finally reach your appropriate pressures, and you can calculate superheat or subcool depending on your metering device to match the system requirements. You may very well be low on charge. Here's the other thing: if you now go and add that 1 or 2 ounces of refrigerant, um, make sure you watch your head pressure, because if the head pressure is going up and if there's something causing refrigerant to keep stacking in that condenser— and also bear in mind, it may take a good half hour You know, if not slightly longer for all that latent heat to leave the condenser and for the liquid to kind of destack, if that's a word. Because you've got all that energy built up and that, that heat, you know, it stays in there a long time. And think about a cast iron frying pan. You know, you turn off the heat, cook your breakfast, turn off your heat, that pan's still going to be hot for a long time, isn't it? Same thing. All that heat stays in that coil for, you know, hours if it's not running as a part of a refrigerant system. So you got to give it a good half hour, you know, maybe a little bit more again, just to make sure that all that excess heat is out of the system and that we're running. Um, if there is some kind of a liquid, or rather some type of a refrigerant line restriction then that's something that may need to be addressed separately. And we will, of course, get into a little more in-depth topics as time goes on, but that's not really within the scope of today's lesson. The main thing I want to focus on is, you know, why we can't just go continuing to add refrigerant to our system. So When we're running at an overcharged, in an overcharged condition, we're basically adding strain to the compressor. I mean, think about if you've ever blown up a balloon to the point to where it pops. I mean, essentially that's what you're doing to your compressor, except what pops in the compressor is motor windings because the motor overheats and then the motor windings break down. And then pretty soon there's no more insulation on the winding and it's, it, you know, it's either grounded or shorted and it stops working or working inefficiently. So it is entirely possible that due to overcharge or due to consistently running with a restricted, rather, in a, with an air restriction, That the windings on a motor can actually fail. And if you're getting unusual refrigerant readings, that can indicate that you have a compressor that's now running inefficiently. Well, you've already been out, you've cleaned the coils, you've checked all the things, and you know, you're still not pushing refrigerant right. This is the point at which, now that you have your values, you have your stuff written down, um, and you have written it down, right? You did already check all this stuff like I, like I asked?
Yes.
Don't make me bring out that other picture of me that maybe may or may not be AI generated of me yelling at the other technician. Um, no, I'm kidding, of course. But having all this data that you've gathered on the system, now is a great time if you're an unseasoned greener technician. Now is a great time to call your office or tech support or, you know, somebody else in the company who can kind of guide you on some extra steps. Again, that's not within the scope of today's lesson, so we're not getting into that. But suffice it to say that, you know, if you verified airflow, if you've added a little bit of charge and we're still, you know, head pressure still not going down, the, you know, maybe suction pressure is not coming up right, you know, something's still not right, you, you need— you could— you should probably call somebody at that point, um, if you don't know what further steps to take. Now the other thing is, if your head pressure and your suction pressure are both kind of high, you're probably overcharged. So at that point, um, you know, you haven't added refrigerant yet, right? Right, we haven't added anything. Try Try the opposite.
Try recovering a little bit of refrigerant.
Try recovering an ounce or 2. See what happens. Do we start to settle down? Because maybe again, you know, Chuck in his magical pickup truck showed up the day before you, and the customer failed to inform you of this, and their solution was to add a little bit of gas, and it didn't work. So they took their, you know, again, they took their payment from the customer. And taillight warranty, they're gone, never to be heard from again. And now the machine belongs to you. So if it's overcharged, now it's your job to recover that refrigerant. Recover, you know, a few ounces at a time. See what happens. Is it good? Don't just open up the valves because you're going to dump the whole stinking load. Um, a little bit at a time, a few ounces here, stop, watch it settle. You want ounces there. Stop.
Let it settle.
Because what we're talking about here, if we overwork our compressor, isn't just, um, it's not just inefficiency, it's not just making the compressor work hard, it's literally burning motor windings and slugging pistons, connecting rods, and valves. Um, or shattering pistons, connecting rods, and valves because of slugging. It's, uh, you ever hear that you shouldn't de-ice your windshield if you live in a colder climate during the winter by pouring a bucket of hot water on it because it'll shatter the windshield? Exact same science behind why slugging a compressor is bad. That temperature change, boy, it can be a doozy. But since were a good conscientious technician, we, you know, if you saw that the suction pressure and the head pressures were consistently a little bit high in relation to each other, um, you recovered a little bit of refrigerant. Now the pressures should return to a normal state. Now this is where you're going to need to use your pressure temperature charts to verify what what that pressure is, you're going to want to probably— unless you're a genius and you can remember all these numbers, or you can, uh, or, you know, you just know for this particular system, um, you might want to use an app to calculate subcool and superheat. Either way, you want to just verify your, uh, your pressures. Everything should start settling down to normal once you have airflow Restored. So we've talked a little bit about restoring airflow, um, talked a little bit about what to do in the case of high pressure or low pressure. We've talked a little bit about, um, you know, what, what causes overcharging. Um, so let's move on really quickly and let's talk about our diagnostic sequence.
Okay.
I know that you guys have been chomping at the bit to get to this point, um, because it's exciting. Because you know what, if I love anything, if anything just gets my blood pumping, it's routine. No, but seriously, you know, successful technicians all have like this sequence. They walk into a job and step 1 is always step 1, step 2 is always step 2, step 3 is always step 3, so on and so forth. Until they've got a diagnosis, a repair, and, you know, a quote for the customer. So when we think about our diagnostic sequence, and yes, this is probably more for the newer guys, but if you're an older tech, you can probably relate. You probably have a sequence. You may not even think about it. You just develop this habit that when you walk into a job, the first thing is first, the second thing is second, and again, so on and so forth. Um, So I've prepared on this slide, uh, just a few little, um, ideas for a diagnostic sequence. But, but, um, the important thing is, guys, make your own. Like, this isn't a be-all end-all list. This is just simply an idea of things that you should check in an order of operations. But if you think about it, like, if you call the manufacturer of, of a piece of equipment, okay, call Trane, give them a model number and a serial number They probably have a published document called Sequence of Operations for that unit. Now, an HVAC system—it's probably not going to be different model to model or brand to brand. But but every every that's a part of engineering these machines is the sequence of operations. You know what's the thing that happens first in order to get this whole thing going? What happens second? What happens third? Um, and in the same way, developing the same routine helps you to track your steps. It helps you to be efficient and effective. It helps you to be confident in knowing that, you know, yes, I checked the filter. Yes, I made sure the coils were clean. Yes, I checked amp draw. And by the way, here's what they are. Don't ever tell a more senior technician if they ask you, you know, how— what— how many amps was the compressor pulling? Oh, compressor was fine. What was the, uh, you know, what was your subcool? Subcool was good. Don't, don't do it. You give them a number. Please, I'm asking for your good, for your well-being. Give them a number, not it's fine. But you want to basically follow the sequence so that you can have that data so that if you need help You can, you know, give somebody good questions so they can actually assist you. Um, but yeah, basically what it boils down to is, you know, when you're following the same steps over and over again, you're being more efficient. Um, and really, we owe it to our customers and to our employers to make sure that we're doing our jobs as efficiently as possible. It's not a race, guys. We're not, you know, we're not actually sprinters. And nobody wants us to just rush through every job. They want us to take no more time than is needed. And I think everybody in this trade understands that sometimes things are going to take a little longer, but that should be as needed, not just because I had to go out to my truck like 15 times and then I went inside, outside, inside, outside. Having a Diagnostic sequence, a set of regular repeatable steps, is going to help you be more effective in doing your job. It's also going to make sure that you have done all of your checks. Because how could I be on step 4 if I haven't completed steps 1, 2, and 3 first? So I'm not really going to go over these individual steps. I think I've I have preached at you enough about this, but, you know, part of, part of it and part of being successful as a technician, you gotta have a set routine every time. The thing to keep in mind is be adaptable because sometimes you will have to make little tweaks and changes here and there. And every now and then the plan sequence just goes out the window and You know, you just you just got to go into stop the bleeding mode, and it does definitely happen. So guys, I just want to thank you for listening to me and following me this far. You know, I hope that you have enjoyed this lesson as much as I have enjoyed giving it. And you know, if you have questions or concerns, if you have comments. Or heck, compliments, feel free to message me on Facebook, Michael James Plezia. That's P-L-E-Z-I-A. I am on the HVAC Is Life Facebook group. I'm one of the moderators, as well as I have the HVAC Mentors Podcast, which this lesson will also be on. If you want to reach out to me via email, Mjplezia@gmail.com. Or again, you can reach me, Michael James Plezia, via Facebook Messenger. Feel free to reach out. Hey, heck, just, just say hi sometime, man. I always appreciate that. But you know, some final takeaways if I were to wrap this whole thing up into just a few final points. One is, um, airflow problems do show up in your refrigerant readings. So while you cannot determine whether you're overcharged or undercharged if you have an airflow restriction, your refrigerant readings will point you toward where there is a restriction. So whether it be evaporator, condenser, um, that's gonna be kind of apparent In the readings. Hey, and by the way too, if you want a copy of this PowerPoint, also email me. I'll be happy to send you one. Um, make sure that you understand charging a system or taking away charge before you're verifying airflow is not only a waste of time, it's a waste of refrigerant, and it makes us look sloppy. Uh, which, you know, of course we want to reflect well.
On our trade.
If we look at the HVAC system as a whole body, remember that the condenser, the compressor, the evaporator, the metering device, the refrigerant, the pipes, the wires, everything— they're all parts of a body. Kind of like we're more than a heart, a liver, you know, a foot. It's all, it's all a part of the whole that makes us us, right? And in a way, your customer's HVAC system is also a part of the body of their building. And understanding that in light of where the system is located can also even give you greater insight still onto into what's going on with the system. What has the system been exposed to? So you know, just looking at the whole thing, not just And what are the pressures doing? Oh, suction pressure is low. Let's go ahead and add some refrigerant. No, let's look at the whole system. So it's a bigger part of diagnosing is my point. It's not just the diagnosis itself. It is one component within the entire system. When you do add charge, be patient. Or takeaway charge. I should edit that.
Mm-hmm.
Make sure that you do it slowly, a few ounces at a time, really. I mean, it's not a massive, like, cooling tower or, or massive, uh, chiller in a half a million square foot building, you know, unless it is, then maybe you can do it a few pounds at a time. But for most residential systems, a couple ounces at a time will give you insight into how the system is operating. And then after you add or take away that couple of ounces, stop and wait. Now, at some point you may realize that maybe the system's really low or really high and I need to take out like half a pound at a time. That you can determine later, but at least starting out, you want to proceed very slowly. And I really— I would not recommend adding or taking away that much at a time anyway. That's just, you know, for illustration's sake. But a few ounces at a time, add or take away, let the machine run, let the system kind of equalize and see what happens. Then you can figure out if you need to add or take away any more. Um, the best technicians— and by that I mean the strongest, the most successful— they follow a Set repeatable process every time, every service call. Now, do we have those moments where it's get in there and stop the bleeding? Absolutely. Then then set you know diagnostic sequence kind of goes out the window. We just do what needs to get done, or sometimes we're interrupted. Things happen, but most of the time at any given service call. You should be following. So final notes, I just want to kind of summarize what we've been through, and I've tried your steps. You know, I'm asking you to drink readings you take in, data you collect. There's a lot of information, and it helps you know welcome to HVAC. Not just go back and forth to the van a thousand times. Not go airflow problems or unit do present in your maker so that you are so until able to perform as effective airflow. And verify good airflow. As efficiently as you can. You cannot really rely on it so much. And honestly, it also makes us look better on what the gauge is telling us.
The gauges are telling you.
Like, we know— Charging a system before verifying airflow wastes time and a ball ball of us. And a ball ball of us. We wanna make sure that you clean your coils, you have healthy motors, healthy components. Airflow before charge does not mean— And, you know, that is just as much a part of refrigeration diagnosis as— What it means is— As gauging airflow and reading your pressure. And charge.
When you do add charge—
Both of them together. So therefore, please do not accurately determine— And then finally, remember that the best technicians— and by that I mean the best foremen—
follow a repeatable process.
Therefore, it's airflow before, change after. Make sure that you know what you're gonna do. You know what step 3 is gonna be. You know what step 8 is gonna be. You know what's going on after and in between. You don't want to upside and down change the whole industry. Are you gonna have to adapt in certain situations? No, but still, the foundation does not change. It's still eight. And always remember, above all else. So again, when you go on the next service, make sure that you verify the Facebook group HVAC Is Life and HVAC Mentors Podcast. Feel free to reach out sometime. Say hi. Drop a suggestion. If you want any handouts or anything for this lesson, if you want a copy of the PowerPoint, feel free to ask. If you just want to play it. For your team meeting or something, you know, maybe you're the service manager or maybe you own your own shop. Yeah, man, absolutely feel free use it if it can be of value to you or to one of your techs or some of your techs. Definitely play it. Trade school teachers don't even ask. Please just use it. It would be my honor. Other than that, you guys have a great day. This has been Monday Night HVAC on the HVAC Is Life Facebook group. I look forward to seeing you all next time. Thank you once again. Bye for now.