Be Brave In Business Posing 2
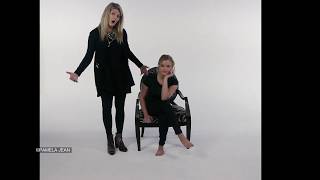
A short tutorial video by Pamela Jean (with her daughter Whitney) demonstrating chair/prop posing techniques. Emphasizes starting from a solid lower-body foundation even when seated, explains hand/arm placement, creating flattering angles (V-shape with elbows, light pockets, separation at the waist), and shows multiple variations and small adjustments to produce a variety of flattering shots from one pose.
Chapters
Hello, it's Pamela again, and this is my daughter, Whitney. We are going to work on our next series in posing poses and work with a prop or a chair because it's a little bit different, obviously, than standing. But you're going to find a lot of the rules apply, whether you're using a prop, chair, stool, laying on the ground, whatever it happens to be. The posing rules do apply, whether they are sitting on something or standing up. As I told you in the last video, we always start with the foundation. Even if we're not going to be showing the legs in a picture, you still have to have the lower body doing what you need it to do, because that's going to dictate where the upper body goes. So just like when someone's standing, you're not going to have a chair typically pointed straight at the camera. Although rules are always meant to be broken. And I'll show you how that rule can be broken and broken quite nicely, actually. So we'll go ahead and start with that. What I'm going to have Whitney do is cross your right leg over the left. As you notice, this is just a side note. As you're working with your clients, it's very important that you express and explain things to them in a way that they can fully understand and it's easy for them to follow. If I were actually photographing her today, I would be directing from the camera. Oftentimes, I would actually show my client how I want them to sit before I have them sit down, because most people are not super comfortable in front of the camera. And Whitney has been in front of the camera since she was wee little, so she kind of knows the drill already. So this is going to be a time that you would break the rule. I'm going to have her straight at the camera. The right leg is crossed just as she has it. She's going to take her left elbow and bring the elbow to the knee. Okay, now this is super important. There's two things here that are kind of a deal breaker on this particular pose. When someone brings the hand to the face, you never, ever, ever want them just to lean in. Go ahead and lean in. Yeah, you never want to do that because you have all of this hand and it squishes the face. So when you have them lean into their hand, tell them you're going to touch here and fingertips. So the base of your hand and your fingertips are going to touch the skin nothing else touches. And then break your wrist for me and just let the fingers gently touch. Exactly. Now look at how beautiful that is right here. But right here, she looks wider than what she is. So she's going to take this arm. The right arm is going to tuck in by your waist, and you're going to bring the elbow all the way across your body. So what we're trying to accomplish here is to bring these two elbows as close together to create that V. So in a photograph, she's going to come down into a nice, pretty V. And I would crop this in image right here. The chin is going to turn towards the left. Go ahead and lean in on the hand. Perfect. Now, if I were actually photographing her in a session, I would have my main light coming from this direction, my kicker light coming here, hair light, background light, etc. But for demonstration purposes, I really just want you to be able to see what happens to the body and how much prettier this is. Go into like a fist. A lot of times you'll see that. You'll see that. And notice how when she leans in, she squishes and creates a little bit of a bump on the cheek. She's not going to like that. Your clients will not like that in a picture either. So just touch at the base of the hand and the fingertips is all that will touch the face. So you can see that that looks much, much prettier. So go ahead and hop on up. If I were to use. Clearly I'm a fan of animal print, but if I were to be using this chair in my camera room, I would probably have. I would start it over this direction. Now, Whitney is going to actually enter the chair from this direction. Obviously, your main line is going to be over here. So if I were photographing her, I would show her exactly how I wanted her to pose. I would tell her, you're going to catch the hip onto the left hip. You're not going to be flat on your bottom. You're going to roll up onto you the left hip. The left elbow leans into the back of the chair. You're going to stretch your legs out and cross your legs over. So the right leg goes over the left. So again, we started at the foundation, we started at the high knee. And then we've got the legs, we have the arm. Then you're going to lean forward and chin turns towards your main line. So let's hop into that pose. Catch the hip. Perfect, perfect. That's really, really good. Now, a couple things that you're going to want to watch in a pose like this is you want to create a nice little separation from the bicep to the waist. By creating that separation, it gives space around their middle and gives them a little bit slimmer appearance. You want to watch how this arm goes here and how pretty this hand is. So we're going to have her. Good. Perfect. That tiny movement of the elbow. I hope you saw the difference that made. And then you're going to bring your fingers up. Perfect. This arm, you're going to stretch down towards the knee. Bring the elbow back just a little bit. Good. So look at all of the space we have. We have light pockets here. We have a light pocket in here. So you have space around her middle to create a really, really pretty line. Good, that's perfect. And if I were photographing this right here, I would probably crop it right below the knee and I would even come in, have her bring this hand over here. Break your wrist for me just a little bit. Perfect. That's beautiful. And then you have another shot here. So I haven't even adjusted her, and I've already gotten two really, really great shots. I would change my expressions, adjust my lighting as we needed to, making sure your main line is in the right position to light the mask of her face. Go ahead and relax. So another thing that you could do in posing with a chair is I will have. I'll just tell you how to do it. So now you can do this one. Bring your knees towards the back of the chair. Go ahead and just stand on your knees in the chair. Good. Rotate your body directly towards the back. Perfect. And now bend at the waist and lean in. Good. This is another really, really easy one to do. You want to make sure of a couple of things. First of all, because they're pressing their body forward, you are going to want to remind them to keep their tummy tight. Because when you don't keep your tummy tight, the muscles relax. And she's not going to like it if her tummy looks big. So keep your core tummy tight. Arch the back right here. Create a nice little dip to the waist. And then with hands, you want to make sure that the leaning on the arm doesn't create distortion in the upper arm or the lower arm. And if so, just have them relax and adjust. Open up your left hand. Right hand falls in. Break at the wrist. Perfect. You see, all of those little nuances make such a difference in how pretty a pose looks. That's beautiful. Turn your chin. Awesome. There you go. And relax. Hop on up. So another one you can do is switch it this way because I'm pretending my Main line is over here, so we'll go this direction. You could have them lean in this way. So go ahead and lean back in with good bend. Awesome. That's really, really great. That looks super, super cute. Now, as you're working on all of these different options, you want to make sure that you're changing from full length to three quarter length to close ups and creating a good variety. Get as much variety out of one body position, one pose as you can. So if I were shooting her on this one, I would do maybe a full length shot with a big, huge, bubbly smile. There we go. That's perfect. Then I would maybe have her keep your body exactly as you have it. Take your left arm and bring it down. And now bring your right arm across just like this. Good. Lower your chin. And I would maybe crop it about right here and go with a little less of a smile. The third thing I might do, barely changing her at all, is bring your fingertips to the back of your neck. Good. Turn your chin towards the main line and drop it down just a little bit. And then I would come in right here now and do a shot that's a little bit more serious. So that gives you. You can relax. That gives you just a couple ideas on how you can work with a chair. There's so many different things that you can do. Think broadly about that. But again, the rules are the same, that you start with the foundation and work your way up the body. Even if you're not showing the foundation, it still has to be in place for the rest of her to look perfect. Thank you so much for joining us. We appreciate your time and enjoy our video.
More from Pamela




Great Things Happen When You Forgive_An Interview With Lisa Bain | A New Life Podcast with...