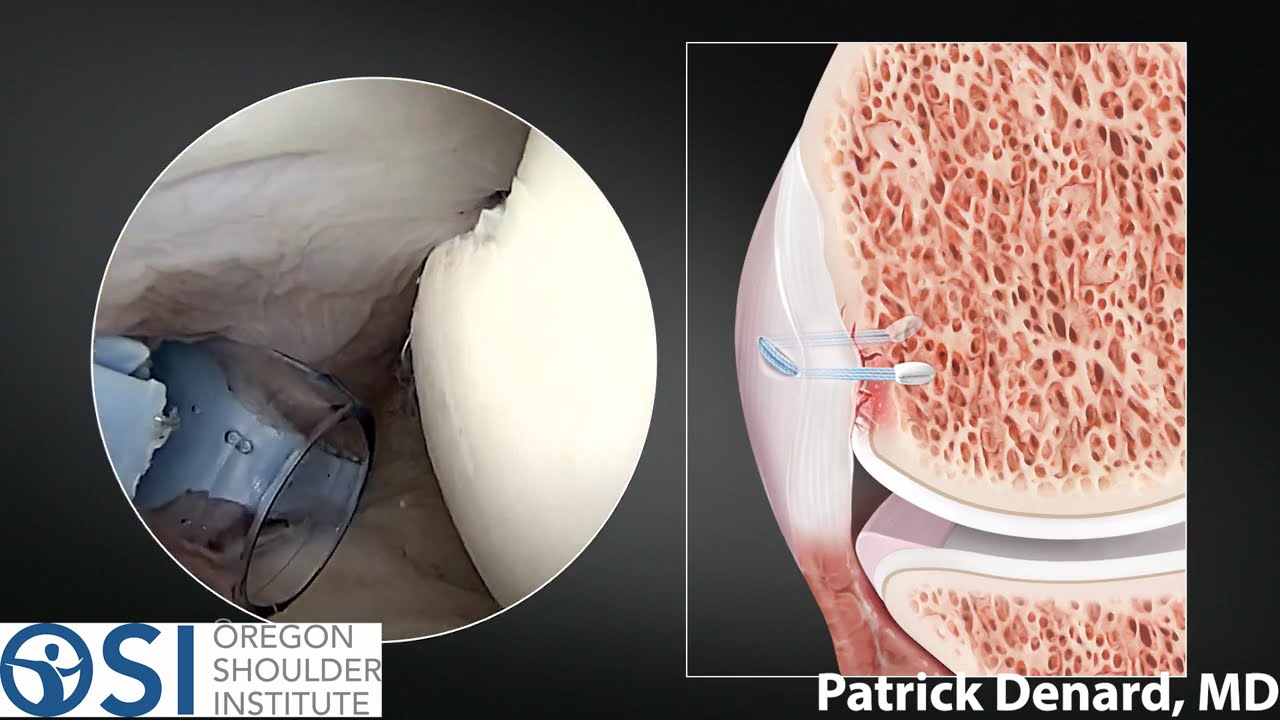
In this instructional arthroscopic video, Patrick Denard demonstrates a knotless Bankart repair combined with a remplissage for a Hill‑Sachs defect. He begins by establishing an accessory posterior cannula, using a spinal needle to locate a point 2‑3 cm lateral to the posterior inferior portal and aiming directly at the center of the defect. A switching stick confirms placement just above the posterior capsule, after which a 7 mm threaded cannula is inserted and cleared of bursal tissue. The assistant holds the cannula to prevent back‑out. Denard then places the inferior knotless 1.8 mm FiberTack anchor first, aligning the guide with the Hill‑Sachs defect to achieve optimal tension on the posterior capsule. After confirming cannula position, he inserts the superior anchor through the same cannula, using a guide without a trocar to avoid catching sutures, and tags the sutures for identification. He proceeds to the Bankart repair, positioning 3‑4 labral anchors from inferior to superior and employing a hybrid suture pattern (mattress‑simple‑mattress). With the labrum secured and the glenohumeral ligaments tensioned, he returns to the remplissage: the inferior and superior suture limbs are crossed to create a double‑mattress knotless construct, which is then tensioned to pull the posterior capsule into the Hill‑Sachs defect. The final construct restores the humeral head centering, adds only about five minutes to operative time, and demonstrates the efficiency of placing the remplissage anchors before the Bankart repair and completing tensioning afterward.
Chapters
I'm Patrick Denard from Medford, Oregon. I'm going to demonstrate a Bankart remplissage. Our defect is completely prepped. My next step is to place an accessory posterior cannula. I like to use a spinal needle first. This cannula is typically directly lateral. To my posterior inferior cannula. Usually it's going to be 2 to 3 centimeters, and I want to get an angle of approach that's going to aim toward the middle of the Hill-Sachs defect. So this is pretty good here because I'm right in the center of the defect. Next, I'll take a switching stick and I'll go down to just above the posterior capsule to confirm that I'm at the right location. So we can see the switching stick. We are clearly Just above the posterior tissue. I'll insert another 7 millimeter threaded cannula. So the goal of the cannula is to go below the deltoid and just above the posterior soft tissue. And at this point, I take the cannula and move in a circular motion to clear out all the posterior soft tissue, which is the bursa. And I can clearly see that I'm just above the posterior capsule and rotator cuff. Once we've established this space, it's really important that your assistant holds the cannula so it does not back out. I'm first going to insert my inferior anchor. You want to insert the inferior anchor first because once you insert the inferior anchor, it becomes difficult to see the superior anchor. So I use a 1.8 millimeter knotless FiberTack anchor. I'll insert with a sharp guide to penetrate through the posterior tissue. I'll typically try to be right in line with the Hill-Sachs defect. I can just see the tip of the insertion guide here. That's going to provide a good angle of approach because I don't want to over or under tension the posterior capsule. Once I establish that location, Sometimes I will move inferior so that I'm directed where I have the most space, just below the head. I'll remove the trocar of the guide, and I'll be just up against the cartilage of the humeral head. If I have a really large defect, sometimes I won't go all the way over to the medial edge of the defect. I typically find that a 1-8 anchor Works very well in this location. Now prior to removing the guide, it's important to push the cannula back down to confirm that you have it just above the posterior capsule. And I'll remove the guide. Next, I'm gonna place my superior anchor. Now I will insert the guide first without the trocar in place. So both anchors are gonna go through this same cannula. Once I get down to just above the tissue, which I can see here, now I'll insert the trocar into place. And I think that's important so that I just do not catch the other sutures on my way down. So here we can see the spike just reaching the soft tissue. Once I go through barely, I'll direct away so as to not damage the cartilage. Just use a subtle twisting motion. Again, you can see my anchor placement is in line with the posterior capsule. So I'll tag both sets of sutures. I'll typically tag one shorter so that I can distinguish which anchor is which. So again, we can see both sets of sutures are coming out the posterior cannula. And I'll set these to the side. At this point, I'll move on to do my Bankart repair. So I need to prep the labrum first. Typically, I'll place anywhere from 3 to 4 anchors from inferior to superior. You can use a variety of suture configurations with these anchors. You can use simple configurations or mattress configurations. I often use a hybrid approach where I will place a mattress suture configuration inferiorly A simple configuration in the middle, and then mattress again up top. So here is our completed Bankart repair. You see we nicely brought the labrum and the capsule up against the glenoid. The humeral head is already well-centered. We have nice tension of the inferior glenohumeral ligaments. And now we're going to go complete our remplissage. And I think this illustrates nicely how difficult it can be to do the remplissage at the end. Because you can see already our space here is half that of which it was before. We're actually fortunate we can see in this case, because sometimes you get so much soft tissue swelling you can't see at all. So again, it's important to make that decision at the very beginning. So now we have both sets of suture limbs out our posterior cannula. The inferior anchor is here. The superior anchor is the one that I'm tagged by doubling up. My assistant and I will take our repair sutures and pass these to each other. And then we will each convert so that the inferior repair limb will be going into the superior anchor and the superior repair limb will be going into the inferior anchor in order to create a double mattress knotless configuration. Okay, now both sets of sutures are converted, and we'll simultaneously go back and forth to bring that soft tissue down to the Hill-Sachs defect. Okay, now our Hill-Sachs defect is extra-articular, and the capsule is right up against that bone bed. So there will be our final tightening. So here's our completed bankarted remplissage. You see that this technique for the remplissage in particular let us complete this remplissage in a very efficient manner, adding perhaps only 5 minutes to the case. The key steps being placement of the anchors first, followed by your bankart repair, and then going back and tensioning the remplissage.