Dr. Patrick Denard shows how to position a patient for shoulder replacement surgery, including the specialized table setup with wedges and braces tilted 30-45 degrees. He details an intensive infection-prevention protocol: benzoyl peroxide scrubs for 3-5 days before surgery, Chloraprep prep, IV antibiotics, and intra-operative Betadine irrigation, targeting an infection rate below 1%.
Chapters
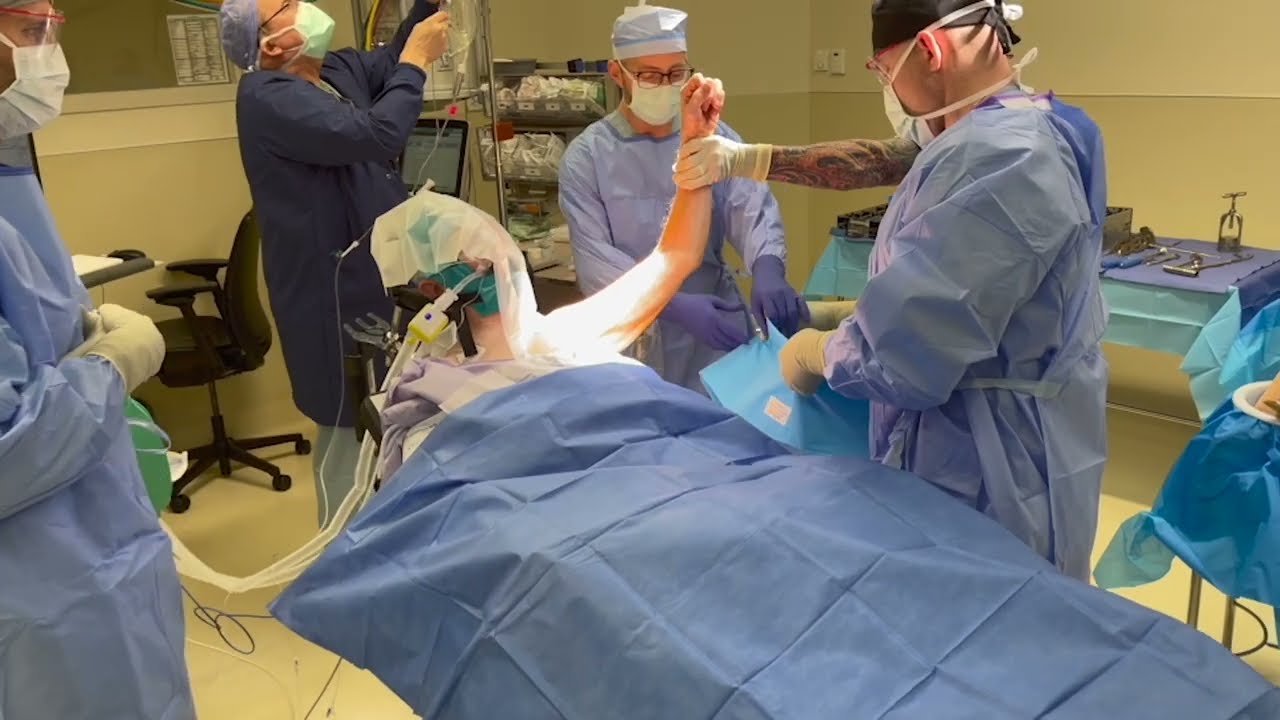
Patrick Denard, MD. So in this video, we want to explain how people are positioned for shoulder replacement. We use a specialized bed. The arm rests right above the top of that. There's a mobile piece so we can get access to the shoulder, and then there's a wedge pillow that goes under the legs. We have braces on the side that hold a person securely, and then we sit up about 30 to 45 degrees. We have equipment at the end of the bed such as suction and electrocautery. There's a strap that goes over the face that helps keep everything nice and padded. The head is supported with a headrest as well, and then we drape out the arm. In this case, we're working on the left shoulder. We do a clear plastic drape that goes across the shoulder and then goes back up kind of behind the ear, and this gives access to the entire shoulder. We close that off with another drape as well. We make sure we can see the initials that we've marked prior to the procedure, confirmed by the patient as well. And then we take infection prophylaxis very seriously. We start this preoperatively using a benzoyl peroxide scrub that's applied to the shoulder 3 to 5 days prior to surgery. Right before surgery, we use a hydrogen peroxide scrub, and then we use a specific prep We give IV antibiotics. During surgery, we rinse with a Betadine, which has been shown to reduce the incidence of bacteria inside the skin. And then we also use an antibiotic powder. So we take all these steps, and with this, we have a very low infection rate, less than 1%. So here's that hydrogen peroxide scrub that goes over the skin. And that's for a particular bacteria that lives in the skin called C. acnes. It's the most common cause of shoulder infection. And then we apply this prep. It's Chloraprep. And then we're systematic with our draping. We apply drapes at the bottom. The shoulder is sealed with a sticky U at the bottom and then at the top. Once we apply this initial layer, we get rid of our outer gloves just in case we've touched anything on the side. Then a second layer goes on. This is the final layer. Again, this has an adhesive. This will stick to that blue drape underneath. So there's a U that goes up and then a U that goes down. So that's established our sterile field, and then we also like to use a drape that's called an Ileband drape. This really helps seal everything off. So we've marked the skin incision, and we believe this also helps lower the risk of infection. We just cut out the free margin there because we sort of sandwich the drapes together. And then the arm is positioned in an articulated arm holder so we can manipulate the arm for the procedure. We put a pouch drape underneath as well. This again just helps keep everything orderly so nothing falls off. Then with this arm in the articulated arm holder It's positioned in natural position, but we can also use internal and external rotation to provide access to different parts. That's locked into place. And then we work off of a couple of Mayo stands, and then we have a scrub tack pass from the opposite side. And then in addition to that, we have two assistants. I'm the surgeon sitting at the shoulder. We have an assistant on the opposite side that helps hold retractors, and then an assistant above the shoulder that holds retractors as well. So I hope you find that informative, and thank you for watching.