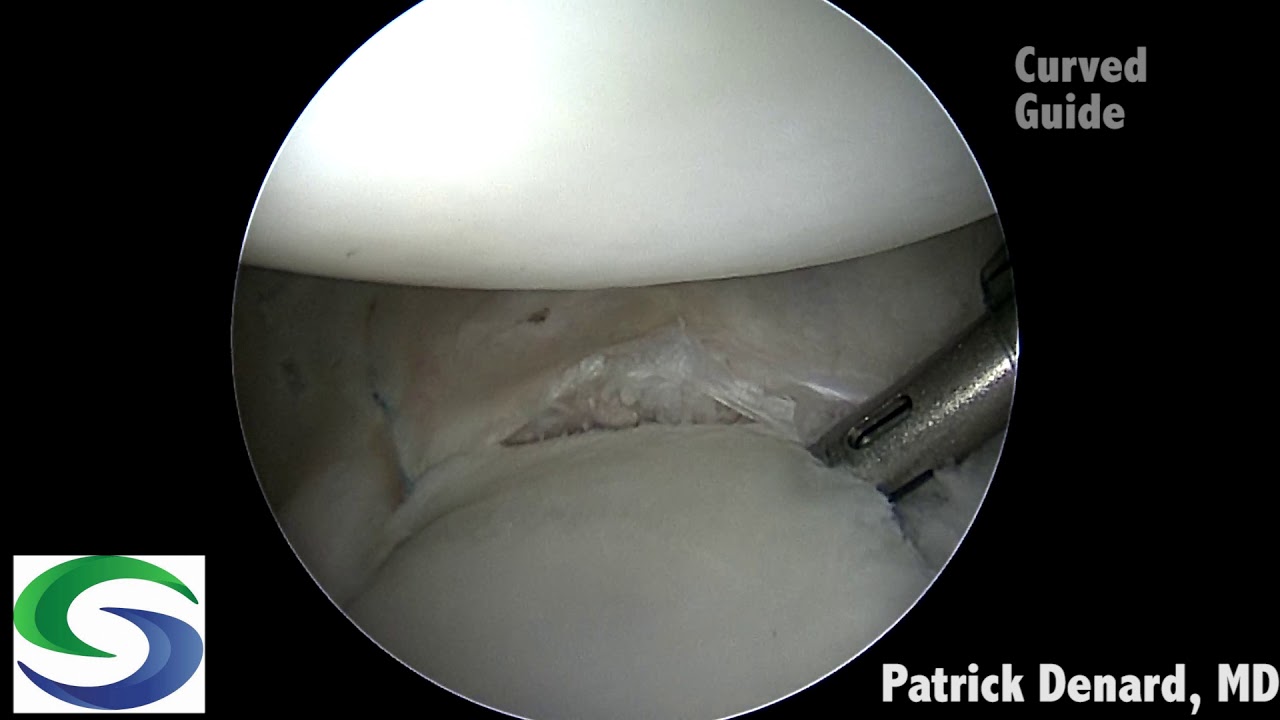
In this instructional video, surgeon Patrick Denard walks through an arthroscopic left‑shoulder Bankart repair combined with a remplissage using knotless soft anchors. He first establishes an anterior supralateral portal above the biceps tendon and an anterior portal just above the subscapularis to access the inferior glenoid. A posterior portal is then created for visualization and measurement of glenoid bone loss and the Hill‑Sachs interval, confirming a minimal loss and an on‑track lesion. The labrum is prepared by elevating tissue, removing a thin layer of cartilage with a curette, and debriding soft tissue with a shaver. Posterior and anterior knotless FiberTac/All‑Soft anchors are placed at the 5‑6 o’clock and 4 o’clock positions using curved guides, and sutures are shuttled through the labrum with a Tight‑Left Curve Passer. The knotless mechanism within each anchor allows tensioning without knots, creating a low‑profile repair. Because the patient is a lax female with an on‑track Hill‑Sachs defect, a percutaneous inferior anchor is placed for a remplissage; the sutures are interlocked to form a double‑mattress configuration, pulling the posterior capsule into the defect. The video concludes with a completed repair showing the labrum secured to the glenoid and the remplissage filling the Hill‑Sachs lesion.
Chapters
This video demonstrates an arthroscopic Bankart and Rumplessage using knotless soft anchors. This is a left shoulder. An anterior supralateral portal is established above the biceps tendon. A cut is made next to a spinal needle and an 8.25 threaded cannula is inserted. An anterior portal is established as well. We want this portal to be just above the subscapularis tendon so we get a good approach to the inferior aspect of the glenoid. Scope's then directed to the anterior superolateral portal. Posterior portal's established and bone loss is measured, and we measure the Hill-Sachs interval to assess if the lesion is on track or off track. In this case, there's minimal bone loss. An elevator is used to prepare the labrum from the anterior portal. We use a curette to remove about a millimeter of cartilage so that we can place anchors on the edge. In this way, the labrum can be brought up right to the glenoid. We use a shaver to remove soft tissue but do not remove any additional bone. Here we can see the tear extends posteriorly. So first we're gonna place a posterior anchor. This is a straight guide through posterior portal. We drill— this is a 1/8 drill. We're gonna place our knotless soft tissue anchor. This has a number 2 suture attached. Anteriorly, I'm gonna place another anchor after the posterior suture has been engaged. This is our knotless FiberTac anchor. This is a #2 suture, as can be seen here. So there's knotless mechanism within the sheath of the anchor itself. The curved guide really lets us get inferior, and we're allowed to do this because we have the All Soft anchor, so we can get as low as possible with that guide. We want to get down to about the 5 o'clock to 6 o'clock position. We're then going to shuttle our sutures. This can either be done through a posterior portal or the anterior portal. In this case, we're going to use a Tight Left Curve Passer to do that through an anterior portal. The blue repair suture is shuttled through the labrum in a simple fashion. We then need to retrieve the shuttling stitch. This is the stitch with a loop on one end. We can then shuttle the repair stitch into the anchor itself to engage that knotless mechanism. Here we can see the suture is now shuttled into the anchor, and as we continue to pull, we can tighten the labrum down. To the glenoid. You see we have a nice low-profile knotless repair. And then from here we simply work up placing two additional anchors. This is our next anchor placed at about the 4 o'clock position. Again, a left curved suture lasso, and we tighten down our knotless mechanism. Another anchor is placed above that. In this case, this individual has an on-track lesion. However, she's a lax female, and because of this I'm also going to do a rhombossage. It's important to place the inferior anchor first, that way your view is not obstructed when the superior anchor is placed. This is placed in a percutaneous fashion. These are each placed through separate posterior percutaneous incisions. Again, this is a 2.6mm drill for this particular soft tissue. Anchor, and then we go superiorly, and I already have one suture out one of the percutaneous incisions, and I'm gonna retrieve all the sutures again out that same incision from the superior anchor. I've done that after I've bluntly cleared the subacromial space. Then I can simply interlock the two anchors to create a double mattress suture, and I can do this because this is a knotless mechanism, so I can do this in a blind fashion. I tighten down reciprocally, and there you can see the remplissage completed with the posterior capsule engaged into the Hill Sachs defect, and there's our final repair.