AI Content Assistant in Public Beta (New Features!)
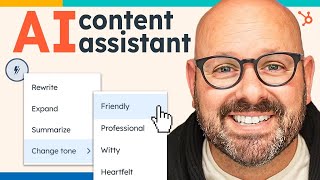
This is a narrated HubSpot product demo showing the Content Assistant (public beta). The presenter (Mark) demonstrates generating and editing marketing copy (marketing emails, social posts, website meta titles/descriptions, blog outlines and paragraphs) using a backslash shortcut and an inline Content Assistant UI that can generate, rewrite, expand, summarize, and change tone. He also demos drafting sales outreach emails via the HubSpot mobile app (question prompts, tone selection, inserting meeting links) and customer service use (shared inbox: expand and personalize replies). The video ends with a CTA to try Content Assistant and sign up for HubSpot.
Questions this video answers
Public beta
June 20, 2023
Chapters
If you're a growing company curious about how AI can help your company grow, you've totally come to the right place. I'm Mark. Or am I? Today, I'm going to show you how HubSpot's new content assistant can help your teams do more with less. In this video, I'm going to show you how Content Assistant is here to help your marketing team create beautiful marketing copy like social posts, blog posts, and even website and landing copy. Next, I'll show you how your sales team can create introductory, cold outreach or even follow up emails using using Content Assistant on our mobile app. And finally, I'll show you how customer service teams can leverage Content Assistant to rewrite, expand and even change the tone of the messages you send your customers. Let's jump in and I'll show you how it works. To get started, head up to the top toolbar and click Marketing and scroll down to Email. Here you'll see all of the marketing emails that you've drafted. And today we're gonna click Create Email. To start a new one, we'll click Automated Email. Here you'll be brought to a page where you can see all the templates you have available to you. We're just going to select this basic one. Here you'll be brought to our drag and drop editor where you can customize any parts of the email that you like. And we're going to go ahead and give this email a title. Now, to get started with Content Assistant, there's a few options. You can start by simply hitting backslash. And here you'll see that Content Assistant is offering to generate a paragraph for you or, or generate a new heading. We can select Generate paragraph and say create a paragraph about our new global donut campaign. I'll click Generate. And here we can see that it's literally starting to create all of that marketing content for us. Now, if for some reason I didn't like this one, I can click Generate and it'll take another stab at it. But I, but I'm going to go ahead and insert that in. I'll go ahead and take all of this other stuff out of there for now. And here you can see we've got a email totally created through AI for you. If you want to edit, you can simply go in here and type in anything else that you want. You can even select the text. You'll see the Content Assistant tool and here you can ask it to rewrite, expand, summarize, or even change the tone. So if I want to make this email a little bit More friendly or professional or even witty. I I can select it and Content Assistant is working in real time to change the tone of this email to be a little bit more witty. Content Assistant can even create social media posts for you. Let's check it out. To get started, click Marketing and scroll down to Social. Here you'll be brought to a page with all of your social media posts. And today we're going to click Create Social Posts to make a brand new social media post using Content Assistant. To get started, you're going to select which accounts you want to post to. So today I'm going to be posting to Facebook and and Instagram. Next I'll scroll down here and I'll click the Content Assistant tool and ask it to create a light hearted post about a new partnership that we have. So I'm asking it to create a post about our exclusive new partnership with Block Enterprises as their exclusive dessert supplier in 18 countries. I'll click Generate and let Content Assistant go to work. And here you'll see a brand new social media post. I can go ahead and click Insert and and it will go ahead and preview it and show me what it will look like on Facebook, Instagram and any other social media platform that I've selected. And it's that simple to create brand new social media content using Content Assistant without even leaving HubSpot. Content Assistant can even create meta titles and descriptions for your website, landing pages and blogs. Let me show you how to do it. To get started, click on Marketing, scroll down to Website and click Website Pages. From here you can either select an existing webpage or even create a new one. Today we're going to go ahead and select this web page. Click Edit. We're going to scroll up top to file and page settings. Here you can see that we've got an internal page name, but I'm going to ask Content Assistant to update the page title to make best use of SEO to make sure that people can find our website. Here you can see there's a brand new page title. And even down here I can update the meta description by simply clicking the Content Assistant tool and watching it generate brand new meta descriptions for our webpage. Content Assistant can even write your website copy and blog posts for you to get started. Scroll up top to Marketing Website and click Blog. Here you'll be brought to a page where you can see all of your blog posts. And today we're going to create a new blog post. We'll make sure that it's going to the right blog in the proper language. And click Create Blog Post. Now this should look familiar. Our drag and drop blog editor. To get started with Content Assistant, we're going to select the text box and simply click backslash. And this brings up your Content Assistant tool. You can see it's here to help you generate a paragraph, an outline, ideas, or even a conclusion. I'm going to go ahead and get started with my first paragraph and type why are donuts a great way for enterprise companies to connect with their customers? I'll click Generate and let Content Assistant get to work. I can go ahead and click Insert. And at any point I can select any of these sentences and you'll see that the Content Assistant tool pops up. I can simply click it and ask it to either rewrite the sentence, expand it, summarize it, or even change the tone. Now, I like to start with a nice witty opening. So I selected witty. Content Assistant is rewriting that intro for me and I went ahead and inserted it right there. Next, I'll go to my next paragraph again and ask it to create a paragraph about how can desserts and donuts help enterprise organizations build trust and brand loyalty. Again, I'll click Generate and let Content Assistant do the work for me. And again I can just click Insert. I can edit this by adding in my own sentences if I like, or if I'm happy with it. I can go ahead. Now I'm ready to write my conclusion. I'll simply click backslash, generate conclusion and write. There we go. There is our conclusion. And we're not done yet. Content Assistant can still help us. We're going to go up top, click File Blog Settings and every good blog needs a title. You can see the Content Assistant tool up here. I'll simply click it and it will generate a an SEO optimized title for us. I'll go on down. Make sure I have an author for my blog post. Next, I'll need to add a featured image. So I'll go ahead and browse my images. That looks like a nice donut. And next we'll click Metadata. Now here is where Content Assistant is really going to make you stand out. Simply click the Content Assistant tool and it is going to generate a meta description for this blog post to help attract users to your website. For you. Go ahead and add it to a campaign. And finally, we are ready to publish our blog post. I think it looks pretty sweet. I'll go ahead and click Publish. And away we go. Content Assistant is even there to help your sales teams. Let me show you how you can draft sales emails using the HubSpot mobile app. To get started, you're going to click the plus symbol down in the bottom and select Email. Here in the bottom you'll see the little Content Assistant tool. You'll click it and it'll ask you a few quick questions. What type of email do you want to send? I'll select introduction email. What am I selling? I'm selling global dessert suppliers for enterprise customers. Who am I selling to? Jacob Block. And describe what you want to communicate in this. Finally, it's going to ask what would you like the tone of your email to be? I always like to come across as professional and optimistic. I'll go ahead and click Done. And now I'll click Generate and let Content Assistant get to work. Here you can see a preview of the message that Content Assistant has created for me and I think it looks good. So I'm going to go ahead and click Insert. And there it is. Now here I can go ahead and customize this. I can add in my name, my company. I also would love to send them my HubSpot meeting link. So I'm going to go ahead and put a little meeting link in here. I'm going to do that by selecting the calendar meeting icon and select my meeting link that says Donut Time. And now you can see, perhaps we can connect for Donut Time. Finally, I'm ready to insert my name in the sign off, scroll up top and go ahead and address this to my email contact. And finally I'm ready to hit send. And literally in less than a minute, I've used Content Assistant to create an AI powered introduction email on the go on my mobile phone from HubSpot's brand new content Assistant. Content Assistant even covers your customer service teams. It can help rewrite, change tone or even expand your customer service emails. Let's jump in and I'll show you how it works. To get started, scroll up to the top and select Conversations and select Inbox. Here you'll be brought to your shared inbox among your whole customer service team. And I see that I have a new message from a customer that is interested about our capacity for enterprise customers. I'm going to go ahead and draft my response and say, sounds good. Let's talk about global options. I think that can sound a little bit more professional. So I'm going to go ahead and select the text and click the Content Assistant tool. And first I'm going to ask it to expand this message. You can see Content Assistant in real time has gone ahead and updated that message and expanded it, but as I read it I feel like it still needs to become a little bit more personal. So I'm going to go ahead and select the text again, click the Content Assistant tool and ask it to change the tone to make it a little bit more heartfelt. And after all, customers love it when you lead with heart. Now that I'm satisfied with the message, I can go ahead and click Send and that message is on its way to my customer's inbox with a smile. Now the Content Assistant has entered public beta. Let me know how you're planning on using it in the comments below. So That's Content Assistant, HubSpot's new AI powered tool that helps your marketing, sales and service teams do more with less and quicker. To get started using Content Assistant, simply click the link in the description below and if you don't have a HubSpot account, as always, you can sign up for free. I'm Mark from HubSpot. Thanks for watching.
More from Patrick



A NEW BREED OF PARTNER: The Partnership Ecosystem Model Journey of Patrick Biddiscombe, Part 1






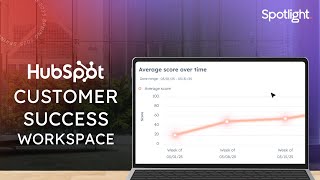
Customer Success Workspace: Never Lose Sight Of What Matters Most | HubSpot Spotlight