Facebook Ads Retargeting - A Complete Guide for Small Businesses
Learn to set up Facebook retargeting ads to win back cart abandoners and past website visitors. Install the pixel through Events Manager or Google Tag Manager, build audiences by behavior, create tailored ads, and track results in Ads Manager.
Chapters
Stop losing sales to abandon carts and bounce visitors. In this Facebook Retargeting Ads tutorial, I'll show you exactly how to bring those warm leads back to your site and turn them into customers. This is the exact approach top brands like Dollar Shave, Club and Casper are using to increase sales in a low attention based market. So whether you're creating your first ad or you're well into the hundredth, by the end of this video you'll know how to track your visitors with Facebook Pixel, create ads that bring them back, build high converting campaigns and measure what's actually working. Let's break it down Before I get into the how to setup, here's what successful brands already know. Retargeting isn't about showing more ads, it's about showing the right ads at the right time. Picture this. Someone browses your online store, looks at a few hoodies, adds one to cart, but doesn't complete the purchase. Without retargeting, they're probably gone forever. But smart brands? They'll show that exact hoodie to them later on Facebook and Instagram, maybe with a special offer or reminder when that person is finally ready to buy. Boom. You're right there in their feed. Why does this work so well? Simple. You're only targeting people who've already shown interest. It costs way less than reaching cold audiences and you can show them exactly what they were looking at. And the best part is you can retarget different groups, cart abandoners, which are your hottest leads, product page viewers, blog readers, video watchers, and even past customers. And if you really want to master Facebook ads, you should definitely check out this free resource used by successful businesses to optimize their retargeting efforts on the platform. Inside, you'll discover seven actionable tips for creating paid ads on Facebook. So if you're ready to maximize your reach on one of the largest social platforms on the planet, I've linked this free guide in the description below for you to download. All right, back to the tutorial. We'll start by showing you exactly how to start the setup in your Facebook Ads Manager. The Facebook Pixel is like your website's radar system. It captures visitor data so you can reach potential customers through perfectly timed ads. Whether you're using Shopify, WordPress, or any other platform, Google Tag Manager makes this super easy. Seriously, it's like a control center for all your tracking codes. Set it up once and you're good to go. Here are the exact steps for setting it up. First, let's head over to Facebook Events Manager. Then click On Connect Data Sources, select Web, give your data set a name, and select Connect Manually and click Next and then finish to complete the process. Once done, navigate back to settings and copy your data set ID number, which is your Pixel ID number. And Google Tag Manager will add the necessary variables so that your site has the pixel seamlessly embedded throughout your ecommerce platform of choice. First, open up your Google Tag Manager account. Select Variables from the left hand menu, and under User Defined Variables, click New. Be sure to name your variable something clear, like Facebook Pixel id. In the Variable Configuration screen, select Constant as the type. Then follow up by inputting your data set ID by pasting it into the value field. Once pasted, click Save to complete the setup. Now let's add the trigger for all pages. It's a simple step to follow. First, head to the Trigger section in Google Tag Manager. Secondly, click New to create a new trigger. Rename your trigger something like All Pages Trigger for clarity so that you can easily identify it later in the next step. Next, we're going to configure your trigger by selecting Page View as the type. Choose All Page Views as the trigger, then click Save to finalize your new trigger. Great. Here's the last step to set up the pixel tag. Navigate to the tag session in Google Tag Manager. Click New to create a new tag. Give the tag the name metapixel for easy identification, and select Custom HTML as the tag type. Next, you'll need to manually copy your base code from the business manager, paste the copied code into the Tag configuration in Tag Manager. Under Triggering, select the trigger you created earlier, All Pages triggered, and then click Save to complete the setup. And that's it. Your Facebook Pixel is all set and ready to go, ensuring every visitor is tracked. Here's a pro tip to avoid headaches. Install the Facebook Pixel Helper extension for Chrome. It'll light up green when everything's working perfectly. Now, in just a moment, I'll show you guys how to create retargeting audiences. But before I do, here are some common mistakes you'll want to avoid here. Don't create multiple pixels for the same website. Make sure to test on all your important pages and check that your pixel is firing on both desktop and mobile. This is crucial. Pretty straightforward, right? Well, we're just getting started, and if you guys are enjoying this tutorial so far or have any questions, please let us know in the comments and leave a like on the tutorial so that more people can find it. Now that the pixel is set up, let's create custom Audiences that we'll target in our retargeting campaigns. It's typically a good practice to start with the audiences that are most likely to convert. In this case, we'll consider the viewers who made it to checkout but abandoned the cart at the last minute, as well as the folks who view your products and your website recently. You'll need to create an audience group for each category. Let's start with the Cart abandoners since they're likely your hottest prospects. First, let's open the Business Manager and select Audiences. In the All Tools menu, click Create a Custom Audience and choose Website as the source. Make sure your desired pixel is the selected source. Navigate below the pixel selection to events and choose Add to Cart as the event. Adjust the retention period to seven days. This is to ensure you keep your campaigns fresh and and focused on visitors most likely to complete their purchase. Name it something easy to identify like Cart Abandoners seven days and add a description like Targets users who added items to their cart but didn't purchase. Voila. Hit Create Audience and give yourself a mental high five. Next, let's continue and create a custom audience for the product viewers. Navigate to Create Audience and click Create New Custom Audience. For this group, select View Content as your event. Set retention to 14 days. This ensures that you target those who recently looked at your products. Name it product viewers 14 days and describe it as Targets Users who viewed specific product pages. Then click Create Audience to complete the setup. Now it's time to capture those who have shown general interest by visiting any page on your website. Again, click Custom Audience, select Website as Source and set Page View as your event under Retention. This time we'll go nice and broad within 30 days to catch recent viewers. Name it homepage visitors 30 days and describe it as Targets Users who visit any page on your website. Hit Create Audience and you're golden. Here's a pro tip when creating these Consider layering multiple timeframes for each group because someone who visited yesterday is more valuable than someone who visited a month ago. Alright, so we just created our retargeting audiences and now this is where the magic happens. Crafting those irresistible ads to target them. This is where you can get really creative. But beware, it's also where some brands mess up by showing the same ad to everyone. Don't worry though. Let me walk you through matching your message to exactly where people are in their purchasing journey. For Cart abandoners, we'll first access Ads Manager, then head to Business Manager and select Ads Manager. Create a new campaign and select Sales as your campaign objective and hit Continue to configure your campaign. Rename it something catchy like Cart Abandoners Retargeting. Scroll down and tap next to move on. Next, let's set up the Ad Set, Change conversion location to website and rename it Cart Abandoners Retargeting. Select Add to Cart as the conversion event, then set your budget and schedule as needed. If you're unsure of a good budget, I Recommend Starting with $10 to $20 daily, but it really depends on what you can comfortably afford to invest. It's always wise to monitor results with a small budget when testing the market. Once you've entered your budget under Vantage Audience, opt for Use Original Audience and pick Cart Abandoner seven Days. This step is crucial so that you target the right audience. Hit Next and then move to the next step. Let's configure the ad, rename it Cart Abandoners Discount Offer and then preview your setup to ensure it's looking sharp. Now to add our creative assets under Ad Setup, decide whether to manually upload images or videos or use Advantage plus Catalog Ads. Make sure to craft your primary text by highlighting the exact products left behind, creating a sense of urgency by adding only two left in stock or a limited time discount such as get 10% off today for example, I'm going to add Oops, did you forget something? Complete your order now and enjoy 10% off with code CART10. Finally, input your website URL for the destination and when everything feels perfect, smash that Publish button. For Product Viewers, let's create a new ad set under the same campaign. Click Create Ad Set, then rename it Product Viewers Retargeting. Under the new Ad Set name the ad Product Viewers Benefits and Reviews. Now let's set the conversion details, set the conversion location to website and select View Content as a Conversion event. Next, we'll choose our existing audience like product viewers 14 days under use Original Audience in the Ad Setup section, you'll have to decide again on your creative method whether to manually upload images or videos or use Advantage plus Catalog Ads. One thing to note here guys, if you're considering creating your own images or videos for your Ad Creative asset, make sure to check out my recent tutorials on Text to Image and Text to Video AI tools where I break down how to create stunning content for your business in seconds, I've linked both of these videos in the description. Alright, to update your Ad Creative, make sure to include the product benefits, customer reviews and responses to common objections in your primary text before finally entering your website URL. Reviewing all the settings and then hitting Publish for general Visitors, we'll again click Create Ad Set under the same campaign, rename it General Visitors Retargeting, and name the ad something like General Visitors, Best Sellers and Social Proof. Now for the conversion details, set conversion location to website and choose View content for the conversion event. Once again, tweak the budget as you see fit. Under Advantage Audience, click Use Original Audience, then opt for your previously created audience homepage visitors 30 days create the ad, repeating the setup steps as before to update Ad Creative in the primary text. Weave in your best sellers, your unique value proposition and some social proof like reviews and testimonials. Double check everything and once you're satisfied, publish your campaign now just as a chess master plan several moves ahead. Winning back customers requires careful strategies with every dollar spent. With that being said, let's set up our campaign structure and craft a budget that makes each move count. Using best practices, we'll allocate 50% to cart abandoners. They're your hottest prospects, so it's safe to place your bets on them returning to converter. Then we'll assign 30% to product viewers since they've shown interest and need a nudge to explore the Add to cart or book a call button and the remaining 20% will be reserved for general visitors to tap into broader interests in a practical sense and you're ad set with a budget of $60. That's $30 for cart abandoners, $18 for product viewers, and $12 for general visitors. Confirm your budget distribution and secure these numbers by saving them to draft. Next up, controlling frequency. Start with 3 ads per person each week. Simple as that. Navigate to your campaign and ads manager and filter the columns to include delivery and locate the frequency column. While frequency and conversion campaigns isn't something you can directly set, consider tweaking it by adjusting your audience size, budget distribution, and creatively refreshing your ads regularly. Secondly, we recommend rotating the creative frequently to keep the content fresh for your audience, but no need to go crazy. Sometimes small changes go a long way to do this. Enable Advantage plus Catalog Ads to automate this process so that you avoid having to manually update your ads every two weeks. Less manual hassle, more engaging ads. Yes, we love automation over here, but if you're old school, feel free to log in every two weeks. I won't judge you. Okay, maybe a little bit. Ensuring your ads reach the right people is crucial, especially to prevent targeting those who've already completed their purchase. To do that, let's first create a custom audience. Head over to all tools in your business manager and select audiences. Click Create a custom Audience and choose Website as your source. Let's simulate the exclusion process in this simulation. Because of our Shopify dummy account constraints, we're using Add to CART as our event. This will work similarly to exclude users who've interacted or purchased. Next, we'll set the audience retention to 30 days. This period helps manage who's considered for exclusion based on recent interactions. Name this audience clearly, like simulated purchasers, last 30 days. Once you've given the audience an appropriate name, provide context in your description. We'll go with this simulates excluding users who've interacted with your shop. Once all set, go ahead and click Create Audience to finalize everything. Now, it's important to remind you guys that this setup uses Add to Cart because our current dummy account doesn't support a purchase event. However, in a real world scenario, you'd opt for the purchase event to accurately exclude those who have completed transactions. This ensures your retargeting campaigns remain efficient and cost effective by not spending ad dollars on users who've already converted. Remember, keeping your audience clean is key to targeting efficiently and maximizing roi. All right, you've tackled the tough stuff, and now it's time for the crucial step that many small businesses overlook, measuring success. Here's how to set things up to focus on the key metrics. First, access the Ads Manager. Then navigate to all tools in your Business Manager and select Ads Manager. Then, on the right side of your dashboard, you click Customize Columns. You can select essential metrics like frequency, cost per, click and click through Rate. Once you've selected your columns of preference, hit Apply to Save. Then take a moment to review your dashboard to ensure all metrics are represented clearly. To save your column preset, head back to Customize Columns and save this view as key metrics. View for quick access in future sessions. If you made it this far, kudos to you my friend. You're an absolute trooper because we covered a ton today from setting up our pixels seamlessly through Google Tag Manager and creating retargeting audiences to crafting tailored messages to fit each audience's journey perfectly and structuring our ads campaign like a pro. Remember, the key to properly measuring success is continuously monitoring your campaign performance and adjusting according to the latest results. You'll also want to boost your paid's ad strategy by snagging our free guide that's already helped thousands of small businesses maximize their profits. Your next steps are straightforward. Install your Facebook Pixel, Create your first retargeting audience. Launch a simple campaign and continuously test and tweak to maximize your return on investment. And don't forget to like and subscribe for more marketing strategies, tips and tools to help you grow your small business. See you in the next video. Sam.
More from Patrick



A NEW BREED OF PARTNER: The Partnership Ecosystem Model Journey of Patrick Biddiscombe, Part 1






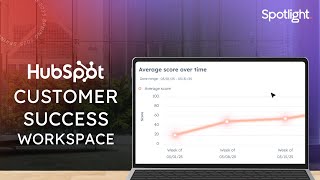
Customer Success Workspace: Never Lose Sight Of What Matters Most | HubSpot Spotlight