How To Set Up HubSpot CRM For Small Business | Step-by-Step Tutorial (2024)
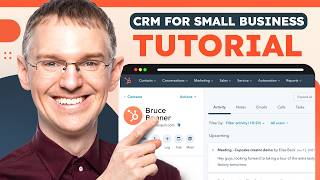
A step-by-step walkthrough showing how to set up HubSpot CRM for small businesses. Covers signing up for a free HubSpot account, HubSpot's data model (contacts, companies, deals, tickets), record layouts and properties, filtering and views, settings and customization (properties, record display), integrations (email, calendar, browser extension), email templates and meeting scheduling, tasks, security/privacy (2FA, GDPR, cookie consent), and user/permission management.
Chapters
If you've been managing your small business from a spreadsheet and you want something more modern, or if you're managing your business out of a whole bunch of disconnected systems and you want something that's more streamlined and all in one. This video is for you. We're gonna walk through how to set up HubSpot CRM. A lot of people see the value of having a CRM, but the hurdle of just getting in there in the first place can be very daunting. Signing up is totally free and it's pretty easy, so follow along, but feel free to use the chapters to jump to the ones that are most relevant for you. And let's get you set up with HubSpot CRM. Here I am on Hubs and we're just going to click this big get started free button. Now, you may be unsurprised to learn I already have a HubSpot account, but we're going to create an account with a new user to show you the whole process. Notice that this is 100% free. You're not going to have to give us a credit card. And you can sign up with Google or Microsoft or just any other email address. It's going to ask for your name, it's going to ask what industry you're in, it's going to ask what best describes your role. It's going to ask for your company name, it's going to ask how big your company is. It's going to ask for a website. If you don't have one, you can just leave. In HubSpot test.com you can choose where your data will be hosted. And that's all the steps to getting into your account. Now that you've created your free HubSpot account, let me show you how data is organized inside the CRM. So up here at the top we have our navigation bar. And if we go to contacts and contacts, this is where you store your contacts. These are the people your company works with. Right. And we start with a couple of basic sample contacts so you can see what this looks like. And if you click on one of them, you're going to see this is how CRM records are laid out. Inside of Houselot, there are a lot of different kinds of CRM records. Contacts are for the people you're working with. We also have companies which are for the companies or organizations those people are associated with. For sales, we have deals, which is how you track your sales that are in progress. Over in service, we have tickets, which is how you track your support requests. But every single one of those doesn't matter. Contacts, companies, deals, tickets. When you click on one, you're going to get this three column layout. On the left. You, you get general information about the person or entity. So here we have a name, we have a title, we have an email address. Then you have these buttons where you can communicate with this person, right? I'll show you how to connect your email. I'll show you how to connect a phone number. So you can send emails and make phone calls and have them all logged right here in the CRM. You can also create tasks for yourself and notes for yourself. Those are internal items. You can send meeting invites if your calendar is connected. That's another thing I'll show you. And then there are some other options. And you can reorder and customize these buttons if there's a particular thing that's more important to you as you take these actions. Over here in the middle we have a couple of tabs. If we go over to activities, you will see your activities, the actions you take, listed here in the middle. So if you have a task or a meeting coming up, you can see the information here. Below these buttons you have what are called properties. These are basically little fields that hold a single piece of information. If you're coming from a spreadsheet, each of these would be a different column in your spreadsheet, right? You would have a column for name and a column for email and phone number. The person in charge of working with this contact last contacted all the information you might have. And actually HubSpot has a whole lot of properties that are in here. By default, if I click this View all properties button, you can see the long, long list of information here. And you can create custom properties to hold whatever is most important to you. The idea here is that once you have that information stored in a property, you can start to find the records that are most relevant to you. So if we go back to just the main contacts page here, we call this an index page. It's where we list out all your records. Once you have more contacts in here, you might have trouble finding the one you're looking for. But in HubSpot you can filter and sort in real time. So across the top we have some quick filters. If you want to see just the contacts who are assigned to you, you can do that. If you want to see the ones that were created on a particular date, you can do that. If you want to see the ones that had a last activity date. So last time we made a phone call, or sent an email, you can see that lead status is a property you can use to keep track of your relationship with this person. Are they new, are they in progress, are they unqualified? And you're not going to work them anymore and you're keeping them just for historical purposes. And then remember all that long list of properties I showed you? All of those are available in the advanced filters. And if you create any custom properties, if you have something you want to track, like people's favorite flavor of cake, if you're a bakery, or their favorite color, if you sell paint, you can add that. And then you can filter your contact list by any one of your properties. And so if we choose one of these properties, let's just say we want to filter by last engagement date, we can say is today, yesterday, tomorrow, or next week. We can say it is before or after. Between certain dates, we can get really granular to see the contacts that match match, or in this case, to see that there are no contacts that match. Right. Nobody has engaged with us today. So that is how data is organized inside of HubSpot. With that as a reference point, let's head over to our settings page. So if we click this settings gear, it's going to take us to our settings pages. And on the left you'll see a list of all the setting categories available inside of HubSpot. If you get lost, there's a search bar so you can find the one specifically for you. One thing to note is that this little settings gear, it's visible on every page inside of HubSpot, but it's dynamic. We were on the contacts page, so now we're looking at our contact settings. And if we want to customize the form that is used to create contacts on that page, there's a little Create contact button. When you click it, a form pops up. You can control what information, what properties need to be filled in in order for a contact to be created. You can also edit associations. So we've talked about there are contacts for people and companies, for organizations. If you want to connect a company to a contact to say this contact works at this company, you can do that. In paid versions of HubSpot, you can start to have association labels. So if you want to say this person is employed by this company, but this is on the board of that company, you can start to make those distinctions. We also have life cycle stages. So as a person progresses with your business, they're going to go through different stages. And the default stages are they start as a subscriber meaning they're just reading your blog or your content. They become a lead when you think you have some reason to do business with them. Marketing can qualify them, sales can qualify them. Eventually they become an opportunity. Now you're going to use one of those deals I mentioned to track that sale in progress. I'll show you that in a minute. And then hopefully they become a customer. And then hopefully they start evangelizing. These are just our default stages. You can customize them if you need to, but this is how contacts are organized and conceptualized inside of HubSpot. And then the final tab here is Record customization. So we saw there are those three different columns. If you would like to change the properties in that left sidebar, you can do that. If you want to customize what's displayed in that middle column, you can do that on the right hand sidebar. That's where you see associated records and things related to integrations. You can control what categories are displayed there also. And you have these options, if you notice, we'll expand this object section. You have these exact same setting options for all of your object types inside of HubSpot. So that's a little bit about how data is organized inside of HubSpot. And you can see you can just put your data in here and use it, but you can customize it to your heart's content. If you want to do that, you come to this properties section. You can choose Is this a contact property? Is this a company property? If you want to see what properties current exist, you can look through them here, you can search them. But then when it comes time to create a custom property, you click this create property button and you go through this process. So we're creating a property for a contact. We can organize these into groups. There are default groups, but you can create custom groups if you want. We'll just put this in contact information and let's say you really are interested in favorite flavor of cake. I mentioned that sort of as a joke, but let's run with it. We can add a description here, right? Sometimes for your properties they're pretty self explanatory like this one. Sometimes you'll want to add a description, so any teammates you have will understand what they mean. Now field type is probably the most important decision you will make when you are creating your property. If you choose single line text or multi line text, anyone can put any value inside this property, right? They can use Alphabet letters, they can use numbers and symbols. That is very easy to fill in. But then it makes it Very hard to do that. Filtering. Filtering is generally looking for an exact match. And if people are spelling things in different ways or if they're putting typos in here, that can get pretty hard to organize. For something like favorite flavor of cake, I think you're probably going to want to use a drop down select. So we're going to give a predefined list of options here and you're going to select the one that is most relevant. If you want to allow someone to select multiples, you can do this multiple checkboxes thing. But for favorite flavor of cake, we want to know your number one choice. If you can only have one kind of cake, what's it going to be? And we're going to add some options here, right? And then maybe you want to include an other option in case someone likes something you don't have and you want to have that for future reference. So you define these options. And now when this is created, anyone who wants to fill in that property is going to have to select one of those options. And then you're filtering and sorting. On that index page you can search for just the ones you're interested in. Show me everyone who wants a white cake. And now you can work with those customers and talk to. So that's a little bit about the structure of the data inside of HubSpot. Now let's talk a little bit about how to connect HubSpot to some of your other tools. So if we come up to this general preferences section of the settings page, here is my profile. I can add a profile picture if I want. I can change my name, I can select my language and the way the dates and times are going to be displayed inside the CRM. I can add my phone number here I can pick my default homepage. This is the page inside of Houseflot I'll land on when I log in. Also, there's this little sprocket button in the top nav here. Anytime you click that, you're going to be taken to your homepage. If there's a particular app or tool inside of HubSpot that you are just really interested in, you can set that. I generally recommend Dashboards as a good homepage because that's where you're going to see your reports of how everything is performing inside of HubSpot. But the thing I really want to show you here on your general references page is how to connect other tools. So let's talk about email. I showed you on the contact record there's a button that enables you to Email the person, the contact you're working with. You can only do that if you have an email address connected to HubSpot. So if we want to connect a personal email, we click this button here. Turning on inbox automation allows HubSpot to do a little more analysis of the emails to get them in the right spot. You can learn more about what's entailed there. Generally, I recommend turning that on and then if we go ahead and connect our inbox, we're going to put an email address here and if I hit next, it's going to detect that this is a Google Gmail address and we can connect to Gmail. If it was an Outlook365 address, it would have detected that it's going to do its best to connect you to the right place. But if you want to choose your email provider yourself, here are our main options. We have a flow for Google and Gmail, we have flows for Microsoft Outlook and Microsoft Exchange. And then if you have another email provider, you're going to have to go through a little manual process. Since I'm in Google, I'll select that and once that's done, it's going to ask me if I want to download the extension. I already have this installed, so I won't, but I highly recommend it. If you're using a Google based email and you have a Gmail inbox, or you're using an Outlook based email and Office 365, there is a HubSpot extension you can install that will give you HubSpot tools right inside your inbox. If you have email templates you want to use, if you have other tools you want to use, or if you want those emails you're sending from your inbox to be automatically logged to the appropriate contact record inside of HubSpot, you can use this extension. It'll connect the two. So you can work in your inbox like usual, but have your CRM logging and tracking everything so you don't have to do that manually. I'm going to skip that step for now. For now, let's just stay inside of HubSpot. We won't cover this in this video, but you can connect your phone to HubSpot and receive calls right inside of HubSpot, have those recorded and saved on different contact records and we have a lot of great tools there. But just moving on to the calendar, if you want to send invites to people, if you want to be able to use our scheduling tool so people can book time directly on your calendar, you're going to need to connect your calendar. You can do this by clicking the connect your calendar button again. You're going to choose your provider. And now both my calendar and my email are connected. So let's go back to the contact record and see what options are available to me. Now we come to these buttons. I can click the email button and I get a composer right here inside of the CRM record and put in my subject line and I can write a message. If you don't want to write the same message over and over, you can create a template. Let me show you what that looks like. If we come up here to conversations and go to templates, we have a couple of sample templates here already. So what an email template is, is it's the rough structure, kind of the bones of the email you want to send. And because this is connected to your CRM, you can pull in personalization tokens. You can see this is automatically pulling in the person's first name right from their contact record. And then we have a couple of spaces that we need to fill in. And so what will happen if I use this template is that it will populate the text you see here. It will fill in any personalization tokens based on CRM data. And then I can just do a quick touch up and hit send. It saves me a lot of time, it helps standardize my outreach, and it's just great for efficiency in a lot of ways. So that is email templates going back to the contact record. Because we connected our calendar, we can also send meeting invites. So if I click this schedule a meeting button, I get this little view here where I can see my calendar, I can see what's coming up, and if I want to meet with this person right here, that's the time we're going to do it. We can give it a title, we can add a location, we can schedule reminder emails, we can add attendees. All the things you would expect to be able to do when you're scheduling a meeting, you can do from here. Add a description, tell them what you're going to talk about, and then it'll be sent just as though it was booked in your normal calendaring software. But it will also be recorded on the CRM timeline. The other thing you can do with your connected calendar is set up a meeting scheduling page. So if we come to the meetings page here, I have this default page already created for me. And so if we just edit this and see what it looks like, I can give it a name. This is the internal name. But by default, the title of the event created when someone books time with me will be this. Because this is connected to my CRM, that data can flow through. You can add a location. If you're using a video conferencing tool such as Zoom, you can connect that with an integration so that the URL is automatically added here. You can add a description that'll be the default description for all of the meetings booked through this page. And then there are a lot of other options. You can control how much time someone can book with you. You can control how far in advance they can book time with you. You can get really granular if you want, but in the end you're going to get a page that looks like this. You can add a picture to it. People will be able to select a date, select a time, and then put in their email address and any other information you want to connect. You can add different fields here and then that will be recorded in the CRM. It will be put on your calendar, it will be put on their calendar and it really spe up the process of being able to book time with you. If you're enjoying this video, don't forget to subscribe so you can see more videos just like it. While we're talking about email, you can also set up your email signature in HubSpot so it'll be included in all the emails you send from the CRM. If you need help designing your email signature, we have a free tool for that. Go to HubSpot.com email signaturegenerator and we'll help you get a great signature created. As you can see, there are a lot of different tools inside of HubSpot and they're all connected with each other. Spend some time exploring and pick the ones that are going to help you the most. For now, let's go back to the Settings page and talk a little bit more about some of your preferences. Over here in the your preferences section of the Settings sidebar, there's notifications. HubSpot has a lot of things it might notify you about and for different channels. You can decide if they're going to be turned on or off. And for individual different apps, you can choose which notifications to receive. We also offer desktop notifications that you have options for and under other apps. If you want to be notified through Microsoft Teams or Slack or WordPress Workplace by Facebook, you can click these buttons and follow the steps to get those things integrated. Finally, HubSpot has a mobile app you should definitely check out. It can not only offer you notifications but also gives you access to a lot of HubSpot's tools right on your phone. As you can see, there are a lot of different things you can do inside of HubSpot. If you're wondering how to prioritize them and which one to do first and how to make sure nothing falls through the cracks. Tasks is a tool you'll want to spend some time understanding. Let's take a look. On the contact record we saw that there was a Create Task button. If you need to remind yourself to take an action with a particular contact, you can do that, and that's available on all CRM records. But this is the general task page inside of HubSpot. All of those tasks you create would be listed here and you can organize them and sort them by due date and work through them. You can also create tasks from here. If you just need to remind yourself to take some action, you can set that up here and it will remind you when the day comes. Now, you may notice as I create this task there are some default values in here. I'm going to be reminded in three business days at 8am there's some other things in here. This is also customizable, so if we go back to our settings page and we come to the Tasks tab, we will see that we can set some defaults in Task creation. One is the due date. It defaults to three business days, but if you want it due today or in six months, you can set that default. And then for each task it's adjustable, but this will be the starting point. Similarly, do you like the due date first thing in the morning? Do you want it even earlier? Do you want it later? There are 15 minute increments here for the full 24 hour day. Whenever you want your task falling due by default, you can set that here. And then for each individual task. If there's a specific time you want to set it to, you can do that. Finally, the default is for you not to be reminded. But if you want a reminder by default for each of your tasks, you can set that here and choose how much advance time you want. Finally, when you mark a task complete, you'll get prompted to create a follow up task every time. If you like that, keep this box checked. If you don't, you can uncheck it and that prompt will be removed. One thing you'll definitely want to take into consideration as you're setting up a tool like HubSpot is your security practices. Let's take a look at some of the security and account defaults you can set up so here on my personal preferences I have a security tab and I can choose what email address is associated with my account. I can reset my password if I need to. I can add a trusted phone number so I can verify my identity and receive security related alert. If you want Two factor authentication, you can set that up here. And if you might be logged in on other computers, you can log out of all sessions right here. You can also remove yourself from this account. Or if you're done with HubSpot and you don't want it anymore, you can completely delete your user account right here. These are again the security preferences for you as an individual. There's also under the Account Setup heading here, a security tab for your account as a whole. And there are a few things here you should be aware of. First is a security health checkup. This is going to give you just an overall sense of how you're doing right now. I only have one super admin. It's good to keep that restricted. We'll talk about that in User Management next. I don't have any users currently currently enrolled in Two Factor Authentication. We saw I didn't have it set up for myself. There are currently no other users in this account. That is a thing that we should maybe put in place to make sure our account is secure. I don't currently have any inactive users. That's great. I'm the only user, so that's not surprising. But this is a good thing to keep an eye on if you're adding and removing users a lot. Making sure that the only users in your portal are the ones who are actually using HubSpot is a very good security best practice. All of these recommendations are organized into high, medium and low risk. There are more actions down here. If you're really interested in getting your security buttoned up, spend some time time checking this every now and then just to make sure your account is secure. The other tab here is called Settings and Activity. Here you are going to set account level security defaults. If you want to require Two factor authentication for all of your users, you can check this box. If you want to set up a single sign on, you can do that here. There are some logs you can view to see what activities have been happening inside your account. You can keep track of who is touching what and you can decide whether or not HubSpot employee have access to your account for support and assistance. This is limited just to people in our customer service department. I for example would not be able to access your portal under any circumstances. But if you are not comfortable with this, you can uncheck this box and no one from HubSpot will be able to access your account. In addition to security settings, you may be very interested to set up privacy and consent settings. Let's take a look at those. So here I am again under Account Setup, this time with privacy and consent. And here are all our different options for controlling and protecting the privacy of your contacts. If you need to be GDPR compliant, or if you choose to be, you can toggle on the data privacy settings and then everything will be put into compliance with gdpr. If you need to learn more about GDPR before you make a decision as to whether you want to be compliant or not, we have some helpful resources here. Up here under Consent options, you can see some of the legal language we use in some of these settings and you can edit this content to match the actual practices of your business business if you need to. We also have settings controlling cookie consent. You need to have a domain connected and your website managed through HubSpot in order to do this. But if you're going to use HubSpot to manage your website, keeping an eye out for how cookies are tracked is a good thing to do. You need to have an external domain connected in order to use these settings, but if you're going to be managing your website through HubSpot, you should definitely keep in mind that cookie management is a thing you will need to make some decisions around. And finally, there's this data privacy dashboard. Under this Analyze tab, there's not a lot of data in here right now because I don't have a lot of data in my account. But if you want to keep an eye on the things that are going on with data privacy and your contacts, this is the best place to get a high level overview. With that, let's talk about how to add other users into your HubSpot account. Once you have your account set up the way you want, you're ready to put your team in here. You need to give them access. To do that, you're going to come to the Users and Teams tab and here you're going to be able to see an overview of all the users in your account. Right now it's just me in here, but if there are more users, you would see them listed out with information about how they're organized and what is turned on and enabled for them. You can see I've connected my calendar, you can see my email status is enabled. Up here at the top you get high level metrics Some of the same things we saw on the security page are listed here. So you as the admin can keep track of how your users are doing. And when you want to add a user, you click this Create User button. Now, depending on how granular you want to get with the permissions and access you give your users, you have a couple of different options here. Quick Invite is just a way to send a quick link or email with preset permissions. If you want to be more hands on than that and customize exactly what people are getting, you can spend a little bit more time and do that. Let me show you the quick version here. We can put in a person's email address and decide whether or not they're going to be super admin. You don't want too many super admins, but if someone needs access to everything and each other's data, you're going to want to check that box. If you want to make it even easier, you can create a link that you can share with people and they can then access HubSpot and create their account accounts. That's going to give everyone a sort of a default permission set. If you want to see the more granular process, let's look at that really quickly. We can add one or more email addresses here and then permissioning. We can choose a few different ways to control what access people have. If you want to make them a super admin, they're going to have access to everything inside of HubSpot, every setting, every record, everybody's data. If you want to start with a template, we have a. This is a good choice for a lot of teams. You can choose a template based on someone's role. If they are a standard user, that's what the quick process gives them. Or if you have a user already set up whose permissions you want to replicate, you can just select that user and then the users you're adding now will get all the same permissions. Let's look at starting from scratch so you can get a sense of all the permissions that are available inside of HubSpot. What you're seeing here are different categories based on the different product groupings inside of HubSpot. So for CRM objects you can choose does a person have access to this object or not? For CRM tools we can choose are they able to do things like bulk, delete or import contacts? On the marketing side, you can choose if they have access to lists or forms or files. And if you turn on marketing access, you can choose whether they have access to things like Ads, marketing, email, social tools over in sales you can control some of these payment related things and line items. And under Sales Access we have templates and meeting scheduling pages which we've already looked at. Service tools include access to things like templates, templates similar to sales and meeting scheduling pages, and there are other options for other HubSpot tools all the way down. As you get more familiar with HubSpot and as you bring your team in, you'll get a good sense of who needs access to what and you can control that all here. If you ever need to change any of these, you can do that after the users are added. Once you've got this set up the way you like, you go to the invite page and you can review the permissions you've set up and then go ahead and send the invite. I'm not going to do that now, but it really is just one more click to get there. One last thing to know about users is this Team tab. Now this is not available for free accounts, but if you had an upgraded account, a professional or an enterprise one, you would be able to organize your users into groupings and use that for permissioning and access. This is great for larger teams. If you are a small business with a few people, chances are you won't need that level of organization here. It'd just be additional clutter. Just adding users and controlling their permissions on an individual basis is going to be the best fit for if you're going to be using HubSpot to create some content, you may be interested in managing your brand look and feel. So here in the Account Defaults tab I can set things up like my fiscal year and my time zone, my company name. This information will appear in email, footers and other places. Definitely make sure you fill it in. But what I want to draw your attention to is this branding page where you can create a brand kit. I have this default brand kit right here where you can add logos. You can choose your company colors, you can choose a theme for your website. If you'll be building your website through HubSpot now, if you're not a branding person, if you haven't thought about logos or favicons, which are the little logos that go inside the browser tab. And if you don't have brand colors set, then don't worry. We have a brand kit generator that can help you create all this stuff in six easy steps. So go ahead and use that and then put it all into HubSpot and you'll be ready to go. I hope that gives you a good starting point for setting up HubSpot CRM? There are a lot more things we could talk about. We have videos for all of them. If you want to know how to create a website, you want to know how to put forms on that website. You can watch some of these videos and we'll help you get there. Now, if you're wondering if HubSpot can scale with you long term, if you're a small business with growth ambitions, don't worry about that either. We have won awards for small business, mid market and enterprise business. We're a leader in G2 in all these categories. So regardless of what your growth ambitions are, HubSpot is there to grow with you. Hope this was helpful. Let us know what you think in the comments. And good luck setting up your CRM. Thanks.
More from Patrick


A NEW BREED OF PARTNER: The Partnership Ecosystem Model Journey of Patrick Biddiscombe, Part 1





Customer Success Workspace: Never Lose Sight Of What Matters Most | HubSpot Spotlight