Instagram Ads for Business (The LATEST Step-by-Step Guide)
Patrick Biddiscombe walks through Instagram ads from Meta account setup to scaling. He covers three high-converting formats, audience segmentation, and a creative timing formula: pattern-interrupt by 2 seconds, value by 5 seconds, call-to-action by 15 seconds. Includes a 24-hour action plan and automated rules for pausing underperforming ads.
Questions this video answers
$10 daily for awareness, $15 daily for consideration, and $25 daily for conversion.
1% lookalike size.
Below 1% CTR is a signal the ad creative may need a makeover.
Return on ad spend under 1.0 indicates sales aren't covering ad spend; kill the ad if this continues for more than three days.
An example pause threshold of greater than $10 cost per result (placeholder to adjust as needed).
Chapters
Stop wasting money on Instagram ads that don't convert Many business owners struggle to see real results from their ad campaigns, but today I'm going to show you how to fix that. After analyzing successful ad campaigns over the past six months, we've nailed down exactly what works and developed a clear roadmap that you can follow with real examples to maximize your profits. I'll first show you how to set up a solid ad foundation in a business ads manager. Then create a campaign using real life examples before finding finally sharing our creative framework that's consistently generating leads under $5. And if you stay until the end, I'll give you the exact optimization system to help you build on what's working. Let's start the account setup by accessing the Meta Ad Manager, which is the hub where you'll be able to create and monitor all your Instagram ad campaigns. One crucial mistake most businesses make is not verifying standard events to make sure their pixel is set up correctly and overlooking other key settings in their business manager. So I'm going to show you four essential settings to avoid that mist. First, let's go to the Meta Business Manager. Hover over all tools and click on Events Manager. Then head to Data Sources, select on your installed Pixel, and then go to Test Events. Enter your website URL where the Pixel is installed and click Test Events down here. This should open your website in a new tab. Now, if you haven't done this yet, make sure to get the Meta Pixel Helper, which you can install from the Chrome Extension Store. This cool extension tool is the best way to confirm that the pixel is set up right. Then on your website. Perform actions that should trigger pixel events, like visiting a product page, clicking Add to Cart, or completing a purchase. If you have a checkout process set up now, you can check the Pixel Helper extension in your browser where you should see your Pixel ID along with the events that fired like a page view or Add to cart trigger. Next, head back to the Meta Events Manager tab, look under Recent Events, and confirm the events are showing correctly. If not, refresh the page and try again. Second, let's build out our catalog integration. Even if you're not an e Commerce store, catalogs help organize and automate ad delivery in the Meta Business Suite, navigate to all tools in the sidebar and click on Commerce or you'll be taken to the Commerce Manager. Scroll down to Catalogs to create your catalog. Next, choose Local Products or Services, Select Local Products for your catalog type and Item Location for location and phonetion. Now let's give your catalog a name. We'll use Luxury Candle Experiences for this example, and then click Create. Now that we have our catalog, we'll need to manually add some services. Under your catalog, go to Data Sources, then click on Add Products in the top right corner. We'll select the Data Feed option to share our products via a spreadsheet. However, you also have the option to import your products from other platforms like Shopify, BigCommerce, or WordPress using the other solution. Next, we'll download the template and organize your products or services accordingly in a Google Sheet document. Once completed, upload your file using a URL or directly from your computer file, Complete the settings and make adjustments as needed. Then hit Upload. Great, you're all set with the catalog integration Catalogs are an excellent way to showcase your various products all in one ad and optimize your ad spend effectively. But if you really want to make sure your Instagram ads are firing on all six cylinders, we've prepared a toolkit that'll help you manage and optimize your Instagram ad campaigns. This free resource includes everything you need from a planning checklist, an ad Creative planner, and my absolute favorite, a tracking dashboard to help you build your campaign every step of the way, ensuring you track the status and performance of your ad metrics to the T. I've linked this offer in the description below for you to download, but before we move on to linking your Instagram account, there's one more step you need to take, and that's integrating your catalog to your account. First, head over to your business manager and click on Commerce Manager. Under Catalogs, select the catalog you want to work with. Click on Items to make sure your product or service listings are uploaded and correctly formatted. This step is crucial because well organized listings help your ads run smoothly and effectively. Next, we need to link your catalog to your ad account. Head back to your Business Manager and go to Business Settings. On the left panel, scroll down to Data Sources and then click on Catalogs. You should now see the catalogs you created. Make sure they're integrated into your ad account. This integration will ensure that your catalog items are dynamically connected to your ad campaigns, making your ad delivery more efficient. With these steps, you're set up for success. Now for the crucial part that you should not overlook. Linking your Instagram account to the Meta Ads Manager first things first, head over to Business Manager and click on Business Settings. Under Accounts, select Instagram Accounts. If your account isn't linked yet, click Add and log into your Instagram to claim your account. Next, ensure your ad accounts and pages are connected to your Instagram account so they're redirected to the right account. To add an Instagram account to your business and business manager, keep in mind it'll need to be a professional account and you'll need to have your username and password handy to switch over. To do so, open Instagram in your browser, click on Profile, then navigate to Edit Profile. In the sidebar, scroll all the way down to Account Type and Tools and select Switch to Professional Account. Select Business and pick the category that best fits your business and then hit Done. Finally, let's ensure we're collecting the right data for accurate reporting and optimal performance. Navigate to Business Manager, then click on Events Manager. In the Data Sources tab, select your pixel and hit Settings. Scroll down to Automatic Advanced Matching and make sure it's on. This little gem improves match rate by using customer data like emails and phone numbers. Next, scroll back up and check the cookie settings. Ensure first party cookies are on. This helps track visitors more reliably by storing cookie data on your domain. Because who doesn't love reliable data, right? And that's it for the account setup. Your Instagram account is now primed and ready for pushing out killer ads. Now that your foundation is solid, let's create your first high converting campaign together and the Ad Manager account. Click Create to select the right campaign objective. For the awareness stage, where you want to introduce your brand and reach new audiences, you should select Awareness for the consideration stage. You could select Engagement if your focus is on interaction or Leads if your focus is on collecting emails. And lastly for the conversion stage, sales should of course be selected now for budgeting. Regardless of your budget, you want to ensure that you're allocating your budget to match the level of priority for each objective. Before you start allocating, you're going to want to turn off Advantage plus Campaign Budget so you can manually control ad spend. Great. Now let's proceed with our budget allocation strategy. For our use case, we'll start with $10 daily on awareness, $15 on consideration, and $25 on conversion. Enter these amounts for each campaign. Now let's go over audience structure. Some businesses make the mistake of targeting everyone with the same ads, but that's like serving the exact same meal to every guest at a restaurant, regardless of their preferences, allergies, or dietary needs. Big no, no. Targeting the right people means your message lands, and that's where the magic happens. So we'll focus on the three groups we believe will offer the most roi. Broad audiences, retargeting Audiences and Lookalike Audiences first, let's work on Targeting Group one, a broad audience for awareness campaigns. Click Campaign, then edit the ad set, scroll to Audience, then click Switch to Original Audience options under Custom Audiences. Leave this section blank. Scroll down to Detailed Targeting and click Edit. Under Detailed Targeting, select Include People who match and for our use case, we'll enter the following Interior design, Sustainability, Candle, Handmade and Luxury. Once you've typed those in, it should save automatically so you can click on Close. Be sure to tailor your targeting by specifying demographics and interests of potential customers to achieve better results. Next, we'll tackle Retargeting Audience for those engagement and leads campaigns. But what exactly is retargeting? Simply put, retargeting is your second chance at grabbing the attention of those who already shown interest in your brand through your website or social accounts or with the right message. They didn't convert the first time around and retargeting is like a friendly nudge to turn those maybes into yeses. To set up the retargeting audience for engagement and leads campaigns, click Create New Audience and select Custom Audience. Choose Instagram Account, then select people who engage with your Instagram account in the last 30 days. Name the audience Instagram engagement 30 days. Then click Create Audience. Under Locations, select the regions or countries where you want the ads to be shown. It will again save automatically after so you can click on Close. Now imagine if you had an all seeing eye to spot people who are similar to your best customer. With lookalike audiences, you can actually find people who share similar traits to your top buyers. This is absolutely clutch because you increase your chances of converting new customers who are already likely to love your products. To create a lookalike audience for your sales campaign, you can hit Sales Campaign and edit New Sales Ad Set. Scroll down and click Create New Audience and select Lookalike Audience. Under Source, Choose Website Visitors or Customer List. If you already uploaded a buyer list, set lookalike size to 1% for the most relevant audience. Set the location to the target country or region, click Create Audience and then it should save automatically. Once again, after setting up these three groups, review all audience settings to confirm proper segmentation. When you're satisfied with your selections, click Next and you're all set. Alright, now for the part you've been waiting for. The ads that have been proven to actually convert, let's break down three ad formats and show you why they consistently drive engagement and conversions. First up is a carousel ad. I've already mentioned this ad creative earlier and for good reason. With catalog ads, you're able to showcase multiple product variations, which in turn saves you from having to run individual ads for each product. It's an easy way to make all your products accessible on a single swipe. Now let's check the video ad. In my opinion, video's still king for ads for one key reason. In this example, consider the first few seconds. See what they did there? Here's why this hook works. With a video ad, you're able to tell a story and take your potential customer through the experience. Mm, I can smell it from here. If done well, your audience will naturally see themselves falling in love with the product. And finally, let's not forget the collection ad. Look at how the products are arranged. There's a smart psychology to this layout. It almost looks just like a real store, with products sitting right on the shelves, your eyes moving naturally from item to item, making everything feel essential. This layout is the best of both worlds. Since you can combine both video and text to highlight features and benefits of the product. This is a must use for product based businesses. But how do you ensure your ads are optimized to convert? Here's the winning formula that I've observed after looking at a bunch of successful ad campaigns. First, most successful ads start with a pattern interrupt in the first two seconds to snag attention. Then by second five, you should hit them with a clear value proposition to showcase why your offer is irresistible. And finally, by second 15, wrap it up with a clear call to action, guiding them to the next step. If you follow this formula, I can almost guarantee that you'll see positive results. But do make sure that you're keeping track of your ad performances and that free template from the Instagram advertising toolkit that I mentioned earlier. A great resource to see which ad is performing well and which one needs to be optimized. Speaking of optimization, I'm just about ready to land a plane, so stay with me folks. But if you've been finding value in this tutorial, please consider ring that bell and hitting that like button so the algorithm shows it to more people. All right, ladies and gentlemen, we've now reached the part where we turn good campaigns into great ones. At this stage of your ads campaign, you should lose yourself in a matrix metrics. Matrix metric. By looking at every single metric, there are only three metrics you need to keep an eye on, so let me show you how to find them. Head over to Ads Manager and click on your campaigns. Click the columns dropdown and select performance and clicks. This is where you Find cost per result, which measures how much you're spending per conversion. The lower the cost here, the better. Click through Rate, which indicates if your ads are engaging. If no one's clicking, we have a problem. And lastly, return on ad spend, which if you don't see it initially, no worries, you can quickly add it under the column settings. This shows your profitability based on money spent versus revenue earned. Now if this sounds confusing, let me explain it more simply with some examples. If your cost per result shows $5 or more, it might mean the ad is too pricey and you need to make adjustments. Consider adjusting your target audience based on your price point. For premium offers such as a $2,000 exercise program, higher cost per click around $5 or more may be justified. If your ctr is below 1%, it's a signal that the ad creative may need a makeover. So try experimenting with different ad creatives to determine what resonates best with your audience. If your return on ad spend is under 1.0, it means your sales weren't covering the ad spend and you're not making a profit. If this continues for more than three days after publishing, it's probably best to kill the ad. Alright, so once your campaign is running, here are a few ways you can monitor performance and make adjustments to improve results. If an ad is performing well, you should gradually increase the budget to maximize results. To do this, go to Ads Manager and click on your campaign name. Scroll to Budget and Schedule and increase the daily budget by 20 to 30% to prevent sudden cost spikes. Again, your changes will save automatically. If an ad isn't delivering results, you need to hit the brakes to prevent wasting your precious budget. Go to Ad Manager and click Ad Set. Find the ad with low engagement or high cost and click Pause to stop running that ad. Consider this a strategic timeout. Now let's use automated rules to optimize ads. And instead of adjusting ads daily, let's automate the optimization using meta's automated rules. This way you can scale up high performing ads and pause underperformers without losing our minds over constant monitoring. For pausing underperforming ads using a rule, go to Ads Manager and click Automated Rules. Click Create a Rule. Your rule name should indicate the action to be taken. We'll use Pause Add if Cost per result exceeds X and Apply Rule to select All Active Ad Sets and action Choose Turn Off Ad Sets under Conditions. Click Add Condition and select Cost per Result. Set the conditionality to greater than and set a Value placeholder like $10 or adjust as needed for the time range, select Last 7 Days and set the schedule to run continuously meaning it should run every 30 to 60 minutes and notifications. Turn on to receive alerts on Facebook and then click Create Rule and Breathe easy for scaling up high performing ads. When an ad has a high click through rate, this is where you ramp up the budget automatically. To set this up, go to Ads Manager and click Automated Rules. Click Create a Rule, enter the rule name Increase Budget if CTR is high and apply rule to select all active ad sets. Under action, choose Increase daily budget by 10%. For the conditions, click Add Condition and select Click Through Rate. For condition, choose Greater than Under Value, set a placeholder like 2% which you can adjust as needed. In the time range placeholder, select Last 7 Days. For schedule, choose Daily at 12am Local Time. Notifications should be turned on for notification alerts. Lastly, don't forget to set your budget cap. Click Create Rule and everything is now good to go. Fantastic if you made it this far in the tutorial. Hats off to you my friend because you now have the complete roadmap on how to run an Instagram ads campaign for your business. Let's wrap this up with an action plan. Here's what you need to do in the first 24 hours. Set your pixel up properly. Create your first awareness campaign and upload your initial creative test. Then within the first week, monitor initial data, adjust audiences based on performance and prepare conversion campaigns. And from the second week, scale winning ad sets. Expand your creative testing and and implement automated rules to maximize your success. Start with the foundation we covered. Test your campaigns using that exact framework and scale what works with the optimization system that I showed you. But to really ensure that your ads are fully optimized, make sure to check out that Instagram Ads Guide which contains additional insights that we didn't cover today. And don't forget to like and subscribe for more marketing strategies, tips and tools to grow your business. See you in the next video. Sam.
More from Patrick



A NEW BREED OF PARTNER: The Partnership Ecosystem Model Journey of Patrick Biddiscombe, Part 1





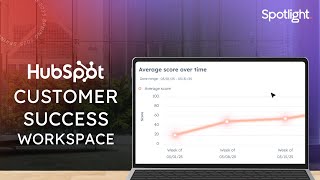
Customer Success Workspace: Never Lose Sight Of What Matters Most | HubSpot Spotlight