Create a Kajabi Checkout Page in 30 Minutes or Less
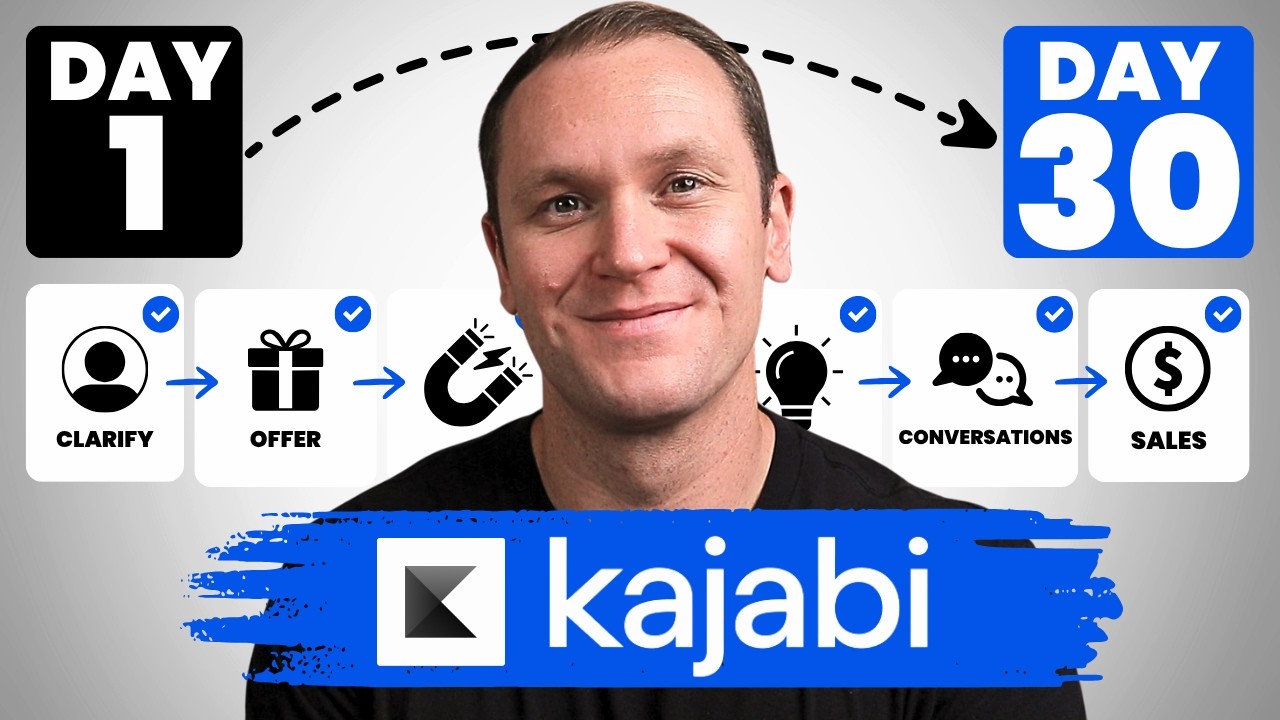
James Allen walks through building a Kajabi checkout page in under 30 minutes, covering offers, pricing options, payment processors, and post-purchase automation. He shows how to route buyers to product libraries, thank-you pages, or onboarding flows, plus strategies like order bumps, upsells, and cart-abandonment emails.
Chapters
In this video, I'm going to show you how to build a Kajabi checkout page from scratch in 2025 and show you some cool automation tricks that I've learned over the years. One of the main reasons I love using Kajabi is the fact that I can send somebody straight to a professional-looking checkout page for any offer that I have, whether it's for my private coaching, for an online course, if they want to do a multi-pay, a pay-in-full option to get a discount, if I want to run a flash sale, or if I want to have a subscription, anything like that has a designated checkout page in Kajabi. I'm able to track all my numbers, and I think one of my all-time favorite things isn't just having a professional checkout page for anything that I have to offer. It's also the automations that follow after the purchase. And I'm going to show you some cool stuff that I've learned over the years. And before we dive into checkout pages, if you have a Kajabi account, I'd recommend that you pull up your Kajabi account so we can walk through this together. Makes this a whole lot easier instead of you having to keep coming back and watch the video. If you're not already a member of Kajabi, but you're thinking about seeing what it has to offer, I always say that the best thing you should do and can do is just to sign up for a free trial, give it a shot, play with it yourself, feel the interface. If that's you and you've been thinking about trying Kajabi, you can get a free 30-day trial when you use my special affiliate link. I do get a commission for referring you over if you decide to pay, but you do get 30 days completely free to just play with this platform. But by using my link, I'm also going to give you a course that I made fully about Kajabi on how you can earn your first $10K using Kajabi. It's basically just pulling back the curtain on how I run my 6-figure coaching business in just 20 hours a week using Kajabi. And on top of that, you're also gonna get a private one-on-one coaching session with me where I'll personally sit down with you and answer any questions you have about Kajabi, strategy for your business, or any tech questions whatsoever. I'm here to support you for 45 minutes to an hour. All of that is completely free to you. To get more details, go to profityourknowledge.com/kajabi or you can always just click the first link down in the description. Without further ado, let's dive in to building out our checkout page. What we wanna do first is go to Sales and then click on Offers and go over here to New Offer. From here, we can put in our offer title. So I'm just going to say Test for now to be simple. Now here's something cool that you can do. You have a product that you can choose to sell. You can decide whatever product you want to associate with this offer. Now something cool about checkout pages and offers and different products that you should know about Kajabi is that Kajabi does limit you based on your plan to a fixed amount of products. So for example, if you're on the Basic plan, you get 3 products. You get 1 product on the Kickstarter plan and then 15 products on the Growth plan, which is the plan that I am on. Now, products can be an online course. It could be a coaching program. They have newsletter products. You can do a lot of stuff with different products, and these are the actual deliverables that you're giving to your customers, but you are limited on the amount of different products that you can have. Now, with checkout pages and offers, basically an offer is a checkout page. There's always a checkout page associated with an offer. You could bundle 3 different products that you have. So if I want to do 1, 2, these 3 products, or every one of my products into some special flash sale bundle, I can do that. Or I can just have one offer like this one, and you know, it would just be the Convo to Clients course. People can buy that and they're gonna get that product with this offer, but you don't need to select a product with an offer. For example, if you are going to be selling private coaching and you don't have any online courses or anything like that, it's the fastest way to start making money in Kajabi, and you can create your own checkout page for your private coaching with a payment plan or a paid-in-full option or even a subscription-based coaching program, whether it's group or in-person, or whether it's group or one-on-one, and you don't need to have any products associated with that. So that's really important for you to know and really powerful is that you don't need to select a product. So I'm actually just gonna leave this blank and I'll show you another cool trick that you can do afterwards. We're gonna hit next. And then here we can decide what type of plan we wanna have. We can do a one-time payment, we can do a payment plan, a subscription, or you can make it free as well, which is always an option. So one-time payment, we're going to just put in the price, you know, like $497 or whatever we want. Payment plan changes up a bit. So we'd say, you know, let's say $200, choose your currency, and we'll say 3. Billing interval, month. So $200 for 3 months. And then we can always do a subscription as well where we could say, you know, $97 billed every month. And that's ongoing and the customer would just decide when they want to cancel their subscription. So I'm gonna keep it simple and just do a one-time payment and we'll just call this $497. You can also let customers pay what they want if you decide to do that. It's pretty much just, adds it of like, hey, you can pay whatever you want. That could be good if you're doing like a freebie and if people kinda wanna tip you for help. I never do it, but it's totally an option. Payment options, you can use Stripe, which can integrate with your Kajabi account. I like using Kajabi Payments. They've done a really good job and it's basically like some partnership that they have with Stripe, but it keeps everything just inside of Kajabi, keeps it seamless. You can accept all these different types of additional payment options like Apple Pay, Google Pay, Klarna, PayPal, all that kind of stuff. And you know, just gives you a couple different options, but I like Kajabi Payments. It's really easy to set up. They walk you through how to do it. So that'll be a first step before you start building out your checkout pages so you can accept payments. We're gonna hit next. And then here we can choose the background color for the button. You can leave it black. I personally like to do this green over here or some kind of green. I think it looks professional. Green means go, you know, and then you can change out the text for what it actually says on the button. Or I usually just say complete payment, and you can see it changed it right over here. From here we can choose checkout fields. So I like to add their name and email address. If you want to, you're shipping a book or anything like that, you can add their physical address, and you can see it's all changing over here. Their phone number, tax ID. I think it's just too much information. If you're selling an online course or something, you don't really need their address. If you're selling a book, totally makes sense. Or if you're selling a course that has some sort of like deliverable, some special, then totally get their address and ship it over to them. And then down here you have a service agreement where you can allow customers to consent to the terms and conditions policy for your business. Totally up to you. Totally optional. Up to you. I just— I'm going to leave it not required for now. We'll hit save and finish. Now we are mostly done with our checkout page, but there's some really cool things that we can do here that I'm gonna show you. So remember we talked about products? I created an offer just now, that's what we just did. We can still update our checkout page, which I'll show you in a minute. But down here I can add products to this offer. So let's say that you made a coaching program and you don't have an online course or anything, you're just kinda getting started on the Kickstarter plan. You don't even need to take up a product slot, which is amazing, and you can still make thousands of dollars or tens of thousands of dollars every single month just from free coaching and a checkout page like this for your private coaching. But let's say that down the road, after you're coaching a handful of people, you start to create an online course. You develop a proven system or methodology and you record that into an online course. Now you've created a new product that you can use in Kajabi, and then you can come back to this checkout page for your coaching and do what I like to do, which is give you one or two of my courses that are relevant to, you know, my coaching offer, and I'm gonna just give 'em to you, and you get to keep 'em even after we stop working together. It's a great value add to your coaching program, and it's also really helpful for when you're coaching people, you can refer them to your online course with all the recordings so you don't have to keep repeating yourself. You can say, hey, I have a video inside the course, I'll send it over to you, watch that, and then they watch it, they come to the actual coaching call and they're like, I know exactly how this all works, I understand it, so I don't have to spend half of our coaching call teaching you something. We just work and get stuff done. Okay, so totally an option that you can do here if you wanted to add something to this. Okay, and you can do as many products as you want that you can add and remove 'em, whatever. Okay, post-purchase, this is what happens somebody buys. By default, it is going to send them to a product library. Now, this is where things get fancy. If you're just selling a course, you can send them to the product library, and that's what I would recommend. They buy their course, as soon as they go through checkout, they go straight to their product library where they can access said course. But if you're selling something like private coaching and you don't have an online course yet, then you can send them to an existing landing page or custom thank you page. and this could be super simple. You could just land on a really simple landing page like I'll show you in just a second. So what I do when somebody signs up to work with me for either I have a $5K or a $10K coaching package and, you know, depending on their business and their goals and how I can help them and whatnot, these are options. So I have 4 steps to an onboarding process, and if you don't have any of that, that's fine. You can just do 1 step. Okay, so what my 4 steps are is at first I have a quick video where they sign a coaching agreement. Step 2 is they set up Voxer so we can message each other in between calls, and then they can access our courses on step 3. Step 4, they book their first session. So going back to our checkout page, instead of sending people to a product library after they signed up to be a coaching client, then I can send them to an existing landing page, and I would just say Step 1. Okay. And if this is for the 5K package, I would send them here. Now what's going to happen is as soon as they go through my checkout page, they're going to land on this super simple landing page, which all it is, if you see here, the blocks, you have a text box at the top and then a video, as you can see, and then 2 calls to action. Now, what I'd recommend, whether you're doing a coaching agreement or not, I think it's a good idea, but you could just simply have that they go through your checkout page, they sign up for your coaching, it points to a landing page that's a super bare-bones landing page, and it could be a video of you, and you say, hey, thank you so much for signing up for my private coaching. You're a rock star, and I'm super pumped to help you with insert thing you help them with. Then you could say the first order of business is I need you to just book your first coaching session. And then underneath this video, click on that and you will go straight to my calendar where you can find a time and that's going to be your time slot or we can refine it on that call. But I just want you to get something on the calendar. Super simple micro win that they can get. And if you watch my video, this is like a 1 or 2 minute video and it's really simple. I can even preview it as well. Click on that. My stunning face. You watch it and, uh, yeah, it's a minute long. And what they do is they click here and this goes straight to— I use a tool called JotForm. It's free, but you can get my coaching agreement. They read through it, they can get their first name, last name, signature. They send it straight over to me and then it's all saved in my little database. I just get a notification that, hey, Someone signed this agreement or, you know, this form. And what I tell them is like, sign that, come back to this video, and then click on move on to step 2. What it looks like is you click here and you will see button action. This one is going to go to my JotForm that I have, or if you use, um, what's the other one? DocuSign. That's a great one too. The second one I made outlined right here. And then they can set up Voxer, goes to another landing page called Set Up Voxer. So we click on this one and then boom, setting up Voxer. Hi friend, thank you. Another quick video, 2 minutes, I show 'em how to set up Voxer. They click here, it goes straight to my Voxer account. They click on step 3. From here they can access their courses. I show 'em exactly how to do it, log into Kajabi 'cause that's where I host my courses. Move on to step number 4, one more, and then boom, book your first session, go straight to my calendar. All of this is taken care of after all that I did was send them a link to a checkout page. That's the power of using Kajabi and checkout pages, and it's all tracked inside of Kajabi. It's awesome, okay? So you can also add automations down to your checkout pages. So when somebody purchases this, then you can send them, I usually like to do an email where I send them an email. What I'll say for like private coaching or even if they buy my course is I'll say I want you or like, hey, congratulations, thanks so much for signing up. Click here to access your course and it goes to the member library just in case they missed it or whatever happened. Or in case of my coaching, I would say click here and take your first step, which is to fill out your coaching agreement. And it points to that first landing page and then they go through this whole onboarding process. Okay, so you can get really fancy with it, play around with it, but these are some different features that I'd recommend. Definitely have an email that you have set up. I do the post-purchase email, I don't do it. You can do a custom email, but it looks like this is super limited compared to when you do the automation. Then you get all these different icons, you can make it full screen, you can add in links. If you want, if you were like, you know, click here to access your course, period, then you can add some sort of link and it would make this a clickable link that's really obvious and you can make it bold and underlined and all that kind of stuff, okay? So it's way better leaving the default email on none or the post-purchase email and instead sending an automation. Alright, so that's pretty much all you need to know here. This is a little thumbnail that you can have for your online course or for your coaching program or whatever your offer is. I'd recommend you add something there and you can totally add a description here. Internal title is more for you. Like if I have my, let's say, $5K option versus having my $10K option, you know, or if it's a payment plan versus a paid in full, because if you do a payment plan or paid in full, you would need to have two separate checkout pages, just FYI, okay? You can't have, unfortunately, I wish that Kajabi would do this, you can't have click here and pay in full, click here for a payment plan option all on one checkout page. I've learned how to do that with a piece of code, but I'm not gonna get into that right here, okay? So at the top, these are all the details, very important. If at any point in your career you ever wanna change your pricing, you would go up here to pricing and then you can add pricing details. You're like, you know what, I wanna switch this to a subscription. Boom. And then you'd fill out all the information. Price text, optional. It's kind of weird, but you can write what you want to have. So this is a one-time payment. I would say one payment of $497. And I'll show you what that looks like. Okay, if we go to edit checkout page right here, it'll say one-time payment. If you don't add in the post or price text override, then it's going to be, it'll just say something generic, just like $497. So I like to say one payment, or if it's a payment plan, I'll say 3 payments of, or 6 payments of, 2 payments, whatever you want to do. Okay, another thing before we get into customizing our checkout page is you can do upsells. Now what's cool is after somebody purchases your offer, let's say you sold like a $27 ebook, you can deliver that through an automated email and not take up a product slot, by the way. And then you had an online course that complemented that email. What you could do is have an upsell where people purchase the $27 ebook and it automatically goes to a little page, and I'll show you what that can look like. This is an upsell that I have where you pay for this one course and then you get my flagship course for $297 instead of $497, so you save a couple hundred bucks. And this is what it looks like, a little video. Okay, down here you can have a whole rundown of what's included with this, and then they can say, yes, I want to add this to my offer. So it's a $97 offer up front for a different course, and then if they want to add the $297, they can do one click and it automatically adds $297 to the $97, okay? Or they can say no thanks, just take me to my course. All right, and that's what an upsell can look like. You can add multiple upsells or downsells or whatever you want. I like to just do one relevant upsell. Again, if it's a $27 ebook, then they buy your online course for $197. Boom, now you're making an extra $197 off that person who's already interested in buying the $27 ebook for this awesome value add. I'm not gonna go into all the depth on creating this. I'll make a different video on creating these. It's really simple, just walk through the prompts, but you can do that, okay? Extra settings, real quick. Send as a gift at checkout. You can get notified when a purchase is made. This is always fun 'cause then you get emails of, saying hey, congratulations, you have a new student inside of whatever program. So that's fun to add on. And then you just put in your email right there. And then you can also activate affiliates for this and add a send cart abandonment emails. Cart abandonment emails, 1 hour later you can decide. You'll have to change this inside of your settings. If you click on settings and then you go down to email templates. So you click on this and then you have cart abandonment and this is where you would, uh, write out your cart abandonment email. Now one thing is that it has to be generic. Unfortunately, you can't have like a 7-day sequence if somebody abandons your cart or something like that. You just have to make one simple generic thing and then it automatically adds in whatever offer they checked out on. So I just say you were so close. 'Hey friend, James here. You were so close to building your online business.' This kind of generic that I do. 'I noticed that you were about to purchase,' whatever the type the offer was, 'but you didn't finalize your order.' All right. Um, and then, yeah, 'If you're ready to grow your business this year and want my best training, click here and buy this. Your coach, James Allen. P.S., if you have any questions, just email me.' All right, you overwhelmed yet? Because now we got one more step, and that is to adjust what the actual checkout page looks like. So first thing I always do is I just get rid of the banner right up here and we have to hit save each time. I just don't like it. I don't think it looks that good. Here you can change out whatever the title is of your offer. So if you say like, I usually just say the name of the product, like Private One-on-One Coaching with James or Effortless Income or Convo to Clients, you know, and then down here it gives you a whole prompt on what to fill in if you click. You'll see checkout description, and then you can make it full screen and just go through. Up here you wanna have something like sign up for this now for one-time payment of blank. Uh, what you're gonna get, really hit home the value that they're gonna get, how this is gonna make their life easier, the deliverables, and more importantly, the benefits behind those deliverables. And then you can add something like a disclaimer, like all sales are final, or you can say this is backed by my 30-day money-back guarantee. If you're not happy, or satisfaction guarantee, whatever. Okay, couple other things down here. You can add a hero image. So we pick a file. This is just a picture that I'm gonna use just for simplicity's sake. We'll hit save. And then boom, now you can see it. So what I like to do is under hero image, all in the same section, you can just click here if you ever get lost, scroll down, you can add a video. Right here of you. I think it's kind of unnecessary. Or you can add a photo. I would just do a thumbnail for whatever your product is. If it's private one-on-one coaching or your thumbnail for your course, just add that in here. Then we have form fields. So if at any point you want to collect their address, it will adjust it. You can hit save and you'll see now we have over here to add to their address or add their address to the checkout. Form, phone number, you can add custom fields, whatever you want. I usually just keep it like this as long as I get their name, email, and card number. You can also add an order bump. So a little bit different than the upsell. The upsell is right after they purchase this and it's a one-time offer. So you get my course for 50% off if you only sign up right now and it complements what you just bought perfectly well. That was that simple upsell. Now an order bump is gonna show up down here. So, you know, let's just say that I did this. You're gonna see it right here. And then you can fill in a bunch of content over here and make this look more attractive than just this. But if they check that box, it's going to add to this order all on the checkout page. So it's before they actually purchase while an upsell is an offer after they purchase. And that's the difference with an order bump and an upsell. Okay, additional settings. Mobile layout, you know, this kind of stuff, I usually just leave this default. One other thing is at the page content, or if we click here, or the thumbnail, we can go down to testimonials. And you can add different testimonials of what people are saying. So this is what my official checkout page for one of my courses, Effortless Income, looks like. I put Effortless Income, join Effortless Income today, what you're gonna get, This is the value that it was talking about. And then I have my little disclaimer. You get a 30-day or 60-day money-back guarantee. What people are saying, and these are what the testimonials look like underneath. People can be like, yes, I wanna add this. The coupon code, it's not showing up here. You would need to actually associate a coupon with it. I'm not gonna get too deep into that. But if you associate a coupon with this, then it will give you this option to apply. A coupon code. And once you fill in all that information, it's really straightforward. You just kinda follow the prompts. It's nice to know a couple of these extra automation tips and things like that. But if someone's on a call with you or you wanna share this, you just go up here to Get Link. We can copy and then I will paste it or share it in a chat in Zoom or whatever. And it goes straight over to a Kajabi checkout page. People can sign up, pay. Obviously you'll fill in all this information add your testimonials, anything like that, and then boom, you're accepting payments. So I know this is kind of a long video and there's a lot to go over. It's just a lot of things I wanted to share with you so that you could know how to actually use Kajabi checkout pages properly. The more that you do this, the easier it gets, the more second nature all of this becomes. But those are a couple of things that I wish I knew when I first got started because I spent years tinkering with Kajabi and not making any money. Again, if you want to get coached by me privately and get a 30-day free trial to Kajabi plus my private online course on how to earn your First $10K with Kajabi, go to profityourknowledge.com/kajabi or click the first link down in the description. If you have any more questions about checkout pages or Kajabi in general, or you want me to make another video going over something specific, let me know in a comment below. Other than that, take what you learned here, get out there, make something happen. I'll see you in the next one.