Kajabi: Beautiful Websites Made Easy in Kajabi
James Allen shows how to build a complete website in Kajabi using drag-and-drop templates and blocks. The platform hosts courses, memberships, and your entire site on one server. He walks through configuring domains, branding, SEO, adding forms and testimonials, and previewing across devices.
Chapters
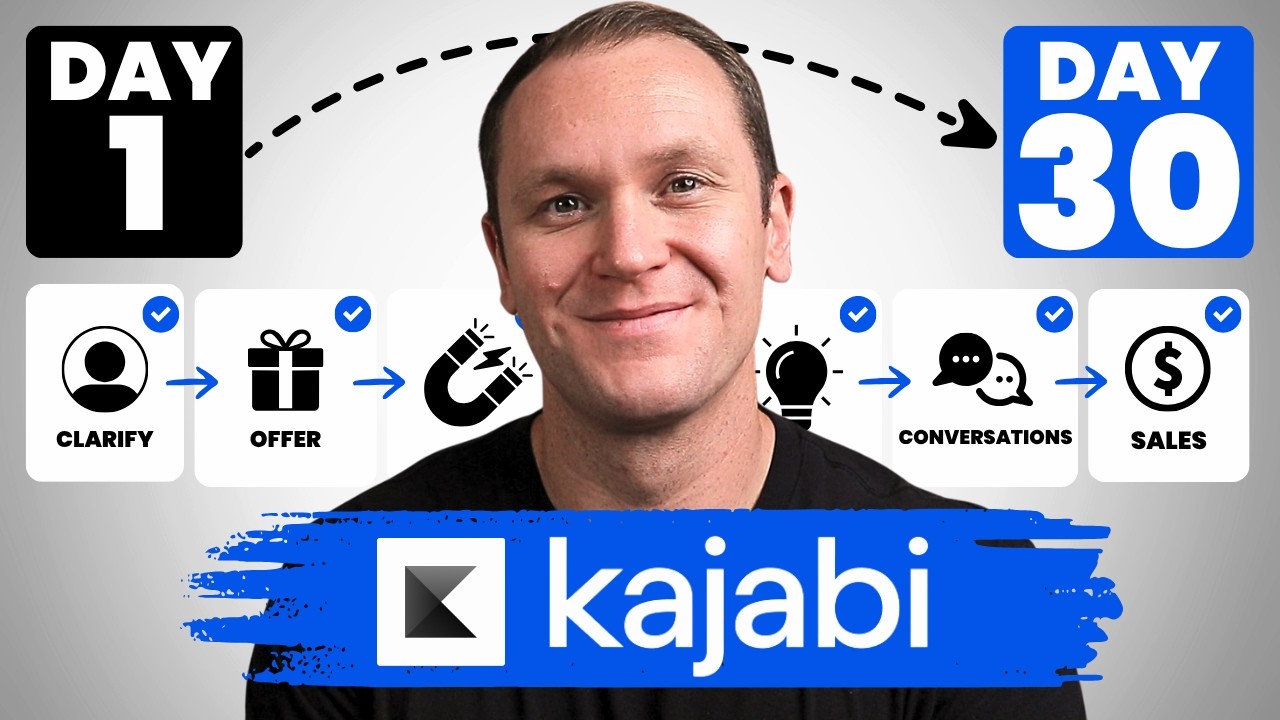
Kajabi is famously known for hosting online courses and membership sites, but another great feature inside of Kajabi is that you can host your entire website inside their platform. And this is just a great tool to make everything work very seamlessly together all on one server, which is where Kajabi has a real advantage. So today I'm gonna take you behind the scenes and show you how to design your website in Kajabi. By the way, if you want to take advantage of a free 30-day trial of Kajabi to play with the platform yourself, you can use my link profityourknowledge.com/kajabi. This is an affiliate link, so I get a small percentage of your investment in Kajabi, but there's no extra cost to you compared to if you went through Kajabi's website yourself. All this does is simply support me and this channel for referring someone to Kajabi. But when you sign up with my link, I'm gonna give you instant access to a course I created called Kajabi Kickstart, which is gonna help you set up and launch your online business with Kajabi in that first 30 days. On top of that, when you're inside of Kajabi Kickstart, you will have access to a free 45-minute coaching session with me where you and I both get to deep dive into your Kajabi account, and I will be there to answer any questions you have about Kajabi, marketing, or even making your first sale with the platform. All this is free, and you can get instant access by going to profityourknowledge.com/kajabi or clicking the link down in the description. Without further ado, let's dive into Kajabi. To start building out your website, you're going to want to go to the website tab right here. You can click and actually preview your entire website. So this is what it looks like right now, um, very, very basic, but we can adjust it and make it look real pretty. Unless you like this, then we can just kinda roll with that. But we're gonna have the design of our overall website, and this is where we're gonna play with like the theme and whatnot, and I'll show you how to do that. And then we have pages, and then navigation, and your blog. So we're gonna play over here in the design section first and foremost. Up here you're gonna have your site details. This is really important when you are brand new and you get this thing started. This is where you're gonna set up your domain and everything basically. So you're gonna wanna go through and check off all these boxes, like a support email. You can have your title, so this is what shows up in, in like search engines and whatnot, and what's up in the tab when people are on your site, what the tab actually says. So I just called this My Sweet Website, We Help You, dot, dot, dot, and just explain how you help people. I like to put the little, the little bracket right there as well. Manage Domain, if you click here, you'll be able to set up your domain. Um, if you have a little bit of trouble with that, just talk to Kajabi. They will literally walk you through the entire process and they really make it easier because I'm not a huge tech person and I'm still able to use Kajabi. So, uh, because they help me honestly. So you have a great help center down in the bottom left-hand corner and you can just reach out to people. If you click on it, you'll see contact support, do a live chat. They get to you in a couple of minutes. Uh, but they also have a help center as well where they have tutorials that show you how to set up your domain. Et cetera, et cetera. You can change the language, the text direction, if you want left to right or right to left, the currency, the homepage, where you want people to actually land. So when they go to your website, you can have them land on a separate landing page, like your sales page, for example, if you wanted to use Kajabi in that way, or if you just want to use the homepage as your overall website. That's what I do, so I'm gonna leave that. And then we have our branding, your actual logo, your favicon, which is the little, icon you see in the, in the tab at the top when you land on a website like YouTube, for example. It'll show you the little, little icon of YouTube up there. So that's what yours is, and you can decide whatever you want to do. Color palette, you can decide if you like green, you click on that, then your buttons are going to be green. The default color is going to be green, okay? And you can play around with it and decide which one you want to use. Instructor, this is you. Put a headshot right here. It gives you the dimensions that they recommend. So I go inside of Canva and use Canva and just put in those dimensions, and then I put in my picture and I know it's going to fit perfectly. Add your name, your title, who you are, the business owner, a coach, whatever it is. And then the page scripts, for this part I don't really worry about this. I didn't really do anything, and I mean, my website works fine. Then you have SEO and sharing. So this is from my actual site. We're not in my site dashboard or my partner's dashboard to show you what a new website looks like. Just says Profit Your Knowledge, the little dash, and then Build Your Online Knowledge Business. Cool, you can add description, add your logo for a social image, and if you want to, this depends on the plan you're on. I'm on the growth plan, so I can decide if I wanna have the Kajabi branding or not. But as you can see right here, it says Powered by Kajabi. I can control whether or not I have that. I'm on the growth plan, so it's like the $200 per month version. But yeah, if you don't, if you're on the basic plan, then it automatically says powered by Kajabi. But it's not like crazy noticeable and detailed, it's just kind of down in the bottom of your website and whatnot. So once you get all this set up, we're gonna hit save. And that's just kind of setting up your site. We're gonna go back to website. And then we have the template store, or you can browse templates down here. Hit browse templates, and then we're gonna have a bunch of different templates that we can build our site around. And what's cool is that all of these templates can be fully customized. You can change the font, you can change the text, uh, the design. So if you like the look and feel of this one, we'll say, but maybe you don't like the, the squiggly cursive style text, you can change that. You can change all of that font, all the colors. If you're like, I don't like the pink but I like the look and feel of this, you can change every little bit of that. But today I'm just going to use the regular one that I have set up, the Streamlined Home. It's just a very simple website builder that you get right when you sign up. It's kind of the default one. We'll hit Customize Page, or you can also click up here and hit Customize or Preview. So we'll go Customize Page. From here we're going to have our entire website. This is what the website builder looks like. Now if you're scared or intimidated by tech and whatnot, Kajabi makes it very, very simple to set up your website. I think the website builder, I mean, I've been using it for a long time, but when you kinda understand it, you get the hang of it, it's actually really, really simple and it feels very streamlined, just like Streamlined Home. I've used many different website builders like GoDaddy or Squarespace even, and the interface to me just feels a lot more clunky, and that was before I even started using Kajabi. Okay, so you have these blocks up here and you can click on any one of these, like this one for example, and it's automatically gonna pull this up, the block that you clicked on. You can add a call to action up here, so I could theoretically get rid of this and include a CTA, and now it's all gonna be inside there. So really, I could delete this block. See how I just clicked it? I can scroll down, delete block, okay? Something else is that you have these different sections over here which you can move around. The hero image, which confuses people, is just a really big image like this, and you can change up the color. You can turn it into a video, so you have a video in the background if you want, but that's what the hero image is. So anytime you see that, it's typically the first image at the very top of a page is the hero image. It's the hero. So We can move this around all we want. If you wanted to have that down at the bottom, you could do that as well. We have our CTA in here. Uh, when you're building out a website, what I typically recommend is to include some sort of opt-in call to action. So we could add, if we wanted to, right here, add a section, and then we're gonna have a bunch of different sections that we can add to this. And even inside of these sections, you can add a almost subsection if you wanted to as well. So we have an opt-in form. When you click on this, it's gonna show you what it looks like. I don't really like that one. Inline opt-in form. Okay, so we'll be able to create a form and use that. Let's go with this one. So we'll click here, and now this is kind of that sub-form. So we can add another piece inside of this form as well. Let's say that we wanted to add social icons underneath. You can do that, okay? You can— let's get rid of this one actually— you could add a blog post if you wanted as well, so people can dive into the different blog posts, or you can have multiple different blog posts and you can choose which post number you want it to be. As you can see, it says measured in posts ago, so the latest post number 1, and it's gonna stay on that. So even when you upload new blog posts, it's always gonna keep the most recent blog posts right up there, or you can do 2 posts ago, okay? But I'm going to delete that block. I'm just gonna keep this inline form. We'll go back, and as you can see, the inline opt-in form, we can put that up here and add that here. The other way that you can do this is you can click on hero. So these are like your main sections of your website, but if you click on hero right here, now we're going to have text, and this is all inside this big block. So, basically, back here in the first section that you can move around, the hero is this whole entire block, and then when we get down here, we're in a new block. But this is where, like, the sub-blocks happen. So, this text block is like a sub-block. So, if we click on hero, we'll add content, and then from here, we can add a form. Okay, so, you see how it's all inside the new, or inside the same block, and we can decide if we want this to be bigger, or smaller or to match the text right here. So you can have some sort of call to action that explains, or not a call to action, but some sort of text that explains what you do and what your business is. And then down below, you can have a form where you click right here. You'll have to create the form. I have different videos on that. But let's say this right here, you wanted to get the name and email to sign up for your email newsletter. Then we can play around with this form as well, and you can say make form inline, so it looks a bit more streamlined like that. This is a great way to capture email subscribers right when they land on your website. It explains what they do with this big text at the top, and then down below it can say pick up my free guide to accomplish this, whatever it is. It's your lead magnet that you have or some sort of free offer, and it entices people to give you their email in exchange for something valuable to them. And then they're on your email list. So what the idea is to build your website around capturing email subscribers. That is the, the best way to do it. Okay, so down here I can get rid of this block because now we've put the inline form up here. And then yeah, we can add section. You can add a ton of different things in here. Image gallery, if you wanted to have a bunch of different images. And with each one of these images you can click on them and decide if somebody clicks on the image on your website where that's going to take them. For example, if it was like an image of your blog, they could click on that, or if these are all different blog posts even, then they could click on each one and it would take them to that different blog post. Okay, so lots of stuff you can do. Testimonials, FAQ if you wanted. I don't really think that makes sense on a website per se, but like pricing options, your offer storefront, and you can have the offers displaying here. Okay, another way to kind of, or you can add a logo list too. So this is like if you've spoken to a lot of different organizations, you can add their logos inside of here. And then we can add that, we'll say, and then we can even put the logo list at the top. So as soon as they land on your website, something captivating, they can pick up a free guide and they're like, I don't know if I want to, and then they see, oh wow, they've actually done a lot of stuff in their business, this seems really cool, and then they can, you know, see you as being a more credible resource just by that logo list. Okay, so you can add an exit popup as well. One thing is if you, if you play with an exit popup, you have to actually enable and then edit exit popup, and then it will show you. But in order to, like, once you edit it, you add an image, you add the form and whatnot, then you have to unclick this. Now what the exit popup does is If you think about when you ever land on a website, you're browsing on it for a minute and then you decide, ah, I think I'm gonna leave this website, you go away and you're going to close the tab or close your browser, then this popup comes up. That's what the exit popup is. So you can do that with your own website. And then I'll just turn it off for now. Then we have a two-step opt-in. So this, if we go edit two-step opt-in, this is usually if somebody clicks on a button will say, then it pops this up instead of moving to a whole new page. So it's just a little bit more streamlined. For example, if they had that, instead of having an opt-in form at the top like we had put, if you just had a button like I originally had it set with, and they click that button, it can come, it can pop this up, and then you can have that form for them to opt in to your email list. Cool? That's where you can add those things. If you want to browse your different website tabs, you click down here, and then you have all these different website tabs. So depending on the theme that you choose, these are going to look and feel a bit different. Uh, but you can access your library, your homepage, member directory, announcements, blog, uh, your thank you page as well. And when you click on these, your 404 page even, this is like if a page is inactive and it goes to a 404 page, uh, you can customize what that looks like and what it feels like as well. Your store where people can buy your products, your about page, contact, all of it is right there, really easy to play around with. Now, another pro tip that took me a while to figure out is if you wanna change the font of your website, we go over here to settings. And from here, you can change up the favicon if you want, uh, style guide, design tools, custom code. I think that depends on the plan that you have is with custom code. I've always been on the growth plan. Okay, and you can change up some things here. But if you do want to change up the font of your website, let's say you, you pick this one, Streamline Home, and you're like, I don't like the font, it seems a little too clunky, I want something a bit different. You go over here to Style Guide, and from here you can change up a lot of different settings like the primary color. We did this in that settings section of your website, but if you scroll down, you're gonna see fonts. And then you can decide which fonts you want to do, what the line height is, the heading height, or the font weight, if you want it to be bold or just normal. I like bold if it's going to be a heading. But we can scroll down here. The one that I use and that I love is Poppins. So if we click on Poppins, it'll just take a second. Actually, I like to do, honestly, Poppins on both. That's what— it's just become my font, I guess. But if you click on it, We'll save it and you can see how the entire font completely changed. But let's say that you wanted to have, you know, maybe pop-ins on the bottom and the heading you wanted to do something more risqué, we'll say. You can do something like this, like Dancing Script, and just look how dramatic the difference is. When I save it, it's gonna pop up and now you can see it looks totally different. It's a pretty cool font depending on your brand. It just has to have the look and feel of your brand that you want it to have, okay? So you can change it up. If you have two different fonts, this is where you do it. And once you have everything set up the way you like, you can get into way more detailed stuff, error message and all that stuff. Don't waste your time on it. I mean, the nice thing about Kajabi is that they do a great job of giving you nice, beautiful templates that you can just run with, okay? You can get more granular with the look and feel of it. And if you're thinking, well, I wanted to make sure that it works on mobile as it does on desktop, that it's really streamlined. Kajabi does that completely for you. Okay, so I wanna hit save again. I've learned to just always hit save so I make sure that nothing crazy happens and my work is actually saved. But if you go down here to the right-hand corner and click on this, you'll see desktop, tablet H, and then tablet V. Okay, and then mobile. So, you're gonna see what your website looks like on these different, these different devices. So, like the logo list, if you're like, oh, actually, I don't really like the way that logo list looks like, you can change that, you can get rid of that. If you're like, this is just like so much scrolling, it's unnecessary. But if you wanna keep the features, you can, and you can just kinda scroll through, change your call to action, etc., etc. And you can see what it looks like on desktop. As well. Now another part of your website design that I'll show you is when you set up your navigation bar, which is everything up here. If you want to add this call to action, we can scroll in. If you just click on the header and just this whole box up here, then it's going to take you over to the header section. You can change the header text color, so all the text inside of the header, and this is where you can add that call to action. So normally the call to action is not there, you would just go click on the header, come in here, and you can change all this up. You can go to add content, and it will give you some social icons at the top if you want to have your Instagram or YouTube channel linked up there. You can do a dropdown menu, which is pretty cool, and then a call to action as well. And you can decide if you want, like, what do you want to have happen when they click on this button up here? You can go to a landing page, you can go to a sales page, a checkout page if you're running some special offer. Download a file, go to a URL that you want to put in, so they can go anywhere, like to your YouTube channel, we'll say, or you can open up a 2-step opt-in pop-up like I showed you before. They click on this button at the very top, and then it pops up that page without taking them to a whole separate website page, okay, or they can go to a section on your page as well. So, I'll just say to just go to a URL and leave it. This is where you would put in that URL. And you can change up all this kind of stuff that you want. We'll hit save to make sure it's saved, and then we'll go back. Oh, and then I'll move it actually. I like to have the logo that I have right here. This is where people log in to your website, so I like to have that at the end and then have the button there, but it's personal preference. You can do whatever you want. So we'll go back. Everything looks pretty awesome, you know, and now we can, we can click here again. This is what the website used to look like, and this is what it looks like now, okay? So, just playing around, you see that the font is completely different than it was down here. This is kind of the basic font that they give you. We didn't even get into a lot of the things that you can do when it comes to designing your website. It's something you do just kind of have to play around with. My biggest tip in terms of websites, just keep it really simple. But if you want to change out the navigation menu of like these different buttons, you would actually need to go back to design. And then in that website tab, we can go down to navigation. When you click here, you're going to have these different navigation menus. You can also change up the footer and what's down in the footer. The member menu, you can adjust all that stuff here. New navigation menu, so you can switch between two different types of navigation menus if you wanna change that. Let's say you, when you're running a special offer, you wanna have some sort of special unique navigation menu, you can change that up. Okay, but if you wanna just keep it baseline, very simple, you can always add, add a product, add a page, add a link, something like that right up here. I like to just have my About Me page, my blog where people can learn more content that I'm putting out, and then a login page for students to land on my website, click that, the login button in my navigation, and then they can log in to their courses and programs that they have invested in. The last thing I'll show you in terms of website design is when you go to the website tab, you go down to pages, you can click here. And this is another way that you can access your different website pages if you want to change up your blog post, your store, how it looks and feels, the member directory, contact page, your thank you page, your 404 page. Okay, this is just another way that you can do it. Remember I showed you inside the actual website builder? At the very bottom of the left column, you could click on that little pop-up menu and you can access all of your website pages as well. Something cool though is that you can actually build landing pages too. So, you can customize a lot of different landing pages. These have many different options for you and then you can link these to your website so they work like website pages. For example, with a podcast, let's say that you're hosting your podcast on Kajabi or not, you can create a separate podcast, like, page really, and then create a navigation button that says podcast or check out my podcast, and then they click on that and it links to this landing page. And from here, you know, people can check out your podcast or they can hit back and go back to your homepage. Okay, so a lot of different options that you have at your disposal to really set your business up for success. Now if you're thinking about trying out Kajabi, I'd highly recommend you check out my link. It is an affiliate link, I just get a small commission for referring people to Kajabi, but there's no extra charge to you. Instead of getting a 14-day trial like you do when you go through Kajabi's website, you get a 30-day free trial from using my link. And on top of that, as soon as you sign up for that trial, you're gonna get access to Kajabi Kickstart, which is a course I created that walks you through how to set up your business for success and for creating passive income and a business that can run on autopilot. That's what the course is designed to do and specifically help you do that in that 30 days. Then you also get a link inside of Kajabi Kickstart where you can book a one-to-one call with me and I'll personally help you set up your business in Kajabi, answer any and all questions you have about the platform. or if you have questions about marketing, sales, whatever it is, I'm here for you at your disposal. As soon as you sign up with my link, you can book a call whenever you're ready. There's a link down in the description. But other than that, I'd love to hear your thoughts about the Kajabi website builder. If you have any questions, let me know down in a comment below, and, uh, I would love to answer it to the best of my ability. If it makes sense, I'll make another video. I hope this was helpful for you in making a decision to see if Kajabi is really right for you. Again, the best way to see if it is is just to dive in and to play with it yourself and see if you like the feel of it. It is an amazing, amazing tool for growing your business. It's the one tool that I use in my business. Thanks for watching. I'll see you in the next one.