Kajabi Tutorial: Building Your Website
James Allen walks through building a website in Kajabi, an all-in-one platform for sites, courses, and email marketing. He covers setting up payments, customizing themes with a drag-and-drop builder, and adding opt-in forms and pop-ups to capture leads. The tutorial includes a 30-day free trial offer.
Chapters
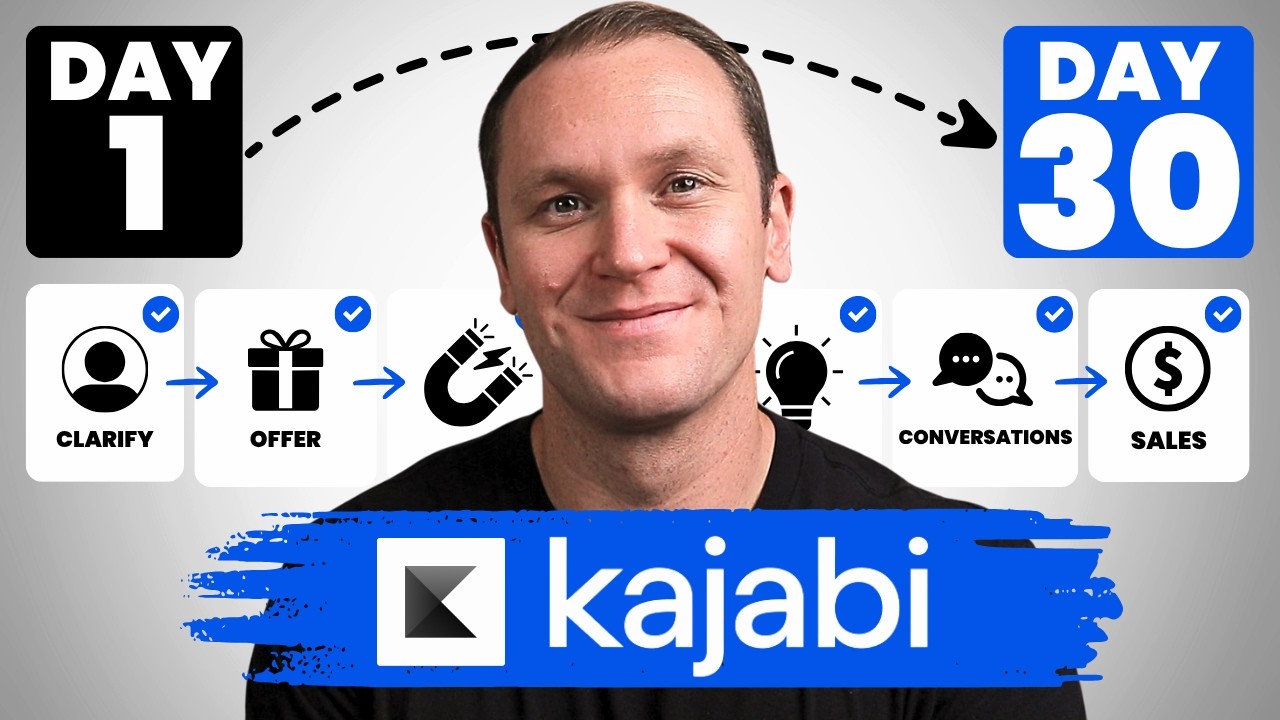
If you're thinking about starting an online business, you should have a website. A website is something super crucial because it's basically your digital business card you can send people to so they can learn about you, what you do, and ideally you can capture that person's email address or information, their name, maybe their phone number, and you can ultimately turn that person into a lead. Today I'm going to show you how to build a website in Kajabi, but not just build a website because a lot of people have websites that don't actually do anything. So I will show you today how to build an effective website. And what I mean by that is one that can actually capture someone's information and is intriguing to the right kind of people that do land on your website. Now, if you're not familiar, Kajabi is a software that allows you to create a website. It allows you to create digital products, online courses, create funnels inside of it, or pipelines as they call them in Kajabi. You can do quizzes, you can do all your email marketing, and it's even a CRM as well where you can store contacts and information of the different people that are on your email list and so on. Basically, it's the all-in-one business tool that makes running an online business super super simple. Now, as we go through this tutorial, if you're thinking that you'd like to try out using Kajabi, I am offering you a 30-day free trial. If you use my link down in the description, not only will you get your 30-day free trial starting the moment you sign up, but I'm also going to throw in my Kajabi Kickstart course. This is a full-blown course that you're going to get instant access to as soon as you sign up. You're going to get an email where you can click the button and just create an account, sign up, and then you'll have access to the course totally free. What this course is going to do is teach you everything that I wish I knew about Kajabi when I first started. I've been using Kajabi for about 2 years, and it does take a while if you just kind of go at it and try and figure this out to really understand the platform and the program. So Kajabi Kickstart is going to help you shorten that learning curve and help you set your online business up in that 30 days so that you have the best head start. I'm going to show you how to set up your business inside of Kajabi, build out your website. I'll show you how to create your first or best mini course, how build and set up a lead magnet for your site, and we'll create a system so that you can make sales on autopilot. And to sweeten the deal, after your 30-day trial using Kajabi Kickstart to set your business up, I'm going to give you a one-on-one 45-minute coaching call with me where we're going to break down everything that you learned inside of the Kajabi Kickstart program. We'll go over your website, your lead magnet, your course, your sales page, all that stuff that I teach you inside the program. So after that 30 days, once you've fallen in love with Kajabi like I have, you can just send me over your receipt through an email, and then we'll set you up to do your call. Now, this is affiliate link, so I do get a small percentage of your monthly investment or your yearly investment depending on how you decide to sign up with Kajabi. But there's no added cost to you, they're just gonna give me a little cut of what you would pay them regardless. It's just a way for you to support me in this channel. So to get your free 30-day trial and the Kajabi Kickstart program, just go to profityourknowledge.com/kajabi, or there's a link in the description as well. Okay, cool.
So this is the Kajabi dashboard. This is essentially home base. Right now I'm in the partners tab, so this isn't my official website. Obviously you can't really see anything here. This is just a little like preview of what your website will look like. I feel like this will give you a better idea of how to actually build it from scratch, because when you first start out, this is what you're gonna see using Kajabi. Now before we start actually building out the website and getting all carried away with that, what we want to do is actually go down here to the settings tab. Inside the Settings tab, you're gonna have a ton of different settings in here, and this is always what I recommend to people to do first and foremost is go through here, make sure you got like payments, you know, any third-party integrations, you know, payment integrations, those kind of things. This is like home base for all that kind of stuff. Site Details is like basically gonna help with SEO settings for your website, so that's what we're talking about today. So when— if you jump in here and you start using Kajabi, go here first to Site Details, make sure you add your logo logo and all that kind of stuff. Okay, and it walks you through the process. And then the domain as well. So if we actually click on domain, it'll bring you over to this little section. And here you can set up a custom domain. So maybe you already have a website and you're using like GoDaddy or WordPress or something like that. If you already bought that domain name, this is where you would go. And anytime you're using Kajabi, just click on the help button. When you click down here, you can contact support. They have live webinars that they do, and you can get more with Kajabi access, live chat. I probably use the live chat and the help center more than anything. So yeah, if you just click on this, you can just type in any questions you have, like domain setup or custom domain, and it'll bring you up a little video. They'll explain all this to you. So super great help center, gotta love that about Kajabi. These are all the different tabs that we have inside of Kajabi. We're obviously just for the purpose of today focusing on the website tab. So once you've already gotten everything set up, you got your logo set up and all that SEO and everything, you have your domain hooked up. So when people type in, you know, mysweetwebsite.com or whatever your domain is, then they're gonna go to your Kajabi website. So it's good to get that stuff kind of set up. If you already have a full-blown website, that's already up, maybe it'd be best to build out your website first and then go down there and then hook up your domain because you don't want people to type in your domain name and then have you just be, you know, building out a website when they land on it so they get sent to like a 404 page or stuff like that. Alright, but this is the website builder. Kajabi makes it super easy to build a website. Like, there's no coding. I mean, you can do coding if you want, but why? You know, I'm not a coding expert by any means. When you click on the website tab, and just like all these other tabs, there's subcategories as well. So we can click on like navigation right here. When you go under navigation, if you don't know, that's what at the top of the website where it shows like the logo, about me page, blog, login. You can actually customize that in Kajabi so your website just always has these kind of pages that people can connect to. So I like to keep mine super simple. I just have an about me page. I have my blog where I upload my weekly content that I put onto like YouTube and a podcast and stuff like that. And then a login is super important. But I also have a coaching tab where people can click on it and they could check out like courses or book a time to work with me, stuff like that. And down here you can also change out the footer as well. So we click Add, you can add different products, add a page, add a link, all that kind of stuff. And essentially it just makes this down here. Okay, so that's gonna be super important depending on your website and what you want to do. When you click here, if you say like add page, you can get— you can name the page whatever you want. You can call it like about or about us, about me. And then you can scroll down, you can add these different options that come with the website theme that you decided to go with. So you can do home, but if they just click your logo, it'll automatically go to the home page. Store, And then yeah, there's stuff like actual landing pages down there. Okay, so you want to get this set up, the navigation menu. And then if we go over to Design, it'll bring you over here to this page, which like I said before, this will give you a little preview of what your website looks like. And then you can always click these buttons and kind of check out what the different pages of your website look like as well. Okay, so when you build out your website, they give you a handful of different themes. And you can also change your site details right here for like SEO and stuff like that. Again, they just walk you through every little piece of that and what you can and, you know, should add for SEO purposes. They initially give you the Premier site, which I think is cool. I think it's perfectly fine. If you did want to change out your themes, you just scroll down, there's saved themes which you can add down here. You can upload a theme if you purchase different themes from a third-party site. But they have tons of great themes, and if you click on Browse Themes, you can change it up however you want. So here, these are all included with your Kajabi subscription that you choose. You can see the different feel. Some have a bigger hero image, which is this, this big image that you see right here. This one's not as big. That one's positioned a bit different, and it shows pictures. So Serenity, there's Kim, Rise, Carl, and Another thing to look at is like looking at the font because it'll give you a bit of a different font inside. You can kind of preview that as well. But yeah, you can scroll down. Streamlined Home, I think, is a great one, or just the one that automatically gives you Reach. And yeah, essentially they all can do basically the same thing, they just have a bit of a different feel. So yeah, you just go through and pick a theme that you feel matches what the feel of your website is or what you want it to be. And what's cool too is that you can change like the color, so that can be a green button if you wanted. This can be yellow or red or whatever color you want. You can do that with all these different themes. And then if you click— go down here to Kajabi Legacy Themes, these are just older themes because Kajabi's been around for quite a while now, but they kept them around, which I think is cool. So you can still go down and decide if you want to choose these. Again, check out the font. So this is more of like a thin kind of font, which is pretty, pretty classy, a little like modern style. A bit of a thicker font, thicker font. So if you see something that's similar to your font that maybe you use already, you can go in there and click on that one as well. All right, but for now, let's just choose the Streamlined Home. When— yeah, when you go here, you can see a better look of what it actually looks like when you actually click on it. And this doesn't automatically make it so that that's the one you're gonna go with. It just kind of gives you a little description of what the page is about or the theme, and you can go add to saved themes. Okay, so once you've picked your theme, then what we want to do is just go over here to customize page, or up in the top right you can see preview if you want to look at what the page looks like right now. Obviously mine is not built in any way, or you can hit customize and go to the same page as right here. And this is your website builder, so As you can see over here, you can change up the settings or the different sections of what the page looks like. We'll just focus on that right now. So you go over here to add section. Now to get that big beautiful image at the top, which I think is pretty cool, it's called a hero image. You just go right here to hero, and any of these that you click on, it's going to give you a little preview. Does not mean that it's added yet. You have to click add, or you can go here to heading. Facebook comments, call to action. You can do custom content as well. There's also features, image gallery, a logo list. If you— this is great if you have like events that you've spoken at or different companies that you've worked with. You can drop all their logos right here, so it's super easy. You can do a link list, offers, opt-in form, opt-in bar, So this is great too. At the top, right when they land on your website, you can capture an email address like that. Pricing options showcase if you're showcasing some sort of product that you have. Okay, but you get the idea. You just kind of go through and you can preview what all of these look like for you. You can add spacers as well. To keep things simple, we're just going to stick with the hero image. So we're going to add that. Say yes, we want to have that. And then in here, this is inside of what the actual hero section is. So you click on that, you can go up here and you can call it like My Sweet Websites, okay? And it'll change it up. You could change the text down here as well. You can even hit the top and then you have a couple different options right here. You can do undo, you can embed different things if you want to add your own kind of code right there. Which is pretty cool. This is always good for like adding a YouTube video or something like that. What I like to do, kind of keep it classy, is do this horizontal line. Okay, sometimes if you can't really see it, you can barely see that line right there. But yeah, you can do a ton of stuff. You do bullet points, numbered list, and if you ever want to, I usually like to click on the expand button, but this allows me to just kind of like see what's going on or what I'm doing a bit better. And I find this a lot more useful when I'm writing things out instead of having this tiny little screen, unless it's something minor. As you scroll down on this hero image, you can choose a background video if you want, where, you know, you have maybe, let's say, a video of you doing some speaking in the background. You can have that there. You can use an image overlay, which is just the, uh, that what made that a black image. So now it's white text upon a white background, but you can uncover that You can use your image, and this is where you can actually add said image or that background video. Now if you added a video then, and you had this set on image, it would only show the, the image right here. So you have to actually upload your video right here and then say background video, and that's what would give you the video effect in the back. Okay, what's cool is you can change the background color. You can make it green, You know, or just keep it how it was before. When you go down, you can choose the alignment if you want it to be off to the side, to the right. I always say just do it off to the left or in the center because people typically read left to right. Spacing is the overall size of this section, so we can do like extra small and it'll drop it down significantly. And you can do this in every single theme that you choose, or you can also choose a call to action. You can even add another call to action. And if you wanted to get rid of that call to action, you just click on these 3 little dots right here, and you can rename it whatever you want. You can duplicate it, so if you want to add a second one right there. Uh, but if we want to go down here, hiding is cool because if you hide, you won't see it on your actual website, but it'll still be here. And then show, or you can delete it as well. And then if you wanted to delete the whole entire section, you would just hit delete this section. Go back. Now something I recommend when you build out your homepage is to really streamline that first page when people land on your website by having something like this with a cool image in the background. It could be a picture of you or it could represent what you do if you're a fitness instructor, for example. It could be you working with a client or someone just being in really great shape. And then transforming this opening line with the call to action to download some sort of free thing. So that's your lead magnet. And I have many different videos on my channel about lead magnets, building them, good ideas for lead magnets, and so on. This could be something as simple as like a 5-step guide, or just a quick— if it was like a nutrition coach, then it could be like how to go shopping properly. And it could just be like a quick guide on tips so that next time they go shopping, they have a little checklist of Good quality foods, you know, and you could just have that, but when they click on this, they go to actually download the guide. They end up going to a page where they have to put in their email address so that you can capture leads with your website and actually have an effective website. Okay, so what you can do is like have your image, have this would be some copy that would say to download my guide, and then underneath you could do something like you do something like features. You click on that, and again, you can change— yes, we want to add that. You click here, and then what you can do is you can change a heading. So you can say like, you will learn— okay, the whole thing is built around whatever that guide is. Like, here's what you're going to learn inside this guide. Okay, so the whole entire first page of the website is like, basically, pick up this awesome guide because it's going to help you with your you know, X result, whatever it is. And I like to keep things tight, so do the extra small. The hero image I will make big because I want to really catch the eye. Maybe make it medium. Okay, and then like this page, you can— yeah, just keep it right here and just have like a benefit, a benefit, a benefit. And if you want a good example of that, you can always just check out my website at profityourknowledge.com. But yeah, we go over here, add a section. And then you can do like a text and image. You can have a picture of, of you or of your guide or whatever. And what's cool too is like, let's say we wanted to add that to kind of like break it up a bit more instead of it all just being white, is that you can keep that white, you can click here and you can go over to the background color override. And what I usually like to do is switch between the white blue, which is like the color that I love. That's my main color for my website. Or I like this one right here, which is like a little— it's like a faint white or like an off-white. Okay, but you can see that that gives you some good separation between the different features that you have or the different sections. Okay, so it's super easy. I mean, building a website here is literally drag and drop. And yeah, if this— you didn't want to have a call to action, you could always just scroll down and Delete that. And yeah, another thing that we could add here is like a— where's that— opt-in form bar. Yeah, you can click on that. We'll add that. And then right here, we'll click on this. You can have— when people fill out this opt-in form, if you have it on your website, could be at the top or somewhere in your page, the bottom as well. As soon as they sign up, you can click here and have them go to download a file, go to a checkout page, or go to a sales page, to a landing page. So let's say that this was to, um, the, the point of this guide or this free thing you were offering was like a free mini course where it was just a couple modules. You could have them to where as soon as they put in their email information, they go to a checkout page that you have that is a free signup. You know, you can make a checkout page, it's totally free, they don't have to pay anything, but they do have to create an account with like a password and their name and all that stuff. So they could give you all that information and then they can get access to their little mini course that you have. And then down here you can click show image or not, and boom. Now if you do an opt-in like this, you will have to create a form that you can connect to this, and that's what's actually going to give you the name, email, or just email, or name, email, phone number, whatever you want to add to it as well. And if you ever at any point want to just kind of preview this real quick, you can either click this little arrow which is going to open it and you'll still be in that edit mode. Oh, it added a video. It's pretty cool. Click here, or you can always click this button, which will preview and open up in a new tab where you can actually see your website as if you were a visitor. Something else that's really cool about building a website in Kajabi is that they're super smart. Like, Kajabi is awesome, and you can always send in requests for different things or different features that you want to add to, uh, Kajabi, or that you would love to see inside of Kajabi as well. But if you go down here, you can click on this button and you can preview this in desktop or in mobile as well, which is pretty legit because so many people are using smartphones to just do everything with. Some people don't even have computers, you know, so it's not always about building it on desktop. What's cool is that Kajabi, with all these themes and everything, just keeping it as is, is that they automatically make them very mobile-friendly. But this is nice because it'll show you what it kind of looks like. And then yeah, you can click up here and that'll show your navigation. Do you have at the top, you can scroll down, you can see all this awesome stuff. Okay. Desktop brings it right back over. And then yeah, they can have this type of experience as well. So as you can see, I did nothing really to make it fit mobile. That's all done on Kajabi automatically. So they make it super easy. Now another thing inside of Kajabi, when you're building out this website is if you want to, this is obviously just the homepage, but a website will have different pages. Maybe it's to book you as a speaker, or, you know, your About Me page, or your blog, or login, stuff like that. And to access those different pages from within this theme, you just go down here to this button, click where it says Home, and you can see all the different pages that automatically come with your website. So it's like a library, a blog, blog posts, which are different from each other. The blog is just the overall look of the blog. The blog post is is, like I said, gonna be a bit different. It's where they can actually read it when they click on, uh, the blog basically gives them like previews. When they click on the blog they want to read or watch, then it goes to the blog post. So you will have to go through and kind of edit those two as well to your needs. There's blog search. You can create a single thank you page that you always send people to no matter what they download. If you have multiple different lead magnets, they can always go back to this thank you page. You can create what your login looks like if it has some crazy picture. I like to just do a white background, do my logo at the top, and then they have to put in their username and password and hit a big login button, and then they can go over to their library. Okay, but you can also add a store, a 404 page, which is like if one of your pages for some reason isn't working or it's under construction, then they'll be sent to a 404 page where it can just have a button that says go back to home. And then your About Me page. So you can change all of this and kind of navigate really easy inside of your entire website. And when you use Kajabi, you will want to go through each one of these and just customize them. But essentially they are all like this, they're all just drag and drop, super straightforward. You pretty much just walk through the prompts of what you want the background to look like, if you want to have a video in there, if you want to have an image, what you want the text to be like, and so on. Now one other thing that you might want to consider inside your website is having an exit popup or a two-step opt-in. So for example, if people clicked on this button, which was to download your guide or watch your workshop or something like that, it would pop up a little screen where they could put in their email address. So I'll show you, if you click on that, this is a little example that I use from one of my guides, but if you click show popup, it'll show you what it looks like. So you can change this image to whatever you want. Okay, I just took it straight from the image of my guide. You can add a progress bar or take it away. And again, you just scroll down. I do have a little freebie form that I made just for an example. So that's your email, they just put in their email, download the guide. So as soon as they click that button, it's gonna pop this screen up and say, hey, you're 50% complete. Obviously this text wouldn't say 2-step, it would say like, you're almost there, claim your free guide, whatever it is, and then just a little like benefit-driven description of what they're gonna get. Okay, but you can change it to where it's gonna send them once they fill that out, download the guide, what you want the button to say, etc., etc. You can change the color. Go down here, if you click on progress bar, you can change what you want the percentage to be. So you can switch it to like 75, we'll say. They're like, they're almost there, you're 75% complete. I usually just keep it on 50.
50.
And yeah, you can change what you want this to look like. If it says 50% done, if you could change that if you wanted to. And you can also change the colors here, what the bar color is or the background color for the bar. Okay, so you can get pretty fancy with it. One other thing is when you are actually editing this 2-step pop-up, you can click Show Pop-up or Not Show the Pop-up. And if if you left this section and tried to play with the rest of your website, but you left it on like this, it actually wouldn't go down. Okay, so if you click Show Popup and uncheck it, then it'll permanently get rid of it. And you can edit it right here, and vice versa, you know, it's, it's not gonna— you're not gonna be able to see even if like you change this image, we'll say, unless this is on, you won't be able to see what it actually looks like. So just kind of an insider tip right there. The other thing is the Exit Popup. So what this is, is essentially you can choose the frequency of days that this comes up. You can choose like 0, you can choose 1,000. Basically when people show up and they look at your website and they're kind of perusing, they're saying, wow, this is super cool, but I don't really feel like signing up for anything. I'm think I'm gonna head out. As soon as they start to trail their cursor away, it's gonna pop up essentially that 2-step pop-up that we just showed, but the exit pop-up will be a little different. So like right here, edit the popup, and you can actually add the image. So you'd have to go through here and make it look similar or just exactly the same as that two-step popup, but they're both different, okay? And they work just a little bit different. Alright, so the two-step popup, just again, is if they click a button, it's gonna pop that two-step popup up. It's a lot of popping. The exit popup will be if they're trailing away, they're about to leave the site, then it pops it up automatically.
Kajabi is so much more than just a website builder. You could build pipelines, you can do email marketing, email marketing, you can use automations, you can create courses, high-ticket or low-ticket courses, you can host your podcast, you can do coaching inside of Kajabi as well. If you want to dive into all those features, just check out this video right here where I do a complete overview of Kajabi. Don't forget to pick up your free 30-day trial along with the Kajabi Kickstart program so you can start building your online business today.
I'll see you in the next one.