
Build your first Ai Agent on n8n (no code)
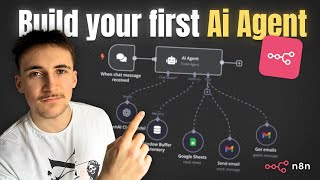
Rory Ridgers builds a working AI email agent on n8n without code. He connects GPT-4o Mini to Gmail and Google Sheets, then shows the agent sending emails by name, retrieving inbox messages, and expanding email bodies based on natural language commands.
Chapters
What's up guys, in this video I'm going to be teaching you how you can make your very first AI agent on NAN. If you haven't heard of NAN before, it's a platform to make AI agents, and if you've used Make.com before, it's very similar to that except it has a couple more features. But one of the main things is that it has an AI agent feature, so you can actually create AI agents rather than just automations. If you haven't seen me before, my name is Rory Ridgers and I help business owners to integrate AI agent systems into their businesses. So if that's something you might be interested in, then I've left a link to my website in the description. You you can go ahead and book in a call or just fill out the contact form and I'll get back to you. Also, I just want to mention that if you want to get started with these agents straight away, you can download the template of my platform Commonus. And if you haven't heard of Commonus before, what it is basically, it's a platform that I made to make sharing AI agent templates and AI tool templates much, much simpler. So if you want to check that out, I'll leave the link to it in the description. You can download this exact template and you can just browse the rest of the templates on the platform. But let's not waste any more time, let's get into the video and I can show you how it all works. All right guys, so first of all, what actually are AI agents? If you don't know, This is how I like to sort of visualize them and how I like to explain them. Basically, AI agents are like AI employees. They can work autonomously and they can carry out specific tasks. So if you look here, this is kind of an anatomy of an AI agent. So you have an input or a trigger which goes along to the AI agent, which has a brain, which is obviously an LLM. It acts as the brain in this case. Then the AI agent or that brain, it has different tools to be able to fulfill a specific request. And then it has an output. So for an example, an input might be you saying to the agent, I want to send an email to this person. It goes over to the agent, it uses its brain to figure out what tools it needs to use to be able to fulfill that. Then it'll use the send email tool, for example, send that email, and then it might output back to us just saying, hey, I've sent that email to da da da, is there anything else I can help you with? So this is kind of the basic anatomy of how an AI agent works. So the main difference between an AI agent and a simple automation on something like Make.com is that an AI agent is able to actually think. I say think like that because it's not actually thinking, it's just an LLM making informed decisions based on your prompt. So with a Make.com scenario, there's going to be set paths based on an input. So an input could be a trigger from anything, or it could be you typing to it, for instance. And then the Make.com scenario will take that a set way depending on sort of hardcoded things. But with an AI agent, you can just input something and based on the prompt, it'll be able to use its tools and use what it knows to be able to complete that task and output something back to you. So that is the basics of an AI agent and what makes it different to a simple automation. Now we're going to get into an actual real agent, and I'm going to teach you how to make your very first one. So we're over in NAN now, and this is an example of a very simple email agent. Basically what we're looking at here is that there is an input, like in our anatomy that I just showed you, there is an input which is just a chat message. So if we go open chat, this is how we can chat with the agent here. And then we have the actual agent here, and connected to the agent is going to be an OpenAI chat model. In this case, it's GPT-4 Mini, and this is what is acting as our brain. So this is our LLM that's powering the whole scenario. We then have a memory node, and this is kind of optional. This basically just means that when you're talking to the agent, it'll remember the last sort of 5 messages that you've sent to it. Just means you can sort of talk to it a little bit more naturally. It's not something that you need, but it's just nice to have, and it's really, really simple to set up. And then we have the tools here. So the tools in this case are going to be reading a Google Sheet, sending an email and getting emails. And now these two tools, quite self-explanatory. We can either send emails or get emails. The Google Sheet tool, what that is basically, I can show you it. So this is the Google Sheet. It's really, really simple. Basically it's just working as sort of a database with names and email addresses. And all of these are just fake names and email addresses apart from mine at the top. This is my real name and my real email. And we use this in the AI Agent build. So basically when we want to send an email to someone, we can have the agent first look at that Google Sheet, find the name, and then find the email that matches up, and then input that into the send email tool. So this means that we can send emails to people just by saying their name rather than their email. So if you have people that you're frequently sending emails to, you can just add them to this Google Sheet, put their name and then their email address, and then when you're messaging the agent, you can just say, hey, send an email to Dave rather than dave@gmail.com, for example. You just say, hey, send an email to Dave, and it'll be able to look at the Google Sheet, find Dave, and say, okay, this is Dave's email address. And then input that into the Send Email tool. It just means you can talk to it a little bit more naturally, and it just makes things a bit easier. So what we're going to do is, now that you've seen it and you've seen the sort of finished product, we're going to rebuild this from scratch step by step so you can see exactly how it works. Okay, so we have a blank slate here on NAN, and to begin with, we have to set up a trigger, which in this case is going to be a chat message. So all we do is click Add First Step, go down to On Chat Message. Don't have to worry about that for the minute, but But basically what this means is we can just have a chat message inside of NAN. If you look, we can type to the agent. Obviously the agent isn't there yet, but we'll be able to type to the agent and just talk to it through NAN. If you want to talk to this externally as well, not just through NAN, what you do, double-click on this and you can click Make Chat Publicly Available, and then you'll get a chat URL here, which if we copy that, open that in a new window, that will give us a chat interface where we can talk to the agent. But for now, if it doesn't really matter. We're just going to be using this through NAN, so I'm just going to turn that off. Next thing we need to do is add another step, and of course we need our AI agent. So we go to AI agent here. Don't have to worry about all this for a second. What we need to do first is we need to link up a chat model, which is going to act as our brain. So let's click Add Chat Model. We're going to use OpenAI, and in this case we're using GPT-4o Mini. And now you'll need to set up your OpenAI credentials if you haven't done this before, and all you do is click Create New Credentials, and then I'll show you how to get an API key. So you're just going come over to the OpenAI platform. This is really, really easy. You can just type it up, create an account. It's free to create an account. You will have to link a credit card or a debit card to be able to use it because you're going to get billed directly through OpenAI. Don't worry, the models that we're using are going to be really, really cheap, but you do have to connect a card to be able to use it. All you do is come over to dashboard, go over to API keys, and just click create new secret key. Hit that, give it a name, click create secret key, and then it will pop up with an API key and you have to copy it because if you close down the window or click off it you won't be able to see the API key again. So it'll pop up with an API key, you just copy that, come back over to Nan, and then there'll be a little input box to put in an API key, and you just put that in, and then they're paired. Really, really simple. That's how you connect your sort of brain or your LLM model to your AI agent. And then this is the sort of optional step, we can do a memory. We just click on memory, and then Nan has a built-in buffer here, so we can just click on that. In the context window, we've just set to 5, this is just the default, This just means it's going to remember the last 5 messages. So this just means if you say something to it like, hey, send an email to this person saying this, and then it sends it, you can say, actually no, send that to this person, and it will remember sort of the content of your email from your last message. It just makes it a little bit easier. It's really, really simple to set up. That's all you have to do is just put the note down like that. So it's probably worth doing, but it's not too important. So now the next things we need to do is we need to add these tools, and the tools that we're using in this agent are pre-built in NAN. Which is really, really nice. It means you don't have to go into new workflows and build new tools and trigger it from the agent. They're just built into NAN, which makes it easier for us. So what we're gonna do is we're gonna use the first tool, which is gonna be Google Sheets. We just type up Google Sheets, hit the Google Sheets tool. Now again, you will need to set up your credentials on here, and if you dunno how to do that, I'll show you quickly. So what you need to do is you'll need to come over to the Google Cloud Console, create a new project. If you haven't done that, you just click up here, click new project. Create a new project, just call it something like NAN, and then you're going to come over to APIs and Services, go to Credentials. You'll need to set up some new credentials. I've already done this obviously, but you need to set up some new credentials. It's really easy to do, they'll just ask you some questions and then you can just type into it. It's really, really simple to set up. Set up your credentials here, then you'll get a client ID and then also a client secret. I'm not going to show you mine, but you'll get a client ID and a client secret. And if you come back over to NAN, actually I'll show you what it looks like. We hit create new credential, you get a client ID, client secret. When you create those new credentials on Google Cloud Console, you just put them into here, and then there'll be a button that pops up saying sign in with Google. And before you do that, what you have to do is you come over to the Cloud Console, and then in this case we want to set up the Google Sheets API. So we go to Google Sheets API, you can just type this up in the search bar, click on this first one. And then in this case, mine's already activated, but there'll be a little button here that says Activate. You want to activate that first before you set up the credential in NAN. So you'll put in your client ID, your client secret, then before you click the Sign In with Google button, make sure that this is activated or enabled. And then you can sign in with Google, sign into the account that you've used the Cloud Console on, and then it will just pair the two. And then anytime you want to set up any other form of Google credentials for like Google Drive, Google Docs, anything like that, you can just go back into your credentials on the Google Cloud. So you can go to credentials, click on this, you can just use the same client ID and the client secret, put it in here, but you have to activate the API for whatever you're using. So Gmail or Drive, you just have to quickly activate that API. And then once you activate it, it stays active, so you don't have to worry about it. But yeah, that's how you do it. It kind of seems quite daunting, the Google Cloud Console, but trust me, it's not when you're on there to just do one thing and not getting distracted by everything else. It's quite simple. So anyway, we set up our credentials on here. Obviously I've already done this. We set the tool description to set automatically. The resource is going to be a sheet within the document. The operation is get rows because we want to get the rows from that Google Sheet. The document, we're just going to choose ours in this case. So it is— so for me it's Names with Emails, and then the sheet is just Sheet 1. So we just link that up and then that's all we need to do with this because it's just going to return all that data from the Google Sheet, and then our AI agent, the LLM, it's going to sort through that and find the right email that links up with the name. So that's all we need to do for that. Make sure to rename this to something that we know we can use in the prompt in the AI agent. So something like— I've just done names of emails, just so we sort of know when we're prompting our agent what tool does what. So that's names of emails. And then we're going to use a Gmail step here to be able to send emails. So Again, we've set up our Gmail account. I showed you how to do that. It's the exact same process with Sheets or Gmail or Drive or Docs or even YouTube, exact same thing. So we set up our Gmail account. Tool description is set automatically. The resource is going to be message because we want to send messages. The operation is send again because we want to send messages. These are all the different things we can do. So we can delete, get, get many, mark as read, mark as unread, remove label, or reply. This case we're going to be sending it. And then what we do— this is a feature that I believe is new on NAN, but it makes it really, really easy if you're just starting out building these agents. What you can do is these are the inputs here that we need for the tool, so the to email, the subject, and then the message. What we're going to do is we're going to click this button here, so let the model define this parameter for all of them. And then basically what this means is that the agent is going to know exactly what to put into these inputs, so we're not manually putting things into these inputs. We're just letting the model decide what to put into these inputs, and then we define in the agent's prompts what goes in these inputs. So for example, the agent's prompts will be something like, for the subject line, put in the subject line that the user has prompted you with, and then the agent will just know when it uses this tool to put that into the subject line input. So it makes it really, really easy doing that, letting the model decide. It's way easier than manually inputting things into the input. So Anyway, the email type, you can do HTML. I'm going to switch it to text just because it's much simpler. And then one of the things I like to do when I'm sending emails through NAN is if we go to options here, append NAN attribution, and then we just switch this off. Because basically what this does is at the bottom of your emails it'll just say sent by NAN. And I mean, we don't really need that. You can keep that on if you want, but it's just not really necessary at all. And if you're actually using this for clients or whatever it is, you just don't really want that at the bottom. So we get rid of that, and then we're going to put one more tool down here. So we just hit the plus again, go to Gmail. This time we're going to be getting emails. So what we do is we change the operation from send to get many, and then we can change how many emails we want it to return. So the default is 50, so this will just mean it will return the last 50 emails out of your inbox. Really, really simple. We're going to change this to 30 just because the more emails you do, the longer it's going to take. Obviously you can do more. I just think for this demo, 30 is sort of a nice example. So we're gonna change that to 30. Simplify, you can switch this on if you like. It doesn't really matter. It just kind of simplifies the emails down a little bit, so it's just a little bit easier for our AI agent to process 'em. And then again, this is all we do for this tool because there's no actual input. It just needs to be able to trigger it. And when this tool's triggered, it'll just return the last 30 emails from our inbox. So that there is the 3 tools we can arrange these to make these look a little bit nicer. These are the 3 tools here. So Names of Emails tool, the Gmail tool, the Gmail— we actually need to change the names of these tools, I haven't realized. So we can go Send Email, let's call that one Send Email, and then let's call the other one Get Emails. So this just makes it again a little bit easier when we're prompting our AI agent on which tools to use and how to use them. It just makes it a little bit easier. So Yeah, this is the basic anatomy of an agent. This is what a basic agent looks like. We have our input here, we have the brain for our AI agent, we have a memory buffer for the agent, which obviously is optional, but I've done it just because it's a nice little touch. And then we have the 3 tools here. So our names of emails, Google Sheets, our send email Gmail tool, and then our get email tools. And now the last thing we need to do, where all the magic happens, is prompting the agent. Because as it is like this, the AI agent isn't going to know what to do because it doesn't know what its task is. It doesn't know why we've created it, what it's doing, and also it doesn't know what tools it has, doesn't know how to input anything into these tools. So we need to prompt it to tell it what to do and how to do it, basically. So on NAN, we've got some different types of agents here. We're just going to be doing this as a tool agent, and most of the time they're going to be tool agents. And this basically just means an agent that has tools attached to it, which in this case it does. A majority of agents do. Sometimes you might have a conversational agent, but majority of the time it's going to be a tools agent. So just leave it on tools agents. The source for the prompt is going to be the connected chat trigger node. This basically just means anything that comes in through that chat trigger that we've got set up is going to be used as the prompt. And you can see it's saved here as json.chat_input. And this is the user message. With AI agents and prompting in general, you have two different types of prompts. You have a user prompt and you have a system prompt. There are a couple other types of prompts, but the main ones you need to worry about are user prompt and system prompt. And the user prompt is going to be what is inputted to it. So when you say— when you're typing out to the agent, I want to send an email to Dave saying hey, then the user prompt is I want to send an email to Dave saying hey. Then we also have a system message, and the system message is basically telling the agent what to do, how it does it, all the different tools it has, how to input things into the tool. So kind of like the brain, the bit that you don't really see, that is the system message, and that is how the AI agent is actually going to work. So for this case, the user message or the user prompt is just going to be the input from that chat node before. And then what we do is we add option, hit system message, and then this is going to be the sort of instructions that the agent has whenever it gets an input coming through. It looks at these instructions to sort of know what it's meant to do and then does it based on what's in here. So obviously I already have a prompt from the last agent, so I've just pasted that in here, but we can have a read through this together, sort of break down what's going on and how I prompt these agents. First of all, we have a role at the top, and this is kind of saying what the agent does, how it does it, just a brief overview of why we've made it and what it does pretty much. So for the role, I've just said you are able to send and retrieve emails for me and also search a database with emails. So really, really simple because this is a simple agent. The prompt isn't massive and the role section especially is pretty small because there's not much to it. It's just able to send and retrieve emails and also search a database with email addresses. The task part here is kind of the bulk of the prompt and it's going to be like that with most of your prompts for your agents. So what I've said in the task is you will be inputted by a user to either send or retrieve emails. You have 3 tools to be able to achieve this, and I will break them down now. So just saying how it's going to be inputted and what it's actually doing when it's inputted. What we put after this is just, like I said, a breakdown of the tools. So we have the different tools here, and I follow the same structure when I'm giving these descriptions for the tools. What we say— we can read through this first one, I can sort of show you what I mean. So email list. This tool contains a list with name and email. So I start off by saying what this tool does to give it some context. Each name has an email attached to it, and you will use this tool when a user specifies someone they want to send an email to and need to find their email address. Then I say when it should use this tool. For example, a user might say send an email to Dave saying what's up. You would use this tool and find Dave's email, then pass it to the send email tool. So I sort of further say when it should use it. You don't always need to do this. Add in an example of an input but I just felt like it was necessary with this to add an example of what an input might look like. So, send an email to Dave saying what's up. If you get an input like that, you would use this tool to find Dave's email, and then you would pass that on to the send email tool. And then again, following the same structure with the send email tool, this tool can send emails for the user. So saying what it does, the inputs will be the recipient, subject line, and email body. This time we're listing the inputs for the agent because this one didn't have any inputs. It just triggers and gives us an output. But this one actually has input. So you'd put the input. So the inputs will be recipient, subject line, email body, and then you'll say what to put in these inputs. User will always provide an email body. If they don't provide a subject line, then generate one of those based on the email body. Also expand on the email body a bit if needed. This bit is optional, but I just want it so that if you say, to example, send an email to Lisa saying, are you still up for that meeting? Hey Lisa, just wanted to check in and see if you're still up for that meeting. Regards. And then your name. So just kind of expands on it a little bit, and it means when you're talking to the agent, you don't actually have to type out the whole content of the email, because I mean, the whole point of these agents is they make your life easier and you do things quicker. So you can just sort of put a summary of what you want in the email, and then the agent can expand on it a bit. I feel like that's a nice little touch. You don't have to do that. The email recipient will either be specified to you in the user's input or will be found using the email list tool. So what we said here, a user's input for this would look something like, send an email to Lisa saying, are you still up for that meeting? So again, I've said what an input might look like. I've told it the different inputs for this tool, and then I've also told it how to input these things into the inputs for the tool. And then again, get emails. I'm not gonna read this out because it's pretty much the same as the other two. You can pause the video and read this, or of course you can just get the free template from commonus.com and the prompt will be pre-filled so you can just read it from there. But just following the exact same structure, saying what the tool does, what the inputs are. I don't think there are any inputs for this tool, so I haven't mentioned that, but I've told it when to use it and then what an example of an input might be. When to use this tool. So now we can actually use this agent so you can see how it works. So we're going to kick it off straight away. By the way, to open that chat, you just hit Open Chat at the bottom because we have this chat message node here. So we're going to say something to it like, hey, can you send an email? I've said, hey, can you send an email to Rory asking if he's free tomorrow at 4 PM? The reason that I'm sending this email to myself is because on that Google Sheets, the only email that's valid is mine, so I can only use me as an example. So We're sending an email to Rory asking if he is free tomorrow at 4. You can see here what's actually going on. So it's first used the buffer memory, then it's used the OpenChat model to look at the system message, and then it's used the NamesWithEmails tool to retrieve— you can see my email here, but this is all the emails. So it's had to use the OpenAI chat model again to go through those emails, find my email address, then it's sent that email off, and then it is outputted back to us. I've sent an email to Rory asking if he is free tomorrow at 4 PM. And then again, it saved it in the memory. So then if we look into my inbox, this is what I got sent. Hi Rory, I hope this message finds you well. Wanted to check in and see if you're available at 4 PM for a quick meeting. Please let me know if this works for you. Look forward to hearing from you soon. Best regards. You can see what I mean, where it expands on it a little bit. It's a little bit nicer. If we just got an email through saying, are you free tomorrow at 4 PM? It's not as nice as getting an email through that's like this, expands on a little bit. So now we're going to try and get some emails from my inbox. And what you can do basically is you can give it a specific criteria to look for from your email. So you can say something like, has Lisa emailed me about that project? And then it'll look through all your emails, see if there's anything about Lisa mentioning the project in your emails. Or you can say something like, how many times has this person emailed me? And it'll go through your emails and tell you that. Or you can pretty much just ask it anything about your inbox. So I got this random promotional email from Typeform the other day, so we're going to say to it is something like, has Typeform emailed me recently? And obviously I'm simulating something like a colleague or a client emailing you and asking the agent if they've emailed you recently. But obviously I'm doing it with just a promotional email just because it was what was in my inbox. So we can see the window buffer memory has been triggered, then the OpenAI chat model has been triggered, and it knew to use the get emails tool. So it's got the emails and it said back to us, yes, Typeform has emailed you recently, here are the details. And then just basically what was in that email. So the snippet of the message indicates that they are offering tips for collecting more responses and encouraging you to leverage Typeform for gathering insights. So doesn't really matter, it's just an example, but you can see sort of the power of this and really, really simple to set up. I mean, this didn't take us long at all, and it is a fully functioning AI agent that you can actually use to save you time. So I do hope you enjoyed this video and you found it useful, and hopefully now you should be able to build your first AI agent on NAN. And if you've used other platforms before like Relevance AI or Make.com or Voiceflow, any other platform where you can build sort of AI agents and automations, and you're just starting out with an AI, and I really like to hear your opinions on it because personally I think it's amazing. I've used other platforms and I think this is so good because you get all the different integrations, you get things like Make.com, and you also get the advanced agent features that you can do on sort of Relevance AI. And then there's also a lot of other features packed in, so it's really, really cool. I'm loving it. I hope you guys are too if you're using N8N. Like I said at the start of the video, this template will be available for completely free on my platform Commonus. So if you want to grab it, get started straight away with building AI agents on NAN, and I've left the link in the description. You can go ahead and grab it. And also, like I said, if you do want to work with me so we can implement some AI agent systems into your business, then I've left a link to my website in the description as well. You can go ahead and book in a call with me or just fill out the contact form. That's it for this video. If there's any more videos that you guys would like to see with NAN, just drop a comment or just drop me an email. I'll try my best to get around to doing them. See you in the next one.
More from Rory




Dynamic Workflows are crazy. This is how to actually use them (beginner's guide)






