
How to build a WhatsApp agent in n8n (credentials set up)
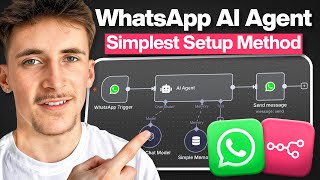
Build a WhatsApp AI agent in n8n using GPT-4.1 Mini. Set up Meta Business app credentials for OAuth, then configure WhatsApp API credentials with a business account ID and access token. Messages trigger the workflow, the AI responds, and you can extend it with memory, tools, and integrations like HubSpot.
Chapters
What's up guys, in this video I want to teach you how to build a WhatsApp agent because I know setting up the WhatsApp credentials can be a little bit tricky. It's not the same as setting something like your OpenAI credentials or Telegram or Gmail credentials. There is a little bit more to it when it comes to the WhatsApp credentials. So I'm going to show you the full breakdown of exactly how you can set up a WhatsApp agent and you can talk to your agent that you build in N8N through WhatsApp and it can reply to you. Okay, so first of all, in N8N, we're quickly going to build out the structure for this agent. So the trigger is of course going to be WhatsApp trigger. So you go to WhatsApp Business Cloud and it's going to be on messages. So we hit that and then we can just put down a simple AI agent. Go to AI, AI agent, and then let's quickly connect up a chat model which can use GPT-4.1 Mini. And then we're not going to give it a memory or tool or anything just for this example, just to show you the most basic and simple version on how you can set up an AI agent. Of course you can add your own tools and memories and anything like that to it. The same way you would as if you're building just a simple agent on NAN. And then of course we need to have a WhatsApp node at the end to be able to send the messages back from the AI agent into the WhatsApp channel. So we just go to WhatsApp and then send message. Okay, so then now we have our kind of structure for how this is going to look, and now we need to set up the actual credentials. So there's two different types of credentials. There's the WhatsApp trigger and then there's the WhatsApp sending a message. They're two different credentials. So first of all, going to show you the WhatsApp trigger one, and this is going to be an OAuth account. So this is an OAuth account, and this one is just a WhatsApp API. So to show you the OAuth account, I've already got credentials set up, of course, but we're going to hit create new credential. And in here we need a client ID and a client secret. So to get that, what you're going to do is you're going to go to business.facebook.com, and it should open up a page like this, your Meta business page. And if you don't have one of these, you can always just come up to the sidebar and hit Create Business Portfolio. But of course, I already have one, Autonomously AI. And then what you're going to do is you're going to go down to Settings and then App, because we need to create a new app to be able to actually use the WhatsApp API. And I already have one in here, but this would probably be blank for you. So you just hit Add in the corner and then create a new app ID. So we're going to hit that, and then this is going to take us over to the developers, uh, Facebook site. And here we can just give the app a name. So I'm just going to say YouTube Demo, something like that. And then the app contact email, it's just going to be my email. Hit next. And then down here we're just going to scroll down to other, other. Go next. Then select an app type. You can choose business or consumer, and once you've picked this you can't change it, um, so just be wary of what you're picking. For this we're just going to go with business because my WhatsApp account is a business account anyway. And then app name, again just YouTube Demo. App contact email, it's just my email. And in the business portfolio, make sure to select that one that you, um, what you want it connected up to. So I only have one, so it's only going to be connected up to this. And because I made the app through my business page here, it doesn't give me the option to change. But if you just came straight to developers.facebook.com, uh, which is what this website is, then it would give you the option to kind of look through and assign this to whichever business profile you wanted to. But I only have one, so it's going to be to Autonomously AI. And then you hit create app, and it's just going to ask you to enter your password in. So you just enter your password Okay, so password has been entered in. It's just loading now, and then it's going to take us to this page here. And we only really want to integrate with WhatsApp, so we're just going to hit the WhatsApp one. Go to setup— apologies, you don't hit setup. You can see now the app is down here. Uh, we're going to come back to that later for the other credential. Um, to get the client ID and client secret, all you do is you go to app settings, and then you go to basic, and then here it should just show you— yeah, your app ID and your app secret. So App ID, we can just copy that, come back over to NAN and add that into the client ID. And then client secret, it's just going to be the app secret here, so we can just copy that and then paste that in. And then if we hit test, there you can see it is connection tested successfully, which is absolutely perfect. And now this is able to receive messages, but of course if we want to send messages back, which, um, you're obviously going to want to be able to do, you need to set up the other type of credential. Uh, so all you have to do to do that is if you come over to this node, it's going to be your WhatsApp API. So again, I've already got an account in here, but we're just going to hit create new credential. And then this time we need the access token and a business account ID. So if we come back over to this app, now we go to the WhatsApp here and we go to API setup. And then you can set the from number, and this is basically going to be the number when you're messaging the agent or want to message the agent through WhatsApp. This is just going to be the number that you're actually going to be sending those messages to. So you can add your own one, but, um, they just give you a test one which works perfectly fine. So I'd recommend just going with the test one here, but like I said, you can add your own phone number. And then the to phone number is going to open up a dropdown that will probably contain your number, uh, just because it will have that information saved. If it doesn't, then you can just add your own number, which means sending messages from your number to this number. So I'm going to select mine. I'm not going to show you my phone number. Um, but yeah, it's going to be my phone number in there. Okay, so now that's in, you can see here we've got the WhatsApp business account ID, which is what we need for the credentials. So if we just copy that, come back to NAN, and then business account ID, paste that in, and then access token, we can just hit generate access token and it's going to open up this page here. So continue as Rory Ridgers and then opt into all current and future WhatsApp accounts or opt into current WhatsApp account only. You might as well just pick, um, opt into all future WhatsApp accounts, just makes life a little bit easier. If you hit continue and then you hit save, Ori Ridges has been connected to YouTube Demo, which is of course my Meta account, to that app that we just made. If I hit got it, it's going to take us back, and then now we have this access token. So we can copy that and then just simply paste that into there and hit save. Perfect. Okay, so now I have the chat open on WhatsApp with that, uh, test number, and then I also have the NAN instance open here. Okay, so if we hit test workflow, it's now listening for a test event. It's waiting for us to message this number on WhatsApp. So if we just say Hey, and then you can see this is gonna trigger here. Perfect. So this triggered here and we got, you can see the text body. Hey, so that's the message that we actually sent over. But of course this errored here because we need to connect up this message variable into our AI agent so we can actually receive it. So if we change this from connected chat trigger to define below, and then we can just drag in this body here and then hit execute step. And then it's actually going to reply to this. So, hello, how can I assist you today? And then to get that back into our WhatsApp channel, we can just connect up this last node here. And the sender's phone number is of course going to be this test phone number that we're sending a message to here. And then the recipient's phone number, this is going to be my phone number, um, because it's going to be basically what this phone number is sending a message back to, or who it's sending a message back to. So I can put in my phone number here, but I'll do that off camera again. So you know, see my phone number, um, but then the text body is just going to be the output from this AI agent. So if we drag that into here, it's now going to be sending a message back to me from this number with this output here. Okay, so I've just put in my phone number, and if we hit test here, you can see, hello, how can I assist you today? Perfect. So it sent us a message straight back. And if you want this to be running so you don't have to hit execute workflow every single time, which of course would be a nightmare and would make it unusable, if you just set this from inactive to active, now you're not going to have to be hitting execute workflow every time. If we just say to it, tell me a joke— spelled tell wrong, can you believe it— and then send this off, give it a second, and it's going to send us back a message, uh, which should hopefully be a joke. Sure, here's one for you: why don't scientists trust atoms? Because they make up everything. So absolutely perfect. Send us the message back. And then yeah, you can just have a conversation with this and it's going to be able to take your message and then reply to your message just the same as talking to an agent inside of NAM. And then of course from this you can build on it. You can add your own memory, you can add your own tools so you can make sort of a personal assistant agent. You can make one that's integrated with your HubSpot, with your calendar, so you can see what you're doing every day. It can see all the updates on your leads and your clients, that kind of thing. You can build any type of agent you want. And have it all connected up to WhatsApp. Okay, so that is it for the video, guys. I hope you enjoyed it. And I hope this kind of cleared up and made it pretty simple on how we can actually set up these WhatsApp agents. Because I know the WhatsApp API seems a little bit daunting. It's a little bit harder to connect to compared to these other APIs. So yeah, hope this video helps. And I hope now you can create all your agents inside of WhatsApp. Yeah, like I said, that's it for this video. If you've got any video suggestions you'd like to see, please do just drop in the comments and I'll try my best to get around to doing them. See you in the next one.
More from Rory




Dynamic Workflows are crazy. This is how to actually use them (beginner's guide)






