
How to build an army of Ai Sales Agents (automate 70% of your sales processes)
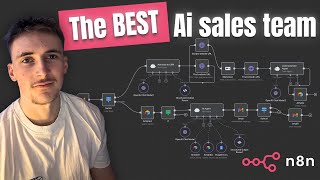
In this tutorial, Rory Ridgers demonstrates how to construct two complementary AI sales agent systems that automate the majority of a sales pipeline. The first system handles new lead intake: a Gmail trigger watches incoming emails, a switch step distinguishes booking emails from Cal.com, an LLM extracts lead details, Tavelly searches for the lead’s website and LinkedIn, the website HTML is converted to Markdown, and all gathered data (website URL, markdown content, LinkedIn URL and summary) is fed to an LLM which creates a lead summary. The summary and extracted fields are then stored in an Airtable CRM as a new record. The second system manages ongoing communication with existing leads or clients. Incoming emails are matched against Airtable records; if a match is found, the agent pulls the relevant CRM record, uses a Google Docs knowledge base (about us, services, pricing, timelines, etc.) and the record data to draft a reply via GPT‑4o Mini. The draft is sent to a human‑in‑the‑loop step for approval before the email is sent, and any new information from the client is appended to the CRM notes. A third automation watches for status changes in the Airtable base (new lead, meeting scheduled, discovery call done, proposal sent, won, lost). When a status changes, a corresponding email template stored in Google Docs is fed to the agent, which injects the lead’s name and drafts (or sends) a personalized email. Throughout, Rory provides concrete configurations for each tool (Gmail trigger frequency, Tavelly API request format, HTML‑to‑Markdown conversion, Airtable field mapping, human‑in‑the‑loop approval flow) and shares free templates in the video description. The overall message is that AI agents can run silently in the background, handling data enrichment, CRM updates, and email outreach, leaving only occasional human approvals.
Chapters
What's up guys, in this video I'm going to be teaching you how to make an AI agent that's able to automate a massive chunk of your sales process. Specifically, this agent is able to research new leads that come in and then update your CRM with all of that information. And then it can also reply to emails from your leads and your clients. And then also it can send out automated emails based on the status of your leads and your clients in your CRM. Just quickly before we get into it, if you don't know who I am, my name is Rory Ridgers and I help business owners to integrate AI agent systems into their businesses. That sounds like something you might be interested in, then I've left the link to my website in the description and you can go ahead and book up a completely free discovery very cool. We could talk about some ways to implement AI agent systems into your business. Also, I just want to mention as well that the templates for the agents I build in this video will be available for completely free in description. There'll be a link that says something like free templates. You can just click on that and then grab all the templates for free. Yeah, let's not waste any more time. Let's get into the video and I'll show you how it all works. Okay, so there are two AI agent systems that we're going to be looking at in this video. This is one of them, and now it might look a little bit complex right now, but don't worry, as we sort of work our way through and I'll show you what each of these parts are doing, it'll make a lot more sense. So basically, just to give you a quick rundown, we have a Gmail trigger at the beginning here, so it's gonna be watching all of your emails. And then we just have a simple switch step here. It's gonna sort the incoming emails to see if they're coming from Cal, which is gonna be our booking software we're using in this video just as a demo, or it's gonna go this way and it's gonna check if this email's from a lead or a client by checking your Airtable CRM. For this video, we're gonna be using Airtable as our CRM. So if it comes this way, basically all that's happening here is you have an AI agent step that's gonna break up the information. That we receive from that email and get the different data points that we can use as variables later on. And then basically we're gonna find their website URL, we're gonna scrape their website, convert that to Markdown to be able to pass that to our agent. And then we're gonna find their LinkedIn and get a summary of that. And then we're gonna pass that all to our agent that's going to generate a summary on this new lead that we've got. And it's gonna add all of that information into our Airtable database. And then if it comes this way, the email's from a lead or a client Basically all the agent is gonna do is it's going to, we've given it a Google Doc with just some business information. For this video, I'm gonna be using a demo website design agency just sort of as an example. So we've given it a Google Doc just sort of acting as a knowledge base. And then basically what this agent is going to do is it's going to be able to look at the emails that you get from your leads and your clients. It's gonna be able to search the knowledge base, see if it can reply to that email. And then these steps here, all this is doing is it's notifying us via Gmail that it wants to send a new email. and then we just hit confirm or deny, and then it can send that email off for us. And then also this agent, another thing you can do is it's going to update all of the information that we received from Gmail for our new clients into your CRM. So for example, if your client says something like, I'm going to be away for the next 2 weeks, uh, my replies to my emails will be slow, then your agent can see that and it can update your CRM with that information just so you have it stored there, which is nice. So before we dive into this a little bit deeper, I do want to show you 2 things just to give you a bit of context. For the video. So the first one is going to be our Airtable base, and this is just kind of acting as a CRM in this case. So we have a name, email address, website URL, status, notes, LinkedIn URL, and lead summary. And then another thing that I want to show you is our cal.com booking. So basically this is just going to be— this is, if you haven't heard of cal.com before, it's basically the same thing as Calendly, but I just use it because I prefer it. There's more features and things like that. And basically this is just like a demo I've made for this video. So users can select a time slot like this and they get asked these questions. So the name, their email address, how we can help them, and then their business name. And then all of that is going to go through our system here, but that'll make sense a little bit later on when we actually go through it. So to kick things off, at the beginning we just have a simple Gmail trigger. Nothing really happening here, we've just set it to check every single minute our Gmail inbox. It's just going to— new emails that come in, it's going to trigger this scenario. And then we have a switch step here, and what we're doing here is we've dragged in variables from the step before. And what we're trying to do here is we're trying to look at the email address and see who it's from. When we receive an email, if it's from hello@cal.com, that's going to mean it's a new inquiry through this form that I just showed you. So in that case, it's going to go this way. But if it isn't— so we've just set it so that if the email address is not equal to hello@cow.com, it's going to go this way. I'm going to show you this way to begin with, and then we'll get on to this a little bit later. So the cow.com— basically, an email comes in, it's from hello@cow.com, which means it's a new inquiry from that form that I just showed you, and then it goes up this way. And what we have It's just a really, really simple LLM. It has a tool attached, but it's basically just an LLM. It's not even really an agent. So if we have a look, we have a prompt in here. So you'll receive an email body for a new meeting reservation. I want you to extract the data points, which should be name, email address, business name, and how we can help them. Please output these data points in JSON as separate variables. Output just the variables, no explanation or summary. Ignore the organizer details. It should only be the guest. So basically what we're doing here is we are breaking the email up that we get from hello@cal.com into just variables that we can actually use. So obviously we get an email through from Cal.com with like all of this information and sort of presented in a nice way. And we just want to extract these certain data points. And those data points are going to be the name, email address, how we can help them, and then business name. And then what we do— and then by the way, the way you do that, it's a really, really handy tool. The way you do this so that your LLMs or your agents can output things as different variables that you can use sort of as different variables later on is you flick on this. So you flick on require specific output format, and then you attach an output parser here. And then what you do is you put an example of the JSON body that you want the agent to output in. So for this, it's going to be name, email, business name, how we can help you. And now the agent is going to be sort of forced to output whatever outputs in this format. So name, email, business name, how we can help you. And then these will be 4 separate variables that we can actually use later on. And then the next step, what we're doing we're using Tavelly for this. And if you haven't used Tavelly before, you haven't heard of it, basically what it is is we use it in NAN all the time, and it's basically just like Google search but for your agent. So you use it via HTTP request. I'll actually show you Tavelly quickly so you can see. So this is Tavelly. You get a bunch of free credits, which is really, really nice. And the kind of things you're looking for here is you've got an API key. I'm not going to show you mine, but you can copy that and use it later on. What we're going to do is go to documentation And then if we go to API reference and then Tavli search, and this is what we're going to be using in this case. So if we go back over to NAM, you can see the URL is going to be this URL here. So just copy that. The method is going to be POST, which we've done. So you can see it's POST, so we set it to POST. And then the headers are going to be content-type application/json. So as you can see here, and then the other one is going to be authorization. So authorization, and then your API key that you get here. So I'm not going to show you mine but you put in authorization, and then underneath that you put in your API key. And then you flick on send body, set this to JSON, specify using JSON. And then let's expand this so you can see it. What we do is we just copy it from here. So we just copy all of this, and this is what we're sending over to Tavelly to basically perform a search on. So you can see there are these different points here. We have query, topic, search depth, max results, time range, all this stuff. You don't really need to worry too much about this. All we're worrying about really here is a query. And this is basically like, think of it like the Google search basically that we're doing. So in here we put the business name's main site's homepage URL. So obviously we get this business name variable from our agent step before, and we put that in here. And say for example, we get an inquiry from Gymshark, let's say. So the business name is going to be Gymshark. So the query that we're searching for will be Gymshark's main site's homepage URL, and then Tavli is going to return that for us. And what we do Really, really simple. We do a HTTP GET request and then we put in the URL that we get from this Tavly step before. And all this is going to do is it's just going to return all the HTML from that URL. It should be the home page for our new leads website. So we'll just get a bunch of HTML from this step here, and then what we do is we convert that HTML to Markdown. So we put down a HTML to Markdown step and we set to HTML to Markdown and then we put in the HTML that we get from this step before, and we convert that into Markdown basically so that the AI agent can process it much better. It's going to be much quicker, much more efficient for the agent to process it in Markdown rather than HTML. So now we have the website URL, then we also have all the Markdown from their website, and now what we need to do is find their LinkedIn. So again, we're using Tavli. So exact same thing here for Tavli. You've seen this all before. The only thing that's different is that this time in the body that we're sending over, we're we're going to be searching for the business name's LinkedIn profile URL. Or you can do the business name, or you can just do the person's name. So you can see here there's the name, and then there says business name. Personally, I've done it as the person's name, but obviously you could do the business name. Let's just use Gymshark again. You could do Gymshark's LinkedIn profile URL, or you could do— let's say we got from Ben Francis, the CEO of Gymshark— we could do Ben Francis' LinkedIn profile URL. And then the nice thing about Tavli is we don't just get a URL. In this case, we also get a summary of their LinkedIn. So that kind of covers the LinkedIn URL and the summary step. So now after all of this, we have their website URL, we have the markdown from their website, we have their LinkedIn URL, and then we also have a summary of their LinkedIn. And what we do here is we basically just pass all of that to this agent. So you can see we've put in their LinkedIn summary and their website content, and we just get to make a summary on this new lead. So you can read the prompt here. But we're basically just getting it to make a summary on this lead based on their LinkedIn and their website. And then we use an Airtable create record to just add all of this data into our Airtable database. Obviously I've linked up my Airtable base, so this one here, I've linked this up. The resource is record, operation is create, the base obviously added that in. And then what we're going to be doing is we're going to be mapping each column manually, and then we're just going to put in all the variables that we've got before this. So their name and their email address we're going to get from this LLM step at the beginning where it breaks up the different data points. So we get the name and their email address from there, and then the website URL we're going to get from that first Tavli step. The status, we're just going to set that to new lead, obviously because they're a new lead. And then the notes is going to be from the how can we help you section that they would have filled out when they inquired. And then LinkedIn URL is going to be from that other Tavli step, and then the lead summary is going to be from this LLM step before. So basically, just sort of an overview: new email comes in from hello@cow.com, we know it's a new lead, so it goes this way. This agent will just break up that email into the different data points that we can use, and then we find their website URL, scrape the website content, convert that to Markdown, and then we find their LinkedIn, get summary of their LinkedIn, pass all of that information to this agent here, which is going to create a summary on this new lead, and then we just add all of that data into our Airtable base. So let's test this out so you can actually see it. So let's just say something like, let's use the example I was using before. So Ben Francis, the email address, we're going to say ben@gmail.com. How can we help you? Let's say I want a new website. And then business name, let's say Gymshark. Already got it in there. So let's hit confirm and then we should see this. Okay, so it said the event time can't be done at this time. So obviously it's a little bit out of date. So let's just pick a new time. Say this time, and then let's fill in this data again. So Ben Francis, email address ben@gmail.com. How can we help you? I want a new website. And then business name, Gymshark. Hit confirm, and then we should see this create— yeah, so it's scheduled a meeting with me. And then if we test this workflow out should pick up their new email. You can see here, picked up their new email. It's gone this way, it's gone through this first, it's gone through this first agent which has split up those different variables, found the website URL, scraped the website content, converted that into markdown, found the LinkedIn URL, and gave us a LinkedIn summary. And then this agent just created a summary on this lead, and then we added all of that data into our Airtable CRM. Okay, so you can see the new lead in here: Ben Francis, ben@gmail.com. Then we've got their website URL, new lead. The notes is I want a website, got their LinkedIn URL, and then we also got the lead summary. So absolutely perfect, really, really handy. Obviously this stuff, it's just stuff you do anyway when a lead comes in. You probably don't even realize it, but just subconsciously all the time when a new lead comes in, you're just out of interest or to using your sales calls, you're going to look up their website, you're going to look up their LinkedIn. So just having all of this data automatically put into your CRM, whatever CRM you're using, it's just an absolute game changer. So now what we're going to look at is the other flow. So let's say now Ben Francis, we got that new lead. Let's say he emails us saying something like, uh, what are your prices? Or what are your timelines for your projects? Let's say what's going to happen, new email is going to come in. It's not going to be from hello@cow.com. So it's going to go this way. And then what this step does is it just returns all of the data from our Airtable base here. That's literally all it does. It's just going to return all of the data. So all of these different columns here, it's going to return that in NaN. And then we use an if step here, and we basically put in the variable from the Gmail step here. So let's say Ben emailed us at ben@gmail.com, we'd put ben@gmail.com in here. And then if that contains an email from our CRM, so we put in the variable that we would have got from Airtable for the email address column, we put that in here and say if this email that we received from the Gmail step contains one of the emails from our Airtable base, then go this way. And if it doesn't, just stop, because obviously this isn't a client or a lead, or isn't someone that we want our agent to be responding to. And then we have our agent step here, and obviously usual deal, we have GPT-4o Mini hooked up to it. And then we've given it the search record, update record, and get document tools. The search record is just in case it needs to search the Airtable database for any sort of specific information when it's replying to these emails. The update record is just going to be updating the notes record in the database, just because like I said, if you get any valuable information through from your clients that they've emailed over to you, you might want to add that to your CRM. So that's what this tool is doing. And the Google Docs, we're actually going to have a look at this Google Doc just so you can see it. So if we open this up, this is just like a demo knowledge base I've put together. So we got the About Us, Services We Offer, pricing overview, typical timelines, our process, revisions policy, communication, all of this kind of stuff, just like a typical knowledge base for a web design agency. We've hooked that up to the agent as well, and it's going to use this to help it reply to these emails that we get through. So this tool, the search Airtable record, dead simple, which basically return all of the records from our Airtable base. So don't really need to look too much into that. Then the update record, what we're doing here is we're updating because we don't want to get rid of all the notes in our section here. So you can see I already got notes in here. We don't want to delete them, we just want to update them and add to them. So what we do, we set the— we set the resource to record, and then we set the operation to update, and then obviously link up our base. And then what we're going to be doing in the columns to match on, we're going to set this to email address because we only want to be looking at the row with the email address that we got from this step here, because this is going to be the client. Let's use Ben again. We got an email from ben@gmail.com. We only want to be looking at the row that contains ben@gmail.com because we're only going to be updating the notes for that person. So in here we put in the email address, and then the email address that we're matching to is the one that we would have received from Gmail. So like I said, ben@gmail.com, we'd put that in here. So now the agent is only going to be looking at the row that contains ben@gmail.com, which should only be one row. And then in the notes We're just letting the model define this because it's going to be wherever it feels like it needs to put from our Gmail step into here. It can just update the note. It doesn't get rid of the existing notes, it just rewrites the notes including the existing ones and adds on whatever information it wants to add on. And then let's say our agent has seen an email and it thinks it's able to reply based on what it has in the knowledge base. I've set it up so the agent just doesn't straight reply because, you know, it could say something wrong. So what we're doing here is we're just having a human in the loop step. So basically our agent is going to draft an email and it's going to give us a subject line and email body. And then we use the human in the loop step. So you can see the operation is send and wait for a response, sending it to myself. The subject is going to be email reply draft, and then we're putting in the subject line that the agent creates and the email body that the agent creates. And we're basically going to send this over to me and it's going to say, hey, I want to send this email. And then there's going to be an approve and disapprove button. And based on what that is, we just set a switch node here. And then if the JSON data approved, which is going to be the output from this step here, if that is set to true, then it will go this way and it will just send that email. And then if it's set to false, then it'll go this way and just do nothing. So basically, if it is approved, then it will send the email. If it's declined, then it just won't send the email and it won't do anything. And you might have noticed this node here as well. Basically, this the same one that we have up there, which getting the agent's output in JSON when it wants to send an email, because we want the subject line and the email body as two separate variables. You can see in here we just have email subject line and then email body, and we force the agent to output in this specific format. And this just means that we now have it as two separate variables, as you can see, because it makes it a lot easier here when we just want to put in to— and then we're also going to put in the email address that we got here. Let's just say again, ben@gmail.com, because that's the client or the lead that we're dealing with in this case. And then the subject line, we can just use a subject line variable that we've got. And then the message, we can just use the message variable that we've got. So it just makes it easier if we use this little node here, because we now— we've got these two variables broken up, and we can actually use them in different places like regular variables. So I just kind of spoke at you there. We're going to run through a demo so you can see how this actually works. What I'm going to do for this demo, I've just updated the email address to an email that I can actually send the emails from. Uh, this way, when we're running it through, the system will think that we're a client or a lead when we're sending emails from that email address. So we're just going to say something to myself like What is your average timeline for a website project? Okay, perfect. Then let's test this workflow. It should pick up that new email. You can see, yep, it goes this way, gets sent to our AI agent because it thinks it's from a client just because I put in that email address. And it's used the Google Docs tool to try and find the answer. It's updated the Airtable record just to say, hey, this client asked about the timeline for our projects, just so we know. So it's in there. And then we should see it use this, uh, human in the loop step and just notify us it wants to send an email. So you can see is use this step. And then we get this email from NAN just saying, this is email body. So thanks for reaching out. Our typical timelines for the website projects may vary. Da da da da. You can read that. So we can approve it or decline it. We're obviously gonna hit approve. And then you can see this workflow carries on. It was approved, so it went this way rather than this way. And then the email was actually sent off. And if we look at my sent folder, you can see, hi Rory, thanks for reaching out. Typical timelines for website projects vary depending on the project's complexity and features. Here's a brief overview. Start a website, growth website, e-commerce website. Obviously it's formatted a little bit weird. You can change this if you like, but this is just a demo. And obviously this bit at the bottom, you would change this as well. And then yeah, absolutely perfect. It's actually taken this from the Google Docs, hasn't just made this up. And if we come over to the Airtable database, let's have a look. You can see Rory inquired about the average timeline for a website project. So absolutely perfect. Updated the, uh, CRM. And yeah, all of this stuff pretty much just works in the background. You can see the only time that you need to intervene is when the agent actually wants to send an email. Obviously we are running through this, so you're seeing this all working, but this would just be working in the background for you apart from when it wants to send an email, you have to approve it. But I mean, you can change it. That is just my personal preference. So that is that workflow there. We now have one other to look at, and this is gonna be an Airtable agent. So we can actually trigger this agent through our Airtable base. So this is kind of a funky looking one, but basically what we have here is an Airtable trigger. And we're just going to be watching for the status field. So we've put in our base URL and our table URL, we set the trigger filter status, so it's only going to be watching when the status column changes. It's going to trigger this workflow and it's going to go one of 6 ways. So if we have a look in this switch, basically what we've done is we put in all the different statuses that we can have. Let me show you these actually. So these different statuses: new lead, meeting scheduled, discovery call done, proposal sent, and then lost or won. We have all of these in here and we're basically just filtering out which one's which. So if the status that we get from that Airtable step before is new lead, or if it's meeting scheduled, or if it's discovery call done, or proposal sent, won, or lost, it's gonna go these different ways. Here you can see I've labeled them to new lead, meeting scheduled, discovery call done, and it's gonna go one of 6 ways here. And then what we have in here is we have Google Docs with basically just templates for automated emails to send out. To these clients or leads. So if we have a look at some of them, let's just say we got a meeting scheduled with a new lead. Let's have a look at this document here. So we just set the status to meeting scheduled, and then we'd send over an email that looks something like this. So, look forward to our upcoming meeting, and then their first name. Hey, first name, just a quick reminder that we're scheduled to chat soon about your web project. On the call, we'll learn more about your goals and audience, review an existing site, brand material, we'll share how we can typically approach custom web design answer your questions and outline possible next steps. No prep needed, just come ready to chat. Rory. And then we have templates like this for every single status that could be changed in our Airtable database. And what we do is when a status is changed, let's say it was meeting scheduled. So let's say this was— so let's say new lead was changed to meeting scheduled. It would come through here, it would go to meeting scheduled, and then we would get this template that I just showed you, and then we would pass this to our AI agent and we would give it the lead's name and then the template email. So we would pass it this template here and then the name that got passed through in this Airtable trigger as well. And then we basically just say to fill out the template with the name. That's all we're doing. So you're going to receive the name of a lead in the email template and I want you to simply add in the name variable into the email template and subject line and then use the draft email tool to draft the email. In this case, we're just drafting the email. Because again, I don't really want it to send emails on my behalf. That's just my personal preference. But you can just set this to sent if you want. If we have a look inside here, the resource is going to be draft, like I said, because I'm going to be drafting them. Operation is create. The subject line, letting the model decide this. And then the message, letting the model decide this. And then the to email, it's just going to be the email that we receive from this Airtable trigger. So quite simple, but obviously this is really, really handy. Again, it's pretty much just going to be working in the background. You're just going to change the status of these leads. When whatever happens with these leads, you change the status, and then in the background, this agent is just going to be working. So let's change one of these statuses. Let's say, uh, Alina Petrova— let's say the proposal was sent and she said no, so we lost the deal. So let's say we lost it, we change this to loss, and then if we come over and test this workflow out, you can see it recognized it was lost, and then the agent step is working. Let's have a look what came through. So this is what came through. The name, the notes, the status, email address, website URL, LinkedIn URL, and then lead summary. Absolutely perfect. That got sent over to the AI agent with the template for the lost email. So if we have a look at my drafts, you can see this is what was sent over. Hi Alina, thanks again for considering us for this project. While it looks like we won't be moving forward together this time, we truly appreciate learning about you and your goals. If things change or you ever need support down the line, we'd be happy to reconnect. Wish you all the best with your website journey. Warm regards, Rory. And obviously this is going to happen for every single status that's changed here. So let's say it went from a new lead to a meeting scheduled. We'd send over that template email with their names filled in that I just showed you. And then let's say the meeting was scheduled and the discovery call was done. Then we'd send over another automated email that's personalized for them. And then let's say the proposal was sent. Again, another email would be sent over. With sort of next steps, what they have to do. And then even lost a one, let's say it went to one, and then maybe an onboarding email is sent over and maybe like an invoice link, whatever it might be. So absolutely perfect. Again, this is kind of just working in the background. You just change the statuses as it happens and this agent will just work for you. Okay guys, so that is it for this video. I do hope you enjoyed it and I hope you learned something about building these AI sales agents. I really, really do think the power of AI agents, which a lot of people seem to be missing It's these agents that just work completely in the background, apart from those few little steps where you have to sort of give it permission or trigger things from your Airtable CRM or whatever CRM you're using. But these agents that just seamlessly work in the background and they integrate into your existing systems, these are the true power of AI agents in my opinion. So yeah, like I said, if you were looking to work for me so we can implement some AI agent systems into your business, then you book up a free discovery call. We can talk about some ways to implement these AI agent systems into your business. And also remember that the free template for this is available in the description of this video. So if you want to get started with this and you want to start using it for yourself, or you want to start sending it to clients, then just go ahead and grab that free template. That's it for this video. I'll see you in the next one.
More from Rory




Dynamic Workflows are crazy. This is how to actually use them (beginner's guide)






