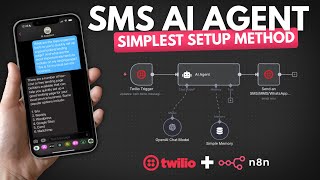
In this 9‑minute tutorial, Rory Rogers demonstrates how to create a fully functional SMS‑based AI assistant using the n8n automation platform and Twilio. He begins by introducing his agency, Autonomously AI, and explains the goal: enabling users to text an AI agent just like any regular contact. The walkthrough covers (1) adding a Twilio trigger node in n8n and entering Twilio credentials (Account SID and Auth Token); (2) purchasing a Twilio phone number, selecting SMS capability, and completing the required regulatory bundle (personal details, ID verification) for UK numbers; (3) configuring the number’s inbound webhook URL with n8n’s test and production endpoints; (4) building the workflow: a Twilio trigger feeds incoming SMS into an OpenAI GPT‑4.1 mini AI agent node, with a simple memory node storing the message ID; (5) routing the AI’s response to a Twilio “Send SMS” node, mapping the ‘from’ number (the purchased Twilio number) and the ‘to’ number (the sender’s phone). He tests the flow using the test webhook, shows the AI replying on his phone, then switches the workflow to active and swaps the test URL for the production URL. Finally, he notes practical considerations: Twilio trial accounts prepend a disclaimer to outgoing messages, the low cost of buying a UK number (≈£0.80/month) and the £10 free usage credit, and the need to top‑up the account (minimum $20) to remove trial branding. The video ends with a live demo where the AI tells a joke, confirming the end‑to‑end setup.
Chapters
What's up guys, in this video I'm going to be teaching you the simplest and quickest way to set up an SMS agent inside of NAN. So essentially you're just going to be able to text an AI agent through your phone the same way you text anyone else. Just quickly, if you don't know who I am, my name is Rory Rogers and I run an agency called Autonomously AI where we find and eliminate operational bottlenecks in 14 days to keep business owners working on the business rather than in the business. So if you're looking to get out of the day-to-day operations of running your business and start working on decisions that actually move the needle, then I'll leave a link to my website in the description and you can go ahead and book up a free discovery call. Okay, so we're in NAN now And the platform that we're going to be using to do all of this is a platform called Twilio. If you haven't heard of Twilio before, it's one of the biggest SMS automation platforms. So a lot of the time when you're, say for example, um, you've ordered something, you've got something out for delivery, and you might get a text message saying it's on its way or it's been delivered, a lot of the time things like that are going to be through a platform like Twilio. It could even be through Twilio. So we're going to be using Twilio because it's so easy to buy and set up numbers and get it connected up to something like NAN. So the first thing we're going to need to do here is we're going to need to add a Twilio trigger. So if we go to trigger and then we just go to Twilio, and then we're just going to say on new SMS. And now we're going to need to set up our Twilio account. So I'm going to walk you through the Twilio setup now so you can get your credentials set up. So when we go to the Twilio credentials in NAN, you can see what we need is the account SID and then the auth token. And the way we do that is by going to Twilio, and it's free to set up an account with Twilio. It's just your standard, you can sign in with Google or anything like that, but it's free to set up. And you're going to want to go to your account dashboard here, and it should look something like this. And if you scroll down, you can see you've got an account SID and an auth token. So I'm just going to copy this and paste them both in. So that's the account SID and then the auth token, paste that in and then hit save. And then now we're all connected. So that's all we have to do to connect Twilio. So what we're going to do after that is we're going to have an AI agent step. So if we go to AI and then AI agent and then quickly connect up a chat model. So I'm just going to go to OpenAI and GPT-4.1 mini. Okay, cool. So now we have our trigger setup, we have our AI agent that's going to be able to respond to the message that you're sending. And then now we need something that's just going to send that message back through Twilio. So all we do at the end here, we just add another node, go to Twilio, and then we go to send an SMS/MMS/WhatsApp. So you can do all of those things, um, you can also do WhatsApp with this, uh, but for this we're just going to be doing SMS. So we're going to put this down, already connected up to our Twilio account, and then the resource is going to be SMS, operation is send. And now we just need to add in a from number a to number, and then also the message that we're going to be sending. So now what we need to do is we need to actually set up a phone number in Twilio. And the way you do that, you come to Twilio, you're going to want to go to Phone Numbers here and then Manage. And then for me, if I go to Active Numbers, it will say the numbers I have. I already have bought a number inside of Twilio, but this is going to be blank for you. So you can either go to Buy a Number here or just go to Buy a Number in this side menu. And here you can do exactly what it says, you can buy a number. So you can first choose the country, For me, I'm gonna go United Kingdom because I'm from the United Kingdom. And then up here you can just select the capabilities that you want. So you've got voice, SMS, MMS, or fax. And for this video, it's just SMS, so we can turn off fax and voice, and then we can hit search. And then it's just going to show you all of the different numbers you can buy that fit into those categories. For us, it's like I said, just going to be the SMS that we're looking for. And now you can see here the price, and these are ridiculously cheap. This one's going to cost me 80p or 83p to buy. I think that's about 50, 60 cents, something around that. And that is a monthly fee. But with Twilio, you get £10 of usage, uh, for completely free. So you can upgrade and you can top up money onto your account, but you get £10 for completely free. So you can see, if they're only costing this much, £10 does actually go a long way with this, especially if you're sort of only using one number. So it's an initial fee of 83p, and then it's just going to be 83 per month, so every 30 days after you initially buy it. So to buy it just click on Buy and then it's going to show the capabilities and a little bit of information on the number. We're just going to hit Next and then Business or Individual. Obviously if you're buying it as a business to do sort of business-related things, then you'd go Business. But for this, I'm just going to go Individual, hit Next. And then what we're going to need to do is we're going to need to assign a regulatory bundle, and I already have one set up. So when I click on it, you can see it pops up here. But like before, you're not going to have this set up. So the way you do it is you go to Create a Regulatory Bundle And then this process is really, really simple. It does take a little bit, uh, of time to set up, but it is really simple. So there's just a few questions that we have to go through. So first it's just the country and the type of phone number. So for me it's United Kingdom and mobile. Then we hit next. And then are you a direct customer or independent software vendor? For this, we're just gonna go direct customer. And then again, it's business or individual. So we're gonna say individual, hit continue. And then it's just gonna ask for things like our first name, last name, contact email. So we can just put this in quickly. And then our phone number as well. We hit continue, and then it's just going to ask for our address. And I'm not going to go through this because I've already set this up, and it's just really, really basic questions. So it's just like basic information, uh, your name, your email, your phone number, and then your address. And it's also going to ask for some form of ID, so like a driving license or a passport. You put all of that in, and then what happens is they send you over an email just to say like your application is being processed. And then it says it can take up to 72 hours for it to be fully processed. but I found when I do it, it sort of takes like a couple minutes most of the time. So you'll fill out all of these questions, put in your ID, get an email saying it's been processed, and then you should get an email, um, a few minutes later just saying it's all gone through. And then once you get that email, when you come back over to here, it is going to pop up with that regulatory bundle. So you just hit that, and then I'm not going to buy this number because I've already bought one, but you just hit buy, and then it's just going to take it out of your free credits. Okay, so now that we have our number set up what we can do is we can click on this and then we're going to configure it. So all we need to do here is just add in a webhook URL. So we can scroll past the voice configuration because we're not doing voice, we're doing SMS. And then down here, this is what we're looking for. So when a message comes in, we put in a webhook URL. So when a message comes in, it's going to ping the webhook URL, which is going to be in our NAN instance. So it's got this example one in here, you can just delete that. And then if you come back over to NAN, go into this Twilio trigger, then open the webhook URLs you get a test URL and a production URL. For this, we're going to do the test and then we'll switch it over after. Um, so you can just copy that, paste it into there, hit save configuration. The reason we're doing test is just so that we can test this out. When we're testing it out, it's easier to have a test URL because we can hit execute workflow and then we can actually see it run through. And what we're going to do now is we're just going to test this out. So I'm going to hit the test button up there and then I'm going to send a message on my phone. As you can see, I'm just going to send a message to that number saying, hey, Send that off and then that should come through in here. Yeah, perfect. So what we need to do now is we get this information here and we just need to put this into the AI agent. So if we go to AI agent, we're going to change the prompt to define below and it's just going to be the message body. So we're looking for one where the value is hey, because that was the message that came through. So body hey, perfect. And then also what we can do is if we go to memory and go to simple memory, and then we can put in an ID here. So if we change this from connected chat trigger nodes to define below again, and then we're looking for an ID. So SMS message ID. Perfect. We can drag that in and now the memory is actually gonna be saved in here. Cool. And then if we run this AI agent, we're just gonna get some type of output that's just gonna say like, yeah, hello, how can I help you today? Perfect. Connect this up to this last node. And then now we have the data to configure the rest of this. So the from number is going to be, uh, the number that we just bought in Twilio. So this one. If I just copy this, come back over, from, perfect. And then to is going to be whichever number we receive that message from. So we're just going to drag in the from variable here because we received a message from my number, we're now sending it back to my number. And then the actual message itself is just going to be the output from this AI agent. So now if we hit execute step, and then we're going to get a message back. So now on my phone, as you can see, we have this message back from the Twilio agent. Perfect. And now all we have to do to make this completely automated is if we switch this on so from inactive to active. And then we need to change the URL from a test URL to production URL. So we're just going to change the production and then copy that, come back over to the configuration here, and then swap this out for the production URL. Then we hit save configuration. And now on my phone, if I'm messaging this, I can say something like, hey, tell me a joke. So as you can see, I said, hey, tell me a joke, send this off. And then we can look in the executions here. And then if we go to executions, you can see This is now running, and pretty quickly back I got a message that says this. I haven't actually read it. It says, "Why don't scientists trust atoms? Because they make up everything." Perfect. And you can see also it says sent from a trial Twilio account. Not too sure if that's focusing. There you go. So sent from a trial Twilio account, and this is just because it's a trial Twilio account, and the way that you get around that is just by paying for it. So with Twilio, there's no monthly subscription. I think there is actually for some aspects, because it does quite a lot of different things, But for what we're trying to do, it's not a monthly subscription. You just top the money up as it needs it. I think the minimum you can put in there is $20, so you can just top it up. Then it's going to get rid of that message at the beginning of your SMSs.