
How to create a custom UI for your n8n systems (full tutorial)
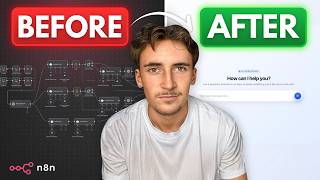
In this tutorial Roy Rogers demonstrates how to create a fully custom front‑end for a multi‑agent n8n workflow (email, Google Drive, and calendar agents) using the Lovable AI‑coding platform. He starts by briefly showcasing the n8n workflow, then crafts a detailed Lovable prompt to generate a pastel‑colored, glass‑morphism chat UI resembling ChatGPT. After the initial UI is generated, he iteratively refines the layout (e.g., moving the input box) via further prompts. Roy then connects the UI to n8n by adding a webhook trigger node (POST) at the start of the workflow and a webhook response node at the end, explaining the difference between test and production URLs. He troubleshoots response format issues, converting HTML responses to JSON and finally stripping JSON to raw text for clean display. Next, he enables Lovable Cloud to create a serverless backend function that forwards messages to the n8n webhook and stores conversation history. Using this, he adds a sidebar that lists full chat sessions with timestamps, demonstrating how the built‑in database replaces external services like Supabase. Finally, he publishes the finished interface, showing how to generate a public URL, optionally attach a custom domain, and share the UI with clients. Throughout, he emphasizes the flexibility of Lovable’s text‑to‑code workflow and the tight integration with n8n for full control over both front‑end appearance and back‑end logic.
Chapters
What's up guys, in this video I'm going to be showing you how you can easily build a front end or an interface for your NAN systems. This could be used to chat with your agents, display data, or have some kind of dashboard or analytics, and allow you to customize them so they look however you like with absolutely no limits. And you can then use them for yourself or as a more professional way to deliver them to clients. Just quickly, if you don't know who I am, my name is Roy Rogers and I run an agency called Autonomously AI where we find and eliminate operational bottlenecks in just 14 days, keep business owners working on the business rather than in the business. So if that sounds like something you might be interested in, I'll leave a link to my website in the description and you go ahead and book up a free discovery call. But without further ado, let's get into the video. So here we are in NAN, and this is a system that we're going to be building the interface or the front end for. And this might look a little bit confusing if you're not massively used to NAN, um, but essentially what this is, it's just a multi-agent system. It's kind of like a personal assistant type agent. So it's just a main agent at the top here, it's connected up to 3 sub-agents. We have an email agent, a Google Drive agent, and a calendar agent. You can pretty much do anything inside of those respective apps. So for example, it can send me an email, find emails, it can find, uh, files and folders in my Google Drive, it can create calendar events for me, it can retrieve a calendar event for me. And this is a system that we're going to be building a front end for, so we can chat with this outside of NAN in a completely customizable interface that can display pretty much anything we wanted to display. So what I'm going to do first is I'm not going to show you too much inside of this system because I think I actually built this in another video because ultimately it doesn't actually matter what is going on in your system. All that matters is just going to be our inputs and our outputs here, which I'll show you how to set up. But what I am going to do quickly is just demo this out just so you can quickly see the kind of thing that we're dealing with here. So I could say, for example, can you summarize the last email from The Neuron? And if you don't know what The Neuron is, it's basically just an AI newsletter. It's one of the most popular ones. I'm signed up to it and I read it almost every day. Um, and then create a calendar event for when the next issue drops tomorrow at 1 PM. So we'll send this off. And then you should be able to see it running through here. Uh, if we close this, so you're actually able to see what's going on. So it should first use the email agent to find that email or summarize that email from the Neuron, and then it will use the calendar agent to create the event in our calendar. So it looks like it's gonna take a sec. We'll come back when it's done. I'll show you the results. Okay, cool. So it just said the last email from the Neuron is about political bias testing in AI models conducted by Anthropic, including their evaluation method and results. It also contains various updates and insights related to AI and technology. And then cool, I've also created an event for them when the next issue drops off the Neuron tomorrow at 1 PM. Perfect. You can see here, use a calendar agent to create that event, and then it used the email agent to get the messages from my inbox. So now what we're going to do is we're going to create an interface for this. So I'm able to chat with it in a much, much nicer way outside of NaN, and I have full control over the customization, how it looks, how it functions, everything like that. The way we're going to do that is by using a platform called Lovable. You've probably heard of Lovable before because it's like one of the biggest AI coding tools out there. But essentially what this allows you to do is just use text prompts to code essentially anything. So you can create full apps, landing pages, dashboards, chat interfaces, anything like that, just using text prompts. So what we're going to do here is we're going to write out a text prompt to first design how we want this to look and come up with the first version, and then we're going to connect it up to N8N. So I'll show you how to do that. So first of all, we need to come up with this first prompt. It's going to sort of like create the environment and do all of that kind of stuff. So the first prompt does take a little bit longer, but then after that we can just customize it to make sure it looks how we want it to look. So I'm going to write out a prompt, I'll come back when it's done. Okay, so this is my prompt. I said create a minimal modern ChatGPT style interface, use a soft pastel color palette only, no harsh or saturated tones. Layout and style requirements: a clean vertical chat layout with subtle glass morphism styling on the chat container, At the top center display, a simple header that says, how can I help you? Conversation bubble should have very soft corners and low contrast pastel colors. I'm not going to read out the whole thing. This is essentially the prompt, all the styling, everything like that. So we're just going to send this off. And then like I said, the first prompt does take a little bit longer because it's got to set up the environment and all that kind of stuff. So we're just going to leave it and I'll come back when it's done. I'll sort of keep you updated on the progress so you can see how it all works in here. So it's just come back to me. It says, I'll create a beautiful minimal ChatGPT style chat interface with soft pastel colors and glass morphism effects. Let me start by setting up the design system with calming pastel tones and then build the components. So first edited the index.css, which is just the styling kind of stuff, and that was doing the Tailwind config. And then now it's doing the chat_message.tsx. So like I said, it's just building out all the pages, setting up the environment, and in a second we'll get a preview here of exactly how it's going to look. And then we can just sort of chat in the chat interface and just keep editing it as we want to go along. So what I'm going to do, I'll just come back when it's got the first preview of this up. Okay, cool. So this is how it looks. So pretty nice. If we want to preview it a little bit bigger, we can just open it up like this. And then yeah, you can see this is how it looks. Very cool. I think I want it to be more ChatGPT style and have it so the input box starts in the middle here rather than down below. So let's just say that to it. Let's say, does it move the input box so it starts in the middle? And then when we start sending messages, it moves to the bottom to open the chat window. So we'll send it off and things are going to be a little bit quicker from now. It's just that first one. It takes a little bit of time. So it's just going to think about that for a second, and then we'll come back when it's made those changes. Okay, cool. This is how it looks. I think that looks much better. What we're going to do is we're going to try sending off a message and just see how it looks. Okay, so this is how it looks at the moment. Like I said, it's just a demo, so it just says it's a demo response. Um, but I think I kind of like how that looks actually, um, with the messages and the reply and things like that. Cool. So now what we're going to do is if we hit refresh here, so it refreshes back to the beginning. Now I'm going to show you how we can actually connect up NAN to this. So what we need to do So we come back over to N8N, we're going to remove this input here because we need to have a new input. The new input is going to be a webhook. So we're going to have a webhook at the start that will take the messages from this interface here, and then we're going to have a webhook at the end that will just send the output of this agent back up through to that webhook, which will display in here. So at the beginning, let's add a node. Let's go to triggers, which are already on, and then go to webhook. Cool. And then leave that for a second. And then at the end, it's just going to be respond, respond to a webhook. Perfect. And respond with first incoming item is fine because the first incoming item will be the output from this main agent. We could always do it where we change this to text and then the response body, we can just drag in the output, but it's just the exact same thing. So we're going to leave it like that for now because it's the same thing. So to configure this webhook at the beginning, the HTTP method, we're going to change that from GET to POST. And this just essentially means the HTTP method that it's listening for. And from Lovable, it's going to be POST because it's going to be sending over data to us. And then we're going to be responding. So it's going to be a POST request from Lovable. So we need to make sure that the HTTP method here is set to POST. And then the other thing that we need to change is from respond immediately to using respond to webhook node. And then that way, what happens is it sends a— is it sends a request to the webhook. and then it will keep waiting until it gets a response from this Responder webhook, which is going to be once this has finished. So what we're going to do now, right now it's the test URL. We're going to use this for testing. The difference between the test URL and the production URL is with the test URL, you can manually hit execute workflow, watch as a request comes in, and then see everything going on here with all this stuff loading and like all the data being passed around. It's much easier for testing. And then in production, you use a production URL. And flick it on, and it'll just work in the background. So let's grab this test URL and let's come back over to Lovable. And let's say I said I have a webhook URL for an AI agent that I want to be connected to this chat interface. Once a message is sent, send it to this webhook URL. And then I gave it the webhook URL, and then the response will be sent back and it should be displayed as a reply. So we're going to send that off, and then we won't really notice any sort of differences in the UI. It's not going to look any different, but it should just ping us back and say, yeah, that's all been connected up now. And then we can actually test it out. So in order to do this, we need to enable the cloud. And what this essentially is just it's built into Lovable. It's the cloud which allows our interfaces, or just our projects that we build in Lovable, to do things like send off requests and get data from external sources. There's a couple other things you can do with it, like a built-in backend, so we can store like previous conversations and things like that, because we have a built-in backend now by enabling the cloud in Lovable. But to be able to send off requests to other servers, i.e., NAN, and receive information back, we need to enable the cloud. So we've just hit enabled here, and you can see it's just working through. Now I'll create a backend function to call your webhook and update the chat interface to use it. So we're going to leave it for a sec and come back once that's all done. Okay, cool. It said, I've connected your chat interface to the webhook. Here's what I've set up. So backend function creates a serverless function that securely calls your webhook URL and relays a response back to the chat. Updated the chat so the interface now sends messages to your webhook and displays the AI agent response. Cool. So what we'll do is we'll come back over to N8N here and we'll hit execute workflow. And then now this is waiting for us to call our test URL. So let's come back over to Lovable. Type just something simple like hey, come back over to N8N. And then what we forgot to do is we actually forgot to change the input for our main agent. So all we do is we come over here, we go to define below, and then we just type in— you can see from the webhook, the body, and then the message, which was hey. So let's drag that in. It's now hey. Perfect. And then let's copy that, also take that into our simple memory here. So let's go define below. Now it's actually going to remember and it's not going to error. So let's run this through one more time in Lovable. Dote. Let's type out, hey, come back over here, execute workflows. Now it's listening again. And then let's send off the request, come back over to N8N. You see, now it's going through and it responded saying, hello, how can I assist you today? But it looks like we got this error in Lovable. So let's just go to try to fix and see if Lovable is able to sort this out for us. Looks like there was an issue connecting to our AI agent in N8N. So let's see what it comes back with. We might have to give it a little bit more context on exactly what we're trying to do. But we'll see if it can fix the issue first time. Okay, so it came back to us with a pretty reasonable response. And basically what it says is just the information we was returning from that webhook was coming back in HTML, but it was expecting JSON. So now it's just adjusted it so that it should be able to accept any type. So what we do is we're just going to refresh it, say hey again, come back over to N8N, test this out, and then let's send this off again. We'll just stay in lovable for now. and we should see this come back. Okay, so it comes back looking like this, and you can see this isn't very nice. We've got iframes here, it's all stuck in an iframe, which means it's in HTML, which, um, isn't very nice. Obviously the only thing that we actually want here is just, hello, how can I assist you today? So what we'll do, so come back over to N8N, and we're going to switch this from respond with text to respond with JSON. So if we go to respond with JSON, and then we leave that response body in there, and now we'll test this out again. So we'll hit save on that Then we'll go to execute workflow again, come back over, refresh this. There's a lot of trial and error with this kind of stuff. Okay, cool. So you can see this time it looks like this. So it's giving it back to us in JSON, which still isn't perfect and isn't really what we want, but it looks a little bit better. There's a lot less fluff. So what we're going to do is we're just going to get Lovable to automatically remove all of this JSON stuff. So let's just say that to it. So I said the responses from the AI agent will now come through in JSON. However, it's returned in the chat interface as a JSON body. I want it as just raw text. So can you make it so that it strips back all of the JSON parts and leaves me with just the raw text? It currently looks like this, and then I gave it the output. I want it to look like this, and then I gave it just the raw text version of that. So we're going to send that off, and it should be able to fix that pretty easily. So we'll come back when it's done. Okay, cool. So it looks like it's finished. As you can see, it says it's done it. So we're going to refresh this again, say hey, come back over to an8n, execute workflow. Let's come back over, send this off, and it should return it to us as just raw text. Hi again, what can I help you with today? Awesome. And as you can see, it said hi again, which means it remembers that we said hey before. So the memory is also working, which is absolutely perfect. So now this is essentially done. This is all hooked up, it's all working as intended. I can now ask this to like send emails, create calendar events, anything like that. But we're going to add one more feature just to show you the extra kind of things you can do with this. We're going to say, I said on the left I want there to be a sidebar that displays previous chats. I want it to actually have the previous chat sessions in there. Create a storage, create a storage system that will store chats with the timestamps and show them in the sidebar. They should only be the full chat sessions, not each individual chat message. So let's send that off. So now we're going to have, like ChatGPT, a function where we have a sidebar that just contains all of our previous messages. So we can have a full sort of chat experience in there where we can look back at our past messages. So it's going to ask us for permission to modify the database, which we're of course going to click. Allow on. So this is using the Lovable Cloud, which is I think a fairly new feature. Uh, before you would have to do something like this in Supabase, but now it's essentially just built into Lovable. So we're going to hit allow on that. As you can see, this is the function that is going to create the new table in our database, and this is all contained in Lovable, which is really, really cool. So we just allowed that, and we'll come back when it's done. Okay, cool. It looks like it's done now. As you can see, there is a chat sidebar. We're going to open this up in a bigger tab so we can see it a little bit better. Sometimes with Lovable, the newest version doesn't display straight away. As you can see, once we've opened this in a new tab, the sidebar isn't here, but it is actually here. So what you usually have to do is just wait a second, and then the newest version of your project will appear. So we'll wait a second, because I think it'll be better to view this on the full screen. Okay, cool. So now you can see the sidebar is here, we're going to test this out again, we're going to say we're going to execute this, and we're just going to say, hey, tell me a joke. So said, hey, tell me a joke. Uh, I can help you with Calendar, Emails, and Google Drive if you like. I can find a joke for you in your documents or emails, or schedule a reminder to tell you a joke later. How would you like me to proceed? So obviously this has a system prompt in here, and it knows it's an assistant for things like Google Drive, Calendar, Email, so it's not going to tell us a joke, which is kind of annoying. But we can test out the memory function with this. So now we have a little conversation going here. Let's hit Refresh, and then you can see it now appears in the sidebar. So we can click on this and we can open it up and we can start a new chat. So really, really cool. It's done pretty much— we've recreated ChatGPT inside of Lovable. And of course, because you've got N8N on the backend, you have full control over what goes on in the backend, what kind of agent you built, what kind of systems going on there. And then because you also are creating the interface through Lovable, you also have full control over exactly how it looks, what data is displayed. So absolutely perfect. Of course, you can customize this however you like. This is a very, very simple version. And then just quickly, if you actually want to publish this and sort of have it for like clients or use it for yourself, having some kind of portfolio or something like that, you can just come up to Publish up here and then you can actually publish this. So it's going to be a real project URL. So if we hit Publish here, the URL slug, let's just say something like, um, N8N interface, something like that. So N8N interface, that slug's already taken, so we'll just put a random string of numbers in there. Let's hit Continue. That shouldn't be taken. Uh, yeah, it looks like it's going through, which is perfect. Then give this a minute and it'll actually launch this product for you, and then now it will be on a legitimate URL, um, that you can send to anyone. So yeah, you can see pretty quickly I've got this URL here that I can now copy and I can send to anyone I like, and they can open up my chat interface and they can chat with my NAN agent through here. Also, another thing as well, if you come up to publish, if you want to add a custom domain, you can absolutely do that. All you do is you go to custom domain You can either purchase a new domain with Lovable, or you can connect an existing domain. So if you want to purchase a new domain, let's just say we want to buy naninterface.com. Let's go to Buy Domain. It's going to take you through this whole process that will allow you to actually buy the domain through Lovable, which is so easy, so convenient, a very, very cool feature. Of course, I'm not going to do that. And if you already have a domain, you can just hit Connect Domain, and it will take you through. You put in your domain here, and then whatever service provider you're using, it will take you through the process to set that up.
More from Rory




Dynamic Workflows are crazy. This is how to actually use them (beginner's guide)






