
How to Whitelabel n8n! (Create branded interfaces for your Ai Agents)
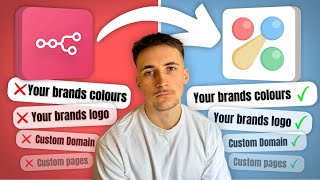
Rory Ridgers shows how to white-label n8n agents using Commonus Agents, a platform he built. You configure a webhook from an existing n8n agent, create client accounts, set up custom domains, and design branded dashboards with chat, analytics, and document pages. A live demo shows the client-facing interface sending and retrieving emails through the agent.
Chapters
What's up guys, in this video I want to show you a new and exciting platform that you can use to completely white label NAN. Of course, this works with other automation platforms, but in this video we're going to be using NAN. And basically what the platform allows you to do is be able to communicate with your agents and automations that you've built via a custom chat interface. You can customize however you want with your own brand's logos, colors, and you can even host it on your own domain. So this is absolutely perfect for delivering these projects to clients, as there's also a couple of other features such as an analytics page that you can add to the interface, as well as a page to upload documents and then also videos. So your clients will basically be getting their own entire dashboard where they can communicate with the agent that you've built for them and also check the analytics and any documents you upload or videos you upload. Just quickly, if you haven't seen me before, my name is Rory Bridges and I help business owners to integrate AI agent systems into their businesses. So if that's something you might be interested in, then I've left a link to my website in the description. You can go ahead and book up a call with me and we can talk about some ways to integrate AI into your business. So let's not waste any more time, let's get into the video and I can show you how it all works. And of course, by the way, I'll leave the link to this platform in the description so you can try it out today. Okay, so to begin with, we're in NAN, and this is an agent I built a few videos ago. I think the video was how to build your first AI agent. You can see it's quite simple. We're just going to be using it as a demo. And basically all this agent is, is an email agent, so it can retrieve emails from your inbox and it can also send emails for you. And then we also have a Google Sheets hooked up to it with just a long list of names and email addresses added to it. So this is if you wanted to say to it something like, send an email to Dave saying what's up, it can just go through that Google Sheet, find Dave's name, and then find his email address, and then use that email address in the send email tool. So it's really, really simple. If you've used NAM before, you'll kind of know exactly what you're looking at here. We also obviously have our OpenAI chat model hooked up, and we're using GPT-4o Mini in this case. And then usually how you would have it is you would have a chat trigger at the beginning of this, so you'd be able to click the button down here and talk to the agent via chat interface inside of NAN. And obviously this isn't really ideal because if you're delivering this to clients or if you're just using it for yourself, you don't want to be using it through NAN, of course. So there are things you can do like connect it to, I know, Telegram, WhatsApp, wherever it might be, but that might still not be ideal for some of your clients. So I want to show you this new platform I developed myself to help you out with this. So this here is the platform that I made. It's called Commonus Agents. And as an AI agency owner, I always kind of face the issue of delivering of these agents to clients, because I found that there's just no real sort of nice intuitive way to do it. Like I said, you'll have to connect up to their existing social channels or their email, and for some people that isn't really ideal. And also there's none of your branding on it, none of your colors, there's nothing to do with you on it. And I wanted to kind of fix that. So what I did was I built this platform from scratch myself so that you guys can deliver these agents to your clients for a nice branded interface with your logo in the corner and and your custom brand colors hosted on your own domain. So anyway, let me show you around the platform. To begin with, you just have a dashboard page here that shows you sort of some of the analytics and what's going on with your account. And then next up, we have an analytics page where you can see the metrics of all your interfaces and clients, because you can also manage your clients through this platform, which is great. So analytics, we have like the total messages for your interfaces, your active clients, average session duration, and we just get little graphs with messages over time, the peak usage time, clients over time, everything like that. And then interfaces, view the analytics for each individual interface, and then exact same thing with clients. So next we have the interfaces, and this is where you're actually going to make these interfaces or dashboards and hook them up to your agents and deliver them to your clients. So we'll come back to that in a second. Next we have clients. This is where you can add and manage all of your different clients and assign them to interfaces. So that the interface can only be accessible via the password that they've made. So it just makes it a little bit more secure. And then we have a Domains tab where you can add your own custom domain and then host this platform on your domain and publish these interfaces on that domain. So right now I just have a really, really simple domain. It was just the first domain that I saw, bought it to test this out. You can see right now this is verified, which means it's all good to go. But if you're going to add your own domain, all you do is hit Add Domain type in the domain. You obviously have to own this domain, so you type in the name of that domain and then it'll give you an A record and TXT record. Just go over to your DNS settings on wherever you bought this domain from, add those records in, and then you should see it go from unverified to verified. So really, really simple. Then we're going to move over to the clients. You can see I already have some clients in here. These are just demo ones at the moment, but I'm going to add a new one with you so you can sort of see the entire process of this. So for the name, let's just say Sarah, and then her email is, let's say, sarah@gmail.com. And if we hit Create Client, we'll get this pop-up. What we're going to do is going to hit Skip for Now. And right now you can see this one's unverified, but all of these are verified. So what we need to do to verify this client is if we click on that, we can get that verification link that just popped up. What we do, copy that, send this over to your client And then all they have to do here is just set up a password, and this is going to be the password that they can use to access the interface that you make for them. So which can say something like, okay, so I've added a password, confirm the password. If they hit complete verification, then just say you're all set, and they can close that window down. Absolutely perfect. And you should see Sarah now is now verified, which is absolutely perfect. And by the way, if you go into these clients, you can see some of the analytics. So obviously their account status, total messages, members since, their message activity and then all their assigned interfaces. So now we're going to move on to the actual main event here. We're going to move on to the interfaces that we can make and customize for our clients. So if we go to— obviously I've already got one in here, but if we go to Add New, we can, um, set one up here. So let's just call it NAN Demo. Description: this agent can send and get emails. Okay, so this agent can send and get emails, and then we just have to add a webhook URL. And you can see, click Need Help, we've got some common issues here. In case it doesn't go quite right. But we get a little image just to say that we have to have a webhook at the start and then a webhook response at the end. If we come over to NAN, you can see I've already got this set up. So I've just got webhook and then webhook response at the end. And if we go into this, there are a few settings that you need to make sure that you have turned on. So the first one is going to be HTTP method. Then the main thing is this respond here, and by default it's going to be set to immediately. You just want to set it to using respond to webhook node, which just basically means when it gets to the end here and it gets to this respond to webhook node, this webhook is just going to send the data back that it gets from the agent back to the place that we initially triggered the webhook from, which is going to be our interface on Communis Agents. So now that we have that all set up, let's just go to the production URL, copy that, make sure this is on, and then if we go to custom webhook URL, paste that in, we can add the webhook, and then we can also test it just to make sure that's actually working. So if we hit test and then should see, yeah, webhook is working properly. So absolutely perfect. Come down here. You can see we can assign some clients to our interface. So we're just going to add that one that we added earlier. So Sarah, perfect. Now she's in there. Hit save changes and then we can go on to the actual customization. So if we go over to this tab, you can see we have appearance and pages. Then we also have appearance, branding, and welcome message down here. And now this, by the way, is how the interface looks by default. If we hit preview, we can just have a quick look. This is how it looks by default, and what we want to do is we want to customize this with all our own colors and branding. So you can see here we have all these different color options that we can add to this interface. And one of the cool things you can do is if you change the colors, you can see up here it will update in real time and show you exactly how this thing's going to look. So there's so many different color options you can change here. So let's just say we want to change this to red. Obviously that looks horrible, so let's just reset to the default. But you get what I mean. You can change all these colors and it'll update in real time here. And one of the cool things you can do is obviously a lot of the time you're probably going to be using the exact same color schemes because it's going to be your brand's or your agency's colors. So what you can do is once you've got a color selection that you like, you just hit save as a template. It'll pop up saying what you want to name this, give it a name. Obviously I've already done this, so if we go to Autonomously, it's obviously my brand. You can see I've got all of these different colors here, and this is how my, uh, interface now looks. So really, really cool. It's already got my logo in there and it's got all of my different colors. So now moving on to the logo, if we go to branding, you can see by default this is just going to be the default Common Sense Agents logos for the interface logo and AI avatar. And I've just set my logo to appear in this corner here. And then AI avatar, this basically just means when we talk to the agent, when we get a response from it, there's going to be a little sort of, uh, icon, like a profile icon that the message is being sent from, and that is all the AI avatar images. So I've just put a variation of my logo. So then we have welcome message, and I'm probably not going to touch this, but this is just going to change this text here. So you can see again, updates in real time, so you can see exactly how it's going to look. So we've got a title, a description, and then also these suggested inputs down here. So really, really cool. Let's hit save changes on what we've done so far. And then one of the things we can do actually is if we preview this, we can try and talk to the agent through this and just sort of see how it will look for our clients. So if I just say hey just to test it out, you can see it's popped straight back. Hello, how can I assist you today? So it's obviously connected to the agent, which is absolutely perfect. But then one of the other things we can do, which is really, really cool, if we come over to pages, you can see at the moment we've just got a chat page, but we can add some more pages to this. So, so right now the pages you can add are documents, videos, and analytics. We're going to first of all add an analytics page. So we can give it a name, let's just say analytics. And then we hit create page and you can see this is a preview of how the analytics will look. And one of the things we can do here is we hit configure analytics. You can see we can select what analytics we want to show up for our clients. So message count, activity metrics, and also cost metrics. And now you can't actually bill your clients through the platform just yet. What those cost metrics are there for is basically just to give an indicator of how much your clients are spending. So for example, if you have a client and you built an agent for them that generates blog posts, let's say, and each blog post is costing them $5, then in here you could just set this to $5. Right now it's just that, um, 50 cents by default. But yeah, you can set this to whatever you want, and it just means that they kind of get an idea of how much they're spending. So let's hit Save Changes, and then let's look at the other pages. So we've got an Analytics page, we can have a look at the Documents page. So let's just call it Docs. And in here, just to show this off, we might as well add the email list with names spreadsheet just in case maybe our clients want to see that for whatever reason. So let's go to Upload Document and then click Files to Upload, and then it's this one here, I believe. And then the title, let's just say, uh, Names with Emails. Description, let's say— so description, I just said a spreadsheet with names and emails that the agent is using. Then let's hit Upload One File. You can see now it's uploaded. It looks a little bit skewed here, but don't worry, when we actually preview this, it's in the proper interface, it looks absolutely fine. And then again, add page. Let's try the videos page. Let's just call it, uh, Tutorial Vid, and then create page. And then let's actually add a video to this. So we hit add video, and you can do it by either uploading a video or you can do a YouTube link. I'm going to do a YouTube link obviously because that agent that I made was from a past video, so I've already got it saved in here. So this is just going to be a tutorial on basically how to make that agent. So let's just call it tutorial. So let's just call it tutorial, and then we can just leave the description blank, doesn't matter. And you can see that video is now in there, and they can actually watch this through the platform. It doesn't just link to— it doesn't just link to YouTube, they can watch it through the platform, which is obviously really, really nice. So let's make sure to hit save changes, and then if we preview this, you can see how this is actually going to look. So we have chat, we have analytics. By the way, I was just editing this video and I realized there was a bug which meant the graphs weren't displaying properly on the analytics page. But don't worry, when you come to use the platform, it will be working properly. I just fixed it. I'll put a little video on the screen of how it's meant to look. So apologies for that. Back to the video. We have docs, and then we also have the tutorial video, which is really, really nice. Now this is pretty much exactly how we want it. We just need to publish this. So we go back to interfaces. You see, at the moment this is going to be a draft, and what we want to do— so we we hit publish, you can see by default it's going to publish onto the Commerce Agents domain. But let's say that we want to publish this on one of our own domains. What we do is we come out of this, simply go to domains, hit visit domain, and you can see logged into our account. And then we just publish this off this domain, and you can see now it's publishing off this domain. So let's just say something like n8n email agent is going to be the path, n8n email agent. Let's hit publish and now we get an option to copy the published URL. Let's hit copy. And now you can see I've opened this in a new tab. We now have to add the email address and password for our client. Obviously this would be our client using this, but this is what they'd see. So they just have to enter in their email, which was sarah@gmail.com, I believe, and then the password. Okay, so perfect. Did the email and the password and now I have full access to this page. So we have all of the different pages here. We've got the chat analytics, the docs, the tutorial video, so we can actually Like I said, watch this video. Really, really cool. We can see the docs, everything like that. And then the chat— let's say something to it to begin with. Let's just say hey again, just to make sure it's working. So, hey. Hello, how can I assist you today? Let's say something like, send an email to Rory saying what's up. So I said send an email to Rory saying what's up. And obviously this does take a sec just because it's going through all all these different steps in NAN. You can see this is what pinged back. I've sent an email to Rory with the subject checking in and the message, hi Rory, dessert's giving us a message. So if we come over to my inbox, you can see it has sent that email successfully. So absolutely perfect. And now let's say something to it. I get a lot of emails from, um, software companies, just like promotional emails. So we're going to say something to it like, so I just said, have I got any promo emails from software companies recently? And obviously this is to just test out the Get Emails tool on the NAN agent. So let's give it a sec and let's see what it comes back with. Okay, so this was pinged back. It said to me I got some emails from Calendly, Apify, Gumroad. You can read all of them, but yeah, absolutely perfect. Works exactly as intended. And now you can deliver this straight to your client. They can talk to their agent that you've made for them through this custom branded dashboard that you've now made for them with the chat, their analytics, a tutorial video on how it works, all the documents used for the agent, which in my opinion is a really, really nice solution. Right guys, that is it for this video. As I said, I did develop this platform entirely by myself, so right now it's still in beta. So if there's any improvements that you'd like to see or any suggestions that you got for the platform on how we can improve it, then please do just let me know and I'll try my best to get around to doing them. I'll leave the link to this platform in the description. You go ahead and get started for free. There is a free plan. Also added some paid plans as well, but don't worry, the way I structured it is so that you can start off with the free plan and then once you get to a certain amount of clients, you have to upgrade to the next plan. But the way I sort of reasoned it is that if you've got this certain amount of clients off the bat, you should be able to afford the next plan up. The plans aren't expensive at all, and on the free plan you can have a set number of interfaces and clients. So by the time that you have that many clients and that many interfaces, you should hopefully be able to afford the next plan up, and then again with the next plan up. So yeah, I really, really hope you guys enjoy this platform. As I said, still in beta, so there's still improvements that we can make. So if there's any that you think of, please don't be shy, just drop me an email and I'll try my best to get around to doing them. But that's it for this video, I'll see you in the next one.
More from Rory




Dynamic Workflows are crazy. This is how to actually use them (beginner's guide)






