
I made a Personal Assistant Ai Agent on n8n (no code)
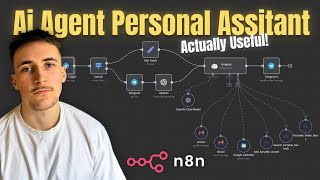
Rory Ridgers builds a no-code AI assistant in n8n that handles Gmail, Google Calendar, Airtable, and YouTube ideas via Telegram. It transcribes voice messages, routes requests with a switch node, and includes a sub-workflow that searches Google for missing company websites. The full template is free on Commonus.
Chapters
What's up guys, in this video we're going to be using Nan to make a personal assistant. And now you've probably seen AI personal assistant videos before, but I wanted to make one that's actually useful because I find when I'm watching these videos of other people making these AI personal assistants, they just seem really, really generic and just sort of things that you wouldn't actually need an AI assistant for. It'd probably be quicker to just do it yourself. For instance, creating a calendar event, it's probably quicker to just go onto your calendar app, click on the time that you want the event for, create the event, add anyone that needs to be in the event, and then just do it that way. It's probably quicker to do it like that rather than typing that out to an AI assistant. So in this video, I basically wanted to make an AI personal assistant that's actually useful and is actually quicker than just doing these things manually. If you haven't seen me before, my name is Rory Ridgers and I help business owners to integrate AI agent systems into their businesses. So if that's something you might be interested in, then I've left the link to my website in the description. You can go ahead and book in a call or just fill out the contact form and I'll get back to you. Also, I just want to say that the templates that I make in this video will be available for completely free on my platform Commonus. If you missed my last two videos where I talked about Combinance, basically it's a platform that I made that makes it really, really easy for you guys to share and download templates for things like Relevance AI, Make.com, NAN, pretty much any platform that allows you to download these templates. It's a really, really easy way to upload and share these templates. So if you did miss those last two videos where I talked about it, I'll leave a link to it in the description. You can go ahead and check it out. You can download this specific template as well. Let's not waste any more time, let's get into the video. So in this video, of course, we're going to be using NAN, and if you've watched my channel before You know, usually I make my AI agents on Relevance AI. I also use Make.com sometimes. I've recently made the switch to NAN, and I've got to say, it's so much better. It's pretty much like having Relevance AI, but you have all the different integrations of Make.com, because one of the main limitations of Relevance AI was that I was having to constantly connect to Make.com scenarios in order to integrate with certain types of softwares, because Relevance AI, if you used it before, you'll know that it can't integrate with that many softwares. But NAN, it's obviously got the agent feature that we have on Relevance AI, so you can make AI agents and multi-agent systems, but then it also has all the integrations that Make have. I think I might have a little bit less integrations than Make, but it has all the integrations you'd need pretty much. So going forward, I'm going to be using NAN in all my videos. So this is the agent we've got. This is the personal assistant agent that I say is actually useful compared to these other personal assistant agents that you see. So this agent is going to be triggered by Telegram, so we're going to be able to talk to the agent through Telegram. So to begin with, we have a Telegram trigger, and if you've never set up credentials for Telegram on NAN, really, really easy. All you do is you hit create new credential, and then if you go over to Telegram, it'll be this BotFever that you can access. You hit forward slash start and it gives you all these different options here, and you hit forward slash new bot, and then you can create a name for your bot. Then it will say to you, done, congratulations on your new bot. You can ignore all that, and it'll say use this token to access the HTTP API. I'm not going to show you my one, but basically it will just give you a token and then you can just input that into the credentials on NAN and then they'll link. It's really, really easy. So we have a Telegram trigger that's basically just watching this new bot that we've made to look out for new incoming messages. And then the way we've done it is that, is that I want it so you can talk to it and then also type to it. So what we do is we put in a switch node. And if we have a look at this, from the node before, so the Telegram node, we'll get a bunch of information. We'll get either a message text. And what we do is if the message text exists, that means that we have sent over a text message rather than a voice message. So what we do is we drag in that variable and say if json.message.text exists, then go to one way basically. And if we get a voice file, it means we've sent over a voice message. So if the voice file exists, then we go the other way. And these are the two different paths here. We're going to test out this trigger actually so you can see what I mean. Okay, so I just sent over a test message on Telegram, and as you can see, we get a text bit here. And this is what we're dragging here because I sent over a text message. So this text input here, we drag that into here, and if that exists, then I've obviously sent a text. But if I've sent a voice message, then this would be replaced with a voice file ID. So we drag that input into there and say if that exists, then go the other way. So if we've sent over a text, it's really, really simple. We just go to Edit Fields, change the text variable to just text, so the variable will be saved as text. I'll show you why we do that in a second. And if we go the other way, if we've sent a voice message, we'll do Telegram Get File, and we basically just have to get that voice file. So in that Telegram node, we'll get the file ID, we just put that into there, and then this is going to download that voice message. And then we do an OpenAI transcribe recording, and then we basically just put in that file and say transcribe this file, and then we just get that output into text for us. So either way, if we send a text message or a voice message, it's going to get put into text. And we save this variable as text. That means in the agent prompt here, we can just put user's prompt is JSON text because they're going to be the same variable. So it just means we don't have to put in two separate variables. And then we just do really, really simple at the end, Telegram sendMessage. So whatever the output from the agent is, we just send that back to the same chat ID. So we put in the chat ID just to make sure we're sending it back to the same chat, but we can worry about that in a minute. So if you've never seen NAM before, this is the sort of anatomy for an AI agent. So you have the AI agent here, we have a prompt which I'll show you in a minute, and then you have a brain connected to it which is just the LLM model. In this case I've just done GPT-4o Mini. If you haven't used NAM before, you need to set up credentials. So I've done that. It's really, really easy. All you do is you go over to the OpenAI Assistance API, get an API key, put that in there, it'll link your account, you get billed directly from OpenAI. And then we have the tools here. And this will see where all the magic happens. We have some simple tools. We have get emails, send email, Google Calendar retrieval, which are pretty self-explanatory. The get emails can get emails from your inbox, send email can send emails. Google Calendar event retrieval can retrieve events from your Google Calendar. And then we also have add Airtable record, search Airtable records, and YouTube video ideas. And now these ones are triggering other workflows. So these are just tools already built into NAN, but these ones were actually triggering other workflows to create slightly more complex tools. So we have add Airtable record. This is just going to add a record to an Airtable database, which I'll show in a second. It just contains lead information, sort of acting as a CRM. And search Airtable records. It can just search that Airtable database to sort of simulate searching our CRM. And then we have a YouTube video ideas, and what we do here is we input the tool saying something like, I want to create some content on AI agents, and I'll show you the tool in a second, but it will just scrape all the YouTube and it will find you the best content ideas, and then it will create you a plan for a YouTube video on AI agents in this case. So first of all, I'm going to show you these 3 tools because they're really, really simple. What you do, if you just double-click on them, we make sure to rename this because this is the name that we need to reference in our agent's prompt just to make sure it's going to use the right tool. We connect our Gmail account. If you don't know how to do that, you have to go to the Google Cloud Console, make a new app, and you'll get your client ID and client secret. You can put that in. Let me know if you want a video on how to set up these Google credentials because it can be a little bit tricky if you're a beginner. Tool description set automatically. Resource message operation get many. We've done the limit to 20, so it's just going to get the last 20 emails from our inbox. Simplify, you can turn that on if you like. And that's all we need to do for this tool because all it's doing is just retrieving emails from our inbox. Send email, this is a little bit more complex, but it's really not complex at all. Again, we've added in our Gmail account, we've renamed it, tool description set automatically, resource message operation send. We have all these different operations here. In our case, we're gonna be sending an email. And then this is actually really cool on N8N. I think this is a new feature, I believe. You have the different inputs that the tool needs here. So to, subject, and message, obviously who we're sending this email to, what the subject is, and what the message is going to be. And what you can do is you can hit here, you can hit let the model define this parameter. This basically means that we can just prompt the agent on how to input data into this tool, and then it will just do it automatically for us. We don't actually have to put in different variables into these inputs, we can just let the agent do it all as long as we prompt it correctly. So we just leave it all up to the agent— the to, the subject, the message. This should be defined in your input to the agent. So when we're messaging on Telegram, we'll say something like send an email to da da da saying this, and then the agent can auto-generate subject line, but obviously needs the message and the to email from you. And then I've just turned off the append NAN attribution because it's basically just at the bottom of emails it will say this message was sent by NAN. You don't need that. You can have it if you want, but you don't really need that, so I've turned that off. And then we have a Google Calendar get events, same thing. We've linked up our Google Calendar, set automatically, resources event operation is get many, the calendar is just my calendar. The limit I've set to 50. There probably won't be 50 things, but I've just set it to 50. And then what I've done here— now you can leave this up to the agent's side. This is basically going to be the time frame. But what I've done this for is I've just done it to a week. So after now, before in 1 week. So it's just going to be basically the next week. And again, you can change this to whatever you want. This might work better for you for an entire month, an entire year, a quarter, uh, 5 days, whatever it might be. Change this to what you like. I've just set it to a week. So those are quite simple tools which are sort of just letting the agent handle the inputs and just sort of telling it what the tool does and how to use it. So quite simple there. Now we're going to go on to the slightly more complex tools where we're actually having multiple steps in the tools. We're going to start off with Add Airtable Record. So before I show you this tool, I thought I might as well just show you this Airtable database that we have. It's really, really simple, just some fake lead data. We have name, company name, company website, email address, and some notes. So just a very, very simple CRM type thing. Obviously you can connect this to your actual CRM I thought I'd do Airtable just because Airtable is a little bit more diverse. People use Airtable for different things. So I thought if I show you how to connect it to Airtable, you can sort of connect it to anything. And also on Airtable, you can do these different types of tables and stuff. It's not just a CRM. So that's why I chose to do Airtable. But yeah, this is the table, really, really simple. And then if we come over to NAN, this is the tool that the agent's going to be calling. So the Airtable Create Record tool, we have the first step as when executed by another workflow. So this is just gonna be when it's executed by the agent, it will trigger this tool. What I thought I'd do to make this tool a little bit more complex, obviously all it's doing is just inputting the data that you've inputted to the agent into your Airtable database. So you think it'd be quite straightforward, but what I wanted to do was that you can say to the agent, add this person. So you give them their name, their company name, the website, the email address, and then the notes. But I thought maybe you might not know the website URL. You might just know their email address, their name, their company name. You might have some notes on them because maybe you've just been talking to them via email. So I thought what I'd do is basically make it so the tool can actually search for their website and then put that into the Airtable database. So first of all, we have an if step. If the company website input is empty, then it's going to go this way to find the website. And then if it isn't empty, if it has a value, then it's going to go this way and just update the Airtable database. I'll show you inside this one really quick. Because it's really, really simple. So we've just hooked up our Airtable database, we've done the right table in the database, everything like that, and then we get these different columns here. And this is just going to be these inputs here. So we get these inputs, so name, company name, company website, email address, notes. The client address and proposed solution are outdated, it just hasn't updated yet. I'll remove those columns. But anyway, all we do is we just drag over the input. So we want to do that from the if node rather than the when executed, but not another workflow because the if node will have the full values because I actually have the company website. So what we do is we just drag them in like this. So name, company name, company website, email address, and then notes. We just put that in there like that and then the inputs will go into the correct column. So that way it's quite simple. If we go the other way, what we're going to do is we're going to do a simple Google search. So to do that, you have to do the URL as www.google.com/search, authentication none. Send query parameters and then using the fields below. So for the search, all we do is we just put in the results from the company name input before. So in this case, I was testing it out, I just put Gymshark. So we basically just search up the company and we should hopefully get some URLs from that. You also have to do a couple bits as well. You have to do the header parameters, the name as user agent, and then you do this as the value. If you're not too sure, you can literally just ask ChatGPT, explain the situation and ask it to give you some header parameters to put in here, otherwise it won't work. But that's kind of what it looks like. It should look something like that, but it's going to be slightly different for everyone. So basically all we're doing there is we're just doing a Google search for the company, and then we just use an LLM step, really, really simple. And what we're going to say to it is, I want you to look through the scraped Google data and output the URL that is most likely to be the website URL for this company. Then we give it the company name, here's the Google data, and then we just give it the output from the step before. Output only the URL, no summary or explanation. So this step should hopefully just output to us the URL of this company's website. And then exact same thing, we use an Airtable update database tool. You can see this one actually has the right inputs. I'm not too sure why the other one doesn't, but again, same thing, we just put in all of the variables that we got before. And obviously the company website is going to be the output from this LLM step before, which should be the URL of their website. So we're going to test this out quickly. By the way, I didn't say this at the start, the way you define the inputs for these executing other workflow tools is you just— at the beginning you can put here the different variables that you want. So I've done name, company name, company website, email address, notes. And if you want to do more, click Add Fields and you get JSON schema here. You can actually edit it to give you some sort of example data that you can run for the tool. So what I'm going to do is I'm going to get rid of the company website and just put in null. And it's obviously going to be null, just basically means nothing, like default, there's nothing there. So We're going to run this tool with null and we're going to see how it works. So if we click test workflow, you can see there's obviously no website here. So it's gone this way, it started to look for their website. The LLM has outputted something. It should be the URL. You can see this is what was updated to the Airtable database. So we got the name, the notes, the company name, the company website. We actually got their company website, which is perfect. The email address, obviously it's just demo information. For Gymshark. But the company website, absolutely perfect. They've got gymshark.com. We can look at these steps before this. So this is what we got from this, just a big bunch of data that we don't want to go through. So we use the LLM step to go through that. The content, you can see, it's just outputted https://www.gymshark.com. Absolutely perfect. And obviously, if we had inputted the company website there, it would have just gone this way and just updated the Airtable. So Quite simple. If we look back at the personal assistant, you can see the inputs will be there for this tool. So add Airtable record. If we have a look, these are the inputs for the tool. And again, like the tools before, we've just set this up to the AI agent to decide what to put in here. We obviously just prompted it with what to put in here. It means we don't have to put actual variables in here. We can just let the AI agent decide what goes in here. But obviously we define all that in the prompting, which I'll show you a bit later. Then this is the Airtable search records tool. Little bit simpler, this one. What we do here is we just— same thing, when executed by another workflow, the inputs here are going to be Airtable queries. It's going to be something like, what is the email address for this lead, or how many people in the database want websites done for them, that kind of thing. What we're going to do is we're going to get inputted that by the agent, and then we're going to search the Airtable database. We're just going to return all of the lead information here. This is really quick, so don't worry about it being too long because it's returning all of it. And then what we do is we just simply aggregate that. So we put in the outputs that we got from the node before this to basically just compress all of those different data points into one variable for each column. So all the names will be put together, all the company names will be put together, all the websites will get put together, that kind of thing. It's going to do that for all of them. And then we just pass that over to an LLM and basically just say to it, I want you to search through the Airtable data that contains my leads and find a row of information that best fits the user's query. So the user's query might be something like, How many people want websites made for them? For, in this case, you'd have to look at the notes section for that and then find the leads that want websites done for them and output those rows. And then we just give it the Airtable data. So we give it the name, the company name, the company website, the email address, and the notes. We do that from the aggregate step here. Hasn't been run, so you can't see it. So we're gonna run it now so you can see how it works. We've got some test information in here. So what is the email address for David Jones? This is just one of the leads here, so it should output. David@gmail.com. Quite simple. Let's test the tool. And you can see this outputs really, really quickly. So let's have a look what it said. The email address for David Jones is David@gmail.com. So really, really simple. We can have a look in a bit more detail what's happened here. So if we make this a bit bigger, this is all the data from our Airtable database, all our different leads, and the aggregate has put all of those into one input for each column. So it's put all the names together, it's put all the notes together, it's put the company names together, the company websites, and then the email address. And then we have an LLM step here, and this is what was inputted to the LLM. So the name, all the names, company names, all the company names, the company website, all the company websites, and it's outputted to us. The email address for David Jones is dave@gmail.com. So really, really simple. Let's hit save on that, and then let's look at the last tool. So then we have the YouTube video ideas tool, and what this is going to do is just give you video ideas for YouTube. It's going to give you an actual plan for a YouTube video. So the inputs for this are going to be content ideas, and I've put an example input: I want to make an AI agent video. What's going to happen is we're going to get the date and time, which is going to be today. We do get current date, the output field name is going to be current date. And then what we do is use another one of these date and time nodes to basically just take 7 days off of that time. So it's going to be the date from 7 days ago, it's going to be outputted by this step. And then we use an LLM step to basically— let's have a look at this— to basically just come up with a YouTube search query for the query from the user. So for instance, if they said, I want to make an AI agent video, then it would have to generate an actual search query for YouTube to find videos that fit into that. So it could be something like AI agents 2025, for example. The LLM will do that, which means you don't have to do that when you're talking to the agent. And then what we do is we use a YouTube node here. Published after is going to be the date and time that we output from here, which is going to be a week from today. So we publish after that, and the query is going to be the output from this LLM step here, which Like I said, it's going to be something like AI agents in 2025, for example. It's going to return 15. We've limited it to 15. You can do whatever you like. Obviously, the more you do, the slightly slower it's going to be. So I've just left it at 15. I thought that was a nice one. And then we use an aggregate node to basically just put all of the data points that we actually want into one sort of aggregation. So there should be 15 things for each variable. So we've got the title and the description. And then what we do is use an OpenAI step. Again, we're using GPT-4o Mini to analyze all the YouTube video data. So in this case, it's just going to be the title and the descriptions, and then create a plan for the user to create a YouTube video based on these videos. Uh, I want the plan to be detailed and explain specifically why and how a user should make a video on the specific topic you have come up with. Here is the video titles and descriptions. And then we put in the inputs from that aggregate step, which is going to be 15 titles and 15 descriptions for YouTube videos in whatever topic we want. So we're going to test this workflow out with the input I've done, which is I want to make some AI agent videos. You can see it's actually pretty quick. We get the date and time of today, and then we take 7 days off of that, and then we use an LLM step to come up with a YouTube search query, which is going to be in this case AI agent creation tutorial. And then we get the YouTube videos. So these are all the YouTube videos that have been posted in the last week that come under that search term. So we're not going to read all of these, but those are the YouTube videos there. We aggregate that. So we've got the titles all in one place and then the descriptions all in one place, and then we use an LLM step to create a plan for us. So this might look a little bit weird now because it's obviously in markdown format, but when it's outputted back to us in Telegram, it'll look absolutely fine. So we can sort of read the start of it. Based on the video titles and descriptions provided, topic revolves around building and utilizing AI agents. This subject is particularly relevant as AI technology is transforming many industries. So, proposed video plan: Creating Your Own AI Agent: A Beginner's Guide. Object of the video: to provide a comprehensive introduction to building AI agents. It's given us this whole plan here. Absolutely perfect. It's going to be super handy, especially for me when I don't have time to just sit and scroll through YouTube and come up with video ideas. I can just message my AI agent to basically do all that for me and actually come up with a plan for a video. So really, really cool and really, really handy for me, like I said. This AI agent, the whole point of that is that it's actually handy for me and useful for me rather than these AI agent personal assistant videos that you see everywhere else on YouTube. Okay, so we're going to test this out and we're going to ask it to get our calendar events for the next week. We hit test workflow, open Telegram here. This is our agent on Telegram. If we hold this down, what events do we have on my calendar for the next week? And you can see this execute here. It goes this way because obviously It was a voice input this time, so it has to transcribe it. Use the calendar, get events tool. It's come back to us. So we've got gym, meeting with a client, dinner with friend, giving us the time. It's also given us a link to view the event. So really, really cool. This time we're going to type something to it. We're going to say, I want to create a video on machine learning. So I've said, I want to create a video on machine learning. Make sure to hit test workflow when we're testing this. And then let's send this off. You can see it went this way this time, obviously really quick because it's just a text input. It's not having to transcribe anything. It's using the YouTube video ideas tool. And then we should see this pop back to the agent and then come back to us on Telegram. So this is what it gave us. Here are some content ideas for your YouTube video on machine learning. Proposed video topic: building and leveraging AI models locally for personal or small business use. And then it's given us some title ideas, a target audience, a content outline. All of this step-by-step guide, setting up local AI models, monetization opportunities, then some video production tips, and also additional elements, and then rationale at the bottom. So absolutely perfect, really, really cool. Now we're going to try and send an email. So we just said send an email to Rory Richards saying hey, let's hit send. And then, by the way, I didn't show you this, I haven't showed you the prompting yet. What we do is when we don't say to the agent a specific email address what we do is we get it to search the Airtable database to be able to find that lead, to get their email address, and then input that into the Send Email tool and use that as the email address. So really, really handy. It said to us, hey, I sent the email to Rory Ridger saying, hey, if you need anything else, feel free to ask. And then if we come over to my inbox, you can see the subject line, quick hello, hey, and then signs it off with regards. So quite nice. You can get it to build on these emails that you send if you want it to expand on the content a little bit. But I've just said to it, do exactly what I say, basically. So what I input, just send that over via email. So really, really cool. You can see all the tools work perfectly, and that feature where it actually looks at the Airtable database to get the email address if we don't say it, it's really, really cool. So now I'm going to show you the prompt for the agent so you can see how we sort of get it to use all these different tools and how it knows what to actually do. So this is prompt here. We have role: you are a personal assistant agent that is able to send and retrieve emails. Check my calendar, update an Airtable database with lead data, search that same Airtable database for lead data, and also generate YouTube content ideas. So we just sort of said who it is, what it can do, and then the task. You can read through all of this, but obviously these will be available for completely free on Commonus, and it will have all of these prompts preloaded in. So you can pause the video and read through. I'm not going to read through the entire prompt. Basically, we just say what to do when it receives an input, how it's going to receive these inputs, and then we've just given it a detailed sort of overview of each of these tools. So we've done the name here, and then we said this tool will allow you to retrieve emails from their inbox and find specific data. An input may look something like, has Lisa emailed me about that project deadline? And then you would use this tool, then look at the output, which will be the last 20 emails, find any data on the project deadline from Lisa. So I've just done that for all the different tools here. Again, you can pause this, read through it, or you can just go to Comonos, download the template, and it will be there preloaded. But I basically just say the name of the tool, what the tool does, what an input might look like, and what an output is going to look like as well, and what the tool actually does. So quite simple, but obviously there's quite a few tools here, so that's why the prompt is quite big. But yeah, that is the agent there. For me, this is actually really, really handy, and I can just access it via Telegram, which is really nice. You can just get the app on your phone, or I can talk to it on my laptop here. So really, really handy. I'm not like a lot of these personal assistant AI agent videos, which are kind of just cool, but you wouldn't actually use them, you know what I mean? So yeah, this is really cool, but it's actually really, really useful. So that is it for this video. I hope you did enjoy it. If you watch my channel before. As I said, usually I use Relevance AI and Make.com, so now I'm using NAN. I hope you like this change of pace because personally I'm absolutely loving NAN, and it's really, really easy to pick up for me because obviously from Relevance AI and Make.com, it's really, really similar concept to those kind of things, and everything's sort of in the same place, but there's just more to it and there's more complexity that you can do with it. So I really, really love NAN, and if there's any NAN videos that you'd like to see that I couldn't make previously, please do just let me know and I'll try my best to do them. Like I said at the start of the video, the template for this agent will be available for completely free on commonus.com. So I've left the link in the description to that. You can go ahead, get the template, and also browse all the other templates on Commonus. And also, if you did want to work with me so we can implement some AI agent systems into your business, then I've also left the link to my website in the description. You can go ahead and book in a call with me or just fill out the contact form. But that's it for this video. See you in the next one.
More from Rory




Dynamic Workflows are crazy. This is how to actually use them (beginner's guide)






