
If you're learning n8n, you only need to master these 12 nodes to build ANYTHING.
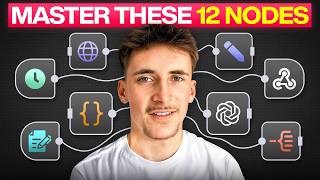
Rory Ridgers breaks down the 12 n8n nodes you need to build any automation: triggers, HTTP requests, webhooks, code, switch, filter, aggregate, split out, AI agents, OpenAI models, Google Sheets, and edit fields. He demonstrates each with live examples like routing 500 leads by country and prompting an AI agent to send emails.
Chapters
What's up guys, in this video I'm going to be teaching you the 12 nodes that you need to master in NAN if you're looking to learn how to use the platform. When you're starting out with AI automation, no matter what platform you're using, it can seem a little bit daunting just because of all of the different nodes that there are available, and you're most likely not going to know what each of them actually do and when to use each of them. I'd say this is especially relevant in NAN just because the platform can be a little bit more tricky to get your head around if you're just starting out with AI automation. So in this video I'm going to run through the 12 nodes that you need to actually be focusing on and the ones that you should actually learn if you're looking to AI systems. Because to be honest, with most of the systems I actually build for clients, 80% of it is just using these nodes that I show in the video. You don't need to be using 100 different nodes to create complicated and useful solutions. You can pretty much stick to the basics and then use the other nodes when you actually need them. So anyway, we're not going to waste any more time, we're going to jump into the video. I'm going to show you through all of these different nodes, give you a breakdown of each, tell you what they do and when to use them. Okay, so we're in NAN now, and these are the nodes that we're going to be going over. So there's triggers, Connecting to APIs, data manipulation, AI integration, and data storage. And I may have lied, I've lumped together the triggers, uh, sort of one node to learn. Obviously there's not one node here, um, but they're pretty much all the same and they work the same. It's just different ways of triggering your workflow. So these count as one node, and then there is 11 more nodes that you should be learning with NAN. So to begin with, we're just going to jump straight into the triggers. We're going to break down each of these. I can tell you what they'll do and when to use each of them. So to begin with, we have a click and execute one, and this does exactly what it says on the tin. You click the button, it executes your workflow. And this is mainly going to be used just for testing when you're sort of testing stuff or you're developing things. You wouldn't actually use this in production if you're using it either internally or for a client. Um, this is just going to be for when you're using it inside of N8N and you want to quickly test your workflow out. You can just put this node down, hit play, and it will just trigger with no data or anything. It just triggers the workflow. And then we have a scheduled trigger, and with this one it's really, really simple. You can just schedule a trigger, so you could do every day at midnight, for example, or you could do every 30 seconds, or you could do every 5 minutes, or you could do every week on a Sunday at midnight, for example. So you can just trigger this, um, whenever you want on whatever kind of schedule you want. And this is perfect for when you're having automations that are going to be triggering, say, every day you want to, uh, like in my last video I made a system that can generate you newsletters. You might have it trigger every day at 6 o'clock in the morning. That's when you would use this node. And then you have the On Form Submission node here, and this is basically a— NAN will sort of build you a form that, um, you can put whatever questions you like on there, and then you can use that to trigger your workflow. So at the moment there's nothing in here, but you can add some questions. So for example, you could say name, and then you could say email, and then you could say phone number. And you can also change the values of each of these inputs. So you can see you've got text, date, email, file, number, password. So we can just change this to email, and then that just means it's going to watch out and make sure it's like an @gmail or like an @something.com, um, to basically make sure it's a valid email in there. And then with phone number, you can do the same in there. You can just set it to number and and then when you hit execute step, it's going to open up a form like this. And then when someone puts data into here and hits submit, it's going to trigger the workflow and you'll be able to get those variables. So you'll be able to get the person's name, email, and phone number that they put in, and you can use that in your workflow. And then we have on chat message received. And what this does is it just opens up a chat window where you can either— this will usually be used for chatting to AI agents, um, because you can sort of use it in a conversational way where you can get messages back in the same chat window and then you can reply to them as such. But the way it works is N8N will create you a chat interface the way they create you that form. They'll create you a chat interface. You can see here, little chat interface like this where you can just type whatever you want and that will trigger the workflow. And one of the other things you can do as well with this is if you double-click on it, you can set make chat publicly available, and then you can copy this URL. You have to make sure your workflow's active to do this, but you can copy that URL, open it up in a new tab, and as you can see, you can get this chat interface here. And I wouldn't recommend this necessarily for production. Only because it doesn't look too nice. You can adjust the styling and add some of your own styling stuff, but it's still a bit, eh. I sort of use this for testing, or if I'm sending it to clients and saying, can you sort of demo this out and tell me your thoughts on it, tell me what needs to be changed, that kind of thing. I would use it for those kind of things. I wouldn't, um, use this actually for production. But yeah, you can open it up as a new link in a new tab, or you can just open the chat interface here inside of N8N. And chat with it here. It's perfect for testing, super quick and super efficient. And then you have things like on-app events. So this is just an example, but this could be absolutely anything. Right now it's a Gmail trigger for when we receive a new email. So every minute the event is message received. So every time we receive a message in Gmail, it's going to trigger the workflow. But like I said, this could be absolutely anything. This could be someone filling out a form on your website. This could be a new calendar event. This could be a field in HubSpot changing. It could literally be anything. In any app that you can connect to in NAN, it will have a set list of triggers that you can choose. Just to give you some more examples, if we go to Add Node, and if we just look at the Google apps, let's say Google Drive, the triggers can be on changes to a specific file, or on changes involving a specific folder. Or if we say, for example, Google Sheets, the trigger could be on row added, on row updated, on at on row added or updated. So you can sort of see it like there's already these predefined triggers, and you can do this for literally any app. So to quickly demo this out so you can actually see, um, what I mean, I've just got a Gmail sender message here. So this can just send an email for us if we just try out some of these, uh, triggers here. Let's say executing workflow. If we connect that up in the Gmail node here, we've just got this sort of example email template. We're sending it to myself with the subject checking in, and then the message is just, hey Rory, just want to check in and see how are you, talk soon. So perfect. If we just hit, uh, execute workflow and trigger this here, you can see that then triggers it with no input at all, and it just sends that message for us. Then obviously in my emails, we come over, I got that email through. Perfect. And then we could also try this with the on form submission. So obviously we got the email input from here. If we test this out quickly we're just going to demo this. So we can put in my name, email, and phone number, hit submit, and then you can see here we get these variables. So we get the name, the email, and then the phone number. We just connect this up to the send a message node. We can swap out the email and then we could put in the email from that form submission. And then now that the variable is in there, we can actually test this out again. So if we hit execute workflow and let's put in the same inputs and then hit submit And then that's going to go across and we've put in that email, which is our email. And then of course that's going to send the email to us again. So again, we got that email through. Absolutely perfect. So I hope all of those triggers make sense and I hope that little demo kind of helped you, um, figure out how you can use these and when you should actually use these triggers. Now we're going to move on to the next one, which is connecting to APIs. And this is something you're going to have to be doing all of the time in NAN to pretty much connect to anything. So the two main ones you have to worry about is an HTTP request and a webhook. And the way you kind of think about it is a HTTP request is to send out data, to get data from external sources, and then the webhook is going to be an external source triggering your workflow inside of an AN. So if you have a look inside the HTTP request, you can see there's a couple different things that we have. So we first have the method, and to be honest, majority of the time you're only going to be using GET and POST. And these are basically— and these kind of do exactly what they say. The GET is going to be when you're getting data from an external source And then the POST is going to be when you're posting data to external source, so when you want to send data somewhere else. And then the URL in here is going to be what's called the endpoint, which is basically the URL that you have to hit to do a specific function. So all software that you can connect to via API will have endpoints that do different functions. So the send message node that we saw up here, obviously NAN wrapped this in a nice wrapper, but this is just a HTTP request to Gmail and the function is going to be to send an email. So the endpoint might look something like https://www.gmail.com/functions/sendmessage, something like that. And then if you're going to get message, it might be that same thing, but instead of send message, it's /getmessage, for example. That's how the endpoint URLs kind of work. And you don't have to know any of them, by the way, off by heart. Anything you're trying to hit via API will give you the endpoint URL, and all you do is you just paste that into here. And then you have the headers, and this is going to be basically defining what you're sending over. So this could be authorizing it, or this could be defining the sort of structure of it. And the main two headers you're going to be sending over for pretty much any request is going to be Content-Type and then application/json. Forward slash JSON. So this basically just means the body that you're sending over in this request is in JSON format. That's all this does. It's just telling whatever endpoint we're hitting, by the way, this body is in JSON, so it knows. And then the other one is going to be authorization, and then your API key. So this basically, when you're sending over a request and you need an API key for whichever server you're sending this to, to sort of verify your account um, or verify your request, you're going to need to send over your API key, and you put that under authorization, and then you'd put your API key in the value there. And then down here we have send body, and this is going to be the actual content that you're sending over. So for example, if we take that Gmail, uh, send message node again, for example, we've put in all of the right endpoints and headers and stuff here. We've done POST because we're sending data, we've done the correct endpoint URL, then we've done content type application/json, authorization our Gmail API key, And then the body here would look something like, let's say we're sending over the email, it's going to the subject line, and then the body of that email, because that's the inputs that we need. We would send over a JSON body that basically just contains like subject line equals the, the, the, the to email equals the, the, the, the body equals the, the, the. One of the other cool and very, very useful things you can do with an HTTP request as well that I do all the time if you set the method to GET, if we do this, we can actually see an example of an HTTP request going off. We can turn off the headers and we can turn off a body, because when you're doing a GET request, you don't send over a body most of the time because you're getting information. You don't really need to send over any type of body. But if you do a simple GET request and then you put in any website URL, I'm just going to put in my website URL. So we do a GET request for my website URL. That's the only information we're sending here. Hit execute step. It's just going to return all of the HTML from my website here. So you can see It's all the HTML from my website. It will just return that for us. This example of a HTTP request in the most basic sort of form. And then we have a webhook. And basically what this means is an external software— rather than us talking to an external software, this just means an external software talking to us. So with the webhook, you get these webhook URLs, and this is going to be like the endpoint URL that we put into the HTTP request. The server that we're receiving a request from would basically use this as its endpoint URL. So to give you an example of how this looks, this Gmail trigger would be the examp— would be an example of a webhook. So here it's triggering when we get a new email from Gmail. So that means Gmail checks to see if we have a new email, and when we do, it triggers our webhook, which is just in the form of this Gmail trigger. The same way with the send message node here, NAN just wraps it in a way like this that's nice. But this is just an HTTP request and this is just a webhook. So that's all a webhook does. And the same way with this, it can be absolutely anything. It could be new calendar event, new HubSpot contact created, a change to a specific file in your Google Drive. It could be absolutely anything. All you need to do is you just need to give this server your webhook URL, and then whenever something happens, it can trigger this webhook URL and it will start your workflow inside of NAN with the data that's sent over. And then here have data manipulation, and these are all the nodes that you would need to be using to manipulate any sort of data. So I'm going to give you a quick breakdown of each of them, but then I think it's best to kind of give you a demo of each of them so you can see exactly how they all work. This node here is a code node, and in here you can just put JavaScript code. And if you don't know how to write JavaScript code, I say this in all my videos, don't worry, neither do I. I know the basics of it, but I never write it myself. I just get AI to write all of it for me. Likely a lot of the time what you can do is you can just go over to ChatGPT and you can just give it context on what you want this JavaScript to do, and it will just write the JavaScript for you. And if you're not too sure like why or when to use this JavaScript, don't worry, I'll tell you exactly how to use that in a minute when we demo it. And then you have a switch node here, and this is basically to route the data. So let's say you've got a massive amount of data that comes through and you want to split that into two categories, you can use the switch node to pass all of that data through, and then depending on certain variables, you can break it up into 2 categories, or you could do 3 or 4 or 5 or however many you wanted to do. But you can basically, yeah, break that data up into separate categories. And then we have a filter, and this one is pretty simple. You probably already know what a filter means. It, um, data gets passed through it and you can filter for specific things, and everything that meets that requirement can go through, and everything that doesn't will just stop there and won't get passed through. And then we have an aggregate node here, and basically what this does is when you have large amounts of data all split up into different items and you want it all in one long list, you would use the aggregate node to basically squish all of that information together and give it to you in one list. So let's say you had 1,000 names all in 1,000 different items, like they're coming through as different items in NaN, and you wanted them all in just one long list, you could run it for an aggregate node and it would do that for you. And then split out, as you can tell maybe from the icons does the exact opposite. Let's say you had one item which is just a list of 1,000 names and you want to split that up into 1,000 lists of just one name each. You would use this split out node that would do exactly that for you. So we're going to demo this out. I have a Google Sheets node here that can just get rows in a Google Sheet, and I'll show you this Google Sheet. It's basically just a big sheet full of all of this information, uh, sort of like demo lead data. So we've got names, emails, LinkedIn URL, company names, company websites, company LinkedIn, industry, country, key info, and then a compliment on each of them. You can see quite a lot of data here. I think there's about, uh, 500 if I remember correctly. Yeah, so there's 500 in here. Um, and what we're going to do is we hit execute step, and then you can see, oh, there's 499, obviously without the headers. Um, so there's 499 items. And the way that data comes through is if we go to schema, this is just one item. So you can see if we scroll, there's nothing. It's just one item. You can see it's just giving us the variables, so name, email, LinkedIn URL, and there's obviously just one here right now, but there's actually 499 names, 499 emails, 499 LinkedIn URLs. You can see it better if you go to the table view. Uh, if you scroll down like this, this isn't the best way to see it because obviously there's a variable in here that's really big which is pulling these boxes down. But you can see here, name. If we scroll down the name column, there's names. Um, so yeah, you get the idea. There's 499 items and they're all split up like this. So let's say we wanted to split this up so that instead of, instead of having it like this with 499 items, we wanted to get all the names in one variable, all the emails in one variable, all the LinkedIn URLs in one variable, so we could use that for whatever we like later down the line. We could add this to the code node, hit execute, and then you can see this is what it gives us. So it gives us all of the names like this, which should be about 500 or 499. And then when we get to there, then it gives us the emails like that, the LinkedIn URLs. And I don't know what you might want this for, but this is just an example of what you can do with the JavaScript. You can pretty much manipulate the data in any way that you like. And there's lots of other things you can do with JavaScript, but I would recommend right now, um, just kind of sticking to using it to manipulate data like this in kind of any way you like. You just have to tell ChatGPT the data that you're receiving and what you're trying to do with that data, and it'll give you the JavaScript and show you exactly how to do that. Okay, then let's take that same output here and put it into a switch node. And in this switch node, we're gonna say the country that we get here. So we get a country for each lead. We're gonna say if it's equal to United States, we want it to go one way. And then if it's not equal to United States, we want it to go the other way. So if it's United States, goes into this group. If it's anything other than that, it goes into another group. That's connected up. Now let's hit execute step. And you can see here there were 446 items that went into the United States route. So 446 items where the country was United States, and then there was 53 items where the country either was blank like this one or wasn't the United States. So that's a good way to kind of split it up. We could have done this by anything. We could have done it by names that begin with NS. We could have done it by company website URLs that have HTTPS rather than just HTTP at the beginning. We could have done it by industry, we could have done it by absolutely anything we wanted to. And then let's do the filter one here. So it's getting kind of hard to see. I'm gonna move this up, but we're gonna say the emails here. So if the email starts with info or admin, it's probably not the type of, um, email address that we want to reach out to. Let's say we're doing cold outreach, we want to make sure it actually has the name like this one has this person's name. If it's info or admin, it's probably not gonna land in the right inbox. So if we connect that up, and if we hit play like this, you can see this time all of them went through. So maybe not the best example, but all of them went through, none were discarded, which just means none of the emails started with info or admin. So really, really simple node, that one. And then we have Aggregate. So again, we can move this up. You can see right now we have 499 items, they're all separate items. If we run this into the Aggregate node and just put all items into a single list hit execute step. You can see now we just get one item that looks like this: data 0, data 1, data 2, data 3, data 4, and it's all in one variable. And let's say you only wanted to get data 2 and data 5, you could absolutely do that if you wanted to. Um, but yeah, all of the data now is in one variable, in this data variable, and each of them are chunked up into data 0, data 1, data 2 And then let's say the data that we receive is already like this and we want to turn it back into 499 items. What we do is we'd put it into split out like this, hit execute step, and then you can see it turns back into 499 items. They're all just in this data input here. So outputs 499 items. So I hope those ones make sense. Now we're going to move on to AI integration, and these are really the only two nodes that you're going to need for AI integration if you're just starting out. There are other ones, but I wouldn't worry about them for now. It's going to be your AI agent and your OpenAI message model nodes. And the AI agent, if you don't know what an AI agent is, is essentially an LLM like ChatGPT that you can prompt to, to do specific tasks. And it also has specific tools that it can use to perform almost any task that you need it to perform. And with the AI agent inside of NNA, you can see we have these three prongs down here. We have chat model, memory, and tools. So I'm just going to walk you through each of them. Chat model is just going to be the chat model that you want to use to actually power this AI agent. So you can use whichever one you like. Majority of the time I just use OpenAI and 4.1 mini. So you connect that up and you can see now it's connected up. And then memory, you have all of these options for the different memory. If you want to see the differences between all these memories, I will leave a link to my other video that I made that break down all of these memories. But for now we're just going to do a simple memory that basically whatever this number is set to here, that's the number of messages the AI agent will remember in the conversation. So right now it's going to remember the 5 messages in the conversation. And then we have tools. So these are the tools that the agent can use. We're just going to say Gmail. And then let's say we're giving this the function to send the message. So message send, we can do the to input, the message input, and the subject input. And if you hit this button here, it lets the model define the parameter, which means the AI agent is able to input this data into the tool. So if you said to it, send an email to Rory at autonomously-ai.com, with the subject this, with the body saying this, the agent will just automatically be able to input that data into the tools. And then also in here you have a user prompt and you have a system prompt. And the user prompt is going to be here. So you set this to find below. And then in here, the user prompt, this is going to be sort of like the variable prompt. So this is going to be the prompt that changes every time when you're talking to it and you say hello. Hello is the user prompt and it replies saying, how you doing? And then you text back saying, I'm doing good, thanks, how are you? Then I'm doing good, thanks, how are you? Is the new user prompt, if that makes sense. So it's kind of like the conversation you're having with it, all the different inputs that it's getting that change every time. Those are going to be the user prompts. And then you also have the option to add a system message, and this is going to be kind of its long-term instructions that don't really change. Obviously you can change them for like testing and development, but majority of the time they don't really change. They're just going to be its hard set instructions. So for example you are an email assistant that's able to help me send emails when I tell you who I want to send an email to, use the tool to input that email address into the tool, that kind of thing. It's like set instructions. Those are going to be in the system message. And then the messenger model node here, you can see looks pretty similar. The only thing is that we don't have the two prongs for chat model and memory. The reason for that is because chat model, this is an OpenAI messenger model node, which means you can only choose between OpenAI models. And for me, that's perfect because I only use OpenAI models really. So you can come in here and you can choose whichever model you want. So let's say 4.1, and then this one doesn't have a memory, but it does still have the tool function. So we could go Gmail, send a message again, for example. And the main difference between these ones is the AI Agent takes a little bit longer to set up, and obviously there's more functionality for it, but like I said, it takes a little bit longer to set up. And the Messenger model one is a lot quicker to set up. You can kind of just chuck it down mid-workflow if you want to include an LLM. If you want to include an LLM in there. Usually with these, I wouldn't include the tools. If I wanted an AI agent that I can actually use tools, I would just use the AI agent node. But if I just want a quick LLM step in my workflow, you can just chuck down one of these nodes here and you don't have to like connect up a chat model or memory, any tools. You literally just put the node down, give it a prompt, and it does whatever you want it to do. So to demo this out, we can actually grab the chat message from up here and then connect this up to our AI agent. And it's quite nice because in the AI agent, the user prompt has a built-in function for the connected chat trigger node, which is nice. So if we connect that up, it's automatically going to use our message as the user prompt. So if we come in here, we open the chat and we just say, hey, you can see that processes and it says, hello, how can I assist you today? Then if we wanted to use some of the tools, we might say, send a message to Rory at autonomously-ai.com saying what's up. So I said send a message to Rory autonomously-ai.com saying what's up, and it said I sent the message saying what's up to Rory autonomously-ai.com, and then I get an email saying what's up from our AI agent. So absolutely perfect. And then this chat message works exactly the same with this model here. This one also doesn't have the theme with the built-in connected chat trigger node user prompt, so you'd have to do is you just drag in this chat input into the user prompt. And then again, it works the exact same way. So you can say, hey, tell me a joke. You can also see that it looks a little bit weird like this output, which is why these are kind of better just in workflows to give, because we get, uh, this output here. You can see these are kind of just better to use in workflows, and these AI agents are much better to use as actual, um, AI agents So yeah, that's when you'd use both of these, and that's how both of those AI integrations work. Like I said, there are more that you can use, but I'd recommend only really worrying about these two. And then we have data storage, and this is something you're going to be doing during your NAM workflows. You're either going to need to long-term or temporarily store your data for whatever reason, and the best way to do that in my opinion is either going to be a Google Sheet or an Edit Fields node. So with a Google Sheet, all you can do is you can do a resource sheet within document and then append row. And if we just choose a random spreadsheet, let's say this one here, Cheap Leads, and then Apollo— this is the one that I use in this Google Sheet node here, so it's the same one— and then it's just getting the columns for us. And then in here we have the different values of the data that we can put in. So these are just the columns of that spreadsheet I already showed you: name, email, LinkedIn URL, company name, yada yada, you already know all of them. and you can just put whatever data you like into here, and it's just gonna store that data in a Google Sheet. And then afterwards, you can do one of these nodes here to get the rows in the Google Sheet. So it can just kind of act as a memory. That is the most simple and easy way to set up a memory in NAN, either for your AI agents or for something in your workflow. I actually did this in my last video, the newsletter system video. Basically what I did was I made it so there's an AI agent that can look at different news stories from today, and let's say it gets 10 different news stories. It can loop through all of those to get the news stories. And then the AI agent that's looking through each individual news story, it can output its data into a Google Sheet, which then means by the time it's looped through all 10, all we have to do is give another agent access to that Google Sheet and just return the rows. And then it just gets all of the outputs from that AI agent that was getting the— that was searching through those URLs or those things that we're using in the newsletter. So doesn't make sense, go watch my last video and you can see, um, exactly what I mean by that. But yeah, I hope that makes sense, kind of using it as a memory that you can use later on in your workflow. Just makes everything way more manageable and way simpler. And then we have an Edit Fields node, and this is basically a way for you to store variables inside of your RN8N. So if we grab this node again quick and we bring it down, and then if we execute it and then drag it into here like this, and then have a look inside. And now we actually have some variables to play with. So if we grab the name like this, you could rename this to whatever you want. You can name it name 10, for example, um, and then the 499 items would be name 10. But then let's say you wanted to grab, just for the next step in your workflow, from this output here, all you wanted was the name, email, and LinkedIn URL. You didn't need anything else. You could just grab the name, the email, and the LinkedIn URL. And you can name these something like LinkedIn URL need now, because you need it right now in the workflow, uh, and you don't need the other variables. You could just say need now, need now. And then you can get an output that is just the names, emails, and LinkedIn URLs like this, all just bunched together. Or another thing you could do is, let's say you wanted to actually manipulate the results that are in these variables, you could add 'need now' to the end of them as well. For whatever reason, you might want to, um, yeah, have these included in the actual value of the variable. If you hit Execute Step now, you can manipulate the data so that they all say 'need now' at the end of them. And it's just a great way to kind of like store your data or more store variables throughout the workflow. There's so much you can do with these things. So that is the best way I found to, yeah, like I said, store these variables across your workflow pick out the variables that you need, uh, get rid of the variables for now that you don't want, and just store data together in a way that you understand. You could even do things like grab the name and the email address like this and say names, uh, and emails. And then you could execute it. Let's say we wanted to get rid of both of these like this, names and emails. And let's say we want to do it like name and then email and hit execute step. Then we get 499 items that look like name and then email. So it's kind of a way to like bunch data together and get the data that you actually need for variables later on in your workflow. So that is it for the video, guys. I hope you learned something. I hope this was helpful for you if you're starting to learn NAN, or if you've been learning it for a little while now but you're still struggling to get your head around it. If you focus on these nodes I showed in this video, you can pretty much build anything you like. Um, you don't have to worry about all the fancy things that people show you and all these like secret nodes that do crazy different functions. If you stick to the basics, the bread and butter, you'll get very, very far by just mastering these nodes. So thank you for making it to the end of the video. By the way, if you did want to work with me so we can implement some AI solutions into your business, then I've left a link to my website in the description and you can go ahead and book up a free call and we can talk about some ways to integrate AI into your business. Yeah, that is it for the video, guys. I'll see you in the next one.
More from Rory




Dynamic Workflows are crazy. This is how to actually use them (beginner's guide)






