
Manual follow-ups will lose you leads, this ai system fixes that (free template)
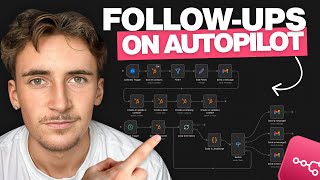
Rory Ridgers shows two automated workflows that replace manual lead follow-ups. The first sends a welcome email instantly when someone books a call. The second checks HubSpot daily and sends tailored emails on day 1, day 3, or day 5 after a proposal goes out. Both workflows are available as free templates.
Chapters
Responding to a lead in the first 5 minutes can increase conversions by up to 400%. Leads contacted within the first 5 minutes are 21 times more likely to convert than leads that are contacted within the first half an hour. So if you're still manually responding to people when they inquire and also manually following up when sending proposals or quotes, you're almost definitely losing out on deals that you should be closing. So in this video, I'm going to show you the exact system that we use to automatically follow up after a call is booked and automatically follow up after a proposal is sent. and if you stick around, I'll give you the template for free so you can start using it straight away in your own business. Just quickly, if you don't know who I am, my name is Rory Ridgers and I run an agency called Autonomously AI where we find and eliminate operational bottlenecks in just 14 days to keep you focused working on the business rather than in the business. So if you'd like to see how we can help you, then you can book up your free discovery call using the first link in the description. Without further ado, let's get into the video. Okay, so this entire thing is actually comprised of two different systems and we have those systems here. And what I'm going to do is I'm going to walk you through one of them at a time and then we're going to demo it, we're going to see what happened, and then we're going to move on to the next one. So this first one here, to give you a high-level overview of what is going on, we have a Cal.com trigger, which is just what I use for my bookings. So Cal.com trigger, once someone books up a new call with me, it's going to trigger this scenario. It's first going to search my HubSpot contacts just to make sure that person that booked up a call isn't already in my contacts. So to make sure they're not a partner or a lead that I've already spoken to or an existing client. That way we know if they're not in my CRM, it must be a new lead. Then what we do is we instantly send out that message, basically just welcoming them and prepping them for the call. And then what we do is we create a new contact in my HubSpot, create a new deal, create a new company, and then we associate all of them together so they're all nicely assorted in my CRM. So everything's ready to go. They've already been sent their welcome message and everything in my CRM is prepared. So what we're going to do is we're going to test this out. So I've got mycal.com booking form here. I'm just going to select a random time. We're going to book in a call. And then we're going to see how it works in NAN. So first thing I need to do, come over to NAN. I'm just going to execute Cal.com trigger. It's now going to wait for an event. So let's come over, let's put in an email address that I know isn't in my CRM first. Perfect, there we go. Let's go company name, we'll just say test for this. And then how can Autonomously AI help you? Again, we're just going to say test because this is just a test one, so it doesn't really matter. We'll hit confirm. This is going to spin for a second. Okay, so that all went through, and then as you can see, this literally happens in a flash, so I barely even caught it. But what we can do is a breakdown of what actually happened here. So that event came through in mycal.com. As you can see, free discovery call between Rory Ridgers and Rory Ridgers. The organizer name was my email address here, and then this was the one that I put in, as you can see. Perfect. And then what it did is it searched my, uh, HubSpot contact. So it used that email here, as you can see, r@roryridgers.online, and it said that there was no one in my CRM. So it went for a filter here that basically says if this variable is valid, meaning if there is a contact in my HubSpot that we just got from the step before, then basically stop. And if there isn't one, as you can see here, there isn't one because this is undefined. That means just keep going. So don't filter out, which is exactly what it did. Then what we do is we just add an edit field step. And this expression, all it does is it just takes that full name, turns it into a first name that we can use in the email. So that's what it's done there. It's taken Rory Ridgers, broken it down to just Rory. And then we have a send message here. So an email send message is going to that email that we would've got from here. So if we look at cow.com, this email here, the attendee are at RoryRogers.online. Subject is Autonomously AI Consultation. And the email is just really, really simple. Just says, hey Rory, I've just received your inquiry and wanted to introduce myself. If you have any questions about the upcoming meeting, just reply to this email. I'm looking forward to speaking with you soon. Rory Rogers, Autonomously AI, and then my website there. So you can have this more in depth and, well, I mean, you can have it say whatever you want. It could send over resources. Answers. Could give them a checklist for the call, could give them an agenda for the call, something like that. But I found that just reaching out to the lead and just introducing yourself, saying hello as soon as that booking comes through, is one, just going to dramatically increase conversions anyway because they're going to be more familiar with you, they're going to be more likely to convert because, you know, you've reached out to them straight away. And two, it's massively going to decrease the, um, no-show rate. So a lot of these leads, sometimes if you don't send them a follow-up message and introduce yourself they kind of like forget about the call. I think you aren't interested, they think you don't care. So in the end, they just aren't really excited for the call, aren't really that bothered, and then just don't show up. So then what we do is we come to HubSpot and it creates a new contact here with the email and then the company name, the first name, and then, and then the last name. You can see that I accidentally just clicked the bin icon, um, so I just deleted that variable, which is kind of annoying. I'll add that back in after. And then what we do is we create a deal. So just the associated vid names or ID is just going to be this vid up here. So essentially we just associating the contact that we just made with this new deal that we're making. And then we just name the deal. I just name it the name of the person. You can do the company name or something more specific. Then we create the company and the company name, really, really simple. It's just a company name variable that we would have got from the Cal.com trigger. And then what we do is we go to create update a contact. We put in the email address of that contact that we just made. So as you can see here, that's the email address and then associated company name or ID and then the company name. So we just get the associated company name or ID. As you can see, it is the company ID that we just made. So now what we're doing is we're just— the contact is already associated to the deal, we're just associating that company to that contact. That way all 3 of them are all associated. So then if we look here, this is the new contact inside of HubSpot. We have the name, the email, the associated company, pretty much everything we need. Then also some activity down here, which is just the free discovery call. Awesome. So that's everything we need for that. And now that is the first system that instantly reaches out to them after they book up a call. And does everything inside of your CRM. Nice simple system. By the way, guys, if you want to get the free template for both of these different systems, then all you have to do, go into the description of the video. You see the first link, which is to book up a call with me, and underneath that you'll see the link to grab this template for absolutely free. So go ahead, grab that free template. Let me know how it goes when it comes to implementing it into your business. And if you have any questions, of course, you just reach out to me. My email is in the description of my YouTube channel. And then what we have here is a system is going to automatically follow up after that proposal is sent, and you literally don't have to lift a finger. What this does is it starts with a scheduled trigger that's going to run every single day. You can set the time if you like, but it's just going to run once every 24 hours. It's going to search through all of your contacts, and what it's going to do, it's going to look for a proposal sent column. So in HubSpot, I have a column, you can see if I scroll to the far right of my CRM here, that says proposal sent. And this is just exactly what it says it is, it's just a column that basically tracks when the proposal was sent. And the way it works, it's really simple, it's literally just a date. So you come in here, if you send the proposal today, you would just hit that date there, or whichever day you sent it, you would just hit the date. So what this is going to do is it's going to basically scrape through all of the ones where the proposal sent is valid. So basically the proposal has been sent. You can see a lot of these are blank in here, uh, which means the proposals haven't been sent. So it's going to look at all the ones though where the proposal has been sent, and then we use JavaScript here to calculate how many days ago that was sent. And then we have a 3-step sequence here. So there's going to be one email that's sent, one day after the proposal is sent, one that's sent 3 days after, one that's sent 5 days after, and then anything in between that— so 2 days, 4 days, or anything past 5 days— just goes into no. You can completely customize this sequence however you like. You could do 1, 2, 3, and then 10 days. You could do a week, 2 weeks, 3 weeks, absolutely whatever you like. For this, I just did 1 day, 3 days, and then 5 days. So this is going to be all completely automated once you just put in your CRM the date that you sent off that proposal. So let's test this out quickly. Let's go into the contact that just made, which is this first one here. And let's say the proposal was sent, uh, yesterday, so on the 17th of January. That's going to save there. You can see 1 day ago, so the system should pick that up. So let's run this through. And yeah, as you can see, it literally happened instantly there. Blink and you'll miss it. Um, the scheduled trigger— obviously we're chucking it manually, wasn't on a schedule here— but it searched through the contacts and then it got 3 items just for testing out here. I haven't, um, looped it back up, but of course these would all be looped back up like this. So all the ones that— there was 3 proposals sent, it went through, grabbed that first one, which was the one I just showed you. And then this JavaScript code basically just outputted my email, my first name, my last name, and the amount of follow-up days. So it was 1, so we sent the proposal 1 day ago. Goes through this big switch node that has all the different, uh, kind of like the logic in here. If it was 1, 3, or 5 days ago, went down the 1 route, and then we should have got an email. So we're going to disconnect these again just so we're sending 1 at a time. But now let's change this. So let's just simulate and say We sent this 3 days ago. Cool. Come back over, hit the button there. Then as you can see, this time went down this route. So this would've outputted 3 days, went through the switch node, went to 3, and then we got this email here. Let's come over to my inbox. Just as any questions on the proposal. Hey Rory, just want to follow up in case anything in the proposal needed clarification. Usually at this stage it's one of 3 things. Timing isn't right, something needs tweaking, or you just haven't had a chance to review it. Let me know which bucket this falls into and I'll take it from there. Fantastic. That's absolutely perfect. And then just to show you how it all works. Let's set it to 5 days ago as well. Perfect. Run this through, should go down the 5 route and then we'll get an email. Cool. We just got this email. Should I close the loop? Hey Rory, haven't heard back. I just want to check whether this is still something you'd like to move forward with. If now's not the right time, no problem at all. Just let me know and I'll close the loop on my side. Appreciate the update either way. Cool. So in there you can see that's completely automated. Obviously I'm manually changing it inside of HubSpot, but that would just tick over as the days pass. So now we'll have a look into how you actually set this up. So the trigger, Dead simple. It's literally just trigger interval days, days between trigger 1. So just every day, essentially it's going to do this once a day. And then trigger hour, I did midnight. If you don't want to be sending emails at midnight, then fair enough, you can set it to whatever time of the day you like. Let's say we'd rather at 3 PM, for example. And then search contacts, what we do here, you go to resources, contact, operation is search. We're going to search contacts rather than like get or get many. And the limit is going to be 100. So this doesn't really matter, this really depends on like how many proposals you're sending out, if you're doing more than 100 in that 5-day window, then set this to higher. Doesn't really matter, but for me it doesn't really make sense to do more than 100. So then what we do is we go to filter groups and then the property name proposal sent. So that column that I showed you, proposal sent, we're only looking at that one, and the operator is known. So basically, so if that proposal sent column for each contact, if it has value, they're the only ones we care about, and that's what we want it to return. And then we've just said down here we want it to return the first name the last name, the email, and then the proposal sent. And that's exactly what it did. We got 3 items, we got their email, their first name, their last name, and then when that proposal was sent. So 2026-01-13, so the 13th of January 2026. And then because we've got 3 items, we're gonna have to loop over each of them. So we just add a simple loop over items node, set the batch size to 1. This just means it's going to loop through each thing once. So 3 items, it's going to do 3 loops. And then we have this JavaScript code here, and essentially what it does— it's not crazy complicated— what it does is it just takes the this proposal sent date and just calculates how many days ago that was. So if you're looking at this JavaScript and you're worried because you don't know how to code, don't worry at all. Neither do I really. I understand this code, but I don't write it myself just because there's not really any point in manually doing it. I get ChatGPT to write all of this. I just tell it exactly what I want and then it outputs this for me. Yeah, as you can see, follow-up date, it said 5. So this date was 5 days ago, and then it also outputted for us the email and then the first name and last name. It's basically just all the info we actually need. And then we just add a switch node here and we put in that variable follow-up day, go to number is equal to, and then just 1, 3, 5. And then we also just have a no column. So basically, if it's outside of that 1, 3, and 5, uh, schedule there, if it's like day 2, day 4, anything past day 5, I'll put no. And that just means basically it will stop and it'll just go back up to the loop. If you're wondering, by the way, why this is highlighted red, it's just because these variables here are numbers, and that's why we did number, but then the word no is a string. So that's why this one is string and equal to, but this variable currently is a number. So that's why it's red, it's showing up red. If this was to actually have outputted no, then all of these would be red. And this one would be green. So basically, the one that could actually go through will be green and fine. The one that it would never have been anyway is red in this case, because it's not no, it's 5. Hope that makes sense. And then what it does, depending on which route it goes down, it's just going to go to Gmail, it's actually going to send that message out. So let's look at this fifth one because that's one that actually went through. The to email is going to be from the switch node, the email here, so r@roaryridges.online. The subject, should I close the loop? And then here is the email body, and then you can see the email body here. And then, hey, we just dragged in their first name there. And of course, like I said, you can grab the template for this and you can change this to whatever kind of sequence you like. It's literally just change the day numbers in here to whatever and then change the actual content here. And you can even add more if you want to, so you could have a 10-step sequence, for example. Okay, so that is it for the video, guys. I hope you enjoyed it. Like I said, make sure to grab the free template for this so you can start using it straight away. And if you were curious about how AI can be used in your business, or if you had a specific system in mind, then don't hesitate to book up your free discovery call with the first link in the description, and we can have a chat about it. Anyway, thanks for watching. I'll see you in the next video.
More from Rory




Dynamic Workflows are crazy. This is how to actually use them (beginner's guide)






