
Stop doing manual LinkedIn outreach. Use this instead (free template)
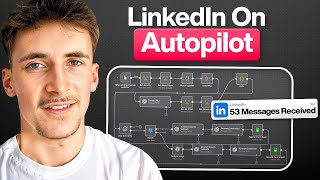
In this tutorial, Rory Ridgers demonstrates a complete, no‑code automation pipeline built in n8n that replaces manual LinkedIn outreach. The workflow starts with an Apify actor that scrapes recent LinkedIn posts for a chosen niche (e.g., AI), extracts essential fields (author name, profile URL, post text, image URL), and then aggregates the profile URLs. A second Apify actor enriches each profile with company, size, email, and other metadata. The data is cleaned with JavaScript nodes (code generated via ChatGPT) and fed into a conditional branch that checks for an image. If an image exists, an n8n "Analyze Image" LLM node extracts a description; otherwise the branch skips this step. Both branches then invoke LLM prompts to generate a personalized LinkedIn outreach message and a matching email body, using inputs such as name, post content, job title, company, and image description. The final records – name, title, company, LinkedIn URL, website, email, outreach message, and email body – are written to a Google Sheet. Throughout the demo, Rory explains practical considerations like avoiding cookie‑based scraping to protect LinkedIn accounts, configuring Apify nodes, using JSON bodies for API calls, and leveraging AI‑generated code to simplify JavaScript. He also shares tips for scheduling the workflow, reviewing messages before sending, and offers a free template and consulting services.
Chapters
What's up guys, in this video I'm going to be showing you how you can automate your entire LinkedIn outreach so you don't have to be manually sitting there anymore looking up different people on LinkedIn, crafting outreach messages, and then sending them over those messages. This system will find new leads for you from LinkedIn, research those new leads, and then craft an outreach message for you and also an email body if you want to send them over an email. By the way guys, if you want to grab the free template for this so you can get started with it straight away, I've left the link in description. You can just follow that link and get the template for absolutely free. That's not wasting our time, let's get into the video. I'll show you how it works. So we're in NAN now And this is the entire system. As you can see, it's not that big, which is good, but it gets everything done that you would need it to do. So just to give you a quick kind of overview of the system and what we're looking at, basically it starts off with a click to execute. I would recommend having this on some kind of timer or having it on a form submission so that it can actually be regular. But, um, for this demo or for this example, we're just doing a click to execute. Makes it a little bit easier when we're sort of demoing this out inside of NAN. But the first step in here is an Apify step. So we run the actor and then we get dataset items. These kind of steps go together, they're just the same thing. It's calling an Apify actor, and what we're doing is we're scraping posts of people that are posting in any specific niche. So you can put in any niche you want. You can put in real estate, AI, marketing, web design, whatever it is, uh, or whatever the people you're trying to target are, you can put in that specific industry And then this actor on Apify is gonna go through LinkedIn and scrape all of the most recent posts for that search query. And it's also gonna get some of the information on the people that are posting it, just like their LinkedIn URL, their name, that kind of thing. And then what we do is we bunch all of that information together. So the information that we get through here, we get a bunch back, but we don't really need all of it. We just extract the information we actually need, which is going to be their name, their LinkedIn URL, the text of the post that they posted on LinkedIn, and then also if they had an image in there, then it will include the image URL. Then we grab all of the profile URLs and we quickly format those, and then we send that over to another actor on Apify. And then we go into a little bit more depth into these LinkedIn profiles. So we're just scraping through the LinkedIn profiles here to get back all of the information we'd need, like the company they work at, the employee size, where they're based, their email, all that kind of information we get from this actor here. And then we just have another code node that basically groups up all the information from here with the information that we get from here. So we just get a list, um, for each lead containing like their name, their location, the company they work at, their email, and also the information on the LinkedIn post that we've just scraped. So like the image URL, the text from that post. So just everything we'd need to craft an outreach message to these people. And then we have a loop over items node. So we just loop over each, uh, lead. There'll be maybe like 50 leads that come through here. We loop over each of them. If it has an image, it goes this way and we just analyze that image. And then we have an LLM step that will generate an outreach message for LinkedIn and also generate an email body. If it doesn't have an image or if it's a video or something like that, then we go this way and it just generates a LinkedIn outreach message and email body based on all the other information we have. So there'll still be the text from their LinkedIn post. So it'll still be kind of about their LinkedIn post. Then it all gets put into a spreadsheet that looks something like this. We have their name, job title, company, LinkedIn URL, company website, email, then the LinkedIn outreach message, and also the email body message or the email message that we're going to be sending over to them. So that is the basics of the entire system. We're just going to run this through so you can see exactly how it works, and then we're kind of going to go into a bit of a breakdown of what's actually happening and how to set this all up. So if we hit execute workflow, we'll see it go through here. It's first going to run that first actor, and for this one we have it set up for AI, so people that are posting things about AI. We get all of the recent posts, we set it to 15, get the items, bunch those items together, which looks like this. And then we grab the URLs, the profile URLs, and this LLM step just formats those URLs. And then we run this other actor that's going to sort of enrich their profiles and get all the information we need from their profiles. And this one does take a second, so we'll, um, we'll come back when it's done. Okay, so you can see that's just finished running, and we got the dataset items. We grouped all of that information together with the information that we got from here. Now we're looping over the items. You can see it's already on the second one here. So the first two had no image, so we just generate— it went this way. We generated the LinkedIn outreach and then the email body, and then we should see this being added to the sheet. So yeah, this is what we see added to the sheet. Sometimes it can't find the job title and company of these people just because it isn't on their LinkedIn profiles. There's not too much we can do about that. But if we look at this one, we have the name, we have the job title, we have the company, we have their LinkedIn URL, we have their company website. Couldn't find their email for this one, but then the LinkedIn message looks something like this. Uh, enjoyed your post about navigating peer review and building your following in the age of AI and Grok. Um, which is obviously what their post was about. And they also generated an email body that looks like this, which is just a little bit more fleshed out and, um, like an actual email body rather than a LinkedIn message. So this one actually errored only because I, um, changed the column slightly. It was a duplicate column and I got rid of it. Um, so it says column names are updated after the node's set up. Don't worry, everything's working here. You can see the email body was generated and the LinkedIn message was generated. But if I was to rerun it after updating these columns, um, it would start the entire system again. We'd have to sit here and wait for it. But yeah, you can see the LinkedIn outreach message was generated as well as the email body. So if we actually have a look at this now, we can have a breakdown of how to set all these nodes up and what was actually going on here. So the first one, we're just running an actor. And this is the actor that we're actually running on Apify. And if you don't know what Apify is, it's basically just a big database of different scrapers that you can use via API. You can use them through the web interface like this, or you can use them via API to pretty much scrape anything. So this is the one that we're using, it's called LinkedIn Post Search Scraper No Cookies. Sometimes with, um, especially with LinkedIn scrapers, you might have to set up cookies. That's why it says about the cookies. We're which basically just means you paste the cookies from your account into the scraper, which means the scraper's kind of running through your account. And you can do this if you want, but I would recommend kind of not doing this regularly and also not doing it for scale. If you're doing this for like a client or something that's going to be using it loads, I'd recommend not trying to go down the cookies route, only because if LinkedIn detects that you're scraping through your own account, you can get your own account banned. But if you're doing it this way, With no cookies, there's no risk of your account getting banned because it's not tied to your account in any way. Anyway, here you can see the different inputs. So the search keyword, the sort type, which can either be relevance or date posted. I've done date posted so we can get kind of the most recent, like as soon as someone posts, um, we can reach out to them about that post. I feel like that makes the most sense. And then just the number of pages, the filter if you want to do a date filter. So you could do like past 24 hours, past week, past month. And then the results limit. So I've just done 50 results. And the way we actually connect this up to N8N— N8N now has a built-in sort of native Apify node, which didn't have before, which is really nice. So you do— I put this, uh, Apify node down, connect up your Apify account, and you can just select the scraper that you're looking to use. And then you just have to put in this JSON body. And the way you find that is by switching this from manual to JSON, and then it already has the inputs that we've put in here. So JSON you just copy that, paste it into here, and then you can switch this out with whatever you want. So this could be AI, this could be marketing, this could be landscaping, roofing, whatever it is, whoever it is you're trying to target, you would put that keyword into there. Then you set the limit, the page number, and also the sort type. But I've just left that as is with AI, limiting it to 50. And then we get this data back, which isn't the actual data we want. It's basically just the data to say that the actor's finished running. And the way that we actually get the data is we put down this get_dataset_item systems node, and then we just put in this default dataset ID, which is going to be the dataset ID from this actor run. Um, so it's kind of like the specific unique key that was generated with all of this data, and then we just use that key to retrieve the actual data. And it'll look something like this, um, so like a post URL, the text, the URL, and then the author, their profile, and then some of the stats. So like the number of, um, likes, reactions, some of the comments things like that, the hashtags. We get all of this information back and you can see we get 50 of those and then we bunch that together and kind of just get rid of this fluff, the stuff that we don't really need. So we just have this JavaScript here that's just going to extract the post URL, the text, the name, the profile URL, and the image URL of the image if there is an image. Sometimes there isn't an image, sometimes there is. So we extract the image URL if there is one. And if you're looking at this code here and thinking, oh God, I have no idea what's going on here, Don't worry, I don't really have much of an idea how to write this code either. I kind of understand it when I'm looking at it. I don't really know how to actually write this. And this is what I say in all my videos, you don't really need to learn how to actually write JavaScript code. I use it all the time, still don't really know how to write it. I just use AI to write all of my JavaScript code. So if you wanted to do something like this, all you do is you just upload sort of like a screenshot or something to ChatGPT and say, you know, I get these, um, I get this output from this step and I want to just extract these certain variables and I want 50 items. So if there's 50 items that come through, I want it to do it as 50 items like this and I just want to extract these variables. Get ChatGPT to write you the JavaScript code and it works pretty much every time, first time. So yeah, that's that. We get these variables here and then we just grab the URLs because we want to aggregate them because you can see there's two reasons why we do this. One, we just want to actually grab just the profile URLs because that's all we're working with. But two, we want to change this from 50 items to 1 item, because if it's 50 items, it's mean it's going to do everything 50 times. So if we just pass this, uh, output here straight to this Formatting URLs LLM, it would just take each variable and run it through 50 times. So instead of doing all 50 variables once, it would look at each variable and process them 50 times, and we don't want that. We want it to process all of them as 1 item. So we have this aggregate node here and we've just put in the profile URL. We want to aggregate all of them into one variable. So you can see this is what we get here. We get this big output like this that just contains all of the profile URLs, and then we pass that to this LLM here that's just formatting them like this. So pretty boring prompt, but we're just telling it how to format them, and it will look something like this. And the reason we need it formatted like this is because for this next actor on Apify, which is going to be this one here, the Mass LinkedIn Profile Scraper with Email, and again, no cookies. All we need to do is we need to just give it a long list of the profile URLs, all the profile URLs that we want to scrape. We just input in a format like this with profile URLs and then the actual URL. So the easiest way to do that is just to get an LLM to take all of those profile URLs and format them in the JSON body that needs to be sent over to the actor on Apify. So we get the LLM to do that, and then in the input here, we literally just put the output from that LLM, which will be formatted like this, which you can see, uh, is the exact same as how it needs to be formatted in Apify. So absolutely perfect. We run that, and then same thing as that first actor, we get, um, we don't actually get the data, we just get the output to basically say I'm finished. And then we use a get dataset items again, put in the dataset ID, which is this one this time, and this is all of the information that get back. So we get like their connections, their followers, their email, phone number, job title, company name, industry, website, all of this kind of stuff. We get actually quite a lot of data back from here. Um, a lot of this we don't really need. A lot of it's like their education, certifications, uh, experience, that kind of thing. We don't really need any of that. So we just put down this other JavaScript node that again, this code was generated by ChatGPT. Which basically just extracts the variables that we actually want and matches them back up with the output from here. So from this one we get these 5, and then we just add some of the enriched data from here, and we get an output that looks like this. So we get the same ones as before, the post URL, the text, the name, the profile URL, the LinkedIn URL, but then we get all of this extra enriched data. So things like their first and last name, headline, connections, followers, email, mobile number, job title, company name, yada yada, and then image URL at the bottom as well. So we just get all the information from that first code node here, which is basically just like their basic information as well as their post information, and then extract their profile information and then just bunch that all together. So we get 50 items with just all of the variables from each person with all of the data that we actually need. And then we just have a simple loop over items node. So you can just put this down and put in 1. It just means it's going to loop through um, each item once. So there's 50 items being inputted, so it's going to do 50 loops. And then we have a switch node here, and what we're trying to do is determine if the image URL is there. Because the way this is set up is that if the image URL exists, like if that post was an image, had an image URL, then the image URL variable will be there, as you can see. But if there was no image, let's say it was a video one, or it was just purely a text post, um, the image URL variable won't even be there. It's not like it'll be empty, actually won't be there. Like, we won't be able to drag it or anything like that. So if you ever want to do this in NaN, you want to sort of work with a variable that sometimes exists, sometimes it doesn't, all you do is you put in the name of the variable and then you should do a question mark true colon false like that. And then it's just going to output true if it's there or false if it's not. So we just set this to boolean, and then true or false. So if it's false, it means there's no image because this variable doesn't exist. And if it's true, it means it has an image because this variable exists. And then it just splits down two different paths, and these paths are pretty much the same except if it has an image, it goes to analyze image. So to analyze the image is just a built-in ChatGPT node called analyze image, and you just pick the model with the text inputs, what is in this image. You can do more if you like. and then we just put in the URL that we get from the switch node. So the image URL, we put that in, and then the AI will analyze this and give us an output that looks something like this. And then we pass that to a generate LinkedIn outreach message node, and we give it these inputs. So the name, the post text, the image description, as well as the person's job title, company name, and company size. And then we've just given it this, uh, prompt here. Let me open this up so you can see it. So you're an expert B2B sales outreach assistant. You'll receive these inputs that I I showed you. Your task is to write a short professional cold outreach message that feels personalized to them. And there's a lot of stuff in here, but I've kind of given it context on what we sell, and I've made up like a fake business selling, um, marketing. So we sell like lead generation stuff, we sell content marketing, marketing automations, that kind of stuff. And then just some guidelines about how to write these messages. And then it gives us an output that looks like this. So, hi Ankita, I enjoyed your insights on how to generate on how generative AI is reshaping animation by driving creativity and efficiency. Your role in SEO and market research, leveraging targeted lead generation and content marketing could help you showcase these initiative trends to the right decision makers more effectively if you're open to it, blah, blah, blah. And it just does like the call to action at the end. So you can see it's included the information from their post and from their profile and then tied in the stuff that we sell to make an outreach message to them that isn't too salesy. Um, but yeah, it's quite nice. And of course you can adjust this to be more salesy, less salesy, different sales tactics, that kind of thing. And then we just generate an email body here, and we've kind of given it the exact same inputs. We've just said name, post text, image description, job title, company name, company size. And the, um, prompt looks almost identical as well, so I'm not going to show you it, but it's basically just saying instead of a LinkedIn outreach message, generate an email body, and it'll give us something like this. Uh, hi Enkita, I enjoyed your insights on how generative AI is reshaping animation by automating complex creative tasks, accelerating content production. Given your expertise in SEO and the evolving digital media landscape, I thought you might find value in your advanced mark— in our advanced marketing services, especially around targeted lead generation and content marketing that can help amplify Polaris market research and engagement with the right audience, which is really cool. So you can see here it's actually used the information from her profile. So obviously her name is Ankita Patel, uh, but then our job title is a search engine optimization executive, which included in both the LinkedIn outreach message and the email body. And then also it included her company name, which is Polaris Market Research and Consulting. And you can see it included, um, that in the email body, which is really cool. And then we just have a Google Sheets node here where we just basically take the columns of this Google Sheet and just mapping all of the data into that. So name, we just drag name, job title, we drag job title. A lot of these are from the switch node. So if we open this up, you can see name is from the switch node here. Uh, job title is also from the switch node. And then the company, her LinkedIn URL, the company website, the email, the LinkedIn message. For some reason this is red, so we're just gonna delete this and we're gonna drag in the LinkedIn outreach message. And you can see, yeah, now it's green, which is perfect. And then the email message. So if we execute this, yeah, it's going to start again from the beginning, which is annoying, so you can't see it go through. But this is a trick, by the way, of N8N if you didn't know this. If you go to Executions and then you look at your past executions, so for example this one, this is one that errored because I said I changed the, um, Google Sheets columns. If you go to Debug and Editor, it will open the exact thing inside of your actual editor, so you can sort of look around and you can change stuff. So there's a little top tip for N8N. if you didn't know that. So if we look at the other route, it's just the exact same thing, but no image. So in this input, we just don't give it an image description, exact same prompts. But again, yeah, we just don't give it an image description. And here you can see how the data actually goes into the Google Sheet and it outputs something like this with all of that data now in the Google Sheet. And if we just have another look at the Google Sheet, this is the kind of thing that you're getting. You can see a lot of the time the emails aren't appearing just cuz these, um, personal profiles a lot of the time don't have emails on there. But if they do, of course, then the email message is ready to go. But chances are, if you're looking at people on LinkedIn, you're probably going to want to reach out to them on LinkedIn. But I just thought email message was kind of a nice backup if you, um, wanted to do both, or if you preferred email outreach. So yeah, you can see here, majority of these, we're getting the job title, we're getting the company, we're getting the company website. And every time, of course, we're generating a LinkedIn message and an email message that actually relates to their posts. And relates to what we're actually selling them. Yeah guys, that is it for the video. I hope you enjoyed it and I hope you learned something. I hope this actually helps you when you grab the free template, um, with your LinkedIn outreach because I know it's like a big thing. I know something that a lot of people are doing is, um, reaching out to people on LinkedIn. So with this system you can pretty much completely automate all of that. All you have to do is like review the messages and actually send them over. Yeah, apart from that, everything's automated. As I said as well, you can set this on like a timer so you get these things through every day with the most recent posts, or every week, or you can do a form submission if you're like constantly changing the niche that you're targeting, your ICP, that kind of thing. But yeah, grab the free template, use this system straight away, modify it how you like, and I hope it helps. And also, if you did want to work with me so we can implement AI solutions into your business, I've left a link to my website in the description and go ahead and book up a free call. That's it for this video. I'll see you in the next one.
More from Rory




Dynamic Workflows are crazy. This is how to actually use them (beginner's guide)






