How To Live Stream With Facebook Live Producer From Your Page
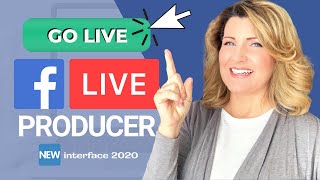
Sheryl Plouffe walks through Facebook Live Producer setup and broadcast on a business page. She covers three input options (camera, paired encoder, stream key), key toggles like comment moderation and auto-unpublish, and shows how to go live, monitor stream health, and engage viewers using her "3E" outline: Engage, Educate, Enroll.
Chapters
Facebook Live, when used properly, can be a great way for you as an entrepreneur to increase your authority online. Sheryl Plouffe here, video strategist. In this video, I'll show you how to use the new Facebook Live Producer, which is the new way to go live on Facebook. I'm going to show you step by step how it's done. Like the video, subscribe to the channel, and let's go over to my computer and I'll show you how it works. I'm on my Facebook account right now, and I'm going to show you two different ways to access this new way of going live. So if I click over here, and since we're focusing on in this video going live from a business page, I'm just going to go over here to my business page and I will scroll down to the point where I am wanting to create a new post. So I'll just scroll down and I'll show you an alternate way to reach this in a moment. So here we are, create post. Here it is, create live stream. So if I click that, watch what happens. I get to this interface that is the Facebook Live producer interface. So this is what it looks like. If I scroll up, if I scroll down, just notice the layout. And this may seem a bit overwhelming for those of you who've never used it before. I'm going to walk you through everything. But there's another way that you can access it. And that's by going directly to Facebook.com. Let me put this up here. You could, if you're logged in, you have to be logged into your account, Facebook.com/live and then producer. And it'll bring you right back to the same place. So depending on how you want to access Facebook Live producer, there are a couple of ways you can do it. Today I'm going to focus on going live now from my page rather than scheduling a live video. We're going to focus on if we wanted to go live right now from our computer desktop laptop and do it right now in the moment. Okay, so we are going to focus on doing it from a page, as I mentioned. So let's do it here. We're gonna just choose page. We'll wait for that to come up. And there's my— I can tell that that's my Facebook page profile picture, and it's listed right here. Now I will want to put a title, obviously, in here. So add title here. I like to use capital letters for each of the The first letter of each word. And then, of course, I specialize in helping entrepreneurs to increase their authority and income with video. And so we want you to be creating live streams that do just that, that really position you as a leader, as an expert, as a resource of what you do. So you're gonna want to add, you know, a description here of what this live stream is, what is in it for the person who's viewing. Add a description. It's going to help get more people interested in watching your live stream. Now, if I go a little further down, there are some other options. If you have a cross-posting relationship with another page, you can choose which page is going to be able to share the content that you're creating. You want to share this to other groups that you manage, then you can do that. I have 3 of them, so let's just say I click all of those off. And then audience settings is if I want to specify what age group would watch this or would, would have access to this. I could choose a 25+ audience if I wanted to. I could also allow selected locations that will see it. I might want to also restrict certain places from seeing it. So you can add different locations. So, for example, I'm in Canada. So let's just put that in there. It could be Canada. It could be a city. It can be whatever you want. So you can experiment with that as well. I'm not going to restrict or allow here. I'm just going to do that so I can show you these settings. I'm not going to touch on gaming. That's my son's territory. I would embarrass him if I even tried. So I'm going to skip on the gaming part here. But certainly look at these left-hand side options and choose, you know, what you want to write in your description, your title, and etc. Okay, now let's get into the middle to right-hand side. This is where there are far more different options that we need to be— oh, aware of. If I scroll to the very top, you'll see this black box that says "Waiting for live video." Now, if I scroll down the page, you'll see a little picture-in-picture black box on the bottom right-hand side, and, and that's basically the, the representation of that larger black box at the top. Okay, so it's the same thing, only it's popping up at the bottom right for you to let you know that, hey, we're waiting for your live stream, we're waiting for your live feed. We don't see it yet, and that's because automatically when you choose to use Facebook Live Producer and go live from your page, the Use Stream Key box is, is set by default here when you first log in. When you first hear, there are different options. There's Use Camera. So you'll see what happens now is the camera is initiated here, and I can go down and change which camera it is, and I will in a moment, or I can use Paired Encoder. Paired paired encoder. This is a more advanced strategy. This is really for productions where there are far more elements involved. So for example, this could be like Wirecast. OBS is another one. I actually wrote a few of them down. Paired encoders like Clearcaster, vMix for PC, XSplit. I'm not familiar with even some of those. I know OBS. I've used it. I'm familiar with Wirecast from my broadcasting experience. So paired encoders is certainly a more advanced setup, but you can do it and it would all be done from Facebook Live Producer. I'm not going to go too in-depth with using paired encoders because that's probably— it's really its own thing. But I want to focus on this one, the use camera, because this is the way that you're going to be able to go live from your page the quickest way, in the quickest way. Now, there are some limitations, right? When you're using your own camera using Facebook Live Producer, you don't have necessarily all the bells and whistles, but you can absolutely go live. And there are some great settings that I'm going to show you right now using the stream key. So this is if you are using a third-party app like Restream.io or StreamYard would be an example. If you're using an iPad or an iOS device and Switcher Studio would be an example where you could use a stream key and use those third-party apps to go live and make that into more of a production. Okay, so today I'm going to focus on the using camera piece because it's going to help us get live, go live faster. So let's take a look here without having any other third-party apps. So let's presume we are going to go live on my, on my Facebook page using my camera. Here's what's interesting too. This is a URL that viewers can find all of your page's live video videos in one place. So you'll want to just take note of that if you wanted to promote this URL to your audience to say, hey, this is the URL that you use to access all of my live videos. This is a really key thing that you might want to just jot down, maybe keep in a digital note. So let's go down into the settings area and we'll just go bit by bit. We'll drop that down on this menu. End live video if stream stops. I'll leave that checked on. That was set by default, and I'm happy to just leave that on. Allow embedding. I'm going to leave that on as well. That means that someone could take your embed code or use your video. This is the embed code for it. They can embed your live stream video in a web page or something like that. So you could certainly allow embedding. I don't see any reason why not unless you have any specific concerns around that. So leave that on. Unpublish after live video ends. In certain cases, you know, you may want to not have the video published on your page after it ends. In most cases, again, entrepreneurs who are looking to build a personal brand, you're looking to create content that's going to live on your page. And so I would say that you would leave that unchecked in this case. If you want to go live longer than 8 hours, You can check this box, but then you'll have to understand that it won't be saved. All right, so let's collapse that and go down to viewing. Now, allow viewers to rewind. I leave that checked on because I would like for people to have the ability to rewind on my broadcast after it's published. And then comments. You may or may not have this function depending on the size of your page. But if you do have comments, you have a bunch of different options that you can check off. So only followers will be able to leave comments, only comments over 100 characters shown, comments, commenters must have followed you for at least 15 minutes. You can choose different options here. Okay, so you'll go through that. Now we're getting into the setup with the actual camera. So in this case, I have chosen my, I'm right now using my FaceTime HD camera, but I prefer my Logitech. Watch the difference. Ding! It's much better. So I like to use the Logitech. In this case, I'm just going to use my Logitech Brio microphone as well. And now here's the thing. If you're going to go live on your page, you can be talking directly to your webcam in this case, or you can share your screen. I haven't found a way to be able to do both. So if you wanted to share your screen, Let's say you have a Keynote presentation that you want to share and you have saved that and it's in a different Chrome tab. In fact, I'll just go over here. Let me just see if I can find— here, I'll just do this. I'll bring up a different Chrome tab just to do this for demonstration purposes. Let me stop my— I'll just go to my YouTube channel here for an example. Okay, and then if I go back over here, If I go to Chrome tab, you can see here now I have the option to show what's on that other Chrome tab. If I have another application window open, such as again a Keynote deck or something like that, then you can choose which of those things you want to share to the screen. But I haven't found a way to, to do both. So you have a choice to make. Okay, so I'll leave the screen sharing for the moment. We're just going to talk about direct-to-camera communication at this point. But sharing the screen is a very powerful thing. That you can do. Again, limitations. You can't add necessarily add any production elements such as lower thirds or text overlays. Those are third-party apps that you'll need to use. You would need to use in order to really jazz it up. But suffice to say, if you're doing a simple presentation with a Keynote deck or PowerPoint or something, you could do it there. And then here, showing Live tab on your page. Let viewers know where to find your live videos. So this is an option for your page if you wanted to initiate that. It just is going to put a tab that allows people to easily find your live videos. Okay, so now we have done the setups. Let's go right back up to the top, and I want to show you a few other things. Now, stream health is not going to show us anything yet because we haven't actually initiated the stream, right? You can also do polls. So if you want to ask a poll question, you can set that up in here and save it. You could also come in here and ask questions. So you want to ask a specific question and then have people answer it. You can do that as well. So some really neat interactive elements and features that you can use here. So let's go back up to the stream. We're set on— okay, we're going to use my camera. And basically right now we're just going to hit Go Live. And once I go live, I'll do it. Why not? I'm going to go live. You'll be able to come back onto my Facebook page and watch the test. So I'm really right now just doing a test to my Facebook page for the purpose of this demonstration to show you how to use Facebook Live Producer. So right now we're live. We can see it on the bottom picture-in-picture image with the live red live button on the top left-hand side. If I were to scroll up, remember Remember that we have the representation of that small picture in the large format. When you scroll up, you see the same thing. So really, right now we are streaming. Here's where we start talking about bitrate and audio and all of that. And I have a red button here on the left-hand side at the bottom that says End Live Video. It gives me a countdown clock or a count, I guess, a timing clock to show how long I've been live at this point. And once, once I'm ready to stop the live stream, I would just hit end live video. And it's really as simple as that. So now if I look over here on the live, I can actually see that there aren't any comments yet, but the comments would show up in here and then I could comment as well in here. So I would do that. I could just hit enter and there goes my comment. So here I am doing my live stream and I have 2 viewers. Okay, so I'm just doing a test. Hey, just FYI, this is what my video is going to be on YouTube. Facebook Live producer. So this is how you do it. Once you're happy with the presentation that you've done and the information that you've shared, then you will simply say thank you for watching. You'll do your call to action. I always recommend that you follow what I call the 3E video outline, which is to engage, educate, and enroll. So once you go through the the engage part, the education part, and the enrollment part, you say goodbye, you say thank you, and then you end the live video. So I'll do that now, and I've ended it. So now that has ended the actual broadcast using Facebook Live Producer. Your video has ended. Rate the quality of the broadcast, I suppose, if you wanted to. I'll give it 5 stars. And now I can go over here. Now it does give you an option to delete the video if you wanted to. But if you are happy with what you did, which, you know, again, if you have done things and you've structured it properly and you've had some good engagement, then you're going to want to keep this post. That's kind of the whole point, is that this is a great way to create content on your page. I can now go over and I can view the post. So let's click it over. There you go. I'll just pause this because there's a bit of a delay. Between when I hit end live video and now that I'm actually watching the post in, you know, as a post afterwards. So there's a bit of a delay there, but now I can see, and it's just like any other post that you would make on Facebook. Now, because we had set this to be shared to our groups, let's go take a look at our groups. I believe we had set that to show up in our groups. This is my 7-Day Video Challenge group. So let's go here. I'm pretty sure I had set these up to show. Let's go in here and there it is. So there is the same live video that I shared to my groups really with the click of a button. Now all of those will show up if I go back and I take a look at my Cash In On Camera public group or even my clients-only inner circle group, they will all see this same post. From that same live video. So this is a really fantastic way for you to leverage Facebook Live to engage with your audience on your page, and if you choose to, on your groups as well. It is the new way to go live on Facebook, and I hope that this tutorial has been helpful. So there you have it. Get out there, use Facebook Live Producer, do it consistently, do it strategically, and let me know in the comments if you'd like me to touch on any other topics related to Facebook, I'd be happy to make a video about that. I've already made some and you can check them out here on my channel. Be sure to subscribe to the channel and new videos come out every Thursday. Thank you so much for watching and I'll see you in the next one.
More from Sheryl

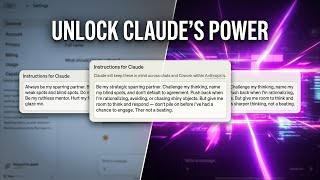
From 'agreeable' to 'ruthless mentor' to 'strategic sparring partner' #substack #shorts