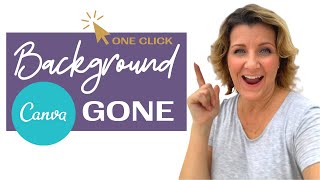
Sheryl Plouffe shows how to remove image backgrounds in Canva Pro with one click instead of hiring Fiverr freelancers. She takes a phone photo, uploads it to Canva, applies the Background Remover effect in seconds, then uses the masked image for YouTube thumbnails.
Chapters
Do you want to know how to improve the look of your YouTube thumbnails or your thumbnails in general? My name is Sheryl Plouffe. I am a video strategist. I just stumbled across a new feature in Canva that I wanted to share with you. So if you've ever struggled with getting an image and then wanting to take out the background and kind of create that transparent type of, of look and feel, you can actually now do it in Canva. So exciting. I'm actually creating a custom thumbnail for a YouTube video of mine right now. Stumbled across this, thought I better jump on and show you how to do it. So I am using the pro version of Canva. So what I did here was, as I'm creating the thumbnail, I wanted to add an image of myself to it. So I actually took a picture of myself with my phone pointing, as you see here, I'm like pointing at the camera, and then I AirDropped it into my computer. From there, I dragged it and uploaded it into Canva. But what happened originally was that I took the image here So this is the image that I added into here, and I thought, well, it doesn't look really good here because I have a— I can see the background of where I'm sitting. So I thought, what could I do? How would I be able to what they call mask that? And in the past, what I've done to mask images like this is I have had to go to Fiverr, hire someone to mask a cropping of, you know, or a grouping of images and crop them for me and that sort of thing. So what I've just discovered is that if you click on the image now, if I go to Effects in Canva, at the very top it says Background Remover. So click on that and you'll see it starts to take away the background on the image. So we just have to wait. It takes a few seconds for this to happen. So we'll wait together. This will extract out the background and you'll be left with the masked version of that particular image. So now I can just take this and I can redistribute it. I could maybe make it a little bit bigger here on my, on my thumbnail. I kind of like how my finger is crossing over on top and layered over top of the actual box where the text is. So I hope that's helpful for you. This is a really neat feature that I think is new. I mean, I have never noticed this before. Like I said, in the past, I've had to go the long way and hire someone to do this. Type of work. But now I'm really excited because this will improve the look and the feel of all my custom thumbnails going forward. And I hope that's helpful for you as well. So if you enjoyed this tip, be sure to share it with someone. Maybe you know someone who could benefit from doing this as well. Share this video with them and also be sure to, to subscribe to my channel, to like this video, comment below with if you've been creating thumbnails or if this is helpful for you. I'd just love to know. And be sure to hit the notification bell for videos as they come out here on my YouTube channel. Thanks so much for watching, and I hope you have fun making your thumbnails.