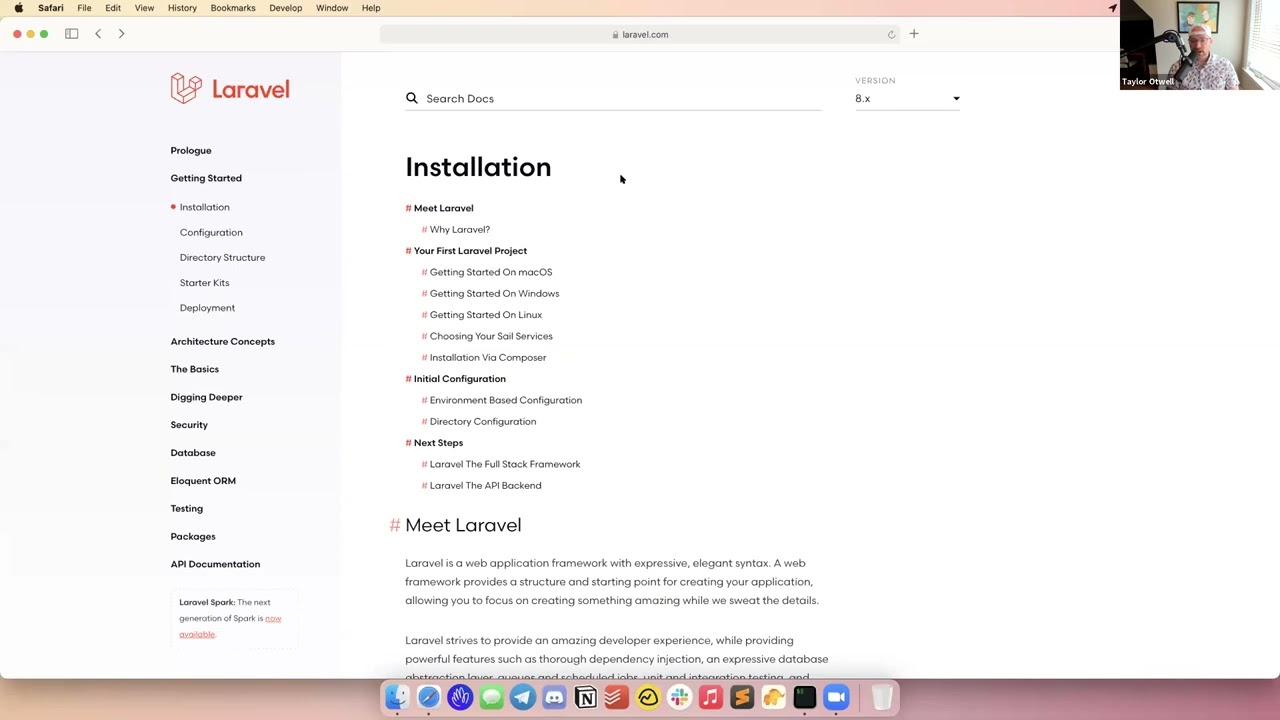
Introducing Laravel VPS & Major Updates to Forge | Laracon Keynote 2025 (Taylor Otwell & Team)
Taylor Otwell announces Laravel VPS, major Forge updates, and Preview Environments for Laravel Cloud. New features include zero-downtime deployments, an integrated terminal with pair-programming, and disposable staging environments that spin up automatically on pull requests with replicated databases and caches.
Chapters
We're going to start with the man that started it all, the reason that we're all able to be here. Please give it up for Mr. Taylor Otwell.
Good morning.
All right.
Hey everybody. I've got my notes, I got my slides, I got a venue, I got a conference going on here. Thanks for coming. It's good to be back. I think this is actually the 10th Laracon US. It's my 23rd Laracon keynote around the world. I still do get nervous at these things. I get asked that every year when I come here. I definitely do get nervous, but we'll get through it together either way. Thank you to our sponsors, our speakers for making this event possible. We could not do really great events like this without your help. So thank you to each and every one of you for helping us make this happen. Um, 2025 has been an awesome year for Laravel so far. It's been one of the most exciting years in our entire history with 2 major product launches with Laravel Cloud and Laravel Nightwatch. We released Cloud back in February, and it is really the realization of a lot of dreams that I had and, and really the, the culmination of how I wanted to deploy Laravel applications. Um, sort of everything I dreamed of all those years ago when I first created Laravel in terms of how I wanted to ship them to production, uh, really was realized with Laravel Cloud. Um, and in June, we launched Laravel Nightwatch, the best way to monitor and observe Laravel applications. Nightwatch is obsessively optimized for monitoring and observing Laravel. It's really fine-tuned for the framework we use, and Nightwatch has already processed billions of events for Laravel applications around the world. So the Laravel ecosystem has never been stronger, and the best part is it feels like we're just hitting our stride. Just like everything else Laravel has built this year, it's been a team effort, and this keynote is exactly that way as well. As Aaron said, you'll be hearing from multiple members of the Laravel team. I'm not sure what it says about the open source side of the spectrum where all of us have lost our hair. Um, But we'll start with open source with myself and Joe and Ashlyn, and we'll work our way into our products where they seem to be faring a little bit better. But I think you'll be excited about all these updates across the ecosystem. Each of these team members and everyone else at Laravel has really poured their hearts into all of these updates. So I'm excited to finally get to share some of them with you today. Like I said, we'll start with open source. Every day, and I get asked this a lot, you know, how have things changed for me at Laravel since the company has grown so much? You know, we've gone from 10 people to over 70 people, and what do I actually do every day? And a big part of it actually has not changed, and that is maintaining Laravel itself. Every morning, 5 usually, and sometimes 6 or 7 days a week, I get up and spend a couple hours on GitHub curating every pull request that you all send to the framework or to any of our 25+ open source projects. Open source packages. That all filters still through me. I read every line of code that goes into the framework and the packages, and honestly, it's something I love to do. Like, it's one of my favorite parts about being at Laravel, and I like to be really in touch with what's in the framework, what's in the packages, making sure like everything feels really cohesive and that it was written by one person. And that's, that is something I really enjoy doing here and still do. Um, and when I first wrote this keynote, how many of you, it was your first Laracon? I couldn't see the hands, so I was backstage. Okay, a good number of you, but a lot of you have been here before. So, you know, at most Laracon keynotes, I usually go into like a Laravel app and a routes file and demo some features. And when I first wrote this keynote, that wasn't in the keynote, and I just didn't feel right. Like, it just didn't feel good. Um, so I asked a few people, they're like, no, you gotta do it, you gotta do it. So, um, we have a lot to cover today, but I did create a routes file for you with some highlights from the last few months of open source contributions. Some of you may have seen them before, but some of you may have not. So I just wanted to bring up some of the highlights, you know, over the last 8 weeks. So without further ado, I'll just slide right over here to my editor. Uh, let's see, I've got a browser, I got an editor. All right, here we are in routes/web.php, and we'll just kind of walk through this together, and I'll show you some of the cool new stuff that's come out recently. We'll start with this bind route. So in this route, I'm injecting a payment processor, which is an interface. So let's imagine this has like an implementation like Stripe behind the scenes that we might wanna bind this to. If I try to hit this route, you'll see that we get an error that the payment processor is not instantiable. And if you've used Laravel for a while, you probably know what this means. And the reason we get this is because we haven't actually told Laravel what implementation of this interface to inject when we need a payment processor. So historically, how you might solve this is you would go into a file called the AppServiceProvider, and you would do something kind of like this. You would say this app bind payment processor to maybe our Stripe implementation. And you can see I have that file here in AppServices, and it implements the payment processor interface. So that all makes sense. And if we do that and then we hit the route again, we of course get an instance of Stripe. Great, so that's totally what we would expect. Um, but recently we've introduced new ways to make these bindings without having to go into your App Service Provider. So, um, what you can actually do instead— we'll comment this out and we'll go into our payment processor— and you can use a new binds attribute. And you can just say bind to Stripe. We will import that, we'll import that, and I think that's all we should need to do. And what's really cool about this is it lets you put like the binding information right next to the interface that it's related to, so it all sort of exists in one place and you can kind of keep the context of everything. So let's try hitting the route again, and it works. So That's great. We didn't have to go into like a separate file, AppServiceProvider, just to register the binding. We can kind of put it right there in the interface. But what's also cool about this is there's a little bit more you can do. It's pretty common to, when you're working with these kinds of things, you might have one implementation in production and maybe one locally. So like as an example, I have this FakeStripe class that also implements payment processor. And maybe during local development or during testing, we actually wanna use fake Stripe instead of real Stripe, because we don't actually want to make calls to Stripe while we're just testing things out on our local machine. So what's cool is if we come into our payment processor and we go to the bind attribute, I can actually register another one with environments local. And now if we check our environment file, I'm in the local environment, and now Laravel should see this. And if we do fake Stripe here it will inject the fake Stripe implementation when we're in the local environment. So let's go ahead and see if that works. We'll hit the route again, and we get fake Stripe. So this is a really convenient feature for managing container bindings in one place. You can do more stuff, like we could say we want this to be a singleton, and if we import that attribute, now this binding will only be resolved once for any given request. Or we could do something like scoped. And if you're using queued jobs or Octane, the resolved instance will be cleared out after each request or job, which is really convenient in those situations. All right, so that is attribute bindings. Recently, really recent in Laravel, actually just in the last few weeks. So give that a shot and see how you like it. Let's move down this file, and I wanted to show the Fluent URI builder. Um, this is a handy little thing when you need it. If you've ever tried to like manipulate URL strings by hand and like change the query strings or remove query strings or add fragments, it's really fragile and it's annoying to do. So in Laravel, we now have this Fluent Uri Builder where you can ask for a URI object and then you can chain all these really nice methods onto it to build up URIs and manipulate them and then dump them out or use them for whatever you want. So in this example, you can see I'm creating a URI for laravel.com. I add a path, I add some query parameters. I can even remove a query parameter, add a fragment, do all these kind of complicated manipulations that would be hard to do by hand if we're just messing with the string directly. And then let's just dump it out when we're done. So if I go to my browser here, let me go back here. And if we dump it out, you can see we get the URL you would expect. It's actually really cool. You don't need this on like every route you write on Laravel, but when you need it, it comes in super handy. So handy to be able to just manipulate these strings fluently. All right, let's go back here and I'll show you a few more things you can do with this. So let me comment this one out. You don't have to create URIs from strings. You can actually generate a fluent URI object from a named route. So down here a little lower in this routes file, you can see I've got this named route right here on line 35 named users/index, and it just returns like a paginated result set of the users. the users in our system. But what's cool is not only can I create URI instances from named routes, you can even just return them directly from routes, and it will generate a redirect to the URI that you just built, which leads to some really, like, fluent, readable code that I really like. So in this example, we're gonna return to the user index route, and we're gonna add, like, a query string parameter to the URL. So if we hit this again, you can see we did get redirected just like you would expect. So really easy to just return these URIs from routes and get really nice readable redirects, especially when you need to do complicated URL manipulation. All right, let's head down to this route. This is a really cool new feature that Tim McDonald, one of our Laravel team members in Australia, wrote, and it's called cache memoization. So what does that mean? Let's not use the feature at first and let's see what happens in the cache when we run this route. I'm using the database cache driver, and so when we hit this page, let's just see what kind of queries we get. Okay, you can see, as you might expect, we hit the cache 4 times in this route. Um, that's not ideal, obviously, for performance. It would be nice if, if we're calling for the same key over and over, we really only hit the cache once. No matter where we do that throughout our application. So what you can do now is we can change all these gets to memo get like that. So we're going to sort of decorate the cache with this memo function. And now if we hit the route, you can see it only calls it once because we've already asked for it. And once we get a value, Laravel kind of holds it in memory and then we'll give it back to you the next time you ask for it if you're using the memo memoized cache. So this makes it really convenient to like use the memoized cache in a form request in your controller, maybe deep in, deeper into your system, and not really have to think about like, have I already pulled this value before? Where can I get it? How can I not hit the cache again? It just sort of takes— you can turn your brain off and not think about that at all and just know that Laravel is going to do it in the most efficient way possible. And what's really kind of slick is let's imagine a situation down here Um, a situation like this where we get a memoized value but then we actually put a new value onto the cache, Laravel will automatically take care of busting that cache for you and re-pulling it the next time you ask for the value. So you're not going to get stale data or anything like that. So you can see if we hit this route, it actually did know that we needed to re-pull it because it was busted. So we're not getting stale data after the new values inserted. All right, let's go down to— I think I'm gonna skip down to this eager load one 'cause I really like this one. Does everyone know what an N+1 query problem is in Laravel? Raise your hand if you've ever had that problem in your application. Okay, all of us, right? We're trying to make it so where you don't hit that as much. So let's go ahead and hit this route. I'm not using any eager loading. Oh, I see. or any special features right now. And let's just look at the database queries we get. So I'm gonna pull a user from the database, and then I'm gonna spin through their posts, and then each post has comments, so I'm gonna spin through those as well. And let's see what queries we end up with. All right, let's go to eager loading. Okay, you can see we pulled the user, and then we pulled the post, and then as we spun through the posts, we executed a query for each post to get the comments. So you can see all these comment queries down here. Really inefficient, right? This is the classic N+1 query problem where for every entity we're having to do a query to pull its relations. Now normally you would have to remember to do like post with comments and eager load them ahead of time, but what you can actually do now is enable automatic eager loading. So if I go in here and I enable model::automaticallyEagerLoadRelations. I can do that like in my bootstrap file or in a service provider or somewhere early in the request cycle. Now if we do this again, you can see that it eager loaded the comments just when we needed them. So as we spun through the post, it saw that we were accessing the comments on that collection of posts and intelligently eager loaded them on demand. It's almost like, uh, lazy lazy eager loading or something. It's It's just-in-time eager loading. It's really slick because you— thank you, thank you. It's really slick because it, it, it prevents you from making a lot of accidental mistakes in development that can actually really slow down your production system. And if you need a more complex eager load, you can always just use the with function and do it all manually yourself. But for these simple cases where you're just spinning through objects, you really don't have to think about the N+1 query problem anymore, and Laravel will just take care of it for you, which I think is really, really great. All right, so that is automatic eager loading, and that's a few of the highlights again just over the last 8 weeks of Laravel development. We release a lot of new open source features to the framework. We actually do a new framework release every Tuesday. It can be hard to keep up with what's coming into the framework, so we actually we just launched a new site at laravel.com/docs/changelog where we're putting up a changelog monthly with all of the highlights, like this kind of stuff, of what we're shipping to the open source framework. So if you wanna stay up to speed with what we're doing there, that's a great place to check in once a month and see kind of what we've been up to and how it might— can help your application. All right, that's a quick open source update. I'm gonna slide back over to the slides and we'll keep going through this keynote. Okay, um, where do we go from here? Laravel is really lucky to have 2 great ways to write front ends with your Laravel backend. We have Livewire, which was created by Caleb Porzio. How many Livewire fans in the house?
Woo!
Uh, Caleb, the creator of Livewire, is going to give you a big preview of Livewire 4 tomorrow. I've seen some of this, some of it I haven't seen, some of it I have. The parts that I have seen are pretty mind-blowing. So if you're a Livewire fan, I think you're going to be super happy tomorrow afternoon when Caleb demos all this stuff. It's really, really great. And then we have Inertia, which was originally created by Jonathan Riddick but now has been brought into the Laravel old and it's something we maintain. And Inertia is a way to pair a modern React or Vue frontend with a Laravel backend in one monolithic repo where you can use server-side routing, Eloquent, queue jobs, controllers, all of the server-side goodness that we're used to with Laravel, but pair it with a modern React or Vue frontend in a way that doesn't make you wanna pull your hair out, uh, which, you know, none of us wanna do. I've already done, but none of you wanna do. Um, so we've been cooking up a lot of cool stuff on how we bridge the gap between your backend Laravel application and your modern frontend. And to give you an update on what we've been cooking up, I'm gonna welcome open source team lead Joe Tannenbaum to the stage.
Joe.
What's up? How we doing?
Okay.
Thanks.
You got it?
Hey, there we go. What's up, everybody? All right, let's talk about some open source. This year we decided to zoom out and we decided to ask the question, what are the remaining pain points when developing a full-stack application with Laravel? On the PHP side, we have a mature framework, we have world-class developer experience, and as Taylor just showed, we're still grinding on that. We're making that even better for you. But we found some stuff on the JavaScript side that we thought could be a lot better. There are some rough edges there we could smooth out. So we have really been grinding to elevate that experience to match the PHP experience that you know and love. So I have prepared a special little open source meal for us to share together. Okay, we have 2 appetizers. We have 2 things that we launched in the last couple months that you may have missed. We have a salad course that is something that we're launching in the next couple weeks that we're very excited about. And we have a gorgeous entree that I am very excited about that we are launching in the fall. So y'all ready to eat?
Yeah.
All right, let's chow. Okay, first appetizer, let's talk about broadcasting. And when I say broadcasting, I'm talking about communicating between the server and the client via WebSockets. On the JavaScript side, we've had Echo for a while and Echo is great. But we worked on this a little bit and smoothed out the experience. Let's install broadcasting. This was too much to type.
There we go.
If you've ever run this command, this should look familiar. You choose your provider. But we've smoothed out the entry to this. We are now asking for all of the information that is required to get you up and running based on the provider that you've selected. So as soon as you're done running this command, we want you to hit the ground running with broadcasting. So let's just fill this out, app ID, app key, app secret, and yes, we want to install the client-side libraries. So cool. What did we just do? Well, the first thing we did is we just wrote those values to your .env file for you with the correct keys.
Okay.
Don't look at the docs, we did it for you, you're good to go. We also provided you with the Vite keys as well so that you can consume them in your JavaScript app. Let's go to our Inertia entry point. We detected that you were running Vue, and so we installed the new Laravel Echo Vue package automatically for you, and we configured Echo in your entry point. Now, if you're familiar with Echo, you're probably used to newing it up on the window, and putting in this very large configuration. It hurt my heart. I didn't like looking at it. So we simplified it. We now have this new configure echo. You just provide the broadcaster, and from there, we'll do the rest. It's convention over configuration. So we'll just automatically read in the .env, and we will configure it for you. Now, you can, of course, pass in the whole thing. You can pass in any of the keys that you want. But if you're doing the standard installation, We've simplified this process for you. So let's talk about listening to events. So this is what it generally looks like, right? So onMount, we connect to a channel, we listen to events, onUnmount, we leave that channel. I don't know about you, but when I see code like this, it screams to me, make a hook, please make a hook. So we made hooks, we made useEchoHooks, okay? So let's just refactor this really quickly to use the hook. Boom, boom, boom. That's the new code. This will automatically listen on mount, automatically stop listening on unmount. And if you happen to know the shape of the data that's coming back, you can actually provide that. So if we have an order data type, you can provide that right here. Order, well, let's just copy paste. And then your callback will be now type safe. And you can see we have a little red squiggly line here. That means we didn't get this key right. So we can actually do username since we're providing the type. Well, name, there we go. So we have hooks for public, presence, model, and by default, private channels. These are available for Vue or React right now to use in your applications. So that's our new broadcasting situation.
Okay, sure.
All right, appetizer number 2, streaming data. Let's talk about it. This is becoming more and more important as we're building AI-enhanced applications, right? Uh, this is already super easy on the Laravel side. So if we pull up a chat controller, this is what it takes to stream a response back from the server. It's 10 lines of code. You really can't get any easier than that. It's amazing. But think about consuming this on the JavaScript side, right? You probably reach for fetch. You should probably wanna cancel it if you need to cancel it. We have to concatenate the data automatically. We want some state around it. There's a lot to consider and the code grows and grows. So we introduced these new stream hooks so you can easily consume your streams on the client side. So all you have to do is fire up the hook, provide the endpoint that's providing the stream, We'll automatically concatenate this data for you and we'll provide some state around connecting, around streaming. We allow you to send things back to the stream and restart it. You can cancel the stream. There's a lot of goodies under the hood here in one tiny hook. So this really simplifies what it means to stream data back from the server and actually consume it on the JavaScript side. And if you are consuming JSON, there's a useJSONStream hook as well. that will automatically parse it as soon as it's done streaming. So these are useStream hooks that are available right now for React and Vue that you can use. There you are.
Okay.
All right, salad course. It's time to eat our greens. Okay, Inertia forms. Let's talk about 'em. This is a very, very simple Inertia form. If you're familiar with making forms, useForm should not be a surprise to you. You use this to set up your data, you get some helper methods, you get some form state off of that. We love useForm, it's great and it's not going anywhere, but it's a lot of boilerplate just to make a simple form. So let's remove all this for a second. And let's use a new Inertia form component. It's a drop-in replacement for the HTML form tag. And let's just refactor this to use it. The action is login, the method is POST. And if we want some form state and other helpers, we can grab that from the slot. Now we can take away these v-models. These are just names. Take away all these form dots. Those don't exist anymore. And now this is all it takes to submit your form back to the server. It'll automatically intercept the submission and it will send it back to the server via Inertia. This is very simple. It's like, this isn't like, you know, mind-blowing, but I think this is going to be a way better DX for people moving forward making forms with Inertia. So this will be launched in the next couple weeks and we are very excited to get this into your hands.
Yeah.
Okay, before we move on to the entree, I'm going to address the elephant in the room. There is a gap, right? And we can kind of all feel it. There's a gap between PHP and TypeScript, right? Well, we tried to address that gap. We wanna answer some of the questions that the client has about what the server has defined. And a couple months ago, Tim McDonald and I, we made a package called Laravel Wayfinder. And what Wayfinder does is it analyzes your application's routes and then it generates TypeScript automatically for the client side to consume into your application. We had a couple of core principles when developing this package. One, the server is the source of truth. The server defines what is available. The client simply consumes it. Okay. 2, No magic strings in client code. Magic strings in this case are routes for your application and HTTP verbs such as like GET, POST, PATCH, PUT. We wanna remove those from your client-side code. And 3, we don't want you to have to change anything about your PHP code to make this work. Install the package, run the package, magic happens. So let's see what this looks like. This is what Wayfinder looks like right now. Okay, we're gonna go back to this simple form here. And what I see here are some magic strings, POST and login. These are educated guesses, right? The client doesn't know that it's there. It's just like, yeah, I know it's in my server side, so it's gonna be there. But let's look at the actual definition of this route. So we have POST login and it's hitting the store method of the authenticated session controller. If we rewire our brains a little bit and say, wouldn't it be cool to import the store method from the authenticated method controller in our JavaScript? That would be pretty rad. So I think we should just do that. We're gonna say store. Oh, we probably have to run it first. That would be good. Okay, store. And let's go to the authenticated session controller. This is TypeScript that has been automatically generated By Wayfinder. Then what you get back is an object. Well, it didn't import. One sec. There we go. What you get back is an object with a method and a URL. It's very simple. What you see here is that you get a login route and it's a POST. Then you can change this from POST to submit. We updated the inertia submit method to look for Wayfinder-shaped objects, and derive the URL and the method from that object. So we have erased magic strings, quote unquote, from this little application. That's not the cool part. The cool part is now what I forgot is this is actually supposed to be PUT, and I forgot to put a little sauce on this URL, and I didn't have to change anything. That just worked. That just happened in our client-side code. It's now PUT. It's now logins. You don't have to think about this stuff anymore. write PHP, it'll get reflected on the client side. So that's pretty dope. We were pretty happy with that. We were pretty giddy when we came up with that. This is moving toward the dream, right? But there's still a gap. We closed the gap a little bit, but there's still a gap. What are the sorts of things that live inside that gap? Things like what are the props coming into this Inertia component? What shape is this request supposed to be in? What is the server expecting when we send this request? What broadcast channels are available to listen to? What broadcast events are available to consume? So today we're gonna close that gap. Let's eat our entree. We have given Wayfinder a major glow up and it now knows a lot about your app. Here's what it knows. We're gonna take this organization's edit component and we're gonna refactor it using what Wayfinder has automatically generated for us based on our PHP code. So we have organization any, we don't love that. Let's make it more specific. Wayfinder has generated inertia component props for us. And now based on what's being returned from the server, we now see a full description of exactly what that shape is. Now we have types for all of this stuff and we can see what the types are. Now we can also get our shared props back and we can access any of those, which is pretty cool. Moving down, we know what to do here. We want to get rid of this. I do not need the definition for that. Thank you very much. We can go straight to the update method of the organizations controller and pass in the organization. We can change this to submit. Okay, so now if we change that route on the backend, it automatically changes in our client-side code. But what are we submitting here? What is this? What do we think that looks like? Well, Wayfinder knows. We do organizations controller and we say update requests. Well, now we know this is what the server has defined. Name is required. Everything else is optional and can be nullable. So if we now remove name, we get a squiggle. I love a squiggle. I love a squiggle when something's wrong. Okay, let's keep refactoring. This is our channel. We're using this new useEcho hook, but the eagle-eyed among you will notice we missed an S here, app/models/organization. That would be a super annoying bug to track down. So let's actually just use Wayfinder's information. We're going to do broadcast channels app models. You just get a nice autocomplete here. You're going to pass in the organization ID, and now that will create this string, which is what you defined in the backend. Let's keep going. This is a string. Joe don't like strings. Let's get it out of there. Okay, great. We just imported that from the broadcast events, again, auto-generated by Wayfinder. Joe don't like anys either. Let's get that out of there. Let's pass the shape in that Wayfinder has detected, events, organization updated. Again, we have an error here. It's not supposed to be org name, it's supposed to be org name. We're starting to get more and more type-safe automatically. What if you're not using Inertia at all? What if you're just making standard requests in JavaScript? This is just making a fetch request. It's a POST request to this analytics endpoint and sending This is the payload. Well, I see a magic string. Let's get rid of it. Store, and that's coming to the analytics controller, and we'll grab the URL. Great. Method. Okay, got rid of those. Wayfinder knows about this body, so let's just grab that. It knows it's expecting store requests, and now you can see, oh, page can be these values. These are the valid values for page, and if I do anything else, I get a red squiggle. I love a red squiggle. Okay, let's keep going. We also know about this response. So if we grab this here and we change it to response, then we know stuff about the response coming back. We're just doing a standard JSON response and we can see these properties automatically coming back. So this is now an end-to-end type-safe Inertia component. coming from PHP. That's wild. Let's mess with it. Let's mess with it and see when we change something on the server, let's see what happens. Whenever we generate something for you, we try to link you back to the original PHP so we can go right in. Let's go to the edit method. And here we just have a standard Inertia render returning, which is not really that common. It's usually something at least mildly more complicated, something like this. If request has simple, return it this way. If not, return it this way. And let's just delete some random stuff. So it's returning the same component, right? But it's returning different props. Well, Wayfinder knows that. It knows that now these are all optional props. You'll always get these back, but it knows that you're not always gonna get these back. So you automatically have type safety around the incoming props. Wayfinder will examine your app. It'll look for all the places you're returning that component. It'll clobber together the props and say, you always get this, it looks like this, this is the type. It's really smart about this stuff. Let's talk about this update request. Well, that's not it. Okay, let's add a required property.
Cool.
We now have an active property that's required and it has to be a Boolean, right? I love a squiggle when the code is broken. It's so nice. It says, hey, you're missing this active property. All we did was to add that to the server-side code and it showed up automagically on our client-side code. Let's add that property. If we try to make that something like an integer, it says nope, got to be a Boolean. Great. Let's keep going. A lot of you probably saw me type this and thought, that's stupid. It's a constant that's just referencing a string of the same name. Yeah, that's valid, except that I didn't want this to be organization updated. What I meant was it should have been organizations updated. So the good news is your asset build just broke because that doesn't exist anymore. And wouldn't you want to know that? So now if we come in here and we update the import, it's now back to normal. This is good. This is good. If you change something, on the server, it should be reflected on the client. One more thing. If we come in here, we know that these are the valid values because this is a rule in. So if we add anything to this, we just added a very good name. We now have this available as autocomplete on this side automatically. This is the dream. This is end-to-end type safety between PHP and TypeScript. And we are very excited to launch this soon. Now, Wayfinder is actually a very thin package, right? There's not actually that much going on in Wayfinder itself. The powerhouse beneath Wayfinder is a package called Laravel Ranger. And what Laravel Ranger does is it walks your app and it looks for interesting things. And if it finds something interesting, it says, hey, I found a model. Oh, look over there, that's an enum. Ooh, I found some validation. And it says, do you wanna do anything with this? Here's a very well-typed DTO, do with it what you will, I do not care. And so in Wayfinder's case, it's walking the app and it's looking for things and turning them into TypeScript. But you can generate anything you want. You could generate JSON schema for all of your models if you so desired. So we have Ranger here. We're saying Ranger on model, generate the model schema, walk the app. And it'll inspect your app. It'll return this model component from Ranger. And you can just sort of map the properties to whatever you need to make a JSON schema. And it will automatically do that for you. So if we run this, php artisan generate JSON schema, it found these models and we generated these JSON schemas. Let's close that. Okay. So here, this is derived from PHP. It's not a guess. This is actually what your model looks like, right? And we just did that for all of the models. You could generate automatic API documentation. You could generate, God forbid, XML. You can do whatever you want with this. I don't know what people are gonna do with this. I just think it's really cool and I can't wait to get it in the hands of the community and see what happens. So in summary, we have useEcho hooks for React and Vue. They're available right now. We have streaming hooks available for React and Vue available right now. We have inertia form component coming in a couple of weeks. And we have Laravel Wayfinder and Laravel Ranger coming in the fall with a public beta Very, very soon. Thank you so much for your time. Enjoy the rest of the keynote. Back to Taylor.
Okay.
Nice, nice, nice.
All right, thank you, Joe. Um, hopefully you enjoyed that. I'm super excited about how we're bridging the gap between Laravel backends and Inertia frontends and giving you a lot of intelligence in your Inertia frontend so that you can code more productively, more safely, and get your apps built quicker. All right, next I want to talk about something that's been transforming the way we write code. Um, I'm sure you all didn't expect to get through a tech keynote in 2025 without this word: Laravel AI. AI has been transforming the way we write code, and we know that here at Laravel. And what's, what's really cool actually about AI and PHP and Laravel is that LLMs are already really great at writing PHP code because it's 30 years old. Um, okay, a lot of languages are old, y'all. Ruby's old too.
All right.
Um, and Laravel has been around a while too. Um, so the LLMs are really trained on lots of PHP code and lots of Laravel code, and that's great. We're really honestly lucky that that's the case because they're very good at writing code for us without really a lot of help. But there are a few limitations. Um, so we've been working on some exciting AI initiatives here at Laravel, stuff that isn't just hype-driven in my opinion, stuff that feels actually practical, pragmatic, and just helps you ship. And we're excited to reveal one of those things today. Um, Ashley Hindle recently joined Laravel, and he's been spearheading a lot of our AI-related development here at the company. And I'm gonna bring him out on stage now to give you a preview of something that I think is gonna give your Laravel app development a boost.
Taylor, howdy everyone! The one before that. Okay, that was perfect. Howdy everyone, so great to be here with you all. This is my first Laracon, like so many of you actually. Taylor's right, we've been really hard at work on all things AI recently. We've been having lots and lots of talks with developers, lots and lots of chats, and running lots and lots of experiments so that we can figure out how we can better help you, how we can make AI better help you in your day-to-day work, but without it taking over that work. One of the experiments that we've been running has turned into something pretty great, actually. Today, I'm very, very excited and proud to announce Laravel Boost, your AI coding starter kit. So Boost is a composable package that you add to your Laravel project, and it makes pairing with AI much higher quality. Basically, Boost helps keep you in flow, and it guides the AI to work a bit better, and it does that through 3 core features. Firstly, Boost provides a Laravel-specific MCP server that gives your AI agent 15 tools so that it can do more to help you in your day-to-day work. So now your AI agent can do things like query the database or run code through Tinker or search the documentation. The second core feature of Boost is version-specific documentation. We have ingested, chunked, and vectorized, and made available through an API all the Laravel ecosystem documentation.
Thank you.
So now your AI agent and you, through the Boost API, can get the exact docs for the exact packages and the exact versions that your project is using. So the code that's written is much more accurate code, less hallucinations, proper actual code. The 3rd feature, core feature in Boost, are Laravel-maintained AI guidelines. So, Boost will create your cursor rules. It will create your Juni guidelines. It will create your GitHub Copilot instructions and your claud.md files. And so, we've created, manually curated and created these guidelines for all of the most common Laravel packages, Laravel, Pest, Inertia, And these guidelines are version-specific. So, if you have Inertia 2, you get Inertia 2 guidelines. If you have Inertia 1, you get Inertia 1 guidelines. And these guidelines help the AI agent. They nudge the AI agent to behave as you would like it to behave in your software projects. Let's give it a look. Okay, so I have this project here. I've been tinkering on the Ping CRM app, which is a contact management app that runs with Laravel 11, Inertia 2, and Pest. So, let's set up Boost there. All we have to do is composer require laravel/boost/dev. Once that's done, we run— my L key is not working— artisan boost install, and we're dropped into this interactive installer for Boost. So Boost is asking us, what shall we install? And Boost offers multiple things, right? But maybe you don't need all of these things in all of your projects. So this has to be configurable. So style guidelines, for example, Laravel style AI guidelines here, that guides AI to write code like the Laravel core team does. But that's a terrible idea to add to an existing project that has existing code. Conventions. So that is disabled by default. You also see here we've got Herd MCP server. Marcel's been hard at work building an MCP server that's going to ship in Herd very, very soon that allows you to manage your Herd sites, secure them and unsecure them, and manage PHP versions and things like that. We don't need them for that for this demo. We're just going to go with Boost MCP server and the AI guidelines. And now we're being asked, which IDEs do we use in this project? Because this Boost is going to automatically install the Boost MCP server into these IDEs for us without any manual configuration or messing around with mcp.json files. And it's also auto-detected that I've already used Claude Code and Cursor in this project, so I don't actually have to change anything here. We're now being asked which agents we use because you can combine various IDEs and various agents. This is a separate step, and this is where our AI guidelines are going to be installed into. These guidelines help steer the AI in the right direction. It's also detected Claude Code and Cursor again because it noticed that I've used them in the past. So, that's it. Boost has installed 13 Boost-written guidelines into Claude code and Cursor, and it's installed the Boost MTP server into Claude code and Cursor on our behalf. And if we look up, you can see Boost has auto-discovered all of these guidelines based on our packages and our exact versions. So we're getting the Inertia Laravel core guidelines that is useful across all versions, but we're also getting the Inertia v2 guidelines, which is only useful in v2. We do have other guidelines. So we've got some guidelines for PHPUnit, FluxUI Free and FluxUI Pro, Tailwind 4, things like that. But they've not been included here because this project doesn't require them. And there's an outlier here, .ai/ping. This is a project-specific guideline. So if I tree .ai, you can see we have .ai/guidelines/ping.blade.php. So Boost has installed 12 guidelines from Boost, and 1 guideline from this project. And we are using Blade files for all of these AI guidelines. So you get the full power of the Blade templating engine to do whatever you like in those guidelines. If you want to query the database, if you want to get something from config, if you want to do crazy loops, you can do all of that in those guidelines. And they will get auto-discovered and auto-composed with the rest of Boost guidelines. And we will also shortly have hooks for package developers to provide AI guidelines within their packages, so when you install those packages, those guidelines will be made available to you too. So that's the Boost install. Very easy, very straightforward, ready to go. So let's take a look at it in Cursor. Here we can see that Cursor has noticed the Boost MTP server already and enabled it for us. No admin needed. And we have 16 tools available to us. So we have things like listing artisan commands, or querying the database, or getting the absolute URL of a relative path, or searching documentation. So let's start with asking the AI to add a new organization and contact for us because this is a contact management application, so we'll need a contact to test with. So Cursor is behaving as normal, looking at the files necessary to understand the models. But now you can see it calling a tool from Boost to understand the database schema so it knows how to behave and how to move forward. It's now querying to see if there are any existing accounts because a contact has to be attached to an account, so it has to go and find an account ID. And now it's using the Tinker tool to use the contact factory in the organization factory to create those for us. So, that's done. It's created as an organization called Laragon is Cool, and it's created as a contact called Untitled Goose. So, let's take a look at that in the browser. All right, we've got a white screen of death. So, we could look at our logs, and we could copy and paste that, but why don't we just tell Cursor, hey, I've got a white screen of death. Can you just solve this for me? And you'll see Cursor now use 3 tools almost simultaneously. It's getting the last error from the Laravel logs, it's reading the last 10 entries in the Laravel logs, which will include notices and info, and it's also calling my favorite tool, one of my favorite tools, browser logs. So Cursor has found a typo. in app.js, I've missed an EOF completely accidentally and not fabricated for this demo, and it's now been able to fix that by reading the browser logs. So when you are using Boost locally, your console logs, your browser errors and exceptions are automatically streamed to the Laravel backend into a logs/boost browser.log file. So you have access to them and the AI agent has access to them. And now we can see our recently added contact here. Hello at night. Laragon is cool. That's pretty, pretty awesome. Thank you. So let's try a new thing and let's see which contacts do we have in Denver. We're in Denver. This is my first time in Denver. And it's gonna call a couple of tools now. Application info offers a ton of information to the AI agent to be better behaved, essentially. It gets PHP version, Laravel version, database engine, all of the packages and their versions, and the models installed in this application so it can make better choices. And it's also queried the database and found we have 7 contacts in Denver. They're all Laravel employees, they're all at the same place, that's super weird. Let's take a look in the browser to see, does the website actually agree? We'll filter here for Laravel. Cool, that was a bit slow, but the web does agree. So, the website and the AI agent, and the Boost tool are all using the same context. Boost is operating within the Laravel application context. But that was a bit slow, right? So, let's fix that. Because this is an Inertia app, we can defer loading of certain properties. So, this recently added contact is actually using a contact service, which is occasionally slow. Not fabricated, just accidentally slow occasionally. And so if we defer the loading of this prop, this entire page can load in immediately, and then we can have the contact load in very slightly after. So let's go to Cursor, and let's try this without Boost. We'll disable Boost. 16 tools, and we'll disable the cursor rules that it created for us so they're never applied. And then we'll just say, let's add inertia deferred to last contact in the contacts controller and index.vue. And we'll see how it does. Sometimes, to be fair to AI, this does succeed about 40% of the time. they succeed. It searches the web with just the right keywords, or it greps every single file in the node_modules directory, in the vendor directory, and it accidentally figures it out. So, let's see if it does it today. It is using the correct code in the backend, which it's good at with Inertia. It's using Inertia defer, as it should. And now it's gonna update the Vue component. This is often where it gets it wrong, but let's take a look. So, it looks like it's done something sensible, but this isn't the Inertia way. The Inertia way, you would expect to use the deferred component. So, maybe this code is functional. Maybe this code will work and it will defer the loading of the last contact. But it's gonna get immediately rejected in a review, right? This is slowing you down. It's 40% successful, and it's doing the wrong thing. It's not based on the documentation. So, why don't we enable Boost, enable the rules, and give this another try? And we should see Cursor immediately use, I hope, the search docs tool. Oh, no, we won't. We should first undo everything that the previous test did. And then we should see Cursor immediately used the search documentation tool. Thank you, Cursor. So it's searching for Inertia deferred props, and it's passing in the packages, and it doesn't have to pass in the version of Inertia because that gets automatically injected. And this is coming from the Boost API that's automatically ingested and automatically chunked and vectorized all of that documentation. And it's done the correct thing in the backend, as you would expect. And we can immediately see it wants to use the deferred component, because that's what's in the documentation. That's what's got returned from the search docs tool. So now Cursor is using the correct way to do it based off the docs, based on how you would expect any other Laravel and Inertia developer to use it. So, let's see if it actually works. So, it's failed to resolve, and it's realized that, and now it's resolving it correctly. And if we refresh, it does it perfectly. The page loads immediately, and now our last contact is deferred. And it's got a lovely little loading skeleton as well. Pretty nice. One thing that's important to note here is that the AI guidelines and the tools that the Boost MTP offers, they work hand in hand. So, our guidelines nudge the AI to say, hey, by the way, there is a search documentation tool, and I would recommend you use it in these circumstances. And so, it did that perfectly. Boost is always up to date with documentation. We are constantly ingesting new documentation and making sure that Boost and you have the correct, most up-to-date docs.
Awesome.
One thing I want to show is the AI agent used the Search Docs tool there to complete some code, but you can just chat with the docs, right? Because I always forget whether the string helper method to to convert something into this, what it's called. I think it's called string sentence, but I don't believe that it is. And so now it's gonna find all of the helper methods from the Laravel framework docs. And hopefully, now it's gonna use all of the helper methods in Tinker to find the exact one that converts And it's headline, not sentence, but I think that's wrong. Okay, well, last demo now. One thing I always forget how to do is rate limiting. So let's add a rate limit to the dashboard route, a max of 2 requests per second. And this is great because the per-second limit, the actual method itself, was added in Laravel 11.
Oh, really?
This application is Laravel 11. So we're gonna get the— we should get the exact documentation, the exact code for this exact version of Laravel. So Cursor should use our Search Docs tool. It's having issues with which keywords to use. And now it's resorted to the web. Thank you, that's perfect. So there are some guideline improvements to make here for how to pass keywords into search docs, but we should see it add the per-second limit to the App Service Controller. I might have to ask it to retry. Here we are. So, this is a good demo of it messing up, actually, because it's AI, right? It's gonna mess up sometimes. So, we have technically a rate limit of 2 requests per second, but it's used the per-minute method, and I wanted it to use per second. So, one thing to highlight here as well, is that without Boost's help, Cursor wouldn't try and make a test for this. Cursor would whack this in web.php, say, job done, catch you later, good luck. But our guidelines are asking it to care a bit more and make some tests for us. And so, it's making a dashboard rate limit test. It is now renaming that test. Why did it rename it? Now, I see. Perfect. And now it's gonna automatically add tests for us. So, without Boost, it wouldn't think to add tests. It wouldn't make sure that it did what it was supposed to do. So, we'll leave it to add those. And let's actually take a quick look at these composed guidelines. So, we have created these guidelines from, was it 13, 14 different guidelines, including project-specific ones. And there's a lot in here we can't demo easily. But from our testing day to day, we see that these rules help in everyday coding. So, it starts with core rules. These are rules that work across every project regardless of the tech stack that you're using. And these are mostly asking the AI to use the existing conventions, right? Like, don't just make stuff up. We have conventions for a reason. Please use them. And so, we have some foundational context here with the packages and versions, And we also say, follow the existing code conventions, use descriptive names, do not create verification scripts. Cursor and AI agents love to create random PHP files with random code in, and then not delete them after. It's a whole mess. There's a lot more in there, but one that I wanted to show is Boost Core. So, if you have Boost installed, we are guiding the AI, hey, You have these tools, and it would be a good idea to use them in these scenarios. List artisan commands and using Tinker, for example, and reading browser logs.
Awesome.
Okay, these AI guidelines and Boost MCP make AI agents much more useful. And to make this possible, actually, we had to build an MCP server, right? We'll also shortly be releasing version 1 of our MCP server package. So allowing you to build your own MCP servers by adding a line in routes/ai.php to build your own MCP servers. And that's thanks largely to Laravel community member Peter Soom. So thank you, Peter. To recap, Boost makes coding with AI easy to set up and makes the AI agent's output much higher quality. We will be releasing Boost for free to all of you within the next 2 weeks. So if you've been waiting to give AI coding a try, then now's the time to give yourself a boost. Thank you. Back to Taylor.
I was just thinking backstage, I enjoy coming up with, like, what am I gonna— am I gonna do the handshake? Am I gonna do the fist bump? Gotta keep them on their toes, you know? All right. Thanks a lot, Ashley. You think live coding is scary? Try live coding with with AI. Um, that's really scary. But, um, we're super excited about Laravel Boost. Um, like I said before, I'm not really into like hype cycles. Did I buy an NFT? Yes. But don't act like y'all didn't either. Y'all all bought one. Um, but we're really about pragmatic solutions that make coding with Laravel better, and we think Boost is just a no- brainer. If you're using something like Cursor or Claude Code or any MCP-capable, um, agent tool, you really should just install Laravel Boost when we release it for free in the next couple weeks, because it feeds always up-to-date information about Laravel. And not only Laravel, but Inertia, Livewire, Flux, Filament, all of the ecosystem packages that you love, we're feeding it the most up-to-date information about those tools so you get the most relevant coding guidance and you don't have to wait for the next LLM training round to get that information. So like Ashley said, we'll be releasing that in the next couple of weeks for free, and you can all contribute to it as well because it will be open source on GitHub. All right, so that is an update on our open source and AI projects. Before we dig into our product updates, being Nightwatch, Forge, and Cloud, David Hill, our head of design, is gonna share a few quick words about how we've thought about product design at Laravel.
It's impossible to capture the thought, creativity, and collaboration which has been happening at Laravel over the last 12 months. But I hope that short video gave you a sense of the amount of work that goes into your Laravel experiences. Hello everyone, my name is David Hill. I'm the head of design at Laravel, and I am beyond thrilled to be here with you today. Last year, I stood on the Laracon stage in Dallas as a design team of one. Today, I am extremely pleased and proud to say that Laravel is a design team of 6. And while we all work together and support one another, we do have designers dedicated to specific products and areas. And I'd like to call out and pay, you know, respect to all the work that they do. We have Hugo and Faye, who lead the design on Cloud. We have—
Woo!
Jeremy, who's leading the design of Laravel Nightwatch. Jim, who may have been busy on Forge. And finally, Tilly, who unfortunately can't be here today, but who I know is watching from home and who is the creative force behind all of Laravel's brand merchandise and marketing designs. The last year has seen the team lead the design of several new initiatives: Laravel Cloud, Nightwatch, and newlaravel.com, and more recently, a new learning platform, event site, and blog, as well as a secret project or two. That's a lot of new things, but design can't always be about creating new things. It can't always be going from 0 to 1. We don't always get to start with a blank canvas. If the last year could be best described as creating the new, then the next 12 months could be more aptly described as crafting, refining, and perfecting. You see, in Cloud and Nightwatch, we believe we've laid the foundations of 2 incredible tools for you to deploy, scale, and monitor your Laravel applications. And in Forge, well, in Forge, we have more than foundations. We have over 10 years of insights, data, and feedback. We believe there's still so much more to design and develop, And we can't do that alone. In fact, we don't do that alone. We listen, we read, and we watch everything that you share to better understand your wants, your needs, your pain points. From your tweets to your support emails, your blog posts, your podcasts, your YouTube videos. And yes, even the delightful Reddit posts. We try to learn from it all. And today you're going to see product updates that show just how much we've been listening as we continue to put you at the heart of everything that we do. We're so excited for design at Laravel over the next 12 months. So please continue sharing your feedback with us, whether directly or indirectly, because we're listening and we are here to make the most productive tools for you. And that is only possible when we work together. With that, I'll hand you back to Taylor. Enjoy the rest of Laracon, and thank you.
We want Nightwatch to be incredibly accessible no matter your scale so that you can get the best insights about your Laravel application. We're also launching new features like this beautiful new Cache Insights page. This page shows you all of the hits, misses, and even the hit rate of the cache operations that you're doing in your Laravel application. And this is really great because if you see unexpected behavior, maybe you're not caching the data long enough, or maybe, maybe you're not caching the right data at all. This screen helps you really dig into those kinds of problems so that you can fix them in your Laravel application. That cache page is available today. Today we're also launching our Nightwatch Slack integration, so you can now— thanks, I appreciate you. We're launching our Nightwatch Slack integration which sends you all of the exceptions and issues that are happening in your application so that you can see them right where you're already collaborating with your team. We'll keep you updated on the status of those things as they resolve. And of course, you can configure where and what notifications we send to Slack so that you're getting just the notifications that you want. We don't wanna overload you with noise. We just wanna send you the most helpful insights about your application right where you're already working. Now, we call NightWatch NightWatch because it's for monitoring your application around the clock. It's watching when you're sleeping, all of that good stuff. Cute name. We really leaned into the NightWatch theme. It's a very dark application. But what about those of us that work during the day? Does NightWatch always have to feel like you're debugging? at 2:00 AM. So in your gift bag, you have a pair of sunglasses. Now is the time to get those out and put those on. I'll give you a second.
All right.
5.
4.
Oh, what, are they in wrappers? All right, just squint, just cover your eyes because today I'm excited to announce the Day Shift.
All right.
So we are launching a light mode for Night Watch immediately after this keynote. So those of you that work during the day, can, uh, have a bright, functional new look for Nightwatch. It's not just an inversion of the color scheme. We've really rethought the accessibility of the platform. We've really tried to fine-tune it to make it really great. So again, that's going to be available immediately after this talk, as well as our new cache page and our Slack integration is going to be available immediately after the keynote, so you can try them right now. We also have more cool stuff coming up in the coming months for Nightwatch. Things like bulk issue editing, things like auto-resolving issues when you deploy. We want Nightwatch to be aware of when you deploy in general so that you can see when new problems arise when you deploy fresh code out into production. We're also working on our Inertia and Livewire insights. So those of you that are using those tools, we'll have dedicated tabs for Livewire, for example, where you get specific insights about that tool and how it's interacting with your application. And later this year, we'll also be launching a new region for data storage on Nightwatch in Sydney.
Woo!
Thank you. All right, so that's a quick Nightwatch update. Nightwatch is very new, but we're working on a lot, and we'll have more to share later this year. Let's dig into Laravel Forge. Laravel Forge has a special place in my heart. I mean, it's the first, uh, product I ever launched in the Laravel ecosystem back in 2014, and I launched it because I was tired of spending hours configuring NGINX and SSL certificates, installing databases, configuring process monitors. I didn't want to do any of that. And what if I just had an infrastructure management dashboard that was fine-tuned for Laravel, that was deeply integrated created with a framework and was just what Laravel developers need, and fine-tuned by Laravel developers for Laravel developers. And Forge really changed everything for me, and it changed everything about Laravel in a lot of ways, and in some ways is the reason we're here. Um, and now I'm super excited that with Forge and Cloud, we have great options for all kinds of different developers, whether you want to self-host and manage your application on Laravel Forge or you want a totally scalable, automatic, fully managed solution in Laravel Cloud. Laravel as an ecosystem has great solutions for both of those approaches. Um, you know, with Forge, you choose your own cloud provider, you link it to Forge, you still have root access to the servers when you need them, and that's great. A lot of developers love to work that way, and a lot of developers have been asking, what are our plans for Laravel Forge. And I'm excited that today we're going to be previewing the biggest update to Forge that we've ever made in the last 10 years. In fact, it's so big internally we've been calling it Forge 2.0. It's a pretty big deal, and it starts with a beautiful new design built by our design team. And to walk you through this design and introduce you to some of Laravel Forge's cool new features, I'm gonna bring out James Brooks, the Forge team lead. Go.
Thanks, everybody. Oh, high fives. How good is that? Before we get started, I want to take just a quick moment to just acknowledge and appreciate the serendipity, which is quite a fancy word, that has led to this moment. Today marks my 6-year anniversary at Laravel. No, no, hold the applause. We've got Forge to go through. My 6-year anniversary at Laravel, and I'm incredibly proud and privileged to be a part of this keynote and share with you the next generation of Laravel Forge. So the team have been working on this for well over a year. And they put in blood, sweat, and tears. I'm really, really excited and relieved that I can finally talk about this, and I know the team feel the same way. We have been keeping secrets. Shall we get to it? Yeah.
OK.
That's a good sensor. Okay, so as you can see, and as Taylor said, we've redesigned Forge. It's a completely new design built from the ground up, and it looks super, super nice. We've worked really hard to streamline the entire Forge experience from the ground up. We've simplified the UX while retaining Forge's personality and what makes it special. And also, we've laid a lot of groundwork for the future. What you see today is just the beginning. In February, we introduced Laravel Cloud to the world. And alongside that came a new design language, which we thought was a perfect fit for what we've set out to achieve with Forge. Many developers are already using both Cloud and Forge. So we've spent the time to unify the overall design language while retaining that personality, the colors. It's not blue. It's not a direct copy. And we love it. So as Evan You is here, I want to take a very quick moment to shout out that this is all done with Vue 3. TypeScript, and Inertia. It's an insane frontend stack, and we have enjoyed working immensely. And of course, while we're on the subject of design, we can't let Nightwatch have all of the dark mode fun. So this version of Forge also ships with an entirely new dark mode. How good does that look, eh? All right. We're going to go back. Are you ready?
No.
Not quite as bad as earlier. OK, so let's dig in a bit more. Right now, we're looking at the organization overview. And a goal that we had with this, with Forge in general really, was to provide and surface contextually relevant information. So if you're looking at this page, you should see recent servers, recent sites, that kind of thing. So let's go through this. At the top here, we have our organization name. We have a list of our recent servers that we've kind of interacted with in one way or another. We have recent sites, which we can see the repository, the branch, when we last deployed it. Then we have a list of recent deployments across the entire organization. And then at the bottom here, we have an activity feed. Okay. So let's go to the top. We've also added support for avatars on an organization level, the profile, and sites, so you can identify things really quickly. Further, we've also added color codes to servers and sites, Which we can see here. So now you can really identify things at a very quick glance. All right, let's go into a server. So we've drilled down into a server. This is the server overview dashboard, and here we can see a list of the recent sites on that server, the background processes, which we previously called daemons, but we have made the same as cloud to make that simpler. Scheduled jobs, which now have labels, so again, you can identify those. Server monitors, and again, the activity feed, but scoped down to the server. On the sidebar here, we have the server details that used to live at the top. We've now moved it to the side. You can, of course, click to copy those. Always useful.
Okay.
Let's drill into a site. So here, we have a list of recent deployments. We can see they've been deployed at various times. Background processes are now available on a site level. And this will also pull in your queues. as well. So we can— let's have a little add. So we can either do the queue worker or a custom background process. And then scheduled jobs also on a site level. So things like the Laravel scheduler, they will now appear here as well. Again, contextual information. And then this time, the activity feed is scoped down further. And at this point as well, because you're looking at a site, when we say that, like, Ryan here has deployed some code, we don't need to tell you the site name any longer. So we just get rid of it, keep it simple. Okay, on the sidebar, we have the site details. And for this Laravel site, we also have the integrations, which we can just kind of click to enable, super easy. So each of these dashboards will adapt to show you the most relevant information based on the server type, site type, and more. It's really easy to use. It feels very familiar, and it looks great with a new modern design language. Okay. One of the biggest fundamental changes that we've made with this new version of Forge, which you've probably already heard me say, is that we're introducing an entirely new organization and team structure to replace Forge's circles, as they're currently called. Organizations are the perfect way to use one account for your hobby, business, and agency projects. They also become the billable entity, meaning you can use one account but be billed in different payment methods. Lost my track, sorry.
Okay.
So now we can add users to our organization, and we've simplified the entire process. So we can invite by email, and when we do that, we can select a role, which is like a group of permissions that we've created for you. So there are various roles including owner, admin, manager, developer, and viewer. Of course, you can use custom roles as well. This drastically simplifies the process of inviting people to the organization, and it allows you to see at a glance who's in there and what permissions they have, level of access. Behind the scenes, we are automatically migrating your current accounts and Circles into this new structure, So you don't have to do anything. It's a totally seamless transition. OK. So Forge has had a command palette for a while. But as part of our goal with this contextually relevant information, we knew that we could do a much, much better job. So we can open the command palette either by clicking on the search bar, at the top, or pressing Command-K or Control-K, depending on your operating system. When we do that, we're shown a list of actions, which includes searching, creating, and navigating. So let's search for a server. We will go for our database one. So we just start typing, it starts searching. And now we could— We could just press Enter or Return to go straight to that server, or we can hold down Command or Control and hit Enter. And the context of this server is now immediately available to us right from the organization dashboard. This works anywhere. So while we're here, let's create a database, and we will call this Laragon.
Cool.
So just like that, without ever leaving the dashboard, we've created this database on one server. But we could take this further. Let's actually go to this database server. So we'll hit Enter this time. It navigates us there. We can see this Laragon demo— Laragon database, sorry. And now let's say that we actually created that database from this page. Let's open up the command palette. The context of the server is immediately shown to us, but what we'll do is we'll delete that. We don't need that. We will then find the Flightso website. So that one, we'll Command+Enter into it, and now we're looking at a site on a server from a completely different place.
Let's—
Deploy that site. How cool is that? We think this is really cool because it means that you don't need to have multiple tabs open, multiple windows. You don't lose the context. You could just do what you're trying to do. There is one more thing I want to show you, although this is full of surprises. Well, let's reopen the Command Palette again. And this time, I will do Ask Forge. So from within the command palette itself, we can now query the documentation about Forge. So we have some predefined questions here, like, what is an app server? How do I add an SSH key? But let's ask it, what is the difference between an app and web server? Nailed that.
OK.
The main difference between an app and web server in Laravel Forge is the scope of services they include. So we've learned something without, again, needing to leave Forge. That's the new command palette. We think you're going to love it. OK. We're also introducing a brand new Notification Center. We can access that by hitting the bell at the top right-hand corner. And here you can see a list of notifications. Most recently that the deployment we did through the Command Palette has finished just now. So what we can do is click on this and it will take us straight to the deployment. The Notification Center will also show you notifications from across all of your organizations. So no matter what project you're working on, you can always be notified of what's happening.
All right.
Now, next, let's create a new server. So here, you can see we have an all-new server creation page. It's very similar and familiar to what we had previously. You have the name of the server, which we could generate again. We also have a provider, which is Laravel v8. To tell you more about Laravel VPS, I'm gonna hand back to Taylor. Thank you so much.
Thanks. I'm not doing any more hand stuff when I come out here. All right, Laravel VPS. We think this is a pretty big deal. And let me set the scene for you. Currently, when someone signs up for Forge, as probably many of you have, you have to bring an existing cloud provider account. That could be an AWS account, a Vultr account, a Hetzner account, something like that. And you have to copy and paste the API key from that account into Forge, and that's what lets us create servers on that platform for you. But that's going to change. You can still do that, but we're also Introducing Laravel VPS, and it makes it so much simpler and faster to get started with Forge. With Laravel VPS, you can now purchase servers directly from Laravel through our infrastructure partnership with our friends at DigitalOcean. No more juggling cloud provider API keys, no more complex setup process. Just sign up for Forge and start provisioning servers immediately. All right, so let's jump into this demo. Let's hit continue. Did I hit it? There we go. All right, and here we can pick our server type, which you're probably used to if you've used Forge. You can pick your region, you can set up your network, and then you're presented with some common server sizes that Laravel VPS offers. These are the most common server sizes that people provision on Laravel Forge, and Laravel VPS is going to have affordable pricing for everyone. This is actually not finalized pricing, but it's close enough to where it will basically be in the ballpark of these numbers, which is pretty much what you would expect to pay for VPS servers in 2025. But let's talk about one of my favorite features of Laravel VPS, and this is word right here, instant. When we first started building this feature, I set a pretty high bar for the team. I said, when someone creates a Laravel VPS server, I want it to be ready in under a minute. Right now, if you create a server on Forge, you have to sit there and wait for 15 minutes while that server builds, while all the software gets installed, while the database is installed.
Yuck.
You know, it's just no good.
All right.
But we thought we could do it faster. And not only did the team hit that mark, they really blew it out of the water. So let's go ahead and create this server. I'm going to make a little bit of a bigger server. I'll hit create server here. We just wait a few seconds and we're in our server. That's it. It takes roughly 5 to 10 seconds to have a Laravel VPS server fully ready to go. We're ready to install a site right now. So I can copy my sudo password if I want, my database password. I can download that stuff. Once I've stored it, I'm good to go. I have a fresh server that I'm ready to use. All right, so I guess we can go ahead and install a site on this server. So I'll hit the new site dropdown, and I've got some options here. We're of course using Laravel. We have this new screen here. We can pick our repository. I've got this little Taylor's app repository here. We can set up the branch, we can set up our database, just all the usual stuff we're used to with Forge. And here's another one of my favorite features, the Forge domain. So yeah, this is great. So every new site with Forge gets a free onforge.com domain immediately, just like Laravel Cloud and the way you get laravel.cloud domains with your cloud applications. On Forge, you now get onforge.com.
Nice.
Domains with every site. That's really great. It means no more IP addresses or setting up DNS records before you can give someone a human-readable URL. All right, so that comes with every new Forge site. So I think this looks pretty good. I'll just go ahead and hit create site. What that's going to do is of course clone down the repository, install my Composer dependencies, basically get the site ready to go. on Forge. So this should just take a few seconds here and then we'll be ready to dig in a little bit more. You can see up there in the top right, we've built a new Nightwatch integration to make it really easy to connect your sites to Nightwatch so you can start pulling in all of your logs and exceptions and all of that automatically. All right, so this site is installed. We haven't actually run our first deployment yet. Before we do that, I'm gonna go into the deployment settings here and let's look at our deployment script. You can see here in this deployment script, there's a couple new things. And for years, developers have been asking for zero downtime deployments to finally be built into Laravel Forge. And I'm happy to announce that is a reality now. So you can see here in the deployment script at the beginning and the end, we have some new functions you can call, create release and activate release. And that basically creates a new release directory on the server. You can run whatever commands you want before that deployment is actually activated. Then you call activate release to make it go live, and then you can run anything you want after that to do whatever you want, to clean things up or whatever you need to do. So zero downtime deployments baked right into Laravel Forge. It's really great. We've also baked another new feature that I wanna show you into Forge, health checks. So this is now also baked into Forge. I'm gonna turn that on. And what that does is after your site is deployed, we'll ping your site from multiple different locations around the world to make sure it's still online after your fresh deployment just went active. And of course, if it's not online, we'll send you a notification that your deployment probably just broke something. All right, so let's go ahead and save that. Come up here, we can just hit deploy. We'll be on this new deployment screen. You can see that zero downtime deployments is enabled. It's running our deployment. Again, our deployment has not been activated yet until the end of this. We shouldn't have any downtime during the deployment. Building our Vite stuff, our frontend stuff. The deployment's complete and it did our health checks and the site is still operational. And now I should just be able to hit visit here. Our site is live. We should be able to sign up if someone hasn't beat me to it again. All right, and we're in. So we have a working application on Forge, database and everything, ready to go with zero downtime deployments. And we probably did all this faster than just provisioning a server on Forge would have taken before Laravel VPS. It's super fast to get started. So I'm not just excited about Laravel VPS because you can get servers instantly. They're also going to be some of the most affordable servers, servers on the Forge platform. For our Growth and Business tier subscribers, we're actually going to give you juicy percentage-based discounts on your Laravel VPS servers that really will make them some of the most affordable entry points into the Forge ecosystem that we've ever had. And I'm also excited when combining Laravel VPS with the Forge API, what you can build when you have access to instant VPS servers at your fingertips. All right, let me show you another feature that we baked into Forge under this Observe tab, Heartbeats. So Laravel has a scheduler where you can schedule tasks to run nightly or every week or even every a year. And sometimes you, you know, you don't know if those are actually running or not, and you want a tool to monitor them. So we're baking heartbeats directly into Forge so you can do that. So if I click Add Heartbeat, I can give this a name, maybe Scheduler, how often it's supposed to run. And if Forge hasn't heard from the scheduler in 5 minutes, I want it to notify me. So I'll hit Create Heartbeat. It's going to give me a URL which I can copy here. And if we hit that URL, we just get a simple response. And I'll go back to Forge, and we should see that this heartbeat is now beating, which we do. We can see that little green heart there. So we know our scheduler is running. Of course, Laravel has the then ping method built into the scheduler that makes it super easy to plug this URL into your Laravel application. So heartbeats are built right into Laravel Forge. All right, let's go to the overview. And if we have a Laravel VPS server, how do we dig into the metrics about that server, things like CPU, memory, bandwidth. This server is brand new, so I'm actually going to go to one of my other servers in my Taylor's Projects organization. I'm going to go into that server, and the cool thing about this server is it's actually running a Nuxt.js site, which we've been working on support for in our upcoming new batch of features in Forge. So if I go into this site and visit it, this is a Nuxt site running in full server mode. You can use server-side actions, in Nuxt, you can deploy this using Forge. We're bringing full support for this to Laravel Forge, which I think is really great. I know a lot of you build Nuxt or Next frontends that you pair with Laravel backends. We want you to be able to deploy those frontends on Forge as well in the same place you deploy your Laravel backends. But anyway, enough with that side quest. Let's jump into our server metrics for this server. I'll go into Observe, and we have a new metrics tab for Laravel VPS servers. where we can get the CPU, the memory, and unfortunately my little side project is not getting much traffic right now, 'cause I just have no bandwidth coming in or out. But it allows you to monitor all of that from this simple dashboard so you can see exactly what's happening in your server. All right, let's jump back over into the Laracon organization. I'm gonna go into my new Laravel VPS server, Twilight Brook, that we created just a few minutes ago. And you know, sometimes when you're using Forge, One of the benefits of Forge is that you have access to the underlying server, right? That's why a lot of you use Forge. And sometimes you need to hop onto the server just to debug something, maybe check if some file is on the server or see what processes are on the server. And you have to typically create an SSH key, add that to Forge, go into your terminal, do the SSH command, copy the IP address, jump into the server. It's just a big dog and pony show, you know, get access to this server. We thought that could be better, so we thought, what if you could just do Ctrl+Backtick? And we're on the server. I have full autocompletion in my terminal. I can check the PHP version. It's a full SSH session And I can just drop right into it anytime with Ctrl+Backtick, or I can launch it from the command palette. Sometimes I really need to lock in, and we can put it in focus mode. Forge fades into the background. I've got a big terminal. I can even run complicated things like htop right here from Forge just by dropping into the server into the new Forge integrated terminal. It's really, really slick. I can also do this at the site level. So let's say I drill into this site. I can just do Ctrl+Backtick, and I'm dropped right into that site's directory on the server. So I'm just immediately right there where I need to be. It's really convenient for those times you just need to drop into a server and check on a problem. It just couldn't be easier. But we know you're not always using Forge alone. A lot of you work with teams. And we want to make it super easy to collaborate with your team members when they need to debug something. And I thought, how can we make that happen? How can we pair up with our team members to help them solve problems? So we're actually building collaboration features into the terminal. I can see my friend James just started a terminal session. I'm just going to join that session. Now I'm pairing with James, who's backstage debugging some things on the server. I can just watch along. It's really, really slick. We're really happy with this feature. The Forge team really locked in to make this a possibility, and we think you're going to really love it. It's super convenient. All right, James, I think we're going to let you go now. Um, good luck with this little debugging session. All right, we can just close that out. So that is a preview of the massive update coming to Laravel Forge in just 8 weeks. It's really one of the biggest updates we've ever done to Forge in its history, and it's bringing a beautiful new design, Laravel VPS, zero downtime deployments, health checks, heartbeats, an intelligent command palette, an integrated Forge terminal, teams and organizations, and an improved API. Like I said, we've got a bit more polishing up to do on this. We hope to get this in your hands in 8 weeks. We are needing early testers. If you are interested in helping us test Laravel VPS or all of these cool new features on Laravel Forge, stop by the Forge booth. Let us know what you're building. Tell us what you're working on. We'd love to get you in early. We actually are running all of this in production right now behind feature flags. It's gonna be very easy for us to give you access. We'd love to hear from you, so stop by the booth and let us know what you're doing.
All right.
We still got one more product to cover. Are you hanging in there? Are you still with me? Let's jump into Laravel Cloud. Laravel Cloud is our fully managed application platform for Laravel. And it's the realization, like I said, of how I've always dreamed of deploying Laravel applications, from having a Forge account to going into production in less than 60 seconds with zero configuration. And not only that, helping you scale to enterprise scale on our fully managed platform. And since we launched Cloud just a few months ago, thousands of you have deployed applications to Laravel Cloud. People are shipping side projects, they're shipping staging environments, and they're shipping production applications faster than ever before. Cloud started with a great foundation, and we're ready to build on that foundation and show you some of the stuff we've been cooking over the last few months. But first, let's talk a little business. We're going to tweak our plans a little bit, and I think you're really going to like it. So we're renaming our Sandbox plan to Starter, and we're adding some new features. One of them is custom domains for everyone. for every plan. So previously you had to sign up for our $20 a month plan to have a custom domain on Cloud. We're bringing that to our pay-as-you-go starter plan. This makes it more accessible than ever to get started with Cloud, whereas before if you wanted to launch an app with a custom domain on Cloud, you really were going to be in for about $25 to $30 per month to get that app online because you needed the growth plan for a custom domain. With the starter plan, you can get a Laravel app on Laravel Cloud with a custom domain for just $5 or $6 a month. It's really one of the most accessible entry points into deploying Laravel applications there is. We're also putting some smart guardrails on our starter plan. We've had a few of you, um, do $500 a month caches, $1,000 a month databases, and we're trying to bring more, uh, intelligence into the platform to help guide you into the right resource size for your application. So we'll limit you down to what we think is best for your application, and you can scale when you really need to and when you opt into it. We're making it much more understandable. Again, if you go on the growth plan, you get access to auto scaling, Pro Compute, larger resources, dedicated worker clusters, and our web application firewall. We're also simplifying compute pricing in general. So We're going to simple round numbers per month for our compute. So $4 a month, $5 a month, no more of this 88 cents an hour stuff, and I don't know what I'm gonna be paying at the end of the month. We're making this super simple for you, and we're going to be baking intelligence right into cloud so you can always see how much you've spent so far and how much different compute sizes cost right in the cloud UI. And all of this new pricing and new application UI improvements are launching in 2 weeks on August 12th, including custom domains for all plans. I'm also excited to announce that today we are launching production-ready MySQL in Laravel Cloud. We've been— yeah, thank you. We've had a developer preview of MySQL on Cloud for the last few months, but we're now production ready. That means fully managed backups, restores. We got proxy SQL in front of all of your databases so you can handle more connections. We're ready for scaling you vertically and we're ready for production workloads. And this is ready right now and we're launching it today. And you can get started for just $6 a month with fully managed MySQL with backups and restores on Laravel Cloud. We're really happy to get this in your hands. I want to also call out an added benefit of Laravel MySQL. This is a totally custom infrastructure that we've built for Laravel Cloud. There's no bandwidth fees when your application talks to a Laravel MySQL database. This is in contrast to the serverless Postgres offering we offer through our partnership with Neon. With Laravel MySQL, this is in-house infrastructure sitting right next to your app. No latency penalty, no bandwidth fees when you're using Laravel MySQL. It's really great, and it's a great default option for all new Laravel Cloud applications. We have a lot more coming on Laravel Cloud that I think you're gonna be really excited about. And to give you more info about all of that, I'm gonna introduce Laravel Cloud team lead, Joe Dixon.
You press something?
Oh no.
All right. Good afternoon, Laracon. How are you all doing?
Awesome.
Thank you all for having me. Thank you for that incredibly warm welcome. It's hard for me to believe that we only broke ground on Laravel Cloud back in March of 2024, just 16 short months ago. It has without doubt been the most ambitious and exciting project that I have ever worked on. And it's one that's posed countless challenges along the way. Everything from managing resources across hundreds of AWS accounts, to tracking bandwidth usage to a single application running somewhere on Crowd's sprawling infrastructure. From wrangling millions of daily billing events, to designing the perfect user experience for custom domain management. You name it, we faced it head on. But it's been an absolute privilege to craft this platform for our community, a platform which strives to take the pain out of deploying, managing, and scaling the infrastructure required for even the most demanding of workloads, affording you the time to focus on what matters to you.
Shipping.
Luckily for me, I have the honor and privilege to work with an incredibly talented team of badass engineers, product managers, and designers who've taken every challenge in their stride, culminating in us launching Cloud to the world in just less than 12 months. But that was 5 months ago, and 750,000-ish deployments since, we've still been— there's been a lot in the oven. And I'm excited today to show you what's been cooking. Okay, so first up, we wanted to really make the create application flow even easier and faster than it currently is. And to do that, we reimagined the whole experience. So we went from a modal-based approach to a full-page experience, which really gives us the breathing room that we need to do this process justice. And there's a couple of small things to call out on this page, which I think are going to be huge quality of life improvements. First of all, we're pulling through the organization avatar here. So if you're working across multiple source control providers, multiple GitHub organizations, we're pulling in the avatar so you can easily identify the repositories that you're interested in. And in a similar fashion, we're actually pulling in those repositories in order of the most recently active because we feel like in most cases, if you're connecting a repository to cloud, it's probably going to be one that you've been working on fairly recently.
recently.
But if all else fails, we also now have finally a filter. So I can search for the repository that I want, and I'm going to be able to find that quickly and easily. And I think this is a huge quality of life improvement for those users who have hundreds, maybe thousands of repositories that they're connected to cloud. But what about those users who want to be able to spin up a new project and kick the tires on a new project on cloud? Well, we've got you covered too with our new user template flow. If I click on this tab here, we should see some options that we are already quite familiar with. We can, from here, deploy a brand new empty Laravel application, or any of our 3 starter kits, React, Vue, and Livewire. And I'm a big fan of Livewire, and I heard a lot of you are big fans of Livewire too, so let's start a Livewire project. So I'm gonna click the Livewire starter kit template, and then I'm presented with some options. First of all, I can pick my source control provider, or my Git provider account. I'm going to stick with this Laracon 2025 organization, and I can give my repository a name. So let's change this to demo. Next, I can choose the visibility of the repo. So I can say private, I only want it accessible to members of my team, or public, and I'm going to make it accessible to the masses. My application name by default stays in sync with my repository name, but I'm free to change that too. And finally, of course, I can select the region I want to deploy in.
Okay.
I didn't think the internet gods would leave me there for a second. Okay, so now the application is created, we have landed on a screen which should be familiar to Laravel Cloud users. It's our environment canvas. It's the place where we can go to see an overview of our environment. Application environment, everything from our network settings to our custom domains to our compute clusters, worker clusters, and any resources that we have attached to that environment. And the canvas itself has had a bit of a glow up over the last couple of weeks. We've made some subtle design changes to kind of make this less busy and allowing you to focus on the things that are important. And we didn't let Forge have all the fun at the hackathon. We also joined in, and these new canvas controls were a late addition for Laracon. You can also see from here that we are— well, we can now have already deployed that environment. So when we created it, it's automatically deployed. So if I click here on our cloud domain, we are taken to our Livewire Starter Kit. And if I jump back to cloud and then click on the GitHub repo that's linked, my brand new repo has been created for me. My Livewire Starter Kit files have all been pushed up to GitHub. So let's take a step back and think about what's happened. In just a couple of clicks within Cloud, I have a brand new project running on Cloud deployed. I have my source control repository in place that all I now need to do is clone down. And as soon as I make any changes locally and push those up, Cloud is going to auto-deploy that for me. We really feel like this new Starter Kit flow really is the fastest way to get your new idea off the ground. I'm glad you applauded because I really needed that drink.
Okay.
I'm also excited to announce that that is, assuming the feature flag gods are with us, that is available and ready to use as of right now. Okay. Every decision that we make about every feature that we build into Laravel Cloud is hyper-focused around taking the pain out of managing and scaling infrastructure. When we launched Cloud, we came out with an opinionated set of auto-scaling rules, a set of rules which we still believe are a sensible default for the majority of Laravel applications. And behind the scenes, we're making continual improvements to our underlying PHP runtimes. So that organically means that those existing opinionated rules are getting better, more performant, and more reliable over time. But we wanted to give you more control over your auto-scaling strategies for those times when you really need it. If you run a particularly CPU-intensive application or memory-intensive application, you may need a little bit more control over when your application scales up. And we wanted to give you that directly from Cloud's UI. So if I click into this existing application that I have here and into my main environment, you'll see that I have 2 compute clusters available. I have my app cluster and my worker cluster. And if I click into these settings here, we'll see something that should be familiar to cloud users. We have our replica range slider. So I'm, here I'm saying I want to scale between 1 and 2 replicas, but what's new here is I have this new CPU and memory threshold. So I now have control at what percentage utilization of either CPU or memory I want my application to scale. And that's the same for both app clusters and worker clusters. So we really feel like the improvements that we're making continually to those underlying runtimes with the new scaling strategies, scaling configuration, excuse me, scaling configuration strategies that are now available within Cloud UI, it's never been a better time to start your autoscaling journey on Laravel Cloud. And those are also available as of right now. But we didn't stop there. Sometimes things like, Setting up your queue worker configuration can be tricky. Setting up the correct number of workers for the resources that you have available to you is not always straightforward. Of course, we have tools like Horizon that can help us there, but Horizon isn't necessarily aware of the amount of resources that we have available on our instance that we're running, nor can it help us to scale horizontally. We think cloud could and can and should do a better job of that. Imagine a world where we can tell cloud the boundaries in which we want it to scale, but cloud will take over and understand the amount of resources that we have available in the replicas to understand how much we can vertically scale those workers and how then we can horizontally scale to ensure that our compute is perfectly aligned with the demands of our queue. So today, I want to show you our new managed queue clusters. And to do that, I'm going to switch into the Lambo environment. So this is a new environment, and I've taken the worker cluster out, and I've replaced it with this new queue cluster. And if I look at the configuration options here, we see things which are relatively familiar to us. We can set the compute class and the compute size that we want to run. And we can configure our queue with this familiar queue configuration panel. Then we drop into the auto scaling section, and we can see here that, again, there's our familiar replica range slider. So here I'm saying I want to scale between 1 and 4 replicas, but then we see this new option, this threshold option. And what this is saying to us is, if jobs are typically staying on the queue for 20 seconds or more, we want to see if there's a way that we can scale either our workers vertically or our replicas horizontally to be able to keep up with that demand. And that's the only variable we need to set. Cloud's going to go ahead and take care of the rest of that for us. Let's take a look at what that looks like. Okay. So what I have here is an app deployed, and this app is going to help us to visualize what these managed queue clusters are doing under the hood and the problem that they're going to solve for us. What I have here is I'm going to— about to push 2,000 jobs onto this queue. And these are very simple jobs, they just sleep for 2 seconds. We want to see how quickly we can process those and how these managed queue clusters can help us do that. So I'm going to push those on the queue now. And while we start to process those jobs, what we're about to see is a card appear for every replica that we have running. And remember I said I wanted to scale between 1 and 4 replicas. So right now we have replica 1 running because this was a completely cold queue to start with. Now, the little boxes that you can see flying across the screen are a representation of the workers that we have running on that replica. So immediately, you can see that we have, I think, around 20 workers on there right now, and our memory usage is 87%. So we're leaving a little bit of headroom, but we're really well utilized for the number of workers on this replica. Now, behind the scenes, what the Q cluster is doing is taking a lot of different data points from different places. We're looking at things like the CPU memory utilization of the replica, plus all of the workers running, plus every single job that gets processed. And we couple that with things like the depth of the queue, the throughput of the queue, and the average amount of time that jobs are spending on the queue. And all those data points allow us to make decisions on how we should scale. Also on that replica 1 card, you can see our confidence score, and this is the confidence that we have in, in the decisions that we make around scaling. And that confidence score really comes from the amount of data points that we have, how fresh that data, and how fresh that data is. And there we go. I was waiting for that to happen, so thank you. In the top right-hand corner, you can actually see the target number of replicas that we are asking our infrastructure to run for us. Now, you can see it's a little high, 17. Well, it's continually fluctuating, but it's a little higher than the value that we set in the UI, where we set our maximum of 4 replicas. What this target is doing is telling infrastructure, in an ideal world, if we wanted to hit that 20-second threshold, we would need this many replicas running based on the resources that we have available to us. We're obviously going to cap that at 4, because that's the boundaries that us, as customers of cloud, set in the UI. We don't want to scale above that. We know what those costs are going to be, and that's what we're comfortable to spend. But you can see now that very, very quickly, those extra 2, 3, and replicas 2, 3, and 4 came online, and we were able to process the backlog of queued jobs really, really quickly. So this is honestly pretty mind-blowing stuff, right? We have tools like Horizon in the community that allow us to configure the number of workers that we want to run, but it's not intelligent enough to tell us whether we actually have the capacity to run that many workers, and it's definitely not able to help us horizontally scale, to really process the jobs in the queue in a timely fashion. This really is the next generation of queue management for Laravel. And I'm excited to say this is coming in just a couple of weeks.
Okay.
When we launched Laravel Cloud, we prioritized the resources that are required for the majority of Laravel applications, namely databases, caches, and object storage. But resources are things that we will continue to work on and improve over time. Taylor's already mentioned that our MySQL offering, which we announced, launched under developer preview, is now production ready. And that's something that we've been working on since launch. But today, I'm very excited to show you a sneak peek of the next resource which is coming to Laravel Cloud. It's 100% been the most requested resource since we've launched, but it's probably also been the most requested feature for Laravel Cloud overall. And it's a resource that's very close to my heart. Today, I'm very excited to show you Managed Reverb. And to do that, I have a brand new application I want to deploy. So I'm going to jump back into the create application flow and If my repos load, I think the Wi-Fi may have just crashed. Here we go. We're good. I have this application called Chamber, which I'm going to deploy here now. I'm going to just stick with the defaults. I'm going to be dropped into the canvas overview again with the default configuration settings, which are relatively low amount of compute with hibernation enabled by default. Okay, there we are, dropped on the canvas. Now the only thing, the only resource that this application needs is a WebSocket server, and today I can do that directly from the canvas. So with our new canvas controls, I can select Add Resource. I'm going to choose WebSockets, and I can create a new WebSocket server here and inline from the canvas. So I'm going to create that. I'm going to stick with the name of Chamber, the same name as my project. I'm going to stick to the same region as my application compute so I can keep the latency between between the two, low, and I'm going to select the amount, the number of concurrent connections which I would like this server to be able to handle. Now, there's a live audience participation element to this demo, so I'm going to select this relatively high, and I'm going to go ahead and create WebSocket server. And if we wait just a couple of seconds, that's it, our WebSocket server is ready there for us to use. Now, because there's some audience participation in this, I'm— oh, I'm going to just save this. And I'm going to bump up my compute a little bit. We'll scale this up as well. So we'll go between 1 and 4 replicas, and we're going to save and deploy. While that deploys, I want to show you a couple of things which just happened under the hood just by selecting that WebSocket server from the canvas. So the first thing I'm going to do is drop into settings, and I'm going to scroll down and look at our injected environment variables. Now, just as a reminder, injected environment variables on cloud are the configuration options which cloud is able to automatically inject into our environment. So any resource that cloud is aware of, we're going to automatically inject those variables for you. So things like database connection credentials, caches, object storage, all that stuff, and WebSockets are no different. So if I scroll down here into these configuration settings, you'll see all of my reverb prefixed environment variables are there and already injected into my environment. I have an app ID, an app key, an app secret, and a hostname. So as soon as this deploys, the backend of my application is going to be able to broadcast events to the frontend of my application. But of course, my frontend also needs to be able to consume those events. So if I scroll down a little bit more, you'll see we've also injected all of the Vite prefixed Reverb environment variables. But that's not the only thing that happened. If I jump back up to the top-level resource, That's the wrong one, sorry. Let's go to WebSocket servers. You'll see my chamber WebSocket server here. If I click into this, I'm gonna explain a little bit more about how this works. So like you have seen with other resources for Laravel Cloud, WebSockets are no different. They can be shared across multiple environments that you have configured within Laravel Cloud. So databases work in the same way, caches work in the same way, and object storage, if we wanted to, can work in the same way too. WebSockets work by a top-level WebSocket server, and then we have different applications which we can configure— WebSocket applications which we can configure on that server. So if we were sharing this across 5 different environments, we would create 5 different WebSocket applications on this server. So I only have one at the moment, and I can go ahead in here and edit the settings. There's some nice things that we can change: the application name, we can change the ping interval, we can change the activity timeout and the max message size. But the one I really wanted to call out here is the allowed origins. Now, if you've ever used WebSockets before, or ever used Reverb before, we have to tell Reverb the allowed origin, so where the request is coming from, we have to tell Reverb to allow that request. And so we've automatically injected the cloud domain into here. So as soon as this deploys, that allowed origin has been set, and we will be able to connect to that WebSocket server. So all of that is taken care of on our behalf. If I jump back into the application, hopefully that's now deployed, which it has, and I can go ahead and click on my Cloud Domain.
No.
Okay.
Let's try that again. There we go. How did people get there before I even—
Okay.
There we go. You never cease to amaze me. So, what we have here is the emoji reaction picker, which we have on the open-source Reverb site. So, just like that, we've been able to, in just a couple of clicks, we've been able to create a brand-new application, attach a WebSocket server to it, and deploy it, and just like that, we have WebSockets in our application. I think that's pretty mind-blowing stuff, and I'm excited to share that that will be coming later this month.
Thank you.
You guys are going all out. Okay, cool. So I hope some of the things that I've shown you today have given you a good reminder of how easy it is to get your applications running on cloud in a way that will scale with you. But what if we could make it even easier to test your new features? What if we could change the way that your development, testing, and QA work? lifecycles work. Well, the next feature I want to show you, I believe, achieves all of that and more. As luck would have it, I have a brand new feature that I want to deploy to this application that I've just deployed. And there's a couple of ways that I could do that. I could jump back to the application level, and I could go and add a new environment. I can select the branch which I wish to deploy, and I can give that environment a name. That will then drop me into the canvas, which we've seen, and I can configure my environment as I would like. But because this is going to be, you know, in principle, a very similar application structure to the one I've just deployed, there's an even faster way to do that. In case you haven't seen this, I can jump to the environment overview. I can select replicate option from the top here, and I can say I want to replicate my main environment here. I can choose the branch I wish to connect. I can still give that environment a name, and I have a number of different replication options which I can choose. And that will basically go ahead and take that original environment, take a copy of it, and attach the new branch to it. So that's already pretty easy, but what if we could automate that whole process so we never had to think about it? If I jump back up to the application-level settings here, you'll see we have this brand new option called Preview Environments. Now, what preview environments allow us to do is automatically generate a new environment every time something happens. And the way that we know that something happens is by creating a new automation. Now, if we take that QA test example, let's go ahead and create this new automation called QA test. And I'll walk you through the options that we can, we have here. The first thing I can do is choose the environment which I wish to replicate. Every time this automation is triggered, which environment would I like to replicate? Now, in this case, I only have one, so I'm going to stick with main, but this will be very based on your needs. So, if you're working typically, your new features work from a staging environment, then maybe the staging environment is the one that you would wish to replicate. But for the purposes of this demo, we'll stick with our main environment. Now comes the fun part. We can choose our automation trigger rules. These are the set of rules which have to be met in in order for this automation to be applied. And broadly speaking, I have 2 options here. I can either do it based on a new pull request, or I can do it based on a new branch. I'm going to stick with the pull request option. And the only other thing I have to pick is I have to choose the target branch that the pull request targets when I open it. So, in this case, what I'm saying is, if a new pull request is opened that targets the main branch, this automation should be triggered. Now, of course, we don't necessarily want to do it for every single pull request. Maybe we have additional requirements for how we want these preview environments to be created. And I can do that by filtering the branch name here. So I have these options where I can say if the branch name starts with, ends with, contains, or matches the regex of a given string, only under those circumstances should that preview environment be created. So I actually like this naming convention that we have in the placeholder here. So, I'm going to say, if I can type on screen, feat/, right? So, just as a reminder, what we're saying here is any new pull request that targets the main branch where the source branch starts with feat/, only under those circumstances should this automation be triggered. Now, I have these kind of familiar replication options. I can choose the compute clusters. I can choose whether I want to replicate the existing compute clusters. Now, you saw that I just bumped I bumped up the server size for the previous demonstration. Maybe for my preview environments, I don't wanna do that. Maybe I want to replicate it so I still have all my app clusters and worker clusters, but I replicate and downsize so I can keep my costs lower. Or maybe, and for the sake of testing, maybe I only need a single instance to run on, in which case I can choose the new default cluster, which remember is Relatively small amount of compute with hibernation enabled by default. But again, there's an element of audience participation in this, so I'm going to mirror the environment I just created. If I have a database, there's some interesting options I can do here. So I have an existing database cluster. I mentioned we can already share that across multiple environments. So I have the option to do that here. I can use the same database as my main environment. Probably don't want to do that. What I'm more likely to want to do is create a new database on an existing existing database cluster, and that's going to be tackled automatically for us anytime this automation is triggered. I can do similar things for caches and object storage, and now of course WebSockets. I can choose to use the same WebSocket application, or I can create a new web application— WebSocket application on that existing server, which is exactly what I want to do here. Finally, I have some more configuration options. So if my preview environment needs a specific set of configuration options, I can inject those environment variables here. And anytime this new preview environment is created, those environment variables will be injected. I can choose whether I want to auto-deploy on trigger. So, as soon as this automation is triggered, maybe I want to deploy automatically, so my preview URL is there waiting for me, or maybe I want to do that on my own terms, because I'm not ready to actually test it yet. I just want to get that draft PR up and running so I can start cooking on it a little more, and I can deploy that then on my own terms. And again, it's another way to keep— to control our costs. It's also important that we probably want to tidy up after ourselves, right? If we are merging that pull request or closing that pull request, there's a good chance we don't need that preview environment hanging around anymore. So, we can tell Cloud to automatically destroy that environment and its associated resources when that pull request is merged or closed. I can also set some initial deploy commands. So there's a good chance I'm going to want to seed my database for these QA test environments. I can add that here, and that will get injected into every environment that gets created. And finally, coming soon, we have the ability to set HTTP basic authentication. So now all of these preview environments can get created, and they're password protected out the gate, and not publicly accessible. So let me go ahead and create that automation. And that drops me back on the preview environment screen. So what should be clear to you now is that we get a summary of what that QA test automation looks like. But I can add multiple automations. So if I have different business rules for different ways that I need applications to be, or preview environments to be created, I can create as many automations as I wish here. And that's it.
That's all we got to do.
But let's jump in and see how that actually works. So, I'm going to go into the repository here, and I'm going to go ahead and create a new pull request. So, remember, my pull request rules that I need to target the main branch, so that's looking good, and that my source branch needs to be prefixed with feat/, so I have this branch here ready to go. No demo would be complete without a cameo from Jason Beggs, and there he is right there on the screen. So, we're going to go ahead and create that pull request, and we're going to give it a new name of Here Be Dragons. So, let's take a look at what happens when I hit the create button.
Okay.
So, what we should see in just a couple of seconds, there it is right there in front of our eyes. We see that we've immediately created that new environment, and we've been able to add a pull request comment on there to give us some details of what's actually happening. You can see here that the preview environment has been created. It's giving us the environment name, and it's giving us a link directly to Cloud's UI to go and see that environment. We get a status. We can see that that application is currently deploying. Those are the rules I had in place to say automatically deploy when this automation is triggered. And it gives me some information about what's going to happen when I close or merge this pull request. And a link to the settings if I want to go ahead and change that. So, I'm going to click the link and go ahead and look at the environment. And we can see indeed that that is automatically now deploying. We can see that our WebSocket server is connected to this preview environment, and we have a new application name, which has been automatically generated by the name of the pull request. If we jump back up to the top, in fact, no, sorry, if we jump back into settings, and look at the injected environment variables, just to prove that's a new WebSocket application, we have a brand new app ID. That was, the previous environment was 001, this is 002. So we have a brand new set of credentials, a new WebSocket application, which we can see back at the top-level resource. We now have our main application, and we have our Here Be Dragons application. And of course, these are configurable independently.
And?
If I edit the settings here, our new vanity domain for our new environment has also been injected there for us as well. So if I jump back to cloud— sorry, if I jump back to the deployment or to that environment, that has now been deployed. And if I don't get a 404 this time, I hope you'll all agree that that is a mic drop moment.
Woo.
OK, that is preview environments, and I'm very excited to see what you do with them. I think they are an incredible opportunity to kind of change the way that we treat our development, testing, and QA processes. And I'm very excited to see, and I'd love to have any feedback from you when you get your hands on these. These are also available as of today, so go ahead and have some fun. I'm very— I hope you're all as excited about these new features as I am and as we as a team are. We would love to hear from you. So if you have any feedback or questions, the cloud team are here. We've got the booth. We're also milling around the conference. Please come and give us your questions and feedback. We would love to speak to you about it. That just about wraps today's keynote. Sorry, not the keynote, today's cloud demo. So I'm going to hand you back to Taylor Otwell.
Nice.
All right, thanks so much, Joe. I know a lot of you have been asking me, even last night at the Mostly Technical rooftop event, for preview environments in Laravel Cloud. I'm super excited that preview environments are fully available in Laravel Cloud. today. We can't wait to see what you build. Can't wait to see what you ship with these awesome new features. So just to do a quick recap of what we covered on Laravel Cloud today. Available today is our new deploy from starter kits flow, preview environments, and production-ready MySQL. Coming in about 2 weeks on August 12th, we have new plans and pricing, custom domains on all plans, and the new smart scaling queue clusters that Joe previewed. And then coming later this fall, we have some more cool new stuff we'd like to share with you. Of course, Laravel Reverb, which Joe previewed today, fully managed on cloud, fully scalable. It's really awesome. We're also working on Laravel Valkey. Valkey is an open-source fork of Redis. We're gonna be bringing fully managed Valkey clusters to Laravel Cloud later this fall, similar to our production-ready MySQL that will have No latency penalties. It doesn't go out to the internet. This is custom infrastructure that we're running here at Laravel, as well as free bandwidth between your application and your managed Valkey clusters. We're working on the cloud API. I know a lot of you are asking about this. We'll have that coming later this fall, as well as new regions, dedicated regions, dedicated compute teams, and role-based access controls. Larger teams, we hear you as well. We already have enterprise customers. Live on cloud with private infrastructure and dedicated compute, VPC peering when you need to talk to your own private database from your Laravel Cloud application, as well as advanced networking controls, more hosting regions coming soon, and SOC 2 compliance and single sign-on coming soon as well. If these are interesting features to you, we'd love to chat with you at the Laravel Cloud booth. Again, we already have enterprise customers on cloud today. It's not just hypothetical, hypothetical. We're really scaling enterprise applications on cloud right now. We'd love to help you do the same. Thank you. Thank you for your patience through this keynote. It has been a packed day. We've had Laravel Wayfinder bridging the gap between your Laravel backend and your Inertia frontend. We're super excited to get that in your hands. We've had Laravel Boost for always up-to-date intelligence in your AI coding agent, no matter where you're using them. If it's in Cursor, if it's in Claude Code, we're releasing that for free to you in the next 2 weeks. We have the next generation of Forge and Laravel VPS with zero downtime deployments, health checks, heartbeats, and the integrated Forge terminal. We have cloud preview environments, which I'm so excited about. MySQL queue scaling and new simple pricing, which goes live in 2 weeks. And we have Nightwatch event increases, new features like the cache page and Slack integration, and we even got a day shift on Nightwatch. It's been a really great day. I really believe that Laravel is the most productive way to build applications. There is no full-stack experience like this. There's just nothing even close to this. And especially when you pair it with our new Laravel Boost AI features and Laravel Cloud, this is the most incredibly productive full-stack ecosystem I could imagine, and we can't wait to see what you build with it. So we are nothing without you. Thank you for trusting us with your applications. Thank you for choosing Laravel. Thank you for building your dreams and companies on our tools and platforms, and we help you go build something amazing. I'll be hanging around all night as long as you wanna talk. We can't wait to chat about all the new things we're shipping, and I'll see you out there. Thanks.
More from Taylor

Everything New with Laravel and Cloud | Taylor Otwell Keynote at Laracon US 2026


In conversation with Taylor Otwell: The India Comeback - Hosted by Vishal Rajpurohit

Introducing Nightwatch for Laravel | Taylor Otwell & Jess Archer Keynote at LaraconAU 2024
Laravel Cloud, Inertia 2.0, VS Code Extension, & OSS Updates | Taylor Otwell Keynote | Laracon US


Taylor Otwell "Laravel Herd, Laravel 11, Laravel Folio, Laravel Volt" - Laracon US 2023 Nashville