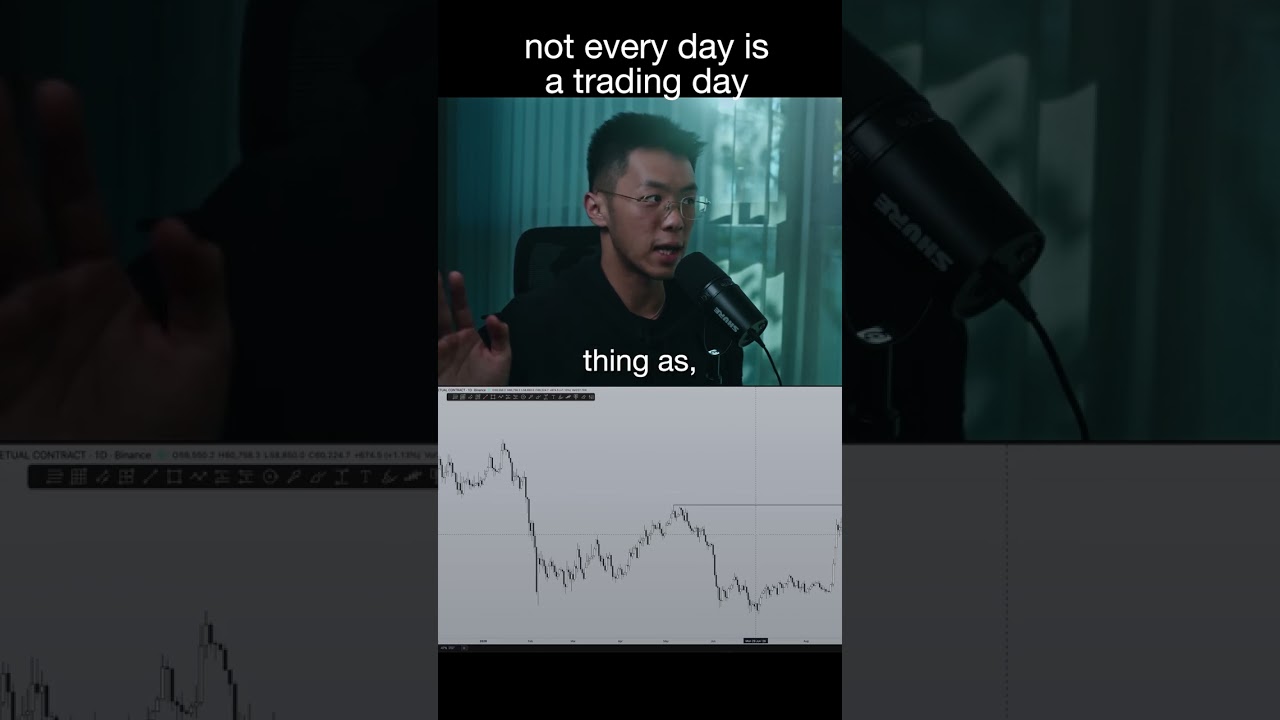
How I Get An 80% Win Rate Trading Crypto, Learn My Exact Methodologies (In-Depth) - Episode 1

In this hour‑long livestream, The Art of Crypto walks viewers through a live backtesting session of his crypto trading methodology. He begins by explaining why backtesting and paper‑trading are essential for rebuilding confidence after a recent losing streak. He outlines his "power of three" timeframe hierarchy (daily, 4‑hour, 1‑hour) and the importance of marking higher‑timeframe levels before zooming in. The core of the session covers four primary entry concepts: (1) break of structure into an order block, (2) momentum order block trades, (3) level‑3 formations, and (4) liquidity purge and revert (a market‑maker pattern). For each trade he details entry rationale, stop‑loss placement, risk‑to‑reward (R) calculations, and dynamic take‑profit adjustments based on order flow and price action. He emphasizes strict risk management – typically 1 % of account equity per trade, never exceeding 2‑3 % – and explains how to size positions based on stop‑loss distance. Performance metrics are shared: over 25 live‑backtested trades he achieved roughly a 50‑R to 75‑R return, with a win rate around 80‑90 % and only a handful of losses. He repeatedly stresses that risk management, not technical skill, separates the 90 % of losers from the 10 % who survive. The stream also includes a brief Q&A covering his favorite patterns, position‑size calculations, and subscription details. Throughout, he encourages viewers to journal every trade, conduct at least 100 live backtests, and adopt a mindset that expects loss on each trade to avoid emotional over‑confidence.
Chapters
Hello guys, welcome to this stream. I know I have been away for a bit, um, primarily just been busy and You know, for the other fact that, you know, ever since the last video I posted on Bitcoin, nothing has really changed, to be honest. So, you know, there wasn't a need to make a video. Contrary to what many people may believe, things don't really happen that quickly in the markets. It takes time to play out. So yeah, anyways, I'll be making the Bitcoin update video. Probably later tonight or maybe tomorrow. But this stream primarily is— I'll give you a bit of backstory about this, um, about why I decided to undertake this, you know, live backtest session. So I'm gonna be quick, like, I'm gonna— I'm just gonna admit it, right? Over the last, I'd say, 3 months or so, I have been wrong. Like, like, I've been wrong The most in, I think, my entire trading career. So, you know, I'm not gonna lie, you know, be it me or anybody else, you tend to lose confidence when you are, you know, losing trades. And more so especially because I have you guys that are, you know, counting on me to give the most accurate analysis, especially the folks in the private Discord group. So, you know, it doesn't really matter if it's just me losing because I've really sound risk management. So at the end of the day, you know, I'm fine. But like when I feel like, you know, when I know that people are losing money because of, say, a call that I made, then, you know, that weighs heavily on me. So I was losing a bit of confidence, not going to lie. So I just went back to my roots and This backtesting thing, right? Backtesting is such an underrated tool that all of you should be doing. So I want you to understand this, right? Before you dive into the real markets, there are only 2 things that I would really recommend that you do. Firstly, use paper money, right? Paper trade. So many people are so impatient to start making money in the markets That, you know, they just jump right in, go like 10x leverage, 50x leverage, or whatever, and they come back a month later and they're like, oh, I lost all my money. You know, that, that's because you're not going at it the right way. You know what I mean? You're not supposed to play with real money before you've done paper trading, right? And for most people, I'd say 3 to 6 months of paper trading is a good sort of window. It allows you to get, you know, a backlog of trades down. With fake money, so that you understand how the markets move. Because a lot of people come in here and they're like, "Oh, where's the Bitcoin update? It's only been 24 hours. I've been doing my analysis on like the four-hourly and the daily chart. Nothing changes in 24 hours." So, like a lot of people, they expect like oh. If I say Bitcoin is going to go to, let's say, this price right here, it's going to happen instantly. But in reality, it takes from the moment the trade filled until it hit the target, it was 30 days. Okay, so by paper trading, it gives you an idea of how things like how markets move, right? I'll give you an example. Um, so the first trade I took was, was here, right? Break of structure. Break a structure to the upside, come back down, fill in, fill in the imbalance, and you know, this is a bullish order block. That's the entry. So for basically, let's, let's see, twice it almost came back down to the entry, right? Twice it was 2% away from the entry. So if you were a beginner and you have not done these backtests, you have not done paper trading, you're going to look at this and you're going to be like, oh my God, Price is coming back to entry. I should, you know, secure my profit. But and and this is where you know back backtesting and paper trading helps because you get to see in real time how long things take to play out. And not just that, you know, you understand that price fluctuates. There's a few times where price came back to entry before ultimately the real move, which is the target, got hit. And this is why I always preach. Backtesting, backtesting, backtesting. It's really like, and basically, you know, what backtesting means is just you turn on this bar replay mode. I don't know if you guys can see this. Turn this on, go to like some random point in time, right? And just go back there. Assume you don't know anything about the future, right? Like even though, and before you, like some of you are purists or critics, You know, write me off, say, oh, I already know what's going to happen in the future. You know, it's a bull market, so you just have to go long on every single trade, then you're going to win, you know. And that's where I will have to correct you, because, uh, currently I've already done 25 trades, and this was live streamed to the members of the private Discord group while I was doing this, right? So everything here is live. I had no recollection of what— like, I did not know what was going to happen in the future. And the best part is, in the 25 trades that I've taken so far, about 20, 23 to 25 trades, in the, you know, that number of trades I've taken so far, uh, there were more shorts than longs. So for those of you who says, oh, it's going to be a bull market in the future, so you just have to go long, well, I, you know, I went short more than I went long. And among the 23 or so trades, I think I only lost about 5. And the account as a whole was up about 50R, right? And the R value basically just means like this one, the risk-to-reward ratio, right? How much are you risking, like, compared to how much you're getting in return? And that is the— that's the ultimate measurement for trading, right? When you're trading, the people who show like, oh my God, look at me, I'm up 11%, you know, if you're on 10x, then oh my God, look at me, I'm up 110%. You know, it's really hard to gauge how much they're actually making and how profitable they are because at the end of the day, if you're having like 110% but you're risking like, I don't know, 10%, 20% of your account, that is a bad trade no matter what. Like, it's just gambling at that point. So the ultimate gauge of a trader's performance is by the R-value, right? And I understand that the stream so far has been me explaining a lot of the things, But I really feel like I have to get through this, right? If you can't even sit through this part about me sharing some advice, you know, you— I don't want to be— I don't want to be straightforward, but you're probably not going to make it in this market, right? So spend a bit of time in this stream, which hopefully is going to last an hour. You are going to learn a lot, like just going through live and understanding what I look for. In the markets when I am trading. And I know this is live backtesting, but this is stuff that, you know, I'm gonna say— I'm gonna explain it this way. If you cannot even spot these things and be profitable while you are in backtesting, right, which is basically just a replay mode without any money lost, right, which is you're just paper trading— if you can't even achieve success in A live backtest, and then you go play with real money. Doesn't that? Doesn't that you know seem a bit off to you? Like you're not even profitable when you're in a replay mode, and yet you're playing with real money. That's you know that's frankly how you lose. So to all of you guys watching this, right before you start playing with real money, I want all of you guys, and I really mean this from the bottom of my heart. This is stuff that I preach to the private Discord group a lot. Which is go do at least 100, 100 backtests live with your strategy and everything you've learned so far. Just purely, you know, just purely from your knowledge. Just go back there, act as if you don't know anything that happens, and do 100 tests. Anything less than that, it's really hard to You gauge if your strategy is indeed profitable, right? Now, this is going to teach you a lot of things. How long do trades take to play out? Why does a trade fail? Why does it work? Like, what profit target should you be going for? How long does it take? Does price fluctuate? Does price come back to entry? Does price come below your entry during the trade? What are you going to do about it, right? Because when you are When you're live backtesting, right? I'm going to show you this, right? Just as an example, right? So you can play it candle by candle. Okay, you can zoom out, right? Let's say I'm going to the 2-day now. I can zoom in, you know, I can go to the 1-hourly, right? This is for all intents and purposes, this is a live, you know, environment, and you can utilize this. You can utilize this and gain— like, you know how there's that saying, right? Like, only fools learn from their own mistakes. The people who are smart, they learn from other people's mistakes by either reading books or listening to interviews and talking to them. Well, backtesting is sort of that, but for trading. Instead of You know, instead of going through the mistakes yourself and losing all your money, you can go into backtesting and you can, you know, take your losses there. You know what I mean? That's how you fast-track your learning. You will see in real time what works and what doesn't. So, you know, with that said, hopefully now you guys understand the importance of backtesting and why I always preach it. Um, to all of you guys here, thank you for joining me. Hopefully you will gain a lot in this stream. For the people who are like just live, like here right now, feel free to ask me questions in the middle of this quote unquote presentation. I will try my best to get to them, but I have a lot of comments, so don't say anything if I don't get to your question. But I will try my best to answer questions because that's the purpose of a livestream, so that I can interact with you guys and hopefully answer any questions. So, um, you know, before we get started, I want you to drop a like on this video, right? If you have found this video helpful so far, it's going to help push it to more people if this video gets a lot of likes. So it's a really small gesture, but it really helps me out a lot. And I will just simply aim to provide the most value that I possibly can in this video. So stay tuned. So before we dive into explaining my thought process behind every single one of these trades, and I did have to go back in time to like mark every single one because I do take notes when I do backtesting. In fact, I take very detailed notes into like every trade before I take after every trade. I note down my thought process, like why did I take this trade? Why did I take profit there? Why did I put my stop loss there? I note down the amount of time that it takes. I note down the amount of time price comes back to entry or even below my entry. And on every take profit, I will share my sort of rationale between behind why I took the profits there. So I do take very detailed notes, and that's why I was able to come back in time to, you know, And I even take a screenshot of every trade. So I'm just going to, you know, before I dive right into it, I'm going to share the general rules I had for this backtest. And in this backtest, I utilized my daily chart, right, the 1-day chart as my higher timeframe. And then I used the 4-hourly chart as my execution timeframe and the 1-hourly chart as my lower timeframe. In case I need to zoom in and understand a little bit more of what's happening on a lower time frame. And if there are any, you know, POCs, imbalances, poor highs that I can take advantage of, that's what the 1-hourly is for. And for those of you watching, I always want you guys to— and do note, you know, like, for those of you watching, I always like It's just stuff that I teach in a private group. But you always have 3 timeframes, right? You always— I think the proper terminology for this is the power of 3, if I'm not mistaken. It's called the power of 3. So basically, you always want to have 3 timeframes separated by a factor of 4 to 6. So 4-hourly— the 4 hours is 4 times 1 hour. So that's a factor of 4. The daily is 24 hours, so that's a factor of 6 compared to the 4-hourly chart. And that's what I mean by a factor of 4 to 6. You want to have a higher time frame so that you can mark out key levels. For example, in this chart, the white lines are levels that are marked out from the daily chart. The blue lines are the levels marked out from the 4-hourly chart. So daily levels, right? The higher the time frame, the more sort of strong reactions you're gonna have, right? And I want you to always notice how— well, you won't notice it now, but I'm gonna tell you first that the most successful trades and the most successful take profit targets always come near or at daily levels. So that is why it is important for you to have a higher time frame. So for example, if you like trading on the 1-hourly, or maybe you like trading on the 15-minute, then your lower timeframe is probably going to be 5 minutes, your execution timeframe is going to be 15 minutes, and your, you know, your higher timeframe is going to be the 1-hourly chart, just as an example. And you always want to have 3 timeframes, and you always, always want to start your analysis off by marking down your higher level time— like, your high— your higher timeframe levels first, okay? If you have— if you don't do that right, trust me, you are going to have a lot of difficulty just trading in general. So start your analysis off from the higher timeframe and then go into the execution timeframe. That's how you— that's how you get better at trading. Okay, now that's the first thing that I have— that I'm getting off. And if you guys, you know, if this series that I'm making turns out to get a lot of likes, or people really appreciate this a lot, then I'm gonna start another series based on a lower timeframe. So in that series, the next one, I'm gonna use the 4-hourly as the higher timeframe, the 1-hourly as the execution timeframe, and the 15-minute for— to zoom in and check how is the session looking like. So the more likes this video gets, the more views this video gets, the more I will know if I should make another series like this one. So that's going to be the first rule out. The second rule is my risk management. So I, on every single trade, I am going to take 1% risk maximum. And this is another note on risk management. And I know I'm sharing a lot more sort of general knowledge compared to actually getting in and diving in to explain my thought process, but I really want to help you guys. So if you're not, you know, this is probably the most valuable part of the video. So if you're not sticking through this, I can't say much. So when it comes to risk management, a lot of people And I mean a lot of people. Like, I'll share with you a statistic. 90% of people in the markets are losing money. Only 5% are about breakeven, and only 5% are really profitable. Let that sink into— like, let that sink in. And I would argue that the reason why 90% of people fail in the market It's not because they don't have good technical analysis. It's not because, like, you know, it's not because they have good— like, they don't have good technical analysis. Because I want you to think about it this way: no matter how good you are at your technical analysis, unless you have a 100% win rate with your analysis, which is impossible— okay, I don't know if it's impossible, but I know it's impossible over Over a core— like a period of a long time, right? It's very hard to maintain and replicate over a sustained period of time. So if you don't have a 100% win rate and you have poor risk management, for example, you're risking 100% of your account in every trade, you are absolutely going to get screwed royally, right? Because when you do lose, it doesn't matter if you win 99 trades in a row. One loss and your account is wiped out. Does that make sense? So risk management is the one thing that I believe separates 90% of losers from the 10% of people who— not winners, right? Note that I do not say winners, but the other 10% of the people who can survive in these markets. Those are the people that will not lose everything. Those are the people that can afford to play for a very long time. And that's the importance of risk management. And for that, like, for that purpose, right, most of you, most of you should not be risking more than 2% risk on every trade. And I would go as far to say 3% top, like tops. You do not want to be— and when I say risk, right, I want you to assume that you have You have a, um, let's say a $100 account, right? Assume you have a $100 account. When I say 2% risk, it means that every trade you take, if you get stopped out— for example, if this trade gets stopped out, right? Actually, I'll use a better example. So yeah, you know, whatever. Let's just— yeah, let's just use this one, right? The stop loss is give or take 5% away from the entry. Right? When I say 2% risk, it means that when you do get stopped out, if you do get stopped out, you are only going to lose $2, assuming you have a $100 account. That is what I mean when I say risk management. 2% of your risk on every single trade max. So let's, let's calculate this, right? With this stop loss of 5%, It means that with every 2.5%, you should only be losing $1, right? So let's put it that way. So since this is 5%, let's calculate this. $100, 5%, that's $5. $50, 5%, that's $2.50. So this position size, you should only be putting in $40 of your account because 5% of $40 is $2, right? You should not be putting all $100 into this trade because if that happens, you're going to get stopped out for a $5 loss. I hope that makes sense. Let's do another example. This trade right here, 3.5% stop loss. So you calculate that, 3.5%, that is give or take $70. If I'm not mistaken, am I mistaken? Three and a half percent, man. Give me a moment. Three point five divided by hundred. That's two and a half. So two and a half percent. So sixty dollars. Yeah. So your position size for this trade should be about sixty dollars because with a three point five percent stop loss, three point five percent of sixty. Is $2.10, which for all intents and purposes, let's just call that $2, right? And that is how you should approach risk management. Some of you are immediately going to click off this video right now because you're going to be thinking, wow dude, I can't believe you're teaching this. How slow would it be to make money if I only put in $40 on my account into one trade? Wow dude, you are full of BS. Right? I thought you were supposed to teach me how to make money. But right now, you know, if I win this trade, 10%, right? This is an 11% trade. I'm only going to make $5. Wow, this guy is so much BS. If you think that way, yeah. That's, uh, yeah, I hate to break it to you, but you're probably not gonna make it in this market, right? So before you start losing money, if you're a beginner, if you're a total beginner, I would even like— I'm so glad you're watching this video. This is stuff I wish I knew back then. This is how you survive. If you can't survive, you can't thrive. So learn how to survive first. Risk management. For the purposes of this account, I'm going only to be taking 1% risk management— sorry, 1% risk max on every single trade. I can go half risk if I believe that the trade is risky. So that means I'll only be taking 0.5% risk. If the trade is risky, I can take that. But for most trades, it is going to be give or take 1% risk. I think I disconnected for a little bit, so hopefully nothing was lost. Anyways, so that was on risk management. So I'll go for like a couple of general rules for this backtest. The kind of the types of entries that I'm looking for during this backtest session is going to be a break, a break of structure into an order block fill. So let me explain that. So this right here is what you call a zone of demand, right? So this is a bullish order block. So when I say break of structure, what I mean is you see how there are swing highs over here, right? So you break structure there, right? You break structure and then you come back down to this order block right here. And this is what I mean by break of structure into an order block. This goes Inversely as well, over here, that's your bearish order block. Break of structure, bam, right? Sorry, you break structure here, you come down, and then you come back up, right? So that will be here. You come back up, you short, bam, right? That is generally what break of structure into order block means. So secondly, I look for a momentum order block trade. Momentum order block entry. So this is what I mean. Right now, I have identified here at this point that order flow is bullish, which means you will continue to make higher highs and higher lows until you know you reach whatever point. So when I say momentum order block entry, I mean I take advantage of order blocks that form within. So for example, that's a bullish order block right there. Break a structure, you come back down, which generally means just break a structure order block. But the difference between this one is, you know, if I know that the direction is going to be, you know, bullish, I prioritize the momentum, right? I trade with the trend. So I, you know, I go long instead of going short. You know, just some just an example. And the third entry is a level three formation. I take advantage of that. Now, what I mean by a level 3 formation is, uh, I'll draw it out for you guys. Basically, the markets tend to move in this fashion where there is— that's a level 1, level 2, level 3. 1, sorry, 2, 3, right? Something like this. Right? In one two three two three, right? One two three one two three. Something like that. That's a level three formation, and you tend to see it across all markets, not just crypto. In fact, I would say this pattern is way more prevalent in the traditional markets, such as forex or even stocks. So in crypto, it's actually like less prevalent, but nonetheless, it still happens. So if I see patterns like these. That is how I will identify if we are going to reverse or if we are going to continue upwards. So this is a pattern that I will utilize throughout this session, and when I spot it, you know, I tend to know what to do with it most of the time. And, um, and lastly— is there a lastly? Nope. Uh, oh yeah, lastly, uh, I look for a liquidity purge and revert. So this This trade is—I do not take any credit for this trade. This was invented by somebody called the Inner Circle Trader. I take no credit for this, but since I'm using the name that he gave this method, I'm going to you know just give a bit of credit where credit is due. So the liquidity purge and revert basically just means like whenever you get whenever you get equal highs, for example, like here over here. Whenever you get equal highs, you have to understand that there is liquidity above these equal highs, which basically just equates to like retail is going to look at this, it's going to look at this level, and they're going to be like, oh, that's a strong resistance, so we're going to have to short there. Or if let's say they short it here, which by the way, if anybody has a hotkey for brush, right, because right now I'm clicking on it every single time. If somebody has a hotkey for brush, that would be really helpful so that I don't have to click on it every time. You know what I mean? So retail is going to look at it like if they went short anywhere here, they would put their stop loss above this, you know, above this level because it's quote unquote resistance. So I want you to take a look here that whenever you get equal highs or equal lows, vice versa, you are going to most likely. Go just a bit above it. Notice here, you go just a tiny bit above it, and then you take out the liquidity, right? So you make people think that oh, this is a breakout, right? Everyone goes long here, and then you reverse it, right? So here, liquidity, you purge it, and then you revert it, right? To take out both sides. Because all these methods that I'm discussing with you guys is. I would say market maker concepts, because I am of the sincere belief that the markets move because the market makers want it to move. The sooner you come to understand this, the better it is for your trading. So what I mean by that is this move right here, right, it is not caused by retail. This move right here, that is not retail. Over here, the reason why it is in a range It is because of, you know, the market makers deeming it that way. They want to keep it in a range so that retail can build positions, take bets, and then afterwards the market makers can wipe out both sides. For example, over here you're getting another liquidity purge and revert. Sadly, I did not see this during my previous live backtest. I wish I did, but you purge liquidity, you reverse it to take out the liquidity on the other side. Like so, right? You take out both sides before showing the true move. That is what I mean by liquidity purge and revert, and that's what I mean by market makers. Like, the sooner you learn to spot these things, the better off you're going to be. Let's just put it that way, right? So that's the liquidity purge and revert. It does not have to be equal highs, it does not have to be equal lows. It can be as well, um, something like, something like, uh, Just a previous high, right? I'm gonna give you an example. This trade right here that I took, if you zoom out now, if the internet would cooperate with me a little bit. Yeah, so, uh, okay, no, that was not the trade. Uh, I think one of the trades that I had taken, it's like a textbook liquidity purge and revert, was here, I believe. Nope, not even there, man. Which one was it? Was it there, man? I totally forgot. I think it was here. No. Yeah, this is the drawbacks of this being a live. Ah, yeah, there you go. Yeah, this is drawbacks of this being a live stream. Yeah. Um, you guys are going to get a little bit of bloopers compared to a formerly filmed, like pre-filmed video. So over here you see that there is a previous high over here. Previous high. It does not need to be an equal high. So if I go into the 1-hourly, when you go to the 1-hourly, you can see that this right here— if only my internet would load a little bit faster, that would be helpful. So let's just wait for the sessions to load in. Come on, you can do it. Okay, I don't think their sessions go all the way back there, but what I determined was that there was a poorly formed high over here, which means price would be attracted to this area and it will likely wick above it to take out liquidity and reverting. So that's how I came up with this trade. Sorry if I couldn't— sorry I couldn't give you guys a perfect example of that, but you get the idea. So those are the 3 entries that I tend to go for during this entire, you know, this entire account. And now that that is all finally over with, I'm happy if you are still here in this video staying with me. But, you know, let's finally dive into the good stuff now. And for those of you who haven't already followed me on Twitter, You know, that's where the latest stuff is going to be shared. If there's any videos, if there's any trades that I'm looking at, check out the, you know, check out the Twitter, right? Follow me on the Twitter at _TheArtOfCrypto. And if you guys want a monthly subscription to the private group, that's open as well. So check it out. Anyways, now to dive into the video. So the first trade I take, the first trade I took Was a break of structure towards the upside into an order block entry, right? So this is a trade that I like. It's literally like just textbook for me at this point. It is a trade that has rarely failed, and historically speaking, I think it has about a 60 to 70 win rate, if I'm not mistaken, as long as you take it in accordance to order flow. When I when I say According to the order flow, you want to determine that the order flow is bullish. Order flow simply means direction, right? Are you going to form high lows and high highs? Because if this was— if you remember, I showed you guys a level 3 formation, something like this, right? So if this part was here, then you're going to drop down, right? So it wouldn't make sense for you to be taking trade here. You understand me? You want to trade according to the order flow. Basically, that's what it means. So break the structure towards the upside, that's when I know that when you take out this daily high, previous daily high as well, that's when you know that, you know, order flow is definitely reversing. So when order flow reverses, right, you always target previous highs. And because I derived this trade from the 4-hourly, um, and I saw That this high was already taken out. This high was already taken— wait, no. Okay, so this high was already taken out, right? When I started here, this high was taken out, which means the next high that it is going to attack is over here. So that's why I set my take profit over there. And in the stream, I think someone is asking me what is my take profit strategy. I don't have a take profit strategy, at least not a set one. My take profit is based on my knowledge and where price is going to go. So during the during the actual trade itself, I don't just set an entry. I don't just set a stop loss and set the take profit and just let it play out. Right? For example, if I see that trade is not going in my favor because I'm watching this live because I'm pretending as though I'm playing with my real money because I am. pretending as though I do not know what is like, what is going to happen in the future. If I see that price is reversing or like price is, you know, just chopping around and not doing what I expected it to do, I'm going to move my take profit. Maybe sometimes I'll stop my trade breakeven, sometimes I'll take profit early. And that's how you should approach your trade as well, right? It can be systematic where you set your entry, you set your stop loss, and you set your take profit, and that's it. But, you know, the markets are dynamic and it is ever-changing. So things change. So you have to react accordingly. And again, if this video has been helpful to you so far, drop a like on this video. It's a really small gesture, but it really helps push this video out to more people. All right. I would be immensely thankful. Man, livestreams always make me really thirsty. All right, somebody commented that, um, turning off the VPVR would make things go faster, so I'm just going to turn it off for now since we don't need it anyways. I'll turn it back on when we do need it. As a person who never traded, is it worth starting or should I just stay calm and hodl? That depends on your— that depends on what you're looking for. Like, if you're just like— if you don't have time nor the energy nor the desire to learn how to trade, because learning to trade is a 3 to 6 month process, at least a 3 to 6 month process. Of dedication, of serious— of just serious dedication to the craft. If you don't have time nor the desire to go through that, then just invest. Because if you're an investor— because if you had— if you were an investor, um, it doesn't matter. Like, as long as you can get— you know, as long as you can get used to the short-term price fluctuations in crypto, which is really immensely high. I'm talking about price fluctuating by 1x in 20 days and going down by like 30% in a few days, like 25% in 2 weeks. As long as you can get over the short-term price fluctuations, you are going to come out on top in 5 years. That is my humble belief. Um, in the short term, I know a lot of people could argue, oh, you know, there's a lot of macroeconomic factors that are not playing out in favor of the financial markets, you know, such as inflation, such as, you know, such as, you know, inflation. You've got the war, you've got jobs, you've got, you know, the, you know, you know what. And there's so many factors that was leading, that is indicating that there is going to be a financial market collapse or some kind of recession. Some kind of a recession. With that in mind, you would argue, oh, you know, might as well wait. You know, might as well wait it out. But here's the thing: if you hold a five-year outlook, maybe ten years, you are going to come out on top, right? As long as you regularly dollar cost average into your positions, into your investments, you're going to be in a much better place five, ten years from now. So as long as you have a long-term outlook. I'd say investing is always a good choice. Heck, I'm investing as well. But whether or not you want to start learning how to trade, that is up to you. That is a decision that you have to undertake yourself. Because if you come into this with— if you come into this half-assing this, you're not going to make it. You're going to lose all your money. Right? This is a very serious— like, think about it this way, right? There are people getting paid millions and millions of dollars. There are institutions getting paid hundreds of millions of dollars to sit at their desk with 12 computer screens in front of them, with algorithms that took millions in research and development. And you're just going to come in here knowing nothing about trading, thinking like, oh, this is just a side hustle, you know, I'm gonna, I'm gonna, I'm gonna be rich trading. And you think you will win, you are extremely deluded. Like, you are extremely deluded. How are you going to— like, if you're not better than them, how are you going to take their money? Because that's the way of trading, right? This is not a— this is not a, uh, what's that word called? This is a zero-sum game where if somebody's losing, somebody else— like, if somebody's winning, right, somebody's losing. You know what I mean? So seriously, that is something you have to make your decision about. Sorry for— sorry for getting sidetracked off that. Anyways, I believe I have a delivery that just reached my home, so give me a moment. I need to go downstairs and pick up the delivery and I'll be right back. Just give me a moment. Hello guys, I'm back. So somebody said that this live YouTube stream is getting me really excited for the updated trading course. Yeah, actually, fun fact, I'm actually using this stream as a as a way for me to, um, you know, test the ideas that I'm sharing in the trading course and to test out the format. So this is really a big experiment for me, um, just to see if this is well received, you know what I mean? You know, just testing out the format, uh, as a— so you can, you guys can literally think of this as a preliminary trading course that I am going to share on the That like this is pretty much like yeah, it's like a preliminary version of the trading course that I'll be releasing in the private group. Although that is not done yet, not even close. So I'd say the estimated time of arrival is about another two to three months, give or take. Anyways, yeah, let's go back into it. Where did I stop? Oh right, I think it was take profit. And yeah, I think it was take profit on this trade. So it was on the previous high right there because I already understood that because this high was taken out, order flow is going to be switching bullish. And whenever you get bullish order flow, you always attack previous highs to take out the liquidity there. So for example, there's going to be liquidity up here, so you wick just a tiny bit above it Watch this. Remember what I said in the beginning of the video about liquidity purge and reverts? You wait just a tiny bit above it, take out the liquidity, and then you revert, right? And that is a trade that I took advantage of as well. Although sadly, I think I did get stopped out on this one. Yeah, I think I got stopped out on this one because I didn't set a wide enough stop loss. Yeah, for this one, you know, the idea was correct, but I set my stop loss too narrow, and it happens. You know, it happens. You know, that's what backtesting, you know, comes into play. You learn what to expect and what to do so that you don't fall into the same trap in the future. So, man, this thing really needs to stop putting me like so far to the front. So the second trade that I took was— and by the way, every single one of these trades was recorded live in the private Discord group when I did the initial livestream. It's just that I did not record that livestream. So that is lost into the void. And that's why I'm doing this livestream, to recap every single trade taken so that the members of the private Discord group who missed the first livestream could come back and understand, uh, what I was doing. So second trade I took was— so remember when I said when order flow switches bullish, you get a bullish order block over here, right? VPVR would confirm this. Right? If I turn on the VPVR, so bullish order block, stop loss beneath the order block. I think it was today, right? And the target was the previous high, the previous high of here, right? That's the target. And the reason why this target is different from this target is because of the area of where I derived it from, right? So. This trade was derived on a macro timeframe, on the daily timeframe, but this one is on the 4-hourly, which means if you look from the 4-hourly chart, this is a key level for, for it to take out. And if you were to get rejected, let's say you go for a liquidity purge and revert here, then you're going to go down, right? So you have 2 methods of looking at this, which is do you want the long-term target or do you want the short-term target? And the reason I took the short-term target was because this was derived on a shorter time frame, like on a lower time frame compared to the daily chart. So that's, that's my rationale behind this one. And again, remember what I said before, if order flow is bullish, you will take out previous highs. For example, I could have had one of my TPs over there at this high. That was the previous high, that was the previous high. Notice how you wick just a tiny bit above it. Whoops, over there. Notice how you wick just a tiny bit above that. I'll zoom in for you guys to see, right? You wick just a tiny bit above that and revert, right? So this could have been your TP as well, right? But for the purposes of this trade, and when I was live and looking at it, that was not the thought process that I went for. Same thing here, you wick above This point of liquidity revert, right? So you could argue that during this process I could have taken many more trades in between, right? If I wasn't if I wasn't playing the chart so far like if I wasn't playing the chart back so fast, I could have taken multiple trades. For example, something like this, right? Even though it is only a 1.39 risk to reward ratio, the time taken for this trade is so quick. That you know I will take that. And again, don't look at 1.14%. Look at the risk to reward ratio. How much are you risking? Like how much are you getting back for how much you're risking? That's the real like that's the real gauge on that's the real gauge on a trader's performance, right? So that's an example. Again, I could have taken another trade there, but I wasn't paying attention. I was playing the chart back too fast. So a word of advice for you guys taking, you know, doing this backtesting session, and I highly encourage you guys to start one, start a 100-trade backtest session alongside myself so that you can see how you, how you fare, right? What is your win percentage? And most importantly, how many Rs can you get back? So for example, in a 5-month session, 6 months, sorry, 7-month session, I returned an average of about seven. I returned seventy-five R on this session, right? And in five months, I think I returned fifty R. So what that basically means is that for the amount of for the amount of risk that I'm taking on, I'm making fifty times that amount over a course of five months. You can argue that that is very little, but. This is how you survive. This is how you thrive. The people who get rich off just, oh, I bought Dogecoin, you know, like, cool, but can you repeat that process? That's the real question. Yeah, so by going through risk management and going through live backtesting, this is how you build a solid fundamental, like a solid foundation for your entire trading course to be based— sorry, for your entire trading career to be based off of. Okay, that's why backtesting is so important. That's why I preach it all the time. Anyways, back onwards to the next one. So the next trade is okay. So when you look at it from the daily chart, it appears that it got stopped out. Man, you really need to stop moving all the way to the front. Okay, it's over there. So on on the daily chart, it would appear that this trade got stopped out. But when you zoom into the 4-hourly, I don't know why this is the case, but when you go into the 4-hourly, you can see that this trade was indeed perfect. So notice how you have a previous high here. So I took advantage of the liquidity purge and revert. I shorted here even though, and this is another thing that I want you guys to pay attention to. I'm not trying to catch every move, right? People who try to catch every move. Um, you can do that if you are an expert trader, if that fits within your trading style. If, if it does, right, then by all means do it. For me, that is not my trading style. I am primarily, first and foremost, I am a swing trader, which means I utilize the 4-hourly and above chart, right? 4-hourly, preferably the daily. So as a swing trader, I am very selective with my trades. I'm not trying to catch every single little move here, although you can, and some would argue that it's more profitable if you do it this way. But for just for my style, I like to be selective and I like to take trades near areas of value. In this case, previous highs, previous lows, previous order blocks, stuff like that. So that, that explains a little bit behind my thought process. So over here, um, you wick just a tiny bit above it. I set my stop at an arbitrary point. Um, this is not based on anything, it is just an arbitrary point. Um, so you can set it— usually my preference is to set it between 2% and 3% on every liquidity purge and revert. So there you go, played out perfectly. I could have ran the risk of it wicking higher before reverting, but you know, I took that trade like that, and that's how I'm going to approach it. And for the take profit target, uh, initially I'm gonna, I'm gonna say this real quick. Initially I was aiming for to take profit here, so this trade would have been a 9 to 1 risk to reward ratio. However, um, I saw that when you pulled a fib from that swing low to that swing high over there, you can see that it came into the 0.618, which is the golden pocket, which is an area where a possible reversal might happen. That coupled with the fact that because this move was so straight up, that in my experience, I just knew that it wasn't going to come all the way back here, right? It was too clean. It will come back to mitigate the imbalance formed Within this zone, imbalance basically just means like if you take a look at the chart right here, you can see that there's basically zero price action here. Like there's nothing in between these two lines. That's what I mean by mitigating the imbalance. I knew it would eventually, but not now. So instead of waiting until my initial target, and the the reason why I remember my thought process is because I noted this down every single trade that I took. I write down the thought process why I closed them, why I took profit there, and I take a screenshot so that I don't forget. I encourage you guys to go through this process as well. It's going to take exponentially longer, but your learning process is going to be sped up quite exponentially as well. So anyways, um, that is trade. That is why I closed it here at the 0.618. Rather than waiting for it to get to my target, which if I did not close it here, I would have lost this trade, right? As you can see right there. So you can argue that over here I could have taken another liquidity purge and revert as well, but I was like, you know, assuming that this is a higher low, then you're going to form a higher high, vice versa, right? At this point, I'm assuming that order flow is still bullish, but Here's when it changes, right? Here is why I start switching to shorting. Over here, you get a break of structure, right? Four-hour swing low there. You break the structure, right? You break below it, and then you come back up to the order block, right? Again, this goes back to the first entry that I look for: a break of structure into an order block entry. Stop loss above the order block. Bam, bam, bam, right? Pretty simple. And this is a pretty textbook example of a level three formation. If you zoom out, you can see that you could argue that this right here is your level one. That's your level two. That's your level three reverse, right? Although, although you could also argue that's your one. That's your two, three, two, and you didn't really. And yeah, over there. That's your three, and then you know you start the process all over again. So I'd say yeah, this isn't really a level three formation; it's just a straight up formation. So yeah, so this entry break the structure into bullish order block. Sorry, bearish order block, and then my take profit. The rationale behind this one is because when just like how when order flow is bullish, you take out previous highs. When order flow is bearish, you take out previous lows. So that's why my take profit was set there, right at a previous low, right there. So hopefully that makes sense. And if again, you know, if you feel like you know this video has been helpful so far, again drop a like. And more importantly, I want you to comment down in the comment section below. Um, just say something, right? Say something that you've learned, or, you know, stuff like that really helps me to understand that this is something that you guys find— that you guys find appreciative, and that I should make more videos like this. Okay, and hopefully I'll continue the conversation with you guys in the comment section below. So that's the third trade— no, that's the fourth trade. So, so far it has been 1, 2, 3, 4 wins. And notice how I'm not capitalizing on every little trade over here. I could if I wanted to, but that's not my style. So I'm only catching entries that I know I'm familiar with and entries that have historically been, you know, the most safe and profitable, right? That's what matters to me. It's capital preservation. I am not trying to make the most insane amount of money possible by gambling. What I want to know, like, what I'm trying to do is to maximize my R-return, risking the least possible, losing as little money as possible while getting the highest returns possible. And of course, this session right here could definitely be optimized because as I'm going through and reflecting on this session with you guys, I'm learning things that I didn't otherwise, you know, notice, which is, oh, look at here, you know, I could have taken a trade there, I could have taken a trade there. So again, this is why you note these down in your notebook so that you can come back to it later and you can go through it. And because you have to imagine, when I was taking these trades, the chart looked like this, the chart looked like this. Of course, I've taken until here, right? This is where I stopped. During last trade, during last live stream. But anything beyond here, I have no clue what's going to happen. So in hindsight, right, first you do it in— first you do your backtest forward, right, without knowing anything that happens. Afterwards, you come and reflect. What could you have done better? What entries did you miss? You start spotting things that you wouldn't have otherwise spotted. During your initial session, which is, oh, look, I missed this, you know, I missed that. Oh, wow. So that's why it played out that way. I encourage you guys to all go through this exercise alongside with me. I promise it's going to be so helpful. And I know that there's a lot of stuff that I shared in this video, Stuff that, like, for the most part, I would say this video is pretty value-packed. You know, correct me if I'm wrong. I'm not really, you know, beating around the bush too much. So there's a lot of knowledge in this video, and it is totally understandable if you missed some things in this video— sorry, in this livestream. So I highly recommend you guys to go through this. So far it's been running for an hour. There's a lot of value shared, so go back In this live stream and learn, right? Just take some notes. The stuff that I've said here that I only share in the private Discord group, you know. So learn. It's going to help a lot. So the next trade is going to be the first loss in the series, and that's going to be here. So firstly, you get a break of structure over here towards the downside. That's your swing high right there. Sorry, swing low. That's your swing low as well. Break structure. So now this point becomes your bearish order block right there. So I shorted. See, I placed an entry short there. So the next time that it comes back, and I was targeting this low right here. The reason why I targeted this low is again because of order flow. I believe that order flow would have been bearish. So targeted this low right there. It did not play out, although it did go down by a bit. By three percent, but my target was there. So this is an example of why you need to be dynamic with your entries and stuff, so that you don't get stopped out for no reason. So over here, I got stopped out because I was complacent. I was playing the chart a little bit too quickly, and I failed to realize that actually I wouldn't have been able to react at all. Look at this candle! Bam! Straight just took out a trade. So you know that's fine. That's where risk management comes in. It's perfectly fine to lose. Heck, some of the best traders in the world are wrong about half the time, and yet they are still wildly profitable. It is perfectly fine to be wrong. What is not fine though is when you are wrong, you lose your entire account or you lose a significant portion of your account. That is unacceptable. So it's fine to lose. Just manage your risk. Yeah. So, where was I? Yeah. So this trade got stopped out. In hindsight, in hindsight. Yeah, I still would have taken this trade. Nothing changes in hindsight. So that's that's the first loss of this trade. So of this uh of this new account. So second okay so now we move on to the next one, which is this trade right here. I took short. Yeah, I took short on this liquidity purge and revert. On notice how you have relatively equal highs here. So that's why I placed an entry. Over here, right? Over here, I placed an entry short, and my stop loss was above this order block right here, right? It was a similar stop loss to this one. So thankfully, this trade played out, right? And I was targeting this part right here. And the reason why I targeted this area right here, that area there, is because this is a bullish order block. And notice how you broke structure here, and you have a very clearly defined zone of demand. That's why I took profit here, because I understood that it might reverse here. So I took my profit here, and then immediately I flipped long, right? I entered long on this order block right here, stop loss beneath the order block, and my target then was this bearish order block, which in hindsight I could have done this better. I could have placed my target here or even higher, because right now you have just gotten high, high, high, low, high, high, high, low, high, high, high, low. I had no reason to be to be going for this one right here. But my rationale behind this trade was that because we have gotten like one two three like a tree movement right like one two three so I thought that this would have been the top right and that we are going to reverse from here. So I had my rationale at the at the time right at the time I would not have known better but a win is a win 1.5r I will still take that. But now that again, when you reflect back into hindsight, you learn things. Right now I'm going through like a just a live reflection session with you guys. So now back in hindsight, you learn things, right? So this trade, these two trades were perfect. So now that the order flow is bullish, right? You want to try not to counter trade the trend too much. So here's what I mean. Over here, I lost this trade as well. So this is the second loss of this session, and I'll go through my thought process of how I lost this one. So over here, if you go back to the daily chart, so this trade was derived from the daily chart. So let me just go back to the daily chart, and I think I lost this one. Yeah, this one right there. So the reason why I lost that one is It would actually be helpful if I bring up the VPVR so that you guys can visualize this better. So assuming this is all we knew, I want you to take a look at this. Uh, so that is where I got stopped at, right there. Wait, was it right there? I think it— oh no, that trade there. So I went short on this line right here. On this line right here. The reason why I went short there is because this is a daily. Let me just draw this out. This is a daily zone of demand. Okay, it's very wide, which in hindsight, now that I look at it, I should have narrowed it. I should have narrowed it down more. For example, if I narrowed it down to this block right here, the trade would have been a lot better. See the next trade that I took right there? That worked out. So I had the correct idea, but I didn't narrow down enough. That's why I got stopped out. You can see the VPVR here is a high volume node, which indicates that there's a lot of risk. There's a lot of resistance up here. That's why. That's why. That's how I derived the trade. Sadly, I did not narrow it down enough, and that's why I got stopped out. Okay, so that is a bearish order block entry for those of you who are wondering. So now going back to— I'm very likely not going to be able to cover all of this in this same video, so I'm actually going to end this stream in another 5 minutes or so because I don't want to overload you guys. There's been a lot of stuff shared here, and you know, it's not just you guys, even I'm getting a bit overloaded. So you know, we're gonna keep this series running Until we finish all 100, you know, all 100 backtests. Currently I'm on about trade 23 or so. So, you know, hopefully there's going to be another 5 to 8 more episodes of just you being able to see live how I backtest and how I trade. What do I look for? What do I see? So if that's something you appreciate, again, drop a like on this video. Seriously helps this out a lot. And if you want to see more, let me know in the comment section below. Right. For now, I'm going to take some questions. I'm just going to take a few questions and then I'm going to end this stream because I don't want this to go on for too long. I'd say an hour is a sweet spot to put for every video. So I'm gonna keep this series to one-hour episodes. So let's take some questions. It would be nice to rank my top five used patterns in or the least risky ones. So I'd say on that note, break a structure into break a structure into order block. That's one of my favorites. Liquidity purge and revert. That's one of my favorites as well. Chart patterns like this, right? Triangles. But just make sure that when you are trading chart patterns, you trade it according to order flow. Unless you understand where order flow is going, do not trade chart patterns. Let's just put it that way, right? Because order flow was bullish, that's why I went long on this chart pattern there instead of, you know, thinking that, oh, it's a bear flag or something like that, right? For example, over here, right? You would have you would have looked at this and been like, oh, this looks like a bear flag right there. This looks like a bear flag. But without understanding first market maker pattern or market maker theories, you would have thought this was bearish and you would have shorted. Just an example. So chart patterns. Um, what else? Um, liquidity purge. Uh, I like yeah honestly uh. Let me go. Let me go. Level three formation. Yeah, that's that's the pattern that I believe everyone should learn. And maybe, just maybe, you guys can look into the Wyckoff. I don't personally use that, but I've had I've heard of people who have had who have had success using that. And most importantly, daily levels. I like to take shorts near daily levels. I like to take longs near daily levels. Stuff like that. As well as the Fib, right? The 0.618 retracement and the 0.705 retracement. Those are my favorites. What is usually position size in dollar amounts, um, per trade? I know it is based on 1% to 3% risk, but curious on the specific amounts you put in per trade to get— to put in per trade. Again, uh, it depends because every trade has a different stop loss. A trade with 3% stop loss would be— a trade with a 3% stop loss is going to have a different position size compared to a trade with a 7% stop loss. So at the end, it's calculating your risk. It's not about the position size, that doesn't really matter. It's calculating risk. I always go into every trade expecting to get stopped out, and that is another mistake that so many people make. They go into the trade expecting themselves to win. That's why when they get stopped out, they're like, "Ah man, I just lost everything." That's the mistake right there. I go into every trade expecting to lose, okay? And I urge you guys to, you know, have adopt that kind of mindset as well. Can you explain the bearish order block on April 11th? Sure thing. Where is April 11th? April 11th. Oh yeah, uh, right here. Okay, I think when— yeah, so you broke your structure. Um, ideally you would have narrowed down the order block to— whoops. Ideally you would have narrowed down the order block to here, but, uh, for the purposes of this video— uh, sorry, for the purpose of this trade, I used this entire block. And by definition, right, by definition, the order block should extend all the way to there. But because most of the volume happens in the actual body of the candle, that's why I don't—that's why I didn't include the wicks. So I just included that. That's—that's how I came up with the order block. Because if you are going to get rejected, it is going to be at the body. It is not going to be at the wick. If anything, this wick is a poor high, which means in the future it is going to be attacked and. Yeah, there you go. So hopefully that answers your question. Um, can you please explain the BTC short at $43,900? Oh right, um, I'll explain that one in the private group. So that's a, that's a call that I made. Uh, don't worry, I'll explain it later. Uh, what is the current, what is the current order flow on Bitcoin right now? So let's take a look. Uh, bullish AF. Seems we are stuck at the $43K bearish order block. Um, yeah, yeah, yeah, that would be a bearish order block as well. Um, so okay, yeah, I'll just explain the thought process behind the short. Um, liquidity purge and revert, basically. So if you bring up— so if you go back to the 1-hourly Take a look there. That's a poor high wick above it, and then you're going to target not that low. You're going to target there, give or take. That's the rationale behind the trade right there. And the reason why I take profit here is because of this. Does that? Answer your question, my friend. Liquidity purge and revert—it is not a swing trade; it is just a trade. It's just a trade—a day trade, if you may. Do you think that backtesting helps in overcoming the fear of losing and makes you more calculated in your risk? But do you think at the same time you can become too overconfident after you backtest and recheck how you should have done? Okay. So yes, to answer that question, yes. I've had so many people reach out to me that said that, oh my God, backtesting 100 times, 200 times was the best thing they could have done. Before, you know, that happened, there were so many people that they just said, you know, hey, I'm losing so much, I have no idea what's going to happen next. They go through this, they go through the backtest sessions, and suddenly they're profitable. Because they see how things play out over an extended period of time. It's hard to be confident about— it's hard to be confident regarding your ideas and your trades if you have never seen it in action before. So for example, breaker structure into order block, I've seen it so many times that that's where you go long, you know. For example, I can be confident that because I've seen it so many times and because I've seen it play out so much I can be comfortable taking that trade. So yes, but do you think at the same time you can become too overconfident? I would say so. Yeah. So that's when it comes to you. That's when it's up to you to to. control yourself and don't act like— don't act as if you know exactly what's going to happen next. You can go through data and like, how— what are the odds of something like this happening? And that's where journaling comes into play because you need to have data, objective data, in order to calculate your odds. So you can get too overconfident, but for the most part, backtesting gives way more benefits than The cons. And whereas the cons, it's pretty easy to, to actually, you know, mitigate the drawbacks of overconfidence, you know what I mean? Hi, I want to join the monthly subscriptions. Must I take for 6 months? No, monthly subscriptions are open right now. Head over to the, uh, I'll type it in chat. Um, it's, uh, patreon.com/artofcrypto. That's the monthly subscription. When did this live start? Um, an hour and 15 minutes ago. Do I trail above the TP price or just limit order on the TP? Usually just limit. Right then, um, I think those are most of the questions that I've answered. Um, if you have any more questions, uh, you can feel free to leave it down, leave it down in the comment section below. No guarantee that I'm going to get back to it because I get so many comments, but if I see it and if I'm free, I'm gonna get back to it. And just remember that, uh, to follow me on Twitter, and if you want to join the private Discord group for like a month just to see how it is, um, you can do so. But otherwise, I hope this video has been helpful for many of you. If it has, Cheers. If it hasn't, sorry. But yeah, for now though, made a gains