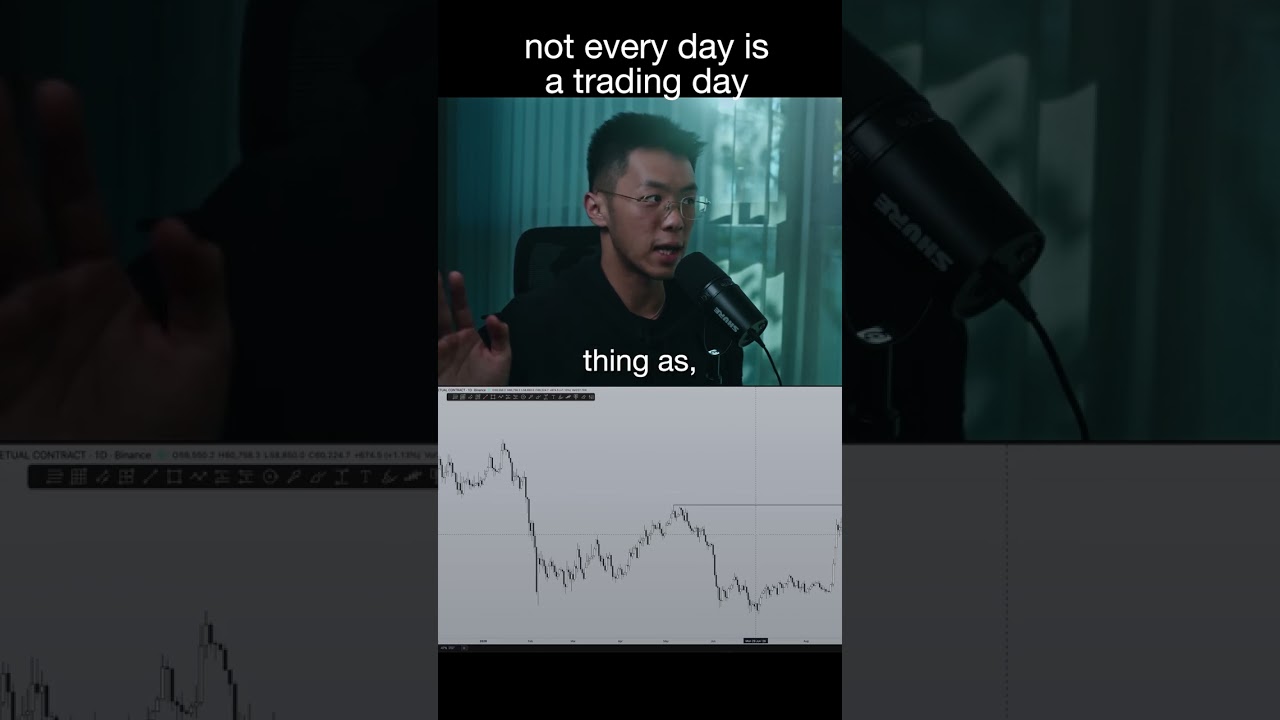
The Trading Strategy I used to make $4500 in 2 hours

In this video, The Art of Crypto walks through a recent gold trade where he earned roughly $4,500 (about 9R–11R) within two hours. He explains his full workflow: starting with higher‑timeframe (15‑minute) analysis to identify recent, significant key levels and establish a bearish bias; moving to a 1‑minute chart for execution; waiting for a Change of Character (CHoCH) signal; entering on fair‑value gaps or order blocks in premium zones; placing stops at the end of the gap or above the order block; managing the position by trailing stops and respecting higher‑timeframe targets; and finally exiting when the profit target is hit. Throughout, he stresses the importance of having a clear plan, patience, and disciplined risk management, while also sharing psychological insights about avoiding FOMO and counter‑trend trading. The video concludes with a promotion for his private mentorship program, Trading Ascension.
Chapters
What's up everyone? So just recording this video real quick to do a trade breakdown on this trade yesterday that I took on gold where I did about $4,500 in a period of about 4 and a half hours. But if you want to put it another way, most of the money was actually made in an hour and 45 because my TP was over here. And at this point I was up about 9R compared to 11R if I were to hold the trade all the way, which I did. So technically speaking, you could also say that I made 4 grand in a period of 2 hours. So So this video, I'm just gonna do this breakdown to show you how you can do this for yourself as well. And hopefully, yeah, you know, let's just dive right into it. So I'm gonna come right off the bat and say that I did not catch this entire move here. My plan was to take out— was for price to get rejected off of these highs and then take out these lows. But little did I expect that price would actually just go all the way for the liquidity all the way back here. So does it matter? Yeah, kind of, because this would have been a potential $16K day rather than $4.5K. But either way, I had a plan and I executed the plan. And at the end of the day, that's all that matters. Because when you were first mapping out your trade, this trade idea in your mind was perfect. And so if it was perfect in your mind and you executed it to perfection, that's all that matters. Hopefully that makes sense. And it's a very important mindset that you need to come to terms with as a trader, just having a plan and executing that plan regardless of, you know, how you might be feeling. Honestly speaking, if I was actually at the charts during this time, I would not have set a TP. The only reason why I had a TP in the first place was because I needed to leave the charts for a few hours. But if I was sitting in front of the charts, my style of trading is to catch as big of a move as possible and definitely to catch as aggressive and as volatile of a move as possible. So my style of trading involves sitting and just waiting until price shows signs that it wants to go the other way. In this case, it would be here. After it takes out this high during this next retracement here, I would have just got out either here or here at either one of those points. That would have ended up being a you know roughly 45R trade. So just to show you what I mean when I said this could have been a huge day, but you know because I had to leave, I had to set the TP and just forget about it. The time I came back, it was at this point here, and oh it was too late. And you know there's no need to chase price. So anyways, now that I've explained you know what happened yesterday, let's get into the trade breakdown. So this trade involves a 15-minute higher time frame and a one-minute. Minute execution. Now, because the 15-minute is our high time frame, first thing I did was just come on to the 15-minute and marked out these 2 levels here. Now, these aren't known as your most significant key levels, meaning where price was at this point here, it was either going to come to here, it was going to come to here. These are the most recent, most significant key levels that price would reach for. And every other level, for example, you could zoom out and you could say, oh, you know, there's liquidity over here, right? This level here, and there was also this level here. Well, in my mind, the first thing you always do is just mark out what is the most significant recent price level that is close to you, because that's going to be the most relevant, especially when I'm trading on a 1-minute chart where I'm not looking to extract this entire move here unless I was sitting in front of charts, of course. But in general, I'm not looking to extract this entire move here. I'm just trying to catch price swings like this, and that would be much more than enough for me. As you can see, $4.5 grand is not a small amount of money. In my case, I just stopped after marking out the recent swing levels. But if I were to have went a little bit further, I would have probably looked at these relatively equal lows. Definitely would not have predicted price to go all the way here this aggressively, this quickly. Now that the, you know, the most significant key levels have been marked out, then you move on to your execution. So basically, you use your high timeframe simply to mark out the key levels and where you think the price is going to go. In fact, before I move on to the lower timeframe, I actually need to explain to you Why I decided to take a short here, and I went for this level instead of this one. So basically, what I saw on the 15-minute chart was the fact that you're sort of forming a range where you have your range lows, and then right now you just took out the range high there. Now I know that doesn't seem like it, but price actually does take out that swing high right there with that little move there. Well, basically, 80% of the time when price is in any sort of trading range, statistically speaking, price tends to take out range high and then go for the opposite direction. The reason why is because Once the liquidity here has been taken, price will always reach for the next point of highest liquidity, which in this case is here and eventually here, and you know eventually all of these down there. And secondly, usually it's just a general rule of thumb. It's a pattern that you can observe in the market a lot is when price makes a high, it tends to come back up to just take out that high just a little bit before retracing because a lot of people actually short on the way up to that initial move, and a lot of people go short. Then what happens when the price dumps is that a lot of people move their stop loss above this high, so that. Indicates that there is a lot of liquidity above that initial high. And so you get a pattern that's sort of reminiscent to this. And if you're looking to go long, it would actually look reminiscent to that where you have the first low and then price takes out the second low. So this is something that you can look out for. I know I definitely do. I mean, you can see you have a first high, you have a second high, and then you have a third high before price actually takes a significant dump. Now this is known as a— some might say, oh, this is a triple top or whatever, but this is actually a tree drives pattern and it is a distribution pattern. So usually 2, sometimes 3, but either way, this is something that you can look out for. But in this case, what I just saw was even though price hadn't like taken this level out yet when price was still moving up here, here's another skill that might be helpful to you as well, is the skill of thinking one step ahead. So the fact that price already formed a low here after filling in this fair value gap means that there is already a new trading range, right? You already have your range low and then you have your range high. Even before this entire move happens, you already have your new trading range, which is here and here. Now this is not a skill that you're going to pick up immediately, but as you gain more experience in the markets, you're going to be able to see this instinctively. You will know where the new trading ranges are. For example, now that price has, you know, formed that low over there, your new trading range is range high and then range low. As simple as that. And so when you— whenever you're drawing your Fibs, for example, you can draw it like that. And when price returns back to the 705 area, that's when you can look to take a short in order to form a new low, in the event that your bias is still towards the downside. So that's the second step, right? I saw that there was a range, and then because range high was taken, my indication, right, in that very moment, what I believed, right, is what you do in the third step is step three: your higher time frame bias. Now you need a bias in order to take any sort of trade. For example, if you don't know if you think that markets are going to go lower or if the markets are going to go higher, how are you going to decide if you want to take a long or if you want to take short? Because if the markets are going lower and you start longing, then you're just counter trend trading, and trust me, you will lose a lot of money from that. And a lot of people watching this video might have. went through that before where you counter-trend trade and like price just tends to— just as an example, when you are counter-trend trading, this is the exact kind of stuff that you get, right? In this case, let's assume that we have a crystal ball. This case we do because we know exactly what happened in past price. Price is in a downtrend and imagine you were looking to, oh, buy the dip, or oh, because gold is cheap, I'm gonna buy gold. What happens then is you spend the next few hours watching gold do absolutely nothing before taking another dump. And so this is what happens when you counter-trend trade. And so you always want to be trading with trend. And if you don't even know, like if you don't even have a bias towards where the higher time frame is going to go next, how are you supposed to trade the trend if you don't even know the direction, right? So that's why having a higher time frame bias is super important. And that's step 3. In that case, the way I determined higher time frame bias was the fact from this range, range high was just taken out and you have liquidity, right? And so in this case, I believed that price would take out the liquidity here. Right? And this is again back to that skill of thinking one step further. This time I'm thinking 2 to 3 steps ahead. So what usually happens in the markets is during buy programs, right, when market is in bullish market structure, sell-side liquidity sweeps— this is known as sell-side liquidity, right? Sell-side liquidity sweeps during a buy program tends to allow the markets to have enough fuel to form new highs. Okay, just to show it to you in action, this is sell-side liquidity. Once sell-side liquidity has been swept, this gives the market enough fuel to form New highs. Now you get it again over here where you sweep these lows and then market immediately forms new highs. Again, you have 1, 2, 3 areas of sell-side liquidity, takes it out and then forms what? New highs. And then over here again, take out the liquidity. And this is also one of those double tap moments right there to form new highs. So I was already thinking 2 steps ahead. I was like, okay, you have sort of a range here, so you're probably gonna take out the range high, temporary retracement to take out sell-side liquidity because maybe the market makers have ran out of fuel, maybe they've ran out of liquidity, so they need to go for a refuel. And then bam, something like that. Note, I wasn't immediately just looking to take a long because I'll get into that in just a bit on how you execute and why you don't just place a limit at random levels and hope for the best. So that was my higher timeframe bias. And so now that you have that, well, now you kind of go execute because now you know what you're looking for. In this case, I'll be looking for a short. And so I just simply monitor the markets to give me a sign that it wants to go lower. And that goes into, well, that's pretty much step 4 actually. Just go into the lower timeframe and then wait. Like literally, Just wait. You already have your plan on a high timeframe bias. And here's the thing about how trading works. Trading is like 10% planning, 10% executing, and like 80% of the time you're just waiting. And that's a very boring thing to do. And honestly, one of the biggest reasons why people don't like— just the reason why people lose money in trading in general is just because they do not have the patience and they pull the trigger too early. So once you marked out those levels, for example, over here, I could have marked out this one, right? That's what I marked out earlier. Okay, once that level has been taken, I just wait until the market gives me signs that it wants to go down. And that comes in step number five, which is look for a C H O C H, right? This is a change of character, and basically it's when the first swing low has been broken, which in this case is here where you get a market candle. Sorry, a candle body close. This known this is known as a change of character. Once you have your change of character, now I can see that the markets are now willing to go lower. Right? That is a sign that I needed. And because I'm on the 1-minute chart, it only took was about 6 minutes after the highs gets taken out for me to get a confirmed change of character. Now, depending on what time frame you're trading on, that number could be different. And it's okay, you just wait until the market gives you signs. You do not have to FOMO because nothing goes straight down forever. Everything retraces, right? In this case, see, it was going straight down, but then oops, it retraced. And that's where we enter, right? Notice how I caught the exact top there and Doing it this way is going to reduce your risk by a ton because you're not just blindly setting limits. What if you set a limit sell here and then price just continues on to that level? Then you would have taken a loss for no reason. Or in the event that you don't put a stop loss, which I don't know why you wouldn't, then you would be absolutely screwed because now price is sitting over here, your entry is over here. Maybe you had a, you know, uh, imaginary stop loss of here, and now you are taking on like 1, 2, 3, 4, 5 times the amount of risk that you would normally be taking on. So a very important thing to do, always have a stop loss. And so once you get your change of character, just simply wait for a retrace back into a key area. Now there are 3 ways that you can do this. Draw a fib from the new trading range, right? So in the 1-minute chart, that's your new trading range because this low has been broken, this low has been broken, that low has been broken. So this is your new trading range. So you simply wait for a retrace into a premium zone. Now this white line here indicates the 0.5, right? This is the mid-range, this is the middle point. Anything above The mid-range in any trading zone is a premium. This is like me selling you an iPhone for $3,000. You probably wouldn't buy it. Why? Because I'm selling it to you at a premium. Anything below the 0.5 is known as a discount. Now, if I sold you an iPhone for $200, you would probably buy it because I'm selling it to you at a steep discount. That is how the market makers operate. That is how the algorithms that the market makers have made operate as well. And it is a very important thing that you need to keep in mind. Always look to sell in a premium. Always look to buy in a discount, not the other way around. A lot of people get FOMO. You know, I definitely got FOMO because initially my gut reaction when I saw price retrace into this fair value gap over here, I actually placed my first buy. And that's fine because my stop loss is right about— I believe it was here. I'll explain why I placed my stop loss there in just a little bit. And then the second time when price gets into this fair value gap, I place another sell. And so turns out that was perfect. And you can either use a fib or you can look for fair value gaps. In this case, it would be right there. And then right there, right, there was 2 fair value gaps and I just took both because both of them are valid. A lot of the times people do ask me like, hey, how do I know which fair value gap or like which order block is more significant? Simplest way to do that is just to draw the fib and then filter it based off of whether something is in a premium or in a discount. For example, my rule is that I wouldn't necessarily sell something— like, I would much prefer to sell something in a premium than a discount. So in this case, I would completely disregard this. If I do miss the entry, okay, doesn't matter, I'll just buy low— I'll just sell lower, right? There is also the notion that you don't necessarily have to sell high, buy low. That is more for investors. When it comes to trading, it is a much better idea to sell low and then sell even lower. So in this case, I'm selling low, right? I'm not trying to sell high. I'm selling low and then selling even lower. So that works much better for trading, especially, yeah, like give it a try, see what I mean. You will realize that trends tend to persist a lot longer than you expect. So you really don't need to catch tops or catch bottoms in order to make money. In fact, there is a saying That top pickers and bottom pickers eventually become cotton pickers because they run out of money and now they have to go farm cotton. So they become a cotton picker, guys. Anyways, um, back into the trade. Yeah, either fair value gaps or order blocks. Order blocks would be here. That would be a valid order block. Or just fair value gaps. Me personally, I prefer fair value gaps that is located within a premium if I'm selling. If I'm looking to buy, then I would look for a fair value gap in a discount, and that would be my optimal entry. And because I already did my analysis on the high time frame— now again, this is one of the other importances of the higher time frame analysis is that, for example, if I was just looking on a 1-minute chart alone, what I would have done is I would just place my, like, short there, maybe place my stop there, and then what I would target was maybe just these lows or something, or maybe even these lows, which would have netted me a much lower risk to reward compared to if I already did my higher time frame analysis. And now I know exactly, okay, let me just put the entry and stop loss, right? So this is an 11.5R trade. Imagine if I would I didn't know what's going on on the high time frame, well, first of all, I wouldn't be able to identify that this is an area where I want to be looking for a short, right? Because on the lower time frame, everything looks very zoomed in. There is also a saying that I really like by Miyamoto Musashi— props to those who know who that guy is— but it basically goes something like this: if you spend too much time staring at the leaf, then you miss tree. But if you spend too much time staring at the tree, you miss the forest. So a lot of the time, people get Too caught up staring at the leaves, and then they miss the tree. So that's why we start off on a higher time frame. We observe the forest, we observe the tree, and then we come to look at the leaves. That is a process that you must take when you are doing any sort of analysis, especially when it comes to the markets. So in this case, because I have already looked at the forest, I know that there is a bigger target in mind. Well, admittedly speaking, I probably only looked at the trees because I completely missed here this, for lack of a better word, let's call it the forest target. But Either way, this was still a good trade, and I would be happy with an 11R trade any day of the week. And so back to— okay, yeah, so once you get your, um, change of character, that indicates that the market is going down. And the reason for that is because I want you to look at price from here to here, right? It is complete, like, just continuously forming higher highs and higher lows until this point here where you start forming a potentially lower low. And then after it retraces back here, now, now you're taking a bet, right? This trading strategy takes a bet on the fact that you're predicting the lower high. If you want to be really, really, really safe, what I would recommend is after you get your first lower low, that's a change of character, right? The moment you get your second lower low, that's called a break of structure. You could also say that this is a break of structure, but after you get your second lower low, right, let's not call it change of character, let's not call it break of structure, let's just say that after you confirm a second lower low, then you look for a retrace, and then now you can 100% bet that that's going to be a lower high because you already got it here. Right? This is already telling you that market is now shifting to a bearish order flow where you make lower highs and lower lows. So if you want to be safe, wait for the second break of structure. But personally, I've done this enough times and I know that I know it's pretty high probability bet. Of course, it is never going to be 100%. The only thing certain about the market is that it is uncertain. So just keep that in mind. And so after you take that bet, so since I am taking a trade based off of the fair value gap, I'll just place my stop loss at the end of the fair value gap. So if you take a look at the fair value gap over here, right, you have the gap here and then you have another gap here. So what I did, I placed my stop loss above this gap and then targeting the 15-minute target, right? This is always, again, what's important about having a hard target and then just watching it play out. And that was actually a beautiful, beautiful trade because it pretty much caught the top. And of course, even if you miss this initial move here, you can always just apply this exact same concept And use order blocks or whatever. Like, think about it this way: a lot of the times people get scared about adding to their positions as it's going down, and then you have to stop to think, like, why is that? Like, think about it this way: if you're thinking that the markets is going down and then the markets actually go down, doesn't that tell you that the markets— like, you were right? Like, you are right. What you predicted, the market is doing exactly. You have a winning trade on your hands, and yet you're fearful of adding to your position. Why? Market's literally telling you that you're right. Instead, people do the exact opposite when the market is telling them that they're wrong, right? Let's say they take a long here, and then now the markets keep going lower, and then they add to their position, right? Because they're scared of losing money again. Why is that? That's very messed up. It's the exact comp— like, it is the exact opposite way that you want to be thinking. Markets is going down, add to your position, right? And how do you do that? You use order blocks. Now, initially on the lower high, I like to use fair value gaps. But when it comes to momentum trading, I really like to use order blocks. In this case, that's a bearish order block right there that price retraces into. This is again also another bearish order block that price retraces into and then goes lower. And then that is again another bearish order block that price again retraces into. And when you're trading these order blocks, it is as simple as placing your stop loss above the order block. So if you're taking this order block here, stop loss there, and targeting, you know, this level here. And then notice how this second entry actually has a better risk to reward, which is double the risk to reward compared to this initial one, even though you're catching it when the price is already low. When the price is already low and you catch it, bam. So like the concept that you need to catch highs and lows in order to make money is just completely laughable. Most of my money is actually made in the momentum trading side of things, dude. Only reason why I didn't do that is because I believe at this point in time, I was taking a bath, and you don't really look at a chart when you're sitting in a bathtub, right? So this is exactly how you do it. In fact, if you've watched any of my live backtesting videos before, the way I make most of my money is actually through trades like this. Once I get confirmed, once the market confirms to me that trend is towards the downside, once I have a confirmed trend, I just trade. I just momentum trade, and that's how I make most of my money. And in this case, if I did that, my profitability could have— could have, not saying I did, but Could have been. Let's see here. That's about 40R plus 35R. Could have been an extra 75R. This could have been a potential 85R trade, just to put it in perspective. In fact, I will link one of my live backtesting videos in this, like below this video, so that you can again look at my live thought process as I go through a chart and take trades. And that video is going to be super valuable to anyone who watches it. So make sure you check it out. Anyways, yeah. Then the rest of the rest of the way is just. Observing what price action is doing. I know, I, I know for starters I came back to the charts when price was here, and then I saw the charts like literally pumping like that, but then I did not panic. And the reason is because, um, I believe I was monitoring the chart on the 5-minute chart if I'm not mistaken. You know what, it doesn't even matter. It doesn't even matter if it's on the 1-minute or the 5-minute. The point here is that the way that I monitor the trade to see if my idea is wrong is this is going to be the last section of this trade breakdown, which is how do you exit, like how do you manage your position? Well, in my case, once price formed this, like once price did this, I immediately moved my stop loss to this level, right? I'm just going to use this. Let's see what we can use. Let's use highlighter as my stop loss, okay? Initially, my stop loss was here. The moment price did this, right, the moment price broke below these lows and then just kept going down, I think at this point or something, I move my stop loss here. Why? Because if at this point price decides to come back up to these highs here and take out these highs, it would mean that my idea that the market is bearish is invalidated. The moment you take out these highs, you're forming a higher low and then potentially— sorry, a higher high and then potentially a higher low, and then you're going to continue on to that target. Because I did my high time frame analysis beforehand, I know that there is potentially a higher target of liquidity up here, which means that when I'm taking this short here Like there is a chance that it might, you know, just reverse and go up again. Tell us that liquidity sweeps in a buy program leads to higher highs. So I had that possibility in mind. And so because you have that possibility in mind, then you have invalidation scenarios, right? In which scenario would things be invalidated? And in this case, we take out this high, it would be invalidated. And then after price comes lower here and takes out this high right there, I believe I actually moved my stop just above this high because same thing, right? In the grand scheme of things, if I were to come on to the 15-minute, you can see that price could potentially be forming structure like this, meaning this is your high, which means if this high gets taken, then you're potentially done. And then after thinking about it for a moment, I moved my stop back to here because that, that is a stupid concept. Because I know that in buy programs, sell-side liquidity sweeps lead to lower— leads to higher highs. Vice versa, buy-side liquidity sweeps during sell programs leads to new lows. So I'm like, okay, if I move my stop here, I'm just going to be a part of the leak retail liquidity, like the dumb money that is going to put their stop loss above here, and then I'm just going to get stopped out for no reason before the market dumps. So then I just move my stop back here, and then sure enough, the price actually does dump. By this point, um, if I was still like in front of the charts and I wanted to hold on to this trade, I would have moved my stop above this high and just watched it play out. But in this case, the profit target was hit before I came back to the charts. So that's how I saved my trade by understanding just basic principles about the markets. Now, this has been a pretty, pretty long video just breaking down one trade, but this should hopefully give you a very clear understanding of my thought process when I am executing a trade and what I look for when I'm, well, looking for a trade. Now, if you're at this point of the video and you're still watching, it's clear that you're someone who's serious about their improvement and serious about making trading If you've been struggling with making trading work for you, maybe it's a bit too complicated, there is way too much information, or maybe you can sort of see what's happening on the charts, but you struggle to turn those ideas into proper trades with profits. Or maybe you want to get started trading, but you just don't really know where to start. Then I'm here to tell you that Trading Ascension, which is my private mentorship, takes on 8 students per month. And if you're interested in taking a proven step-by-step fast track to getting to $10K per month trading, or simply to make huge progress in your trading, then I invite you to click the link in the description box below, and I'll see you inside Trading Ascension. Bye-bye.