This Simple 3-Step Trading Framework can Make you Profitable

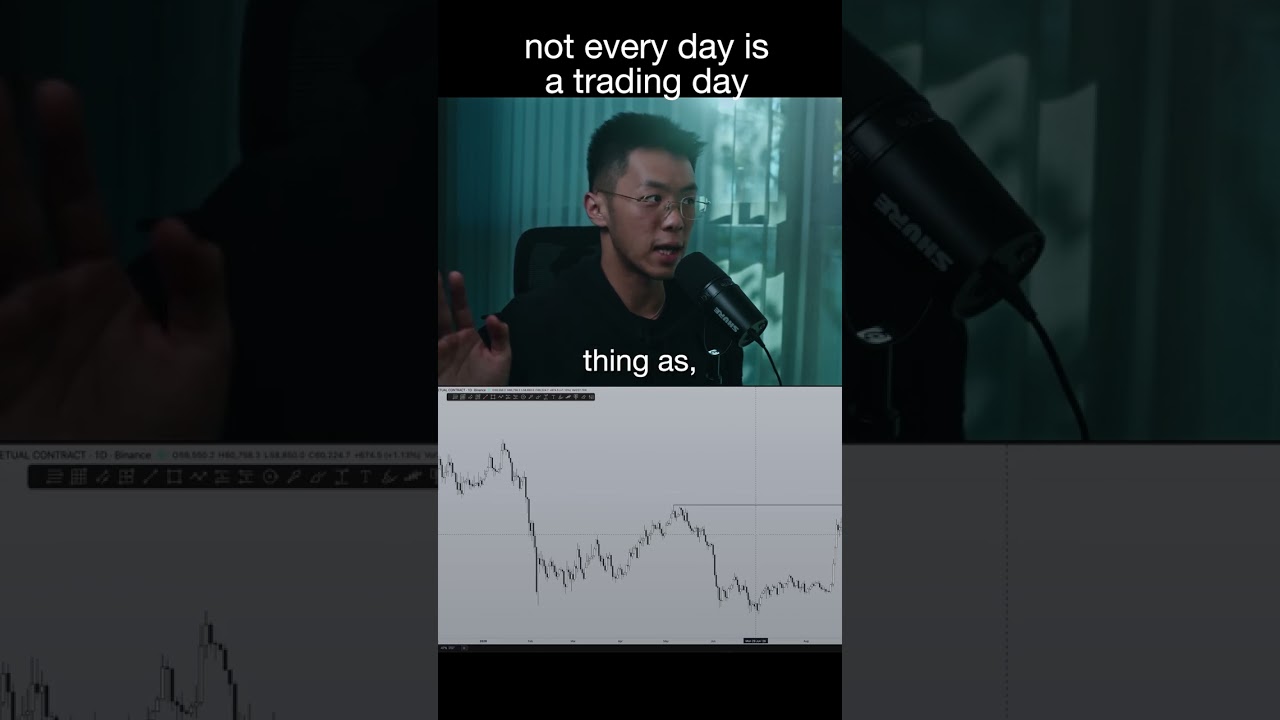
In this 25‑minute YouTube tutorial, THE ART OF CRYPTO (AOC) breaks down the three‑step "AOC" trading framework that he used to generate a 10R (10‑times‑risk) Solana trade. He starts by showing the trade’s entry, stop‑loss, and target, then walks through each of the three steps: (1) higher‑timeframe analysis – establishing a bias and marking key liquidity levels; (2) lower‑timeframe analysis – locating precise entry zones that align with the higher‑timeframe bias; (3) execution – placing entries, stop‑losses (invalidation points), and targets while managing reward‑to‑risk. Throughout, AOC explains how to choose appropriate time‑frame pairs (e.g., 15‑minute execution with a 1‑hour higher‑timeframe, using a 4‑6 multiplier), how to interpret buy‑side and sell‑side liquidity, and why a clear invalidation point is essential. He emphasizes the profit boost from tighter entries and tighter stops, illustrates the process on Solana and Bitcoin charts, and then provides concrete action items: back‑testing the framework with tools like FX Replay, TradeZilla, and TradingView, and practicing before risking live capital. Finally, he promotes his paid AOC Alpha Group for deeper mentorship. The video serves as both a conceptual guide and a practical checklist for traders seeking a repeatable, high‑R trading method.
Chapters
What's up everybody, welcome back to another video. Yesterday on Twitter, I called a trade on Solana publicly saying that I wanted to see this level here with a stop loss here and a TP there. Now this is a 10R trade, meaning if you were to have risked $100, you would have gotten $1,000 in return. If you risked $500, you would have gotten $5K in return. So this is what I posted yesterday publicly, and this morning when I woke up Boom! Came exactly to the entry. The stop loss was just perfect enough to not let me get stopped out. So this was the TP, which hit within ten hours, and this returned a total of ten R. So I'm making this video right now to break down a three-step framework, a very simple three-step framework that that basically boils down all of my trading. This is the exact framework that I use to catch trades just like this and to be able to make a lot of Rs in very little time. So without any further ado, let's dive into it. What better way to do it than to go back to Solana? So as you can see, this is the trade that I was taking. This is stop loss, and then eventually. That was the target. I'm on backtesting mode right now, so let me just get out of there. And that is the target. So this 3-step framework can be broken down very easily, and for all intents and purposes, let's call this the AOC framework. So step 1 is your higher time frame analysis. Before you start diving into the details, you want to be able to get a big picture understanding of what the markets are doing. And there are 2 things specifically that we want to identify when it comes to our higher time frame. The first of all is your higher time frame bias, and the second of all is your key levels. And then we move on to step 2. Once we have a big picture, it's time to zoom in and start executing. But before we can start executing, most people tend to just jump right into something like this, whereas they're skipping a very important second step, which could be a reason why you're struggling with your trading. So step 2 in this case is going to be your lower timeframe analysis. So the key thing that we want to identify here is key levels that we can execute from, and then only then do we move on to step 3, which is execution. So let me break down the trade that I took yesterday, walk you through it step by step. What I did in order to determine that this was a good trade and how I managed to get 10R in like 10 hours. So starting off on the higher timeframe. Now my higher timeframe in this case is the 1-hourly chart. A question that some of you might have is how did I determine my higher timeframe? Well, it starts with your lower timeframe. What timeframe do you want to execute from? In my case, it's the 15-minute because I found the 15-minute chart to be a sweet spot where I'm able to take trades on an intraday basis and close it out within a couple of days. So the 15-minute chart is essentially my favorite short-term trading timeframe, meaning I'm closing it out within a few days. And most of the time, the targets do hit like this within 24 hours. So for you, it could be very different since we're all very different traders. Some of you might enjoy trading on the 1-minute chart, right? So even faster than myself. Now personally, I have nothing against the 1-minute or the 5-minute. It's just that for me, for my unique personality and my unique strengths and weaknesses, the 15-minute chart works the best for me. For some of you, that is different. So if you're trading on a 1-minute or if you're trading on a 1-hour or even if you're trading on a 4-hour or the daily chart, I'm going to give you a framework that you can use to determine your timeframe combos based on whatever timeframe that you're trading on. For example, mine is the 15-minute. You just want to multiply it by a factor of 4 to 6. So that will give you your higher timeframe. And in my case, 15-minute times 4 is 60. So that is my higher timeframe. Now usually if you're on a 1-minute timeframe, I do recommend like the 1-minute timeframe is the only timeframe where I basically recommend using the 15 as your higher timeframe because 5 is also a little bit too zoomed in for it to act as a good higher timeframe for the 1-minute chart. But as for the rest of the other timeframes, for example, if you're trading on a 5-minute chart, then probably the 30-minute chart could be your higher timeframe. It could also be the 15-minute chart. So again, 4 to 6, this would be 3, but the 15-minute chart does work well. If you're on the 15, that's gonna be the 1. If you're on a 1-hourly, then it's probably your 4-hourly chart as your higher timeframe. If you're on a 4-hourly, then it's your 24-hour chart, which is the daily chart, as your higher timeframe, and so on and so forth. The reason why you wanna have 2 timeframes is because if you're only trading on the lower timeframe, you tend to lose sight of the big picture. And this is the reason why you probably get caught on the opposite side of the trend. For example, in this case, you're looking at all of these potential support lines and you're buying each and every one of these levels and you're wondering like, hey, it's not really bouncing, right? If anything, it's just going lower. This means that you're countertrend trading. You did not identify the trend correctly. And a very simple way to fix that is to actually have a higher timeframe. Just understanding the big picture prevents you from getting— well, trading the opposite direction of what the market's trying to do. And secondly, it prevents you from getting chopped up over here. I'm sure you've been in a situation before where you're not quite certain which direction the market is going up. One point it seems to be going up and then it's down, it's up, down, up, down, up, down, up, down. And you get a lot of these little movements where throughout the entire time where it's happening, you're just doubting yourself and you're doubting if your trade is even the correct decision. So the way to prevent that is to have a higher timeframe that you can use to identify the big picture. And then the importance of the lower timeframe is that If you only have a higher timeframe and you're purely executing from the higher timeframe, then you tend to lose sight of the details. For example, if I'm looking at the chart from the 1-hourly here, I might decide that, okay, just based on the 1-hourly chart, this might be the correct stop loss instead of over there. I would not have seen this potential stop loss here if I wasn't on the 15-minute chart. So the difference between both of these, like you might argue, okay, a win's a win, a target's a target. Both of these still ended up going all the way down by 3.75%. Fair enough. But There is a huge difference that a lot of people do not account for, which is the fact that the reward for this trade is 2.5, right? Roughly 2.5. The reward for this trade is roughly 10, right? That is a difference of 4 times. If you apply this, like, you might think this is not a big deal. This is literally the difference between if you were risking $100 on this trade, this is the difference between making an extra $750 for the same exact trade. Being able to narrow down your entries and narrow your stop loss so that you can increase your reward is one of the best and most underrated ways of increasing your profitability overall. And of course, this is just one trade. If you apply this over the course of 1, 2, 3, 5 years, you can imagine just how many tens or even hundreds of thousands of dollars you're leaving on the table. So having a lower timeframe as well as a higher timeframe gives you the best of both worlds where you still get a good sense of the bigger picture, but then you're still able to look for the details and execute at a very high level on the lower time frame. So now that you understand the importance of these time frames, let's actually get into the analysis of how I came about this trade. So step 1 is to identify your higher time frame bias, and to do that you actually need to mark out your higher time frame key levels first. And the framework for this is very simple. So let's go into backtesting mode, come back to this previous point here, and let's study the chart at this point. Okay, so At this point here, you can see that price is sort of in the middle of nowhere and the closest— and this is what you want to look for in particular. You want to look for the extremes. The extremes in this case would be that you could say that price is trading within this range low and this range high, right? Where price is currently staying in between these 2 levels. The range low and the range high pretty much just means your extreme levels. You could also argue when I zoomed back out a bit that there were some highs over here that have yet to be taken out. So this was my extreme that I decided on. Right? Buy side liquidity that has not yet been swept tends to act as a very good key level. And over here, this is your sell side liquidity that hasn't been swept, meaning this level hasn't yet been taken out. And then of course there are lower liquidity levels over here that you can continue using. Now the reason why I'm not using this one or even this one or even this one is because, and this is going to help a lot of you, it tends to be something that many people struggle with, which is how do you find the sweet spot between what is relevant now and what is completely irrelevant? If you're trading on a 4-hourly timeframe, which let me just give you an example. For example, if I'm trading on the 4-hourly timeframe, then absolutely, like looking at the chart like this, boom, that's my range low and that's my range high, right? But on the 1-hourly timeframe, this is not relevant. The time that Solana is going to take to get all the way down here is probably completely irrelevant to my trading on the 15-minute timeframe. So you want to zoom out, but not too far. And this is the beauty of having that 4 to 6 rule. It gives you a very concrete set of rules to not zoom out too far or be too zoomed in. So in this case, I have my 2 levels marked out. Now my job is to determine the higher time frame bias using the key levels. So looking at this sell side— sorry, looking at this sell side liquidity over here, let me just remove this line so that I don't get confused. Looking at here and here, where do I think price is more likely to go to at the moment? Now there are a few ways that you can determine this, but at the end of the day, you must understand that your higher time frame bias is just a guess. It is an educated guess on where you think the price is going to go Next, on a big picture basis. Now, over time, as you get more practice, you will get better at this, which helps you increase the accuracy of which you determine your higher time frame bias. So for those of you who have been watching my videos for a long time, you understand and you've seen firsthand that I'm able to call the direction of the markets very, very accurately, and it comes from a good understanding of the higher time frame bias. So in this case, based on the information that I have, let's make a guess. So I know that currently Bitcoin is still within a downtrend, and if Bitcoin if Bitcoin goes down, most likely altcoins are going to go down. So already. I have one of the macro conditions satisfied that is potentially pointing me towards the downside. Now let's look at the chart itself. So looking at the chart itself, I can see that this high could potentially have already been taken out. Let's just say that for the price to come all the way back here, first of all, there's quite a bit of distance here, but the distance is not the key, right? A lot of people tend to mistake, oh, just because the price is closer to this side means it's going to come to this side. Not necessarily. To identify the higher timeframe bias, you want to have a solid understanding of how liquidity works. And I can break it down to you in less than 30 seconds. Just understand that in order for the markets to go up, you need fuel. Where do you get fuel? You buy stopping out other traders on the way up. Now, if you're on the way up, where are traders placing their stop losses? Most likely on below swing lows, right? That's why this is called sell-side liquidity. In order to go up, you need sell-side liquidity to be taken out, and then in order for the market to come down, you need buy-side to be taken out. So hopefully that was within a 30-second timer, but in this case I know based on how many times I've seen this play out, I know that there is a very good chance the market is not going to start coming up here because there is sell-side liquidity right there for the taking. It's so close to price that doesn't make sense for price not to take that. Even if it goes up, like sure, it'll go up after taking this level, which again brings me back to the previous point on relevancy. What is the most relevant move for you at the moment? It's definitely not this one, right? Like I have a move right here that I can play. Like why play this move, which is potentially gonna take a couple more weeks before it even gets to this level? So now that I've determined my higher timeframe bias, meaning that I think the market's going to go down, I think it's going to come to this level right here. I've already established that my bias is towards the bearish direction. Now that I have my direction, it's time to hop into the lower timeframe in order to find an area to execute from. Now similarly, remember step 2, which is I want to look for key levels to execute from in lower timeframe. Now the same process applies. You're going to look at price in its current range right now. And find the extremes. So in this case, there is buy-side liquidity over here that has yet to be taken out. And over here you have sell-side liquidity that has yet to be taken out. So already you can see that price is existing between these 2 levels. Now your job is to determine which level is more likely to be more relevant to you. Now, this is where the higher timeframe comes into play. A lot of the times I definitely have seen a lot of people, like even though they've done their higher timeframe analysis, the fact that they didn't come up with a bias means that the moment they come into the lower timeframe, they get confused again. Because okay, you have two levels. Which one do I use? And some people might just say, "Oh, okay. If this level gets taken out, I'm just going to buy that and go all the way up to here." Wrong. You are forgetting your work that you did on a higher time frame. The fact that you've already determined that this is at least in near future within the time frame that is relevant to you, market is in bearish order flow. You can completely just remove this level right here because it's not relevant to you. Like it doesn't matter if you look at any market within a bearish condition. Every time you take out sell side liquidity, you don't bounce. You just go further down. Sell side liquidity. You don't bounce, you just keep going further down. Similarly, when the market is in a bullish order flow, every time buy side liquidity gets taken out, the market just keeps going higher, right? The simplest way to put it. And in this case, the fact that I've already determined when the market is bearish, then I only want to look for buy side liquidity to execute from. So there are 2 ways this plays out. Now that I'm looking at the chart again, okay, boom, this level right here is the extreme. But honestly, I have a key level right here, which is the true daily open when I was looking at it yesterday. So I have an understanding That if the price were to come sweep this liquidity whilst filling in potentially the true day, then it will head down, right? I understand that if this is wrong, I'm going to potentially look at this level to short, but at least within the context of this trade, there are 2 levels that I can consider and both are valid, and hence I'm going to take both if it happens. Listen, you already understand that your higher timeframe bias is towards the downside. Now you just need to determine which areas, which high probability areas that you want to execute from. A lot of the times people tend to get confused, like, okay, there are 2 valid entry points here, which one do I take? Do I always take the, you know, the one that's above, or do I always take the one that's, you know, closer? There is no such thing as, oh, if I take this one, then I'm falling prey to FOMO, that I'm not getting the best entry, that like I'm just trying, like hungry to get into a trade, or that I don't know what I'm doing. That's false. Based on our analysis here, both of these entries are valid, okay? That's the keyword here. Both of these are valid. We have a very clear thought process on what makes this entry valid, and I have a very clear thought process on what makes this entry valid. And if that is the case, then both are correct. The only thing that you can do in the markets is do your analysis as best as you can. But as for what the market actually wants to do, that's all up to what the market wants to do. Like, we can't control that. But as long as we have a solid thought process, as long as we're disciplined in that all of our trade entries are taken only when we can easily and completely explain why we're using this entry, then yeah, absolutely, just take both. So in this case, I placed my entry right there, placed my stop loss thankfully above the true daily open, because if I didn't put it above the true daily open, I would have been stopped out by literally $0.01. So note here, always place your stop loss slightly above or slightly below whichever areas that you're executing from. And then in terms of the stop loss, again, the stop loss— how do you place your stop loss? Same concept there. What is the point of invalidation? Now, how do you place your stop loss? This tends to be a question that gets asked very, very often. The only way to think about it is what is the point of invalidation? So if your entry points are what are the points of valid, right, what are the valid points, your stop loss is what is the point where this idea would be invalidated. So in this case, I'm looking for a liquidity sweep here, right? Remember what I said earlier, in order for the markets to go down, you want to sweep buy side liquidity. This is your buy side liquidity. I want, I want to look for a sweep of the buy side liquidity before the market expands lower, right? So that is the idea. And I was using the true daily open as my invalidation point, meaning that if the price were to go above the true daily open, then it's probably gonna come to this level instead. And so this idea gets invalidated. Okay? Always have an invalidation point. Similarly, if I were to take my trade here, I might set my stop loss above this wick knowing that, okay, this idea is based on sweeping the candle body and then going down, right? It's not supposed to sweep the wick. So in this case, I would set my stop loss like that, and then that is my point of invalidation. Now, What your point of invalidation is is completely up to you. All that matters is that you have a point of invalidation for the specific idea that you are looking at. Okay, so once that's determined, all that's left is to let it play out. I literally posted this at what, 11 PM my time, and when I woke up, I woke up to a couple extra thousand dollars of profit. That's as simple as trading can be. So you might ask then, okay, AOC, what is the next move for Solana at this point? At this point, same exact thought process, right? I'm gonna remove everything now and Higher timeframe first. This is the closest level that's going to be relevant to me on the higher timeframe. And at least on the higher timeframe, this would be the closest level. So you might ask, oh, why not, why not this high? Or why not this high? Or even why not this high? Again, what is the level that is relevant to you? You can see that at least on the lower timeframe, price is likely to be trading between these 2 areas. Okay, this is the thought process that you use. Going back down onto the 15-minute, it's time to look for some key levels that we can execute from. So looking at higher timeframe, I do think that the bias is going to head towards the downside. Given that we already have such strong momentum, it doesn't make sense for the price not to take out this level before any kind of significant up move. So higher timeframe bias is towards the bearish direction. Higher timeframe target has also been determined. Now let's hop onto the lower timeframe and mark out a level that we can execute from. Now the true daily open just happens to line up with this candle body here. So I'm going to wait for some kind of liquidity sweep here before taking a trade down to here, right? Same exact thought process, 3-step framework, very easy to understand. So let's now hop onto, let's say Bitcoin for example, and let me apply also this simple 3-step process. So Bitcoin chart. Now the levels that are relevant to me, probably there and potentially there, right? I'm gonna mark this out, but this is not immediately relevant to me. Again, the 1-hourly chart, especially the fact that I'm trading on the 15-minute chart means that I'm not looking for price to move on scales that would only be possible on the 4-hourly chart. Now, if I was on the 4-hourly chart, boom, like this is the closest level that I would look at, right? I wouldn't even look at this one just because, you know, that is the extreme. And then right here is potentially another extreme where price is currently trading between both of these extremes. Now, for this to happen takes weeks, right? Potentially a couple of weeks. I'm trading on the 15-minute. My time frame is literally a couple of days. So I'm not looking for a move like that. I'm looking for a move more like this. So going back to yesterday, I've actually just seen the exact same trade play out. So Yesterday, if I were to have done this analysis yesterday, this would be on the lower time frame. We're doing step 2 now, marking out your key levels. So given that my bias is towards the downside, I want to completely remove this. And this is the entry: liquidity sweep on the buy side liquidity, stop loss on the wick just like what I talked about before, and target potentially there at, you know, over there on the buy— sorry, sell side liquidity. So this would give me a 7.3R trade. Now granted, this trade is not yet over, but the simple Thought process, the simple framework still applies. Now here are some action items that you should do when you go back onto your own chart. Do not try to apply this right away because it's so stupid when people trade their live money based on a strategy that they've only watched— literally, this video is recording for 25 minutes. 25 minutes is not enough time for you to truly understand the intricacies of a strategy inside and out. So what you want to do is you want to get some practice first, just like how you wouldn't go play a full-on basketball pickup tournament before actually practicing the moves individually, right? That's what you have to do first. Simplest way to do this is to use TradingView backtesting mode. But me personally, I hate TradingView backtesting. Like, it actually feels like such a chore to backtest. What I use nowadays is a tool called FX Replay, but that's only because this is one of the 3 tools that I will always recommend people to use. The other one is TradeZilla for journaling, and of course you have TradingView. These are the only tools that I would ever recommend a trader use simply because they are worth your time. FX Replay makes backtesting actually feel just like a freaking chore, trying to manage between your time frames. And they have a free trial for 5 days that you can just use a burner email for. Try it out and you'll see what I mean. It saves you a lot of time. So that's your action item, going on to FX Replay and backtesting this system specifically. And if you start failing on your backtests where you start seeing like 10-20% win rate or even 5% win rate, just understand that you've probably screwed up somewhere along those 3-step processes. Okay? Either you got your high timeframe bias wrong, either you're not following the rules, or it's a combination of both. Usually it's a combination of both that leads you to trading all of these little choppy areas and getting chopped up. Or if you want a more proven step-by-step process on how to learn this system and get profitable fast so that you don't miss out on this bull run, consider joining the AOC Alpha Group where you will get access to this exact system plus all of my trade ideas. You can find a link to join there. Now, I don't actually sell that group publicly. But you can get access to it if you sign up to the newsletter and reply to the first email that you get sent. But otherwise, I hope you enjoyed this video. I hope you found value from it, and I'll see you guys in the next one. Bye-bye.