How to Rack the Kettlebells
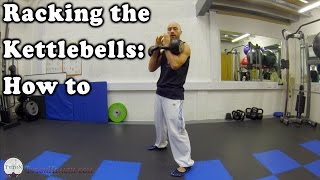
Two ways to get a kettlebell into the rack position for presses and squats. The deadlift-clean works for lighter bells and beginners. The dead clean, where you pull straight up from the ground, suits heavier weights and advanced lifters. Key is keeping your spine neutral and rotating your thumb at the top.
Chapters
Hey guys, welcome back. In today's video, we're going to be talking about how to rack the kettlebells. Basically, just get them up into the rack position. No particular exercise once they're there, just getting them up so that perhaps you might be able to do military press, front squat, bear complex, anything like that. Doesn't matter. If you can't effectively and safely get the kettlebells up into the rack position, you're not obviously going to be able to do these types of exercises. So, two main variations we use here at Titan Health and Performance, that's the deadlift with a clean, just a standard deadlift and clean, or we'd use the kettlebell dead clean. So both very effective, but it would tend to be the weight of the bells and the experience of the lifter that would determine which variation we're going to do. So if you're a bit more of a beginner or the kettlebells aren't too heavy, then we just use the standard deadlift and then clean them up into the rack position. If the kettlebells are a lot heavier or you're a more advanced lifter, then we would tend to use the kettlebell dead clean. So they're both very effective, but the dead clean just allows you to create a lot more speed and momentum in order to get the bells up. So if they're heavier, perhaps a couple of 24s, 28s, something like that, you might need this increased momentum and hip drive in order to get them up into the rack position. So I'll get right into it. First thing you're going to want to do for the deadlift with the clean is just make sure that the handles line up. So you set the kettlebells down next to each other, get the handles in line with each other. Then you're going to step over the bells just so that the handles cut your midfoot in half. So it's just like if you're doing a barbell deadlift, you obviously want the bar directly over the midfoot. Well, this is the same, the handles are directly over my midfoot. Then the first movement I would need from here is the tip from the hip. So I tip Maintain neutral curvature in the spine. I keep my chest up, so I haven't done this, basically. It didn't come from my back, it came from the hips. So I push my hips back as if I'm trying to touch the wall behind me. And now, once I feel a good stretch in the hamstrings, I've still got this neutral curve, and my hand, basically the palm of my hand, is about at my knees. Doesn't have to be exact, but thereabouts. Then from here, what I would do now is break at the knee and allow my knees to come forward. I maintain the same torso angle, so my knees come forward. This allows me to get lower and deeper into the, into the deadlift position. And obviously my hands now come down and I can reach the belt. So I tip, hands are here, now I break at the knee, my hands are now lower, and I can take hold of the belt. From here, I now drive from the knee initially, so I imagine I'm pushing the floor away from me with my feet. Once I get to the knee again, so the handles would now be in line with my knee, I now drive my hips forward and I obviously reach the lockout position. From here, first thing I'll do is pop off the hips, tip again, and the bells will obviously swing through my legs. As I do this, I turn my thumbs in, so this will turn the handles in so that the handles— the outside of the handle doesn't hit my thighs. I tip, turn them in, and then from here drive my hips forward and allow the momentum and force that I create from my hips to carry the bells up. Now what I'll do from here, as I drive my hip forward, keep my elbow fixed, the bell will want to come round and over. So what I have to do is curve my wrist, sorry, curl my wrist slightly to bring the kettlebell up and around. If it keeps coming up and over, it's obviously going to keep whacking me in the forearm and I'll end up pretty bruised. So obviously from here, once I've got the swing, I keep the elbow in, the bell comes up, and I manipulate my wrist so the bell comes around. And it will sit nice and smooth just in here. And obviously you'll have the 2 kettlebells in the rack position. So, show you what I mean. I tip, break at the knee, drive the floor away, hips go forward, pop off, turn the thumbs in, drive, and up. So it's nice and easy. Show you again. Bells are here. First we tip, break at the knee, then I drive the floor away, hips go forward, pop off, thumbs, hip drive, and up. So as you see, from here, elbow stays in nice and tight, pop, and around, and the bell comes around the hand nice and comfortably and sits in the rack position. The other version is, of course, the kettlebell dead clean. As I said, generally you'd use this with a heavier bell. Couple of 16s. If you've been lifting for a while, this shouldn't be too difficult. So from here, you want to make sure that you create a V with the handles. So you set the bells next to each other and create a V. So I want the point of the V to point directly at me, so it's not pointing away, it's literally pointing in at me. And I want this right in the middle. I will take a stance just outside shoulder width. So as you see, the bells are quite close, my feet are obviously much wider, and I stepped away approximately the length of my torso. It doesn't have to be exact, but thereabouts. Then from here, again, I tip from the hips, but this time, because obviously the bells aren't here, I will now rock forward onto the balls of my feet. So that's where most of my weight is, so that I can take hold of the bells. So initially I'm quite relaxed Not too fussed about the curvature just yet, but what I would do with the movement is obviously I will rock forward onto the balls of my feet and then I will drop back into my hips. So as I drop back, I will bring the bells through, and obviously it's on this drop back that I put all the curvature back in if I was very relaxed. So if I'm here and I'm a bit rounded, so I've not really got any curvature here just yet, once I come forward that's where the curvature goes back in. Because if I, if I stay like this, that's obviously poor technique. I'm not going to be able to effectively transfer force into the bells to get them up, and I'm obviously at risk of injuring my back. So we don't want either of those. So I'm here, I'll rock forward, back. Once I drop into my hips, I drag the bells through. As you see, my hips are pushed right back, the chest is still up, and I will use this tension I've now created through the hamstrings, the glutes, and the low back to catapult the bells up. So they get dragged through, I drive my hips, and as I do, the bell again will want to come out and up and over. So all I make sure that I do, like before, as I drive through, elbow stays fixed, the bell will come up, and again I bring it around the wrist nice and safely so I don't get any of this clanging happening. So I'm here, hands on, rock forward, back, and up. Nice and easy. So I'll show you once more. So there's my V, take hold of the bells, fairly relaxed, drop in with the curves, drag hips, and up and over. And as you see, my wrists stay nice and straight once I'm in the rack position. I don't want them bent over like this, must be straight. The bell cuts across my hand diagonally. So then from here, of course, I can effectively produce force on it when I decide to do certain exercises. So both very effective. Try them both out. So that's your deadlift with the clean or the full dead clean. As I say, try them out. Use various weights with the kettlebell. See what, see what you feel comfortable with, and I shall see you next lesson, guys. Thanks. So, did you like this video? If so, subscribe to our channel, and of course, feel free to share this video with all of your friends and family, or anybody that you feel may benefit. And if you'd like access to additional health and/or performance advice, get yourselves over to titanhealth.com and sign up for email updates.
More from Tyrone

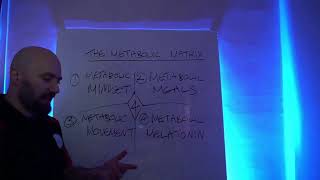



Boost Your Metabolism, Burn More Fat and Reduce Cravings: The ONE Simple Dietary Tweak