Kettlebell/ Circuit Warm Up - Basic/ Intermediate
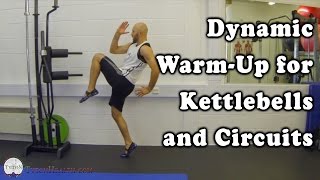
Tyrone Bray from Titan Health walks through a 10-minute warm-up for kettlebell and circuit training, moving from neck to lower body. He covers mobility drills like shoulder rolls, torso twists, hip circles, and reverse lunges, with cues on posture, common mistakes, and scaling options for each movement.
Chapters
Hey guys, what's up? Tyrone Bray here, founder of Titan Health and Performance, and welcome to this week's performance tip. So this week, guys, we're just going to go through a basic/intermediate warm-up that you guys can use whenever you're going to do perhaps some circuit training or a kettlebell circuit, anything like that. It's just very good for getting the heart rate up, getting the blood pumping, and obviously preparing each muscle group for use during your workout. For the sake of keeping the video as short as possible, I'm just going to do 3 to 5 on each side to give you an idea. But ideally, when you come to do this yourself, you're going to want to do, say, 10 on each side. And obviously, if it's just a— if it's an exercise where you don't have to do individual sides, then you just do 10 of those before moving on to the next one. On average, should take, say, around 10 minutes to complete this. Once you've got it nailed and you're not having to think about each exercise anymore, you can just go straight from one to the next. And obviously, as I say, by the time you're, you finish the warm-up, you should be fully prepped to then go into your workout and start loading yourself with, with some weight. So first thing we're going to do, we're going to start from top to bottom, work from the top down into the legs, etc. So initially what you want to do is stand in good posture. So pick your chest up, you don't want to be all rounded out. So good posture, and then from here you just do neck circles. So you want Full rotation in the neck, like so. Make sure you complete the full range, and you're going to find that certain areas are tighter than others. You can spend a little bit more time in those areas if you wish, just to make sure that obviously those muscles get loosened up properly. So once you've done 10 of those to, say for instance, the left, then you're going to go off to the right and again complete 10 of those. Just make sure as you do these You keep the chest up the whole time. As I say, you don't want to be standing in poor posture, etc. So the chest is up. Once you finish those, you go into shoulder girdle rolls. So from here, you just come around. So if I show you from the side here, all you do is come forward as far as you can, come round and up towards the ears, take them back as far as you can, keep the chest up, down and around. And again, you're looking to do Say 10 of those in each direction, then we go forwards. Same thing, just finish those off. Once you've done your 10, you're then going to move into full arm circles. So initially, we're just going to do one side at a time. So from here, for instance, to start with, we'll go backwards. What you want to make sure that doesn't happen is you're not twisting from your waist and from the spine. You want to make sure that the majority of the movement happens at the shoulder. So from here, keep your chest up again, try to stay as square as you can on the front. And just let the arm and the shoulder do the work. Once you've done 10 backwards, you're gonna go forwards like so, finish those 10, and move on to the opposite side. And then we switch forwards, same thing again. And again, once you've done 10, we're going to doubles. It's pretty simple so far, just all about loosening things up and then And again, 10, going forwards. So once you've completed those, you've gone through the shoulder, we're now going to move down into the waist. And with this first one, we're just going to tip side to side. Now I tend to keep my hands here, I tend to obviously do quite a bit of martial arts, so for me it's just good practice to learn to keep my hands up. But for yourself, you can put your hands on your side if you wish, they can go on your head, Whatever it requires for you to keep good posture and make sure you're just moving side to side, not twisting, then your hand position doesn't really make much difference as long as you maintain that. What you don't want to do also is sway your hips side to side. So the hip stays fixed and it just happens from the thoracic spine and in the obliques. So we just squeeze and I feel this side stretch, the side I'm leaning away from. Back to the center. And down. But I just switch, 1, 2, and as I say, you're looking to do around 10 each side. Once you've got that one, again, soft knees now, keep the hips fixed, and this time we're going to go into rotations. Now, the hips will move a tiny bit, but you want to keep them as fixed as you can. You don't want to get this full rotation just yet, that one's going to come next. So initially, we're here, and I just twist like so, and try to keep my hips as fixed as I can. And sometimes it helps to try and look behind you just to increase that range of motion. And again, once you've done 10, you'll move on to the next one. Now you're allowed to do a full pivot. So from here, just twist right the way through. And as I say, if you look behind you as you do it, you'll find that you can get much further rotation. Than if I remain looking ahead, for instance. So I just twist, 2, like so. And again, I might be doing 10 each side. So from here, we're now going to move into the hips. So initially, we're just going to do forward and back. So we're going to do tip and push through. Now with these, a bit, bit easier if I show you on the side. When you tip, you don't want the movement to come from the spine, it's from the hips. So what we do is I push back, as if I'm doing a Romanian deadlift, and then from here, my hips drive forward, squeeze your bum, and you just push your hips forward slightly. Keep your chest up, and again, we don't want it to come from the low back. It's all from the hips. So you tip, push through, tip, push through, and each time you tip, make sure you keep this lumbar curve, chest up nice and high, chin tucked, and through. Tip, Like so. And again, you want about 10 of those. Once you've completed that, we're gonna continue with the hips. Now we're gonna do hip circles. And initially we're gonna go out to in, and then we go in to out. So initially, for instance, if I go out, I bring my leg across and in, and then as I step down, I shift. Hip comes up and over, and shift. So you just follow the movement, nice big circles in the hips, like so. And again, you're looking for around 10 on each side, like so. Once you've done out to in, you want to go in to out. This one's kind of the same, big circle, step, big circle, step. So wherever your foot goes, that's the direction you're then moving. Same when I go out to in, I come around, and as my foot comes down and out, I just follow the foot. Basically, that way you get good flow going. So it was in, across, and like so. That's your in to out. And again, you want to do 10 on each side. So now that we've gone through from the neck into the shoulder, the waist, the hips, now we're going to get into the press-up position. Which will now help warm the core up some more and also prepare the shoulder girdle for loading once we're obviously standing and got some weight in our hands. So you come down into this position. Now what you want to make sure is that you're not like this if you can help it. In the early stages, if needed, you can be on the knees just until you get used to the movement, but ideally you'll be here. Now With these next ones, you're gonna have to do quite a bit of stability work where you're coming off with single hand and stuff. And it helps if your stance, your feet, are around shoulder width. If they're any narrower, it becomes even more challenging, which is good. So if you can do it that way, that's fine. But if in the early stages you find it too difficult and your hips are swaying all over the place or your bum is sticking in the air, then what you're going to want to do is take a wider stance in the feet. So for instance, once I'm in this position, if I find it difficult to stabilise when I'm on one hand, what I will do is just go wider. That way hopefully I can keep a good base because the first one we're going to do is chest touches here. So as I said, if I find it difficult, I widen my stance. If I'm okay and I can do this at around shoulder width, then I will. And again, You just want to stay in position, hands stay directly underneath the shoulders, and what you don't want is swaying and movement through the torso and the hips, or to end up like this. So we're here, chin is tucked, and I touch. And again, I just want that 10 each side to help warm things up. Once I've completed these, we then go into retractions. So it's a full arm retraction, I squeeze my shoulder blade and same here, like so. Just going to shift slightly so I don't hit the wall. So, like so. And again, we don't want all this swaying taking place or the bum popping up in the air. Now the next one is a little bit more challenging, particularly if you find press-ups quite difficult. So you may want to do this one initially without the press-up. But if you can do it with the press-up, great, you'll get a better warm-up. So from here, what you ideally want to do, we're going to go press-up into the full body T. So you come down, up, and as I press up, I turn. Hand turns right over my, my head and my gaze follows the hand, and then I twist back into the centre. Another press-up. Down, here, turn. And again, you don't want the hips up or sagging down. Just try to keep your body— as you go through, you want to make sure your body's nice and straight. So if the press-up is too difficult, you literally just turn, follow the hand, like so. But if you can do the press-up, as I said, you go down, then turn. Allow your feet to lay on the side. And then like so. And again, you want 10 of those each side. It's not a problem if you can't do the press-up, but obviously if you can, it just helps work and warm up the pec musculature a bit more. So then if you've got any pressing movements or pushing movements, then obviously those muscles are going to be better prepped for that. So once you've done those, you've got your chest touches, Then from that, you go to the retractions. So you want to squeeze the shoulder blade across towards the spine each time. Then once you finish that, press up with the full body too. Get that rotation. Now we're going to get the legs involved a bit. First, we're going to do some single leg exercises. So we're in that same position, the press-up position. We're going to go into mountain climbers and then groiners, which are the single leg ones. So from here, with a mountain climber, You want the knee inside the elbow. And ideally, when these legs switch, they'll happen together, but you won't get too much bouncing. What you don't want to do is this. You don't want this big bounce if you can help it. Instead, you hold solid and it's predominantly just the leg. You'll get a little bit of movement, but ideally you don't want that bounce in the hips every time. Because that way you're not as stable. You want to stay as stable as you can, keep the core engaged, and you work it through the hips. It's not shoulder exercise so much, it's more about stability in the shoulder and just maintaining your position. So as I say, that's the first one, that's your mountain climbers. That stays inside the elbow. Then we go into groiners, which is exactly the same, but we take the knee outside the elbow. So from here, switch to— and again, you don't want this happening if you can help it. So they're not too difficult, those ones, once you get used to them. The hardest part is just holding that position and not having the balance go off. So 10 each, 2 of those. So that's 10 on each side of the mountain climbers, 10 on each side of the groiners. Now we're going to go into squat thrusts. Followed by froggers. Now again, they're pretty much the same exercise, but one is with the knees inside the elbows and the other with the knee outside. So from here, same position, but this time once I jump in, both feet come through and I wanna land here, knees again inside the elbows, and then from this position I extend and back out. And again, we don't want this big movement through the hips. So just tuck like so. And again, you want 10. Then we go into knees outside. So this time the knee is outside my elbow instead of inside. And same thing, you want 10 of those. Pull back, tuck. Like so, and just avoid this happening. Big movement and sway where you've got lots of movement through the shoulder and through the head. You don't want the head tipping back and forth. So again, 10 each with the knees inside and then with the knees outside. Once you've completed that, one exercise left, which is just simply a reverse lunge. With the knee drive. Now with this one, again, you want to keep good posture and you want the hands to move opposite to the legs. So for instance, if my right leg goes backwards, my right hand comes forward. So I drop back, so it's as if I'm in like a sprinter stance. So I drop here, and now as I drive off this heel and up onto the toe, I drive this knee up and through and and forwards, and my hands switch at the same time. So from here, I come through and up, drop back like so. Good. So just show you that from the side. Once I'm in position, chest is up, I drop in. Now I drive off this leg, this knee comes up and through, and ideally I come up on the toe of the standing leg. So just here, squeeze. And each time I go up, you want to squeeze the glute on the standing leg. So I just take my position, drive like so, down, up. Keep the chest up, squeeze. Once you've done 10 on that side, you switch, down, drive through. Like so. And again, do your 10. Once you finish that, you should be fully warmed up and then ready to start loading yourself with weights, medicine balls, dumbbells, kettlebells, whatever it may be for your program that you're about to perform. So if you have any questions, of course, feel free to go onto our blog, post your comments or your questions below, and of course, I will get back to you as soon as I can. Thanks for watching, guys. See you next time. Did you like this video? If so, why not subscribe to our channel? And feel free to share this video with all of your friends and family, or anybody that you feel may benefit. And if you'd like access to exclusive health and/or performance advice that are only shared via email, get yourselves over to www.titanhealth.com and sign up for email updates.
More from Tyrone

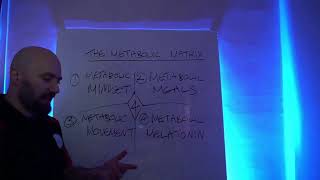



Boost Your Metabolism, Burn More Fat and Reduce Cravings: The ONE Simple Dietary Tweak