How To Setup Configurable Payroll | So Much More Flexibility!

Richard Kohberger shows how to set up ServiceTitan's Configurable Payroll in ST54, which lets you create multiple pay profiles and assign them to individual technicians. You can add performance bonuses, sales commissions, TGL bonuses, sliding scales, and technician split rates, then test profiles against past invoices before running payroll.
Questions this video answers
August 13, 2021
The Works package
Tech Generated Lead
No — a single technician can only be assigned to one profile at a time.
The Master Pay File (Payroll Detail report is no longer accessible)
What's going on everybody? It's Richard Kohberger here, the blue collar nerd. And in this video I'm going to be showing you a game changing new feature that is coming out in St 54 called Configurable Payroll. This feature has been in beta for a while, but it is finally coming out with ST54. And basically, configurable Payroll gives you a ton more flexibility with how you pay in Servicetitan. So recently I did make a video about the core payroll features that are in Servicetitan. You can check that video out in the corner of the screen here. I'll also put a link in the description down below. And while those core payroll features do cover a lot of people's pay structures, it doesn't cover everybody's. It's not all that flexible. And that is where Configurable Payroll comes in. Configurable Payroll can accommodate for a lot of different pay structures, including paying tax based on tech generated leads that they turn over. Paying tax on sold hours versus actual hours elapsed, paying on a sliding scale, paying differently depending on job type or business unit, and a whole lot more. Now before we jump into this, one thing to know is that this feature is exclusive to the Works package. So Service Titan is sold in three packages. Starter, Essentials and the Works. You'll need the Works to utilize this feature. Another thing I just want to warn you, going in Configurable Payroll is a lot more flexible. But as a wise man once said, with greater flexibility comes greater complexity. Uncle Ben, rest in peace. So yes, there are a lot of moving parts in this. And the more complex your pay structure is, the more complex the setup is going to be. But with all that said, let's jump in. So under Settings and then Payroll, you will notice this new section, Configurable Payroll. Your global settings for things like timesheet codes and how you pay for idle time, that still lives up here. But we also have now Configurable Payroll. And under there we have profiles and custom payroll fields. We're going to start with profiles. So by default you will have one pay profile just called default. That profile is automatically generated for you. And every technician in that profile is just going to continue getting paid the way that you had payroll set up by before Configurable Payroll. Now let's create a new profile. So on the first page here we need to name our profile, give it a description that is optional and pick a color. The color is just to help you quickly pick it out from the settings. Page if you have a lot of profiles. So we will call this the service tech profile. Now the next page is where we assign all of the technicians to this profile. And keep in mind, a single technician can only be assigned to one profile at a time. So I called this my service tech profile. So I'll pick all of the people in the service department and then I will click next. And here is the page where I configure my pay rules. So I'll click Add pay rule here and I get this dropdown list of options. Now, performance bonus that is paid to the technicians assigned to the job and who are performing the work. You could also call this a commission, but it's not a sales commission, it's a commission paid to the people performing the work. So like for example, if you wanted to pay your installers a percentage of the ticket, that would be set up as a performance bonus. Now sales commission on invoice that is paid to the person marked as the sold buy on the invoice. So the person who converted the estimate TGL turnover bonus paid on installation. So tgl, that stands for tech generated lead. So this is if you wanted to pay technicians for turning leads over to like a salesperson, but, but with this one, they will only get paid that bonus once that job actually gets installed. So if they turn over a lead but it doesn't sell or it falls through before the job actually starts, the technician wouldn't get paid. The bonus underneath that is TGL turnover bonus paid when the lead is set. So with that one, the tech gets paid to turn over a lead whether or not it actually sells, whether or not it actually gets installed. So for example, like if you wanted to pay your techs, whatever, a hundred bucks per lead just to encourage lead turnover and you don't care if the lead actually converts, you're just encouraging your techs to be turning them over over, then you would want to use that one. Next is sales commission on invoice item. So this is a spiff or commission paid to the technician who is marked as the sold by on a particular invoice item. By default, that's going to be the person who originally added that item to the invoice, but it is editable from the office side. So this one is going to look at the item bonus or the item commission that you have set on the individual like service level and it's going to pay that to the technician who is marked as the sold buy on that item. So usually the technician who made the invoice not necessarily the technician who puts it in. That could be a different technician. And then item bonus is a similar concept. It's going to be looking at the flat dollar amount or the percentage commission that you set on a particular price book item. Except this one is paid to whoever performs the work. So this one is for the person who sold the item. This one is for the person who actually installed the item. And that differs from these top two because these are on the item level, individual invoice items, whereas these are on the invoice level, the entire invoice. Okay, so let's go ahead and let's make a performance bonus rule. Now, the first option we get is to set a job filter. So by default this rule will apply to every single job. But it doesn't have to. We can set filters so that this rule only applies to certain types of jobs and these are the options that we have. So let's just, for example, choose a invoice subtotal. So I could make this rule only apply to jobs whose invoice subtotal is equal to, not equal to, less than, less than, or equal to, greater than, greater than, or equal to some sort of dollar amount. And if I choose dollar amount set here, then I just get this text box where I can type in what that dollar amount is going to be. So maybe I only wanted this rule to apply to invoices where the subtotal is greater than or equal to, let's say $1,000. Now I can do that same thing with technician split rate, invoice discount, invoice margin. I can also only apply it to certain business units and I can tell it which business unit to look at, the invoices business unit or the technicians business unit. I can apply it to certain job types and I can even only apply it to jobs that came in from certain campaigns. And this is where you really start to see just how much more flexible this is the than the core payroll features. Now, something to note here. I have invoice discount as an option. This option is only going to work if I have discounts and fees enabled in my account. That is a gated feature that you would have to ask your CSM about. If that feature isn't enabled, then invoice discount isn't going to do anything for us. So for this example, I said that this was my service tech pay profile. So I'm going to filter by the invoices business unit. So we'll say that this is across the trades, but I want to make sure that this rule only applies to invoices that are in the service business unit in any of my trades. So electrical service, H Vac service and plumbing service. So basically what I've just done is I've given myself insurance that if one of my service technicians gets assigned one day for whatever reason to a non service type job, maybe I throw them on an install. Service titan is not going to try to pay them for that job the same way that it would for a service job. Because even though that technician is assigned to this service pay profile, I am filtering it to only include service invoices. And I just noticed that H Vac, I accidentally picked sales. So let's fix that H Vac service. There we go. Now if I wanted to, I could include additional filters so I could say add filter and I don't know, maybe I wanted to filter on discount where the discount is less than or equal to 5%. I don't know. Just an example. So you'll notice that now these filters are connected with an N. So now the job has to meet both of these conditions. The invoice has to be in one of these three business units and the invoice discount has to be less than or equal to 5%. Okay, then once I'm happy with that, I will click continue to pay calculation and it's going to ask me if I want to take a flat dollar amount or take a percentage. Now this part could be a little bit confusing. What we're setting here is the base number that we want service titan to look at to then calculate the pay off of. So let's say I wanted to set this rule so that it pays my technicians 5% of the invoice subtotal. I would actually pick flat dollar amount here, not percentage. And that's the part that might be a little counterintuitive before you fully understand. So flat dollar amount and invoice subtotal or commissionable base. And I'm going to jump ahead a little bit here, but I'm going to go back. I just need to help wrap your head around this. So I'm going to hit apply more and then I get this, multiply by field. And then here is where I would pick percentage. Let's say set here. That's going to give me a text box to type it in. And we would say 5%. So what I've done here is I've told it in this first box what to look at. Look at the flat dollar amount of the invoice subtotal and then multiply that number by 5%. Okay, let me delete this and let's back up for just a second. So I chose flat dollar amount and then I had a choice between invoice subtotal and commissionable base. So what's the difference between those? Invoice subtotal is always going to just look at exactly that, the invoice subtotal. Meaning if you choose that, then it doesn't care whether the items on that invoice are marked commissionable or not. It doesn't care if you have materials on that job where you've checked off that box that says deduct as job cost. It doesn't care if this job has a purchase order where you have selected that that PO should impact the technician's payroll. None of that will matter. It's just going to look at the invoice subtotal. If you want all that stuff to matter, then you would want to choose commissionable base. And once you do that, it allows you to pick which of these it should pay attention to. So pay attention to materials that I've said deduct as job cost. Pay attention to purchase orders where I've said that this purchase order should impact technician payroll. Pay attention to whether or not the item on the invoice is actually marked commissionable, whether I want to deduct labor costs or like hourly rate. Okay, so now I'm going to redo that 5% part. So multiply it by a percentage set here, 5%. Okay. Then I'm going to choose continue to pay on date. And there I have two options, payroll date or last payment date. So if I choose payroll date, then that means that the technician is going to get assigned this payment as soon as the invoice is posted, whereas last payment date, that's going to assign the payment to the technician as soon as the balance on the invoice is brought to zero. So basically, if I don't want the technician to get paid until the customer is all paid up and doesn't owe anything else on the invoice, I would choose last payment date. Now, before I hit save payroll, I do have an option up here to test this profile. So basically this allows me to take the profile that I've just made and, and apply it to past invoices to make sure that it's doing what I expect it to do. So I would choose my technicians here. I would choose those same service technicians that I assigned to the profile. This is a sample account. I don't remember their names. So I'm just going to pick random Ones I would choose the from and to date here I'd probably want to pick like an actual pay period. And then I would hit run report. Again. I'm in a sample account, so I don't really have any data. So this isn't going to populate. But this just allows you to do some trial and error in a safe and controlled manner. So there's my performance bonus. Now, set up for this service tech pay profile. But let's add another rule. Let's. Let's add a second one. Now, let's say we wanted to make it so that anytime a service tech turns a lead over to a salesperson, we want that service tech to get a 3% commission on the eventual install once it actually goes in. So for that scenario, we would choose TGL turnover bonus paid on installation. Again, we could set job filters. I'm not going to apply any filters for this example. Continue to pay calculation. I'm going to take the flat dollar amount of the invoice subtotal. And again, invoice subtotal. That's going to ignore those granular settings of are there materials that should be deducted? Are there purchase orders that should be deducted? All of that. But that's what I'm going to pick for this example. Invoice subtotal. And then I'm going to say multiply by percentage. Set here 3%. All right, so let's actually call this done. As far as our service technician pay profile, I'm going to hit next and I'm going to hit save. I get this overview screen and I'm going to hit finish. Okay, now let's make a sales profile. So again, create new profile. Profile name sales profile. Next. Now I'm going to include my technicians that are in the sales division. Next, add a pay rule. Now, a salesperson typically isn't performing the work, they're only selling the work. And so for that reason, we're really only interested in two options here, either sales commission on the invoice or sales commission on individual invoice item. For this example, I'm going to say sales commission on invoice. Again, we can add a job filter if we want to. So let's say for this example that we want this rule only to apply if the salesperson has given a 3% discount or less. And if they give more than 3% discount, then we'll set up a separate rule for that. Theoretically, I'm not going to actually set up the second rule, but that's the idea. So we would say Add filter, filter on invoice discount, which again, this option only works if we have discounts and fees enabled on our account. And we want that to be less than or equal to a percentage that I will set here and 3%. Great. Let's continue to the pay calculation. Take. So again, this is the number that we want Service Titan looking at when it starts doing the calculation. So this is going to be based off of the flat dollar amount of the either invoice subtotal or commissionable base. We should already understand the difference between those. I'm going to say invoice subtotal for this example and continue. And then I'm going to hit apply more multiply. By now, we could either do a flat percentage here, but some people like to pay their salespeople on like a sliding scale. So for this example, let's do that. It's a little bit more complicated. Let's say percent on range. Again, I'm going to set it here and then I'm able to start inputting my ranges. So let's say anywhere from $0 up to $3,000, I want to pay 5%. Add a new range, it automatically puts in 3,000 as the bottom of my new range. Maybe between 3,000 and 5,000. We're going to do 6% and we'll call this third range our final range. Now, whatever your last range is, I recommend setting the top of that range to being fully maxed out. As in like just hit nine in that fields until it won't let you hit nine anymore. That way you just, you know for sure you've got everything covered. There's no way anything is going to fall outside of this. And then maybe we'll set that top range to 8%. Now, we're not quite done here. We still need to hit apply more. We still need that magical multiply by step. So I'm going to say multiply by the flat dollar amount of the invoice subtotal. Now, I know that's a little bit confusing because we did already tell it to take the flat dollar amount of the invoice subtotal up here, but we do have to remind it down here. So basically the logic of this is we're telling it. Okay, look at the invoice subtotal. It's like, okay, I've got that. Okay, now use that invoice subtotal and reference this chart to figure out what percentage we're supposed to hit. And it goes. Okay. Okay, let's say the Invoice subtotal was $5001. So now it knows it needs to fall into the 8% category. So now it's got the 8% but it doesn't know what to do with that. So we have to tell it. Okay, now take that 8% and multiply it by the invoice subtotal. Again, pay on. So do we want to withhold payment until this install is completely paid for or not? If we do, that would be last payment date and we'll call that done for our sales profile. Okay, we've got a service tech profile, we've got a sales profile. Let's set up an installer profile. So we're going to add our first pay rule here and let's make it a performance bonus. Installers are typically mainly performing work they're not so much doing selling. Although some people do have their installers do upsells and you can account for that here. But let's start with the performance bonus since that's usually the meat and potatoes. Actually I should clarify here. The two most common ways to pay installers is some sort of percentage based off of the ticket or piecemeal pay where you're paying individually based on the items that they're actually installing. So performance bonus, that's the one you're going to want to go with if you're planning on paying a percentage off of the ticket. But let me delete this real quick. If we were trying to pay piecemeal, then item bonus would be the option for us. Okay, let me go back. I am going to pay percentage based for this example. So performance bonus again we could set a job filter. Not going to for this particular example, continue to pay calculation. We're going to take the flat dollar amount of let's call it commissionable base this time and let's say we're just going to take out any non commissionable items. Okay, Apply more, multiply by let's say a percentage set here and maybe our installers total get 10%. Now I say total because typically an install team is a team. It's more than just one person. So we probably need to account for splits here that it's 10% total. But that 10% gets split between say two people. So if that's the case we want to hit apply more, multiply by again percentage again but this time we're going to select technician split rate. So if these installers were installing a $10,000 job, it's going to take 10% of that. That's $1,000. And now let's say we're splitting that 60, 40 between the lead installer and the assistant installer. The split rates, by the way, are set the same way as they were before you do it per job. So we've got our thousand dollars. Now it's going to multiply it by our technician split rate, which we have set as 6040. So that's going to apply $600 to the lead and $400 to the assist. Again, we could test it up here to make sure it's working the way we want, but I don't have any data in the sample account, so I'm going to call that finished. Okay, so we've covered a few different pay structure scenarios here. Let's do another. Let's say you wanted to pay your technicians based on sold hours. Not actual hours elapsed on the job, but sold hours, which are set up on the service level in the price book. Okay, so let's walk through this one. Let's create a new pay profile. We'll call this tech sold hours, assign some tax, and add our first payroll. Now we're setting these sold hours on the service item level. So we're going to set up an item bonus. As always, I have the option to set some filters, and then I can take the flat dollar amount percentage or sold hours. I am course going to choose sold hours. Then I have the second dropdown. So if I've already got my sold hours set up in my price book, then I would choose this top option, invoice item, sold hours. If I choose set on invoice item, it's going to allow me to export my price book and set those sold hours from there. I know that's a little confusing, but if you've already got your sold hours set up, then the top option is what you want. All right, then I'm going to hit apply more, multiply by and if I'm trying to pay like an hourly rate based on these sold hours, then I'm going to pick flat amount. Now, so far, I've mostly been picking set here, which just gives me a text box. And I can type in the dollar amount or the percent or whatever it is, but maybe not all of my technicians get the same hourly rate per sold hour. Well, I have two options on how I can handle that. I can use the set here option and then make separate profiles for separate technicians who are paid those different hourly rates. But that's kind of cumbersome. My other option is I could choose set on technician, and. And that is going to make A custom payroll field on the technician profile, meaning I can go into the technician settings, or I can import from a spreadsheet to set every technician's individual hourly rate for this pay profile. For this example, that is what I'm going to do. So set on technician and then it gives me this dropdown here where I can upload a CSV file and I can click this link here to download the template. From there, I could import all of the technician's hourly rates and import it. So for this example, let's say these people are getting 15, and from here down, maybe they're getting 25. I would then save my edited template, come back here, choose file, give that a name, and hit upload. Okay, so now that's good to go. Just need to set my pay on date, and we are good to go. Okay, now if we go into a technician's profile, let's look at my man Chris Hunter here. Under the payroll tab, you'll notice he has that tech sold hours field. That is the custom field that we just added. Now, the default hourly rate field that's always been there is still there, but that's not the field that that pay profile is looking at. It's looking at this new one. So if we wanted to change that in the future, we could either change it from that template file or we could change it right here. You'll also notice back in payroll, if we click into here this custom payroll fields, we now have one. We have techsold hours and this is where we could choose to import a new file. Or we could also deactivate that field from here as well. Okay, you guys want to do one more? I'm going to do one more bonus round. This is around TGls. Again, tech generated leads. At the beginning of the video, I briefly mentioned paying just a flat dollar amount for a tgl. So a tech turns over a lead, you give them 100 bucks. It doesn't matter if the job sells. It doesn't matter how much the job sells for 100 bucks for the lead. Now, on the TGL example that we already did, we were paying on a percentage based on the eventual install. We weren't paying just a flat dollar amount. So how do you do that? Well, it's actually kind of tricky right now. This will likely be simplified in the future, but for now, here's how you'd have to do it. So for this example, we're going to choose TGL turnover bonus paid when lead is set. Because for this example, we don't care if the job actually gets sold or goes in. We're basically just encouraging the technician to turn over leads by saying, hey, every time you do turn one over, we're going to give you 100 bucks. Job Filter options. As always, we're going to go ahead and continue to pay calculation. So now we have to choose whether to look at the flat dollar amount or the percentage of the invoice, subtotal or commissionable base. And this is where you might start scratching your head, because none of that matters. For this example, we're paying 100 bucks no matter what. And yes, that's true. So we have to get a little bit tricky. So I'm going to say flat amount of the invoice subtotal, I'm going to say apply more, and I'm going to say multiply by dollar on range and I'm going to say set here. So this is just like how we set up that sales profile, except over there we did it based on percentage. And here we're doing a flat amount. And we only need one range that ranges from $0 to 999-9999. And the flat amount that we're paying is 100. So now with this set up, when the salesperson eventually goes out, whether they sell an invoice for $0 or for $100,000 or for $500,000, it's going to fall within this range. And so the technician who generated that lead is going to get a flat $100. So I have covered a few common pay structures here. I know that there's probably a lot of you watching this video feeling very lost and afraid because I didn't cover your pay structure. And the fact of the matter is, I can't cover every single possible pay structure. This video would be longer than the Snyder cut. But be not afraid, because there are other resources besides just this video. So there are videos in the academy, as well as a written onboarding guide and user guide, and I will link all of that in the description down below. Also, don't be afraid to mess around and use that test feature. You can just save a pay profile as a draft. So it's not like you're locked into making it live just because you started. And of course, if you really hit a wall, there's always support and there's always your csm. I should also point out that while configurable, payroll is way, way, way, way, way, way more flexible than the core payroll features, it's still not to the point where it can do everything under the sun, for example, if you want to pay out bonuses based on weekly revenue or monthly revenue, we don't have an answer for you there just yet. Configurable Payroll only pays per invoice but just like anything else in Servicetitan, Configurable Payroll will continue to evolve and improve over time. Some other very important things to know about Configurable Payroll Once you are on Configurable payroll, the Master Pay file will be the payroll report that you use. The Payroll Detail report will no longer be accessible. The Master Pay File report will also have a new Refresh Payroll Data button, so if you've made any payroll related changes elsewhere in Service Titan, you can click that to refresh and get updated data. You'll also only be able to make direct payroll adjustments. Anyways, that's all I got for today. Be sure to check out the description down below for additional resources on all of this. Be sure to hit like if you liked the video and found it valuable, be sure to subscribe to ServiceTitan's YouTube channel. If you haven't done that already, hit that bell icon so that YouTube notifies you anytime we upload a new video and leave me a comment down below and let me know what you think of Configurable Payroll. Your engagement through likes, comments and subscriber numbers are the ways in which my success is measured. Appreciate it. Peace.
More from Bill



Capturing the 80%: How SmartAC’s Gen-2 Targets Non-Membership Homeowners | Podcast Ep. 296
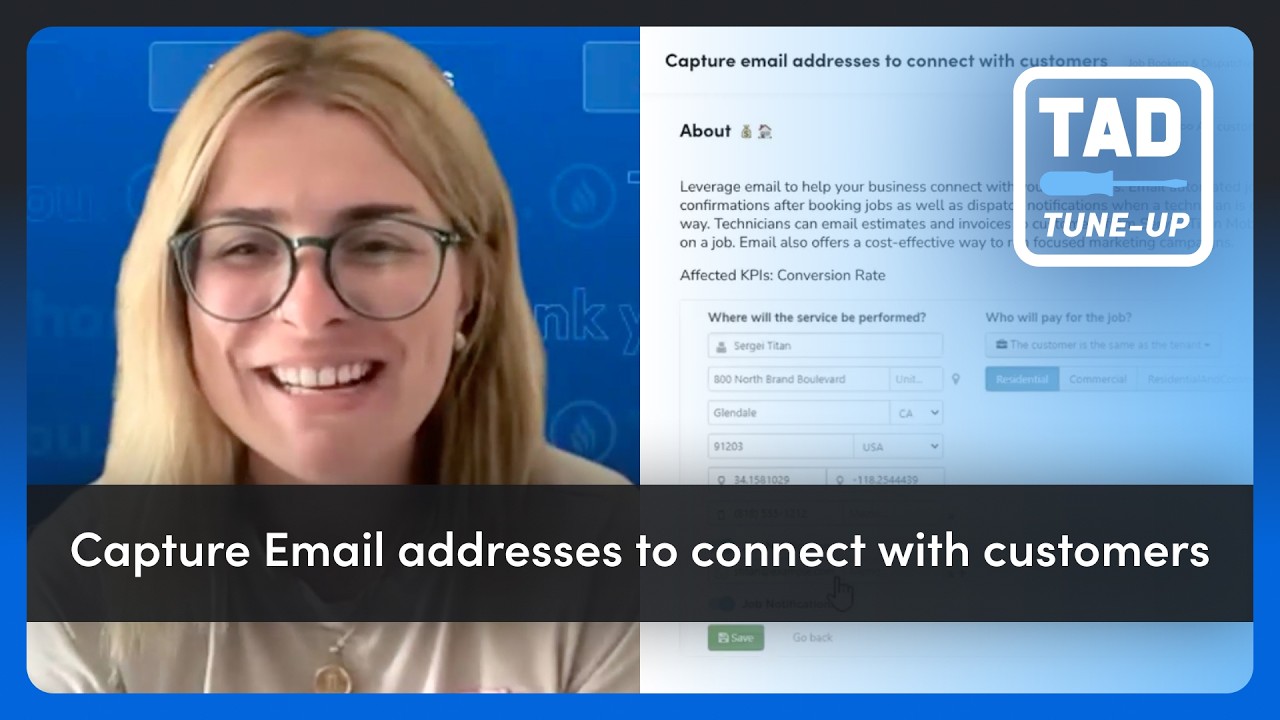
Build better customer data with every booking in ServiceTitan | TAD Tune-Up Series

The Biggest Change for Roofers Coming From Other Roofing Software to #ServiceTitan?