Release # 67 | Release Notes Overview Fall 2023

Richard Kohberger walks through ServiceTitan's Fall 2023 updates, including automatic recurring bills, AI-generated invoices and summaries, and new features like Reserve with Google booking and Fleet Pro GPS integration.
Questions this video answers
Go to Settings and search for "recurring bills" (manage templates there).
Daily, weekly, monthly, or annually.
Settings -> Invoicing -> Generative Content Rules.
Click "Save as current prompt" and toggle the "Generative invoice email" switch on.
What's going on, everybody? It's Richard Kohberger here, the blue collar nerd. So I know that last Release Notes video. I started the video off with this intro with this silly little song and a lot of people thought it was fun. I just want to make it clear stuff like that. It adds a lot of extra work to the video, alright? So it's gonna be a very occasional treat to do that sort of thing, you know. It's certainly not gonna happen twice in a row.
Everybody hop on the release notes boat we got some new features we got flamingo floats we got items that came from you Surfboats they're gonna make us cheer until we got sword floats We're. Everybody hop on the release notes boat we got some new features we got flamingo floats we're having a party on the release notes boat we're having a party on the release notes boat Everybody hop on the release notes BO we got some new features we got flamingo floats we're having a party on the release notes boat we're having a party on the release notes boat.
It's fall now. Okay, first on these release notes, under accounting we have a new feature as part of Servicetitan Payables, which is automatic recurring bills. So now instead of having to manually create every single non PO bill, you can now set up automatically recurring bills. To do that, go into settings and search for recurring bills and that's where you can set up and manage them. And you can have those bills reoccur daily, weekly, monthly or annually. And you also get the option to choose how many days in advance you want the bill to be created. Now back on the accounting screen, when you're looking at bills, the recurring bills will be marked with this circle arrow icon and you can hover over that for a quick link to the template where you can make any edits if you need to. Next, we have some new AI powered email automation. So if you were at Pantheon this year, then you've already seen a demo of this, but there are now two new places in Service Titan where you can use AI to help you generate email text. So when sending an invoice to a customer, you can use AI to generate the email body itself. And you can also use AI to generate or help clean up invoice summaries. So for example, if you were in the very, very rare scenario where a technician out in the field didn't write the most thorough and professional sounding invoice summary, then you could use AI to clean that up. So to set this up first, go to Settings, and then under invoicing you'll find generative content rules. And this is where we can give the AI some instructions on how we want our email bodies and our invoice summaries to sound. So when you get on the Settings page, you'll notice at the top we have two tabs, Invoice Email and Invoice Summary. So I'm going to start with the invoice email. So first we need to enter a prompt. This is just general instructions on what we want to tell the AI to do. So I'm going to click Enter prompt and it gives you some examples here of what kind of stuff you could put in. For this demonstration, I'm going to use the third example that Service Titan gives me here. But to be clear, you can type in whatever you want into this box. It doesn't have to be one of the examples that ServiceTitan provides, but here's my prompt. It says, generate a friendly reminder for any invoices that are not past due. For invoices that are 30 days past due or more, create a firm overdue payment reminder that clearly emphasizes the urgency of the situation. Okay, so I'm going to click next. Now, it gives me a summary of my prompt so I can double check and make sure that it's understanding what I'm trying to say properly. So I've got three bullets here and all of that looks good to me. So I'm just going to say done. Okay, now in this box down here, the prompt test settings. Here I can select what fields, what pieces of information I want the AI to always include in the email body. So by default, everything is checked off in here. Leaving everything checked though, is probably going to result in a pretty wordy email. So I'm going to uncheck a few things. I'm going to say we don't need the invoice summary included. We don't need the job summary. That's probably instructions for the technician anyway. I'm going to assume they know what city and state they're in. I don't think I need Invoice total and balance. I'll just do balance. All right, you get the idea. You can choose what you want to be included. Okay. And then we can come over here and click Generate Test email. Give it a quick second. And then here is the example based on this actual invoice number. So I can search for a specific invoice so I can see how it words things differently if they're past due versus not past Due. Now in my test environment here, I think all of the example customers are past due, so it's probably only going to generate me some firmer email bodies here. But over here this is what it gave me at a glance. It looks pretty good to me. But if we didn't like it, if we thought it was way off, then we could make some adjustments to our prompt and or what pieces of information we're asking it to include. But do keep in mind and I'll show you this later when I show you how to actually use this after it's set up. But you don't have to just use the text that it gives you word for word. You can make some edits. Okay, so once we're happy, very important we need to come up here. We need to say save as current prompt and then we need to toggle this switch up here. Generative invoice email. It's currently off, we need to toggle that on. And now that is ready to use. Next let's do our settings for the invoice summaries. Very similar situation here. So first we need to offer it a prompt. I'm just going to use the second example here that Service Titan provides. Just says create a refined bulleted summary highlighting the work that the technician provided. So down here under my test settings again, I can search for a specific invoice so that I can see how it would treat that specific invoice. I have this checkbox here whether or not I want to include the job summary as well. For me, I'm going to uncheck that. My job summary usually is like instructions for the technician, so I don't want that information being mixed in there. Now this example invoice that it's pulled already has a pretty clean bulleted list, so I'm going to give it a different example. Okay, so here's a little bit of a more realistic real world example of what a technician might give us. Cleaned condenser coil, blew out drain line. Changed filter and inspected electrical components on two units. Found upstair unit low on refrigerant. Recommend leak search. All right, you know, it gets the point across, but you know, so let's see how the AI cleans that up. I'm going to click generate test summary. And just like I asked in my prompt, it's giving me a bulleted list. We performed a thorough cleaning of the condenser coil. The drain line was cleared of any obstructions. The filter was replaced with a new one. Our team also inspected the electrical components on both Units. After the inspection, we discovered that the upstairs unit was low on refrigerant. In order to address this issue, we recommend conducting a leak search. And that sounds much more professional. Now, again, you can make some minor tweaks before you send this out, but that's a darn good starting place. I mean, I'd feel comfortable just sending that as is. Okay, so once we're happy with how that's turning out, same situation, we're going to click Save as current prompt and again, we need to toggle this switch here at the top to actually turn it on. Okay, so now we've got it set up. Let me show you how to actually use it day to day. So we'll start with the invoice email. So we're going to go to the accounting tab. I'm going to go to invoices, and then on this invoice right here, I'm going to say email invoice. And it still auto populates my default template body, but I have this new button here that says Generate email body with a little TI Titan Intelligence logo next to it. And if I click on that, then I get my AI generated email body that uses the prompt that we just set up. So of course I can read that over and any changes that I want to make, I'm free to type in here and make any edits that I want to make. Okay, so that's the invoice emails. Now let's do an invoice summary. So here's an invoice. It's got a very mediocre invoice summary, but I've got this new button that says enhance with ti. So I'm going to click on that. That gives me this fly out here so I can actually make edits on the fly to my prompt. Or I can choose to include the job summary, but what we set up in the settings is the default. And then I'm just going to click Generate summary and there we go. There's our new cleaner invoice summary. Then I would just click Save generated invoice summary. It's going to ask me if I'm sure. Yes, I am. Okay, Next, a business unit email address dynamic field has been added to email template settings. So when setting up email templates, you can now add the job's business unit email address as a placeholder for the invoice or estimate. Next, we have some improvements to the burden cost calculation. So previously when Service Titan was calculating burden cost, it used a pretty simple formula that was just done. Time minus arrived time, but sometimes something happens in between during that working time. For example, maybe a technician takes some sort of unpaid break. So that simple calculation has no way of accounting for things like that and could result in inflated burden costs. So now the paid working time is actually taken from the payroll module, so you're getting that true paid time. Okay, next, under Customer and location Records, we have some improvements to adding and editing customer and location records. So previously, if you were on the call booking screen and you clicked Add new customer, you would be taken here to this totally separate page. But now instead of that, you'll get this nice little fly out from the side of the screen. Now, everything that the form asks for is still the same. None of that has changed. It's just that it's a cleaner experience now and you don't have to navigate to a totally separate page. Also, when creating a new customer from this flyout, it'll have this label at the top of it with the phone number of the correlating call that you're currently on. Just to make things extra clear, in a situation where you have multiple calls, maybe you've got some people on hold or something like that. And by the way, this new flyout experience also carries over to whenever you're editing contacts on a customer or location page, you'll get a similar sort of flyout there too. Now, next, under Dispatch, technician, shifts can now be repeated for longer intervals. So previously, when you were creating a recurring technician shift, you were limited to the options of having it recur every up to six days or every up to four weeks. But now you can repeat shifts daily for up to every 31 days or weekly for up to every 52 weeks. All right, next, under Enterprise Hub. Now, this is only relevant to you if you use Enterprise Hub. Enterprise Hub is a centralized place where you can go and manage multiple companies in a situation where one entity owns multiple companies. But in Enterprise Hub, there is now a new section in User Management that allows you to add new roles, assign Enterprise Hub and Service Titan permissions to to that role, and duplicate and edit the role. And this helps you easily assign group permissions to users. Next, under Estimates, we have a new customer name field in Business Unit Settings. So now under Business Unit Settings, you're able to add the customer name to your templates for the acknowledgment, paragraph, authorization paragraph, and Estimate authorization paragraph. Now, at this point in the video, you might be thinking, boy, really light on y' all items this go around. I haven't seen a single one yet. Well, I'M about to make you eat those words that I put into your mouth. So this next note is a y' all item, but it's a very special y' all item. By that I mean it's a very big y' all item. So big, in fact, that I had to make a special purchase just for it. It's a y' all hat. So big I have to squat significantly to get it all in frame. Now, what you ask could warrant such a comically large hat? Well, you know how Service Titan has those back end configurations, also known as feature gates? Of course you do. And you know how it makes you feel like you don't know what's truly available to you? Like there's some secret menu somewhere that you're not aware of. And you know how sometimes you'll deal with a problem for months and months only to find out that there was some backend configuration that could have solved the problem for you immediately. You do, don't you? You know that frustration. It's okay, let it out. We've all been there. But now there is a new feature configuration screen in the product that you can access yourself. So to access this new screen, I keep bumping the mic with my hat. So to access this new screen you're going to go under settings and your account and then you should see this new feature configuration screen. Now, access to the screen is behind a permission, so anybody with the admin role should have the permission enabled automatically. But anybody else is going to be off by default and an admin can choose to enable it if they want to. And from here you can scroll to your heart's desire and browse the feature configurations that are available to you. Now, some of these feature configurations you can just toggle a switch and just like that, it's all on completely self service. It's done. However, some of them are a little higher risk. They have some more caveats. And so we still want somebody at ServiceTitan to put eyes on your account to make sure that that feature is not going to cause you any problems in those situations. Instead of the toggle switch, you'll have this request change button. Simply click on that and the request will be sent into ServiceTitan. So go in there, take a look around and have fun. Howdy, doll. Okay, next, under FinTech Finance, financing is now available estimates. So if you're using FinanceIT, then when you're sending out an estimate, you'll have this option to allow the customer to apply for financing through the online estimate. And if that's Toggled on. Then the customer will have this link that says get pre qualified. Then they can fill out all of their information and get pre qualified on their own. Okay, next, under identity and user management, there are now different role types in serviceitan. And again, this one's mainly relevant to people who use Enterprise Hub. So in employee settings, there's now this new column that shows labels for either Service Titan or Enterprise Hub. So for Enterprise Hub role types, the role is locked and it must be changed from Enterprise Hub. Permissions for users that were made through Enterprise Hub also must be edited in Enterprise Hub, and the same applies to role permission settings. If it's a role that was created in Enterprise Hub, it must be edited there. This gives Enterprise Hub users more control and helps prevent permissions from getting mismatched in the actual tenant versus Enterprise Hub. Just for clarity, we are talking about employees here. This does not apply to technicians. Okay, next, under job booking and contact experience, we've got a y' all item. So there have been multiple improvements made to the job booking experience when you're booking a job for the arrival windows, if you choose Custom arrival window, the up and down arrows now move the time in 15 minute increments versus 1 minute increments to make adjusting that time a little bit easier. And we have completely removed the configuration necessary to show custom fields on your call booking screen. So previously that was a configuration that you had to turn on, but it's now on by default for everybody. Next, keeping the hat on, we've got another y' all item. We've added some job booking guardrails to help ensure that your calls are being booked accurately. So first of all, when you were booking a job, the start date used to default to today's date, but that resulted in a lot of jobs being booked for today when they weren't supposed to be booked for today. So now instead of it defaulting to today's date, it just defaults to blank and you can select today if today is the appropriate day. Also, the call linking confirmation is now on by default for everybody. So a csr, maybe they have multiple tabs open with multiple customer or location records. If they are on the phone with a customer, then by default that call is going to be linked to whatever job that they book for that customer on the phone. But if for whatever reason a CSR clicks into a different tab with a different job page open, as soon as they click into that, the call is going to be linked to that job. And without a warning, CSRs were often not aware that this was happening and it caused a lot of confusion as to why the call was not linked to the appropriate job. So for a few releases now there's been this option in settings to enable a call linking confirmation so that CSRs are warned when their call is about to be linked to a different record. But you had to turn that setting on, which is no longer the case. That setting is on by default for everybody. And also in a recent release we added the ability to make the job summary field required, but there was a catch which is that if you pre populated questions into that job summary FIELD for the CSRs to answer, well then the system had no way of differentiating between that pre populated text and newly entered text. Meaning if you had pre populated questions in there, then the CSR could still completely ignore them and nothing would happen. Which is problematic because a lot of people do pre populate questions into that field. Long time BCN viewers might be familiar with the concept of the crippling 10%. We had one of those, but that gap is now closed. The system can differentiate between your pre populated text and new text that the CSR enters, meaning you're truly able to make that job summary field required even if you choose to pre populate some text into that field. And this is technically a separate note on the release notes, but I'm just going to roll it in. There is also now a warning message that appears when somebody selects a job start date that is in the past. So previously if you selected a job start date that was in the past, Service Titan just let you do that. It didn't bat an eye. But now you can still book a job in the past if you were legitimately trying to. But you'll get this warning banner letting you know that you are booking a job in the past. And all of those new features combined should result in a significant drop in the amount of mistakes made in the call booking process. Howdy doll. Okay, next, under Job planning and management, business units are now available in projects. So on the Project screen in the header you will see a new field where you can assign a business unit to that project. You also have an option available in Settings. It's under Settings, Operations, Project Settings and then you go to the Project Setup tab where you can choose to automatically assign a project to a business unit based on the first sold estimates. Business unit into Project That's a setting that's off by default, but you can enable it if you want. So because of this new feature, several things can happen now. For example, when you are using the search function to search for projects, you can now search based on business unit. And again, if you have chosen to assign a business unit to a project, then whenever you create or edit an invoice, purchase order, requisition return, payment, application, or job within that project, then the business units assigned to those must match that of the project. You can now also add Project Business unit as a column in the Work in progress, percentage of completion report and project job costing report. And by the way, any changes made to a project's business unit are recorded in the project's history screen. Next, we have an enhanced task section on Job, Customer and Project screens. So on any one of those three screens you'll see this new improved task section, which now includes visual status indicators to help you determine which tasks are still open, overdue and closed. Next, you can now filter purchase orders on the project screen. So when you're looking at the purchase orders table on the project screen, you now have filter options within the headers that allow you to filter by purchase order numbers, vendors, dates, status and job numbers. And also on the project screen, we have a new Quick Copy button next to the project name, and you can click on that to easily copy the project's name, location, and a link to the project to your system clipboard. Okay, next, under Leads Integrations, we have a new reserve with Google Booking integration. So by enabling this, your Google My Business profile will have this new Book Online button where customers can of course, Book online and then that comes through as a job booking request on your call booking screen. Now, there are two sort of versions of this. If you're using Scheduling Pro, then setting this up is going to be easier for you because you get to use that enhanced Scheduling Pro widget and you're just able to select one of those widgets that you've already set up. If you are not a Scheduling Pro user, you are still able to use this. It's open to everybody, but you have a little bit more to do in the setup process. But either way, to set this up you go to Settings Integrations and Marketing Integrations and then you should see a tile there for reserve with Google and you would click Configure to start the onboarding process. Okay, next, under memberships. Okay, so let's say you're using deferred revenue and you've got a customer. They're on your membership. And let's say this particular membership includes four recurring services per year. That means that each one of those recurring services is going to be assigned a 25% revenue split. Now, previously, if you deactivated one of those recurring services, then the remaining recurring services would still remain at a 25% revenue split, which is no longer correct because there's not four anymore, there's only three. So now, in a situation like that, the revenue splits are automatically updated. Okay, next, under Payroll and Timesheets, there is now a new GPS timekeeping integration with Fleet Pro. So typically, you know, the time that a technician is on the job is dictated by when they arrive and when they close out the job. But that, of course, relies on the technician doing that accurately. So now, if you have Fleet Pro, then in the payroll dashboard, any discrepancies between the technician's recorded time and the GPS data will be highlighted for you. And you can view those discrepancies and choose to automatically correct some or all of them. There are some settings for this, so if you go to Settings and Payroll, you can choose to turn the feature completely off if you want to. It is on by default. And you are also able to set your discrepancy thresholds there. So maybe you want things really accurate. And so you want your threshold to be like five minutes. So any discrepancy five minutes or greater, that's going to get highlighted. Or maybe that's a bit much for you. You want to set it to more like 15 minutes. In any case, you have those options there. All right, next, under price book, another y' all item, you can now put proposal templates into categories. Ooh, I'm really excited about this one. Proposal templates are a really powerful feature that when I look at the statistics of how many of you are actually using them, it makes me sad. Now, one of the biggest complaints that we had with proposal templates is that previously they were all just put into one big list. So if you had 50 of them, then your technician or your office person had to scroll through all 50 of those to find the right one. Same thing if you had 100. Same thing if you had 500. It was one long list. But now that's no longer the case. You can now assign proposal templates to categories in your price book. So to do this, first of all, we're going to go to our price and pull up our proposal templates. We're going to click View and edit details on a proposal template, and then we're going to click view and edit details again. And there we're able to choose a category for this proposal template. Once those are assigned, proposal templates can be filtered by category on both the Office and technician Sides. Super useful. There's that excuse out the window. Build some proposal templates, please. I've got a video that walks you through how to build them, and I'll put a link to that in the description down below. Howdy y'. All. Next, we have a new service agreements feature. Now, to be clear, this feature is geared towards service Titan users who do commercial work. I know that in the residential space, service agreement is synonymous with membership, is synonymous with PM or preventative maintenance. We're talking about commercial use cases here. So this feature allows you to create and use templates as a starting place for your service agreements. You're able to select both locations covered under a service agreement, as well as specific pieces of equipment at those locations. You're able to plan any maintenance visits covered under that agreement and see how many visits are left. You can set a billing schedule and payment terms for the agreement, and you can even view profitability details, including information like budget versus actuals and expense details. That way you know specifically how that service agreement is performing. I am considering making a separate video for like a full tutorial on how to use this. So if that's something that interests you, let me know in the comments down below. Okay? And finally, under Titan Advisor, there are now customizable plans in Titan Advisor that let you choose your own adventure. So now if you open up Titan Advisor, it's that rocket icon in the upper right hand corner. The top recommendation section is now replaced by the current plan section. So this is your action plan and you're able to customize it so you can go and drag things around to change the priority as well as drag features in or out. So you have that full list of features there on the right. It's also searchable, so if there's features that you want to include in your plan that aren't already in there, you can drag them in. Also in that available features tile, if you click that filter icon, you've got some really cool options for how you want to filter there. So you can filter by primary business goal, like drive revenue or increase efficiency. There's also a filter for quick wins, so things that have a really good like input, effort versus value ratio. And you can filter features by business sections, things like lead generation, job booking and dispatching, customer communications, et cetera. Really cool. I think this is going to be super helpful to put some structure in place to help everybody improve their Titan scores. Anyways, that's all I got for today. Be sure to hit like if you liked the video and found it valuable, be sure to subscribe to Surface Titan's YouTube channel if you haven't done that already, hit that bell icon so that YouTube notifies you. Anytime we upload a new video and leave me a comment down below, let me know what you thought about my song and the release, I guess. Please remember that your engagement through likes, comments and subscriber numbers are the ways I in which my success is measured. Appreciate it. Peace.
Notes Boat Everybody hop on the release Notes Boat. We got some new features. We got flamingo floats. We're having a.
More from Bill



Capturing the 80%: How SmartAC’s Gen-2 Targets Non-Membership Homeowners | Podcast Ep. 296
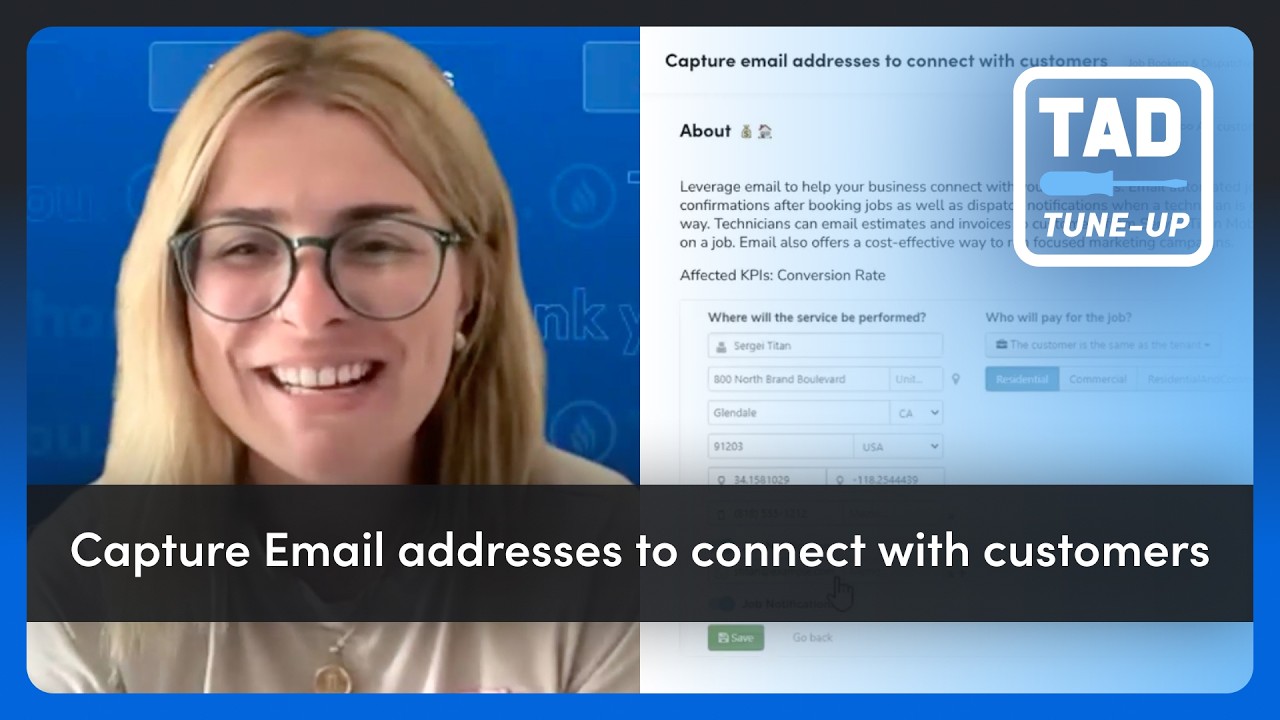
Build better customer data with every booking in ServiceTitan | TAD Tune-Up Series

The Biggest Change for Roofers Coming From Other Roofing Software to #ServiceTitan?