Release #69 | Release Notes Overview Spring 2024

ServiceTitan Release #69 brings major accounting updates including touchless journal entries and audit trails, plus UX improvements across dispatch, estimates, inventory, and integrations. The Accounting Reimagined initiative rolls out in stages to simplify workflows.
What's going on, everybody? It's Richard Kohberger here, the blue collar nerd. Can you feel it? The birds chirping, the bees buzzing, the clouds of pollen blanketing the south. It can only mean one thing. It's springtime. And as the seasons change, so must Service Titan. It's that time again. We've got some release notes to go over. Let's jump into it. All right, so a lot to talk about right here at the start of the release notes. So we're kicking off with some accounting related changes. You may have heard me talk about accounting reimagined in the past. That's an initiative. That is exactly what it sounds like. Reimagining the way that accounting works with ServiceTitan in order to make it more streamlined, less painful. So all of our accounting notes here are related to that initiative, but this one's a little weird. So all of these accounting related notes that I'm about to go over with you, they're all in the ST69 release notes. However, you might not necessarily get these features at the same time as you get the rest of the release. These features are being rolled out slowly over the next few months and they're being rolled out independently from the rest of the release. So if you get the release and you don't see these changes in your account, nothing's wrong. That's normal. I'll also say that I'm only going to give you a high level understanding of these changes here in this video. However, I will be making a separate fully accounting focused video to really dive into these changes down the road. Also, a couple of these notes are marked as y' all items, but I'm actually. I'm just gonna bust out the big hat. I'm gonna use the big hat for this one, if that's okay with everybody. I'm just gonna call this whole accounting section 1 big Y'. All because really, all of the asks that I see for accounting related stuff, sometimes they're for these granular little things. But really the spirit of all of them is just, let's just please make this easier. And that is the goal. With all of these changes, I will be occasionally bumping into the mic with my hat. Unavoidable. Sorry. Okay, so first of all, once these changes hit your account, you can. Service Titan will be able to generate journal entries. When you go to the accounting screen, there will be a new section called journal entries and you will be able to export those journal entries. That's beneficial one, because now accounting nerds can Export and do all kinds of fancy pivot table stuff, whatever they want to do with it over in Excel. But it also means that Service Titan will now be able to integrate with essentially any accounting platform, because journal entries are kind of this universal language and if we can export them, almost all other softwares have a way to import journal entries. So if you wanted to use a Software other than QuickBooks or Intact, you could technically do that. Now you would just export your journal entries out of Service Titan and then import them into whatever software you want. However, if you are using QuickBooks online or intact, then you'll be able to automatically export your journal entries into those softwares using the new touchless integration. And this is a really big deal because the touchless journal entry integration completely eliminates the need to batch post and export, and it also eliminates 99.9% of export errors. And it means that you will be able to edit transactions that have already been exported until the accounting period closes and everything stays up to date in near real time. So Service Titan is updating every two minutes and syncing over to QuickBooks online or intact. So if you make a change on the Service Titan side, then the longest it could take to see that reflected in the accounting software is two minutes. And when you're exporting journal entries instead of exporting documents, which is what the old way of doing things did, when you're exporting journal entries, only the GL account needs to match between ServiceTitan and the accounting software, meaning there's only one possible export error, the GL accounts don't match. Now just in case you're sweating right now, I wanna make it clear that nothing's going to change without action from you. So it's not like once these capabilities hit your account, boom, now your workflows have to change. You decide when you are ready for this. Okay, so I mentioned with the journal entries and the touchless integration, you'll be able to make edits to exported transactions until the accounting period closes. Which brings me to the next note, which is those accounting periods. So you'll be able to define on the Service Titan side when transactions can be created, edited or deleted. And if an accounting period closes but you still need to make changes for whatever reason, admins will have the ability to reopen closed accounting periods. Okay. And finally with these accounting changes, we have the accounting audit trail. Now this one in particular, this one's actually already in your account. So this was kind of pretty quietly released and now we're documenting it here in the St. 69 release notes. So if you go to the accounting screen, you'll see a tab that says Audit Trail there at the bottom. And this is where you can go to review and verify any changes that occur when a record's created, modified or deleted and serviced item. This will be especially handy when you're using the touchless integration, when things are able to be modified, even if they're exported, until the accounting period closes. And finally, I don't always cover early access stuff in these release notes videos because it's early access, so it's not out yet. However, there is one thing in the early access section of these, not that I think fits in pretty well here, which is the ability to send invoices to customers through sms. So that's currently in early access, meaning you have to request access to it. However, we are aiming to have it out to Everybody by the 69.3 release. So there's now these major and minor releases. Right? So it's worth noting that that is coming and I'll talk more about it in that separate accounting video that I mentioned earlier.
Howdy y'.
All.
All right, so that's all the big accounting reimagined stuff. We also have a minor accounting related improvement which is the ability to filter invoices by batch status and number. So in the invoices module which you access from the accounting screen, you can now filter invoices by batch status and you can search batches by batch number. All right, next, under Dispatch Pro, jobs booked with assigned technicians are no longer marked as technician specific at the time of booking. Basically, this means that if you choose to assign a technician at the time of booking a job, Dispatch Pro is still going to be allowed to move that job to a different technician by default fault. This is because if you're using adjustable capacity planning in order to sync with the like web booking widget or something like that, then it's necessary to assign a technician at the time of booking the call in order to keep capacity accurate. But previously that would prevent Dispatch Pro from doing its thing, but now that's no longer the case. Even if you assign a technician when booking the call, Dispatch Pro will still be able to move it unless you choose to mark it specifically as a technician specific job. Hi, Editing Richard here. I thought it was worth pointing out that this feature is controlled by a feature gate, and starting with ST69, that feature gate is going to be on by default. What that means is starting with ST69, it's going to start working the way I just described but if you don't like that new behavior, if you don't like the new way that it works, you can ask to have that feature gate turned off and it will revert back to the old behavior. All right, back to the video.
Bye.
Next, we have the ability to link tags to technician skills. So this is really handy. You can now set up associations between tags that you can place on jobs and technician skills. And any tags that you apply to job types, locations, or equipment are copied over to the job level at the time of booking. This is set up from the Dispatch Pro settings on page four. It's labeled 4.2. This is really handy because, okay, let's say you do some commercial work, but not all of your technicians carry ladders on their vans, but you service certain properties where a ladder is required in order to access the equipment. Well, you could create a ladder tag and then tie the ladder skill to that tag and then apply the ladder tag to any locations that require a ladder in order to access the equipment. And that way you won't accidentally send a technician with no ladder to a property that requires a ladder to do the work. Next, we have some enhancements to technician ranking. So, first of all, there's been some improvements to the calculation that goes behind how technicians are ranked in the first place. Plus, there's new settings that allow you to have some influence over how you want technicians to be ranked. And those settings can be adjusted in the new technician ranking tab of the Dispatch Pro settings. Plus, there's a new report template that gives you more insight into how your technicians are being ranked by Titan Intelligence. And if you want more details into all of that, or if you're just curious as to how Dispatch Pro works and how it's making its decisions, I've got a whole video on Dispatch Pro, which I'm releasing alongside this video. And I know that in the last release notes video, which was like, three months ago now, I said that the Dispatch Pro video was, like, already filmed and I was going to be releasing it any day, but I ended up holding off because these updates were coming and these updates made some of my video inaccurate. So I had to make some updates. But it's out now. It's released alongside this video. I'll put a link to it in the description box down below. Next, under estimates, we have another y' all item. So there is now a new notes section in Office and Mobile Estimates, meaning you can now leave internal notes on estimates. So on the office side, on the estimate screen, next to costing, there's A new tab called Notes. And that's where you can of course leave notes. And you're also able to pin notes to the top. And in mobile, on the estimate page there will be a new section called Notes and Tapping that will open any notes associated to that estimate. And text from the mobile side can add their own notes as well from that Add note button.
Howdy y'.
All.
Next, we have the ability to view and edit business units on on sold estimates. So you can now view and edit the business unit field when editing an unsold estimate. This helps to make sure that your estimates accurately reflect the business unit actually doing the work. Next, estimate Resend Events now show up in the opportunity and job history logs. So somewhat recently we gained the ability to automatically have Servicetitan resend estimates to customers if they haven't accepted or opened the estimate in X number of days. And now when Servicetitan does automatically resend those estimates, you'll be able to see where that happens under the Opportunity and job history logs or audit trails. Next, another y' all items. The task button has been renamed to Services in Estimates. So this is essentially addressing a naming inconsistency that existed within the product because in the price book there's these things that we refer to as services. But in certain places throughout the product, such as the estimate screen on the office side, services were referred to as tasks and that caused some unnecessary confusion. But now that's no longer the case. Services are now called services, no matter where you look. That's both internal and customer facing.
Howdy y'.
All.
Alright, next, under FinTech. FinTech stands for financial Technology. In case you didn't know, we have enhanced payment statuses. So before when somebody took a payment, it took a while, up to several minutes, for the payment status to update, meaning it took a while to know if the payment went through or not. But now the payment status updates almost instantly, so you know right away whether or not that payment went through. Next, under Forms and media, another y' all item. Oh yeah, I forgot this was in here. I might cry. This one. I've been asking for this one forever. We have the ability to add tags using conditional logic in forms. So you can now add tags to the job, the customer, the location, or the equipment records when specific responses are entered in forms. This is hugely useful and let me give you some examples to demonstrate why. I know for a fact that a bunch of you H Vac people out there have a question on your maintenance or tune up form that asks what the customer's filter Size is. And when a technician fills that out, what does it do? Kind of nothing. It just stays on that form. So the next technician that goes out still doesn't know what kind of filter they need to bring inside with them. They still have to go inside and check and then come back out and get the filter and go back in. But now you'll be able to say, okay, when a technician enters 16 by 25 by 1 as the filter size, add the 16 by 25 by 1 filter tag, and then the next technician that goes out can see the tag and know ahead of time what filter they need to bring inside with them, eliminating a trip back out to the van. So now a field that was previously kind of just there for fun, like it wasn't really helping anybody. Now it does something, I guess something other than inform the customer what their filter size is if they didn't know. Another use case might be for happy call. So you can have a happy call form that somebody in the office fills out and then you can have a question on that form that says, like, do we need to have a manager call back? And if it's no, then you can just add like a happy call completed tag that just says, hey, the happy call is done, everything's good. But if the answer is yes, we do need to have a manager callback, then you can have a different tag with a big red X and you can have an alert tied to that tag that goes to the manager to let them know, hey, something's wrong here. We've got a customer that's maybe upset and we need to reach out to them. That's just a couple of examples, but this, in my opinion, super, super valuable. I think I have footage from like before I worked here asking for this. I'd also like to be able to apply tags to either the customer or the location based on answers to specific questions within forms. For example, let's say you have a question that says does this client have a dog? And if the answer is yes, then we can put a tag that says bring dog treats to this house, for example.
Howdy, y'.
All.
Alright, next, under inventory we have the new inventory counts feature. So with inventory counts, you can monitor and reconcile your inventory records. Basically it helps you correct for drift that happens over time due to just accumulated human error. These counts are initiated from the office, but they can be done from the Inventory mobile app with the barcode scanning. This feature has been in beta for a while and I did actually talk about it in my video about the Inventory Mobile app. So if you want some more information, check out that video. I'll put a link in the description box down below. Next, we have the new units of measure feature. So with units of measure, you're able to specify, for example, okay, we're buying PVC when we buy one PVC stick. What does that mean? Well, we buy it in 20 foot sticks, for example, so you can specify one unit of measure is one 20 foot stick. So these units of measure are set up from the individual material page. So you'll go into the material and into inventory settings and then you should see this card for unit of measure, click into that and then you can hit Add unit in the upper right hand corner to add a new unit of measure. And you'll put in a unit description, quantity and base unit. So for our 20 foot PVC stick example, our base unit is foot and then we'll put in 20 because we buy it by the 20 foot stick and our description will be 20 foot stick. Then if you toggle on used for purchasing, you'll have options to select the primary vendor that you purchase this item from and a checkbox to choose to use this unit of measure as the default for that vendor. Now, I want to point out that your inventory still counts by the default measure. What I mean by that is, okay, let's say we moved one 20 foot stick of PVC out of our inventory. Your inventory is going to decrease by 20ft, so it's still counting by feet. But we moved one 20 foot stick, so it reduces by 20. Next, we have a new default warehouse setting under Business Unit. So basically you're now able to tie a default warehouse to specific business units so that when you're creating a purchase order, you don't have to select the warehouse manually. It will be automatically filled out based on the associated business unit. To do that, you're going to go to Settings, then Operations and Business units, hit Edit or Add, and you should see a single select dropdown where you can select the default warehouse. All right, next, under Job Booking and Contact experience, the dropdown limit has been increased for custom fields, so you can now include up to to 1,000 options for the custom fields dropdown. Next, under job planning and management, we have the new Project Portfolio, which is a project tracking tool. And I want to point out that this feature is tied to project tracking. So if you have project tracking, then you will get this. So in the main navigation bar at the far right, there's a button for projects that will take you here where you can search and Filter for specific projects. For example, you can look for show me all the projects that are currently in progress, and that will give you this nice project overview dashboard. And I want to point out that down here at this table at the bottom, you can edit the columns that are shown here. You do that with that Edit columns button right there. And then you can select which columns you want to show or not show. And once you do your searching and filtering and get that dashboard, if that's now a dashboard that you want to look at all the time, well then you're able to save that as a default view. So, for example, we're currently looking at projects that are in progress. So if I want to look at this all the time, then instead of having to set those filters every single time, I can just click up there where it says default view and then save as enter in a name for this view, click save and that will save it. So it's in that dropdown and you can select it quickly. But if this is the one that you want to open by default, whenever you navigate to this page, then you can click that little blue bookmarks icon and that makes it the default. As soon as you click on the page, that's what's going to open. Next, we have a new business unit toggle for projects. So you can now choose whether transactions are required to match a project's business unit or not using the new toggle on the Project Setup tab. Then we've got the new bid status for projects. So you can use the new bid status to track open bids and unsold estimates for projects. Next, project type categories have been added to projects, so if you go into settings, operations, and project types, you'll see some default project types, and you can also create your own custom ones. And you'll be able to assign this project type to specific projects. And when you create or edit a project type, you're able to choose which sections will show or not show for projects of that type. For example, let's say that for our install projects, we have no need for the task management section. It's just something that's kind of in the way creating clutter. Well, then in our install project type settings, we would click that little eyeball next to task management. And then anytime we assign the install project type to a project, that task management section will not show up. To assign a project type, you're going to go to the individual project page. And in the upper left hand corner you should see the option to assign the project type. And you can make on the fly changes from there as well. All right, next, under Leads Integrations, we have a new integration with Thumbtack, so you can now receive and manage online booking requests from Thumbtack directly in Serviceitan. If this is something you're interested in, there is a short process to set it up. And the knowledge base article with all the instructions on how to do that is linked in the Release notes document. Next, under PriceBook Pro we have a yawl item which is configurable services. So basically with PriceBook Pro we know that by default there are materials tied to your services to give you some sort of accurate costing. But those are just generic materials. They're not actually exactly what you're ordering from your vendor. Plus, one service might encompass various materials that you could potentially use. For example, maybe you have a task that's capacitor up to 20 microfarads. Okay, well it's up to that size 20 microfarad, but it could be different sizes. So configurable services solves that problem. So let me demonstrate how this works. So I'm in the price book here on the office side and I'm under materials and I'm looking at this specific material, a chrome two handle kitchen faucet. So I am going to view and edit and then I have this checkbox here to mark this as a configurable material. So what this means is, okay, this material that I'm on, this two handle chrome kitchen faucet, it's just a generic material material. It's not the exact thing that I might use on a particular job. So if I have this material marked as a configurable material, then anytime I have an estimate where I'm adding a service that this material is tied to, it's going to pop up with options that says, okay, this is a configurable material that's tied to this. So which sink faucet are you actually using? Choose, choose the correct faucet. So let me show you what that looks like. Let's hit save on this and then let's go and build an estimate and I'm going to add this service which I know has that configurable material tied to it. And when I add that service, I'm going to get this fly out asking me which material I want to use. So there's a quick add function here that's showing me some two handle chrome faucets. And I didn't have to do anything to tell it which ones to pull there that's done with Titan Intelligence. But If I'm looking for one that isn't showing up there in the quick add, I can just click over into find more items and from there I can search for any material that I want. Alternatively, I can click this button to skip this and just use the generic material. All right, next, under improvements, we have a new feature that is specific to commercial customers who are using customer specific pricing. So you can now enable two new savings comparisons to display on your invoices. Show my customer savings and show new customers potential savings. So to set this up, you're going to go into the specific CSP rule and then under advanced settings, you have the option to show customer savings. When you toggle that on, you'll have the choice to pick a specific rate sheet that you're comparing this customer's price to. So let's say we're editing the rule for our maintenance agreement rate sheet. Then you would want to compare that to the non maintenance agreement rate sheet. And from this page right under that, you also have the option to show new customer potential savings. Now, an important note here is this only works if you're using the new document template engine for your invoices. That's a recent feature. I talked about it in the last release Notes video. So if you're not familiar, then go back and check that out. But you have to be using the document template engine because there are certain merge tags that you need to put in to show these savings. So after you set up the rule, you'll go into your document template for your invoice and you'll add the merge tags in so that these potential savings will show up where you want them to. Ooh, I forgot to take the y' all hat off. That last thing, the savings comparisons thing, wasn't. Wasn't a y'.
All.
Just, just so we're clear, sometimes a guy just wants to wear a hat. Can I wear a hat? Can I wear a hat? Can a guy wear a hat anymore? Okay, but this next thing, this next thing is a y'.
All.
Now, Now I'm wearing the hat with purpose. We have a new setting to enable rounding and dynamic pricing. So in dynamic pricing, if you go and edit a rule on the last page where you're able to set up the modifiers, you'll have a new option for rounding. So you can choose to have it round up or down, and you can round to the nearest dollar, nearest $10 or nearest $100. Now, in order to apply this, you'll have to check off this checkbox saying that you understand that this rounding modifier will be applied after the member pricing, and that may result in the final discount that deviates slightly from the original set percentage discount. Basically this, when it's calculating, it's going to give the member their membership discount. Let's say you have it at 15%, but then after that it's going to apply the rounding. So if your discount is, say, 15%, okay, it's going to apply that. And let's say that that comes out to $119.10. Well, if you're setting us around up to the nearest dollar, then it's going to be $120, but that's not exactly 15% anymore. It's slightly deviated.
Howdy y'.
All.
Next, Visit templates are now available for commercial service agreements, and basically this allows you to templatize certain information related to visits so that you don't have to set it up individually every time you're setting up a new service agreement. For example, we can have a spring visit template and a fall visit template, and within that template we can set up things like a default visit window, a default job type, default cost estimations for labor and material costs, as well as default equipment types that this visit is going to be applied to. To set these up, you're going to go into Settings, Service agreement templates, and you'll see a new tab called Visit Templates. And then once you have some of those set up, when you're creating a new service agreement in step four, which is that scope of work step, you'll have those visit templates available to you. By the way, I have a whole video that walks you through exactly how to set up service agreements, and I'll link to that in the Description box down below. To be clear, though, we're talking about commercial service agreements, not memberships. Okay, next, under the improvement section, you can now set total agreement price directly. So before, price was calculated based on markups and surcharges that you set on your estimated labor and material costs. But now you can type in any price you want, or you can toggle on the Define Markup Value and surcharge switch to calculate the price. That way you also have the option to manually enter pricing on service agreements that have already been set up by going to the Kebab menu next to the service agreement price and selecting Edit Total Agreement Price. Then you can toggle the switch at the top to enter a manual price. And again, for all of those service agreement notes, I was wearing the Yellhat strictly for fashion purposes. Those were not y' all items. The rounding and dynamic pricing was the last y' all item. Just wearing a hat. I can't wear a hat. Anyways, that's all I got for today. Be sure to hit like if you liked the video and found it valuable, be sure to subscribe to Surface Titan's YouTube channel. If you haven't done that already, hit that bell icon so that YouTube notifies you. Anytime we upload a new video and leave me a comment down below. Let me know what you think about the release, the new features, these videos in general. Or just tell me, do you get. Do you get allergies in the spring? Let me know. Let me know. In the comments. Please remember that your engagement through likes, comments and subscriber numbers are the ways in which my success is measured. Appreciate it. Peace.
More from Bill



Capturing the 80%: How SmartAC’s Gen-2 Targets Non-Membership Homeowners | Podcast Ep. 296
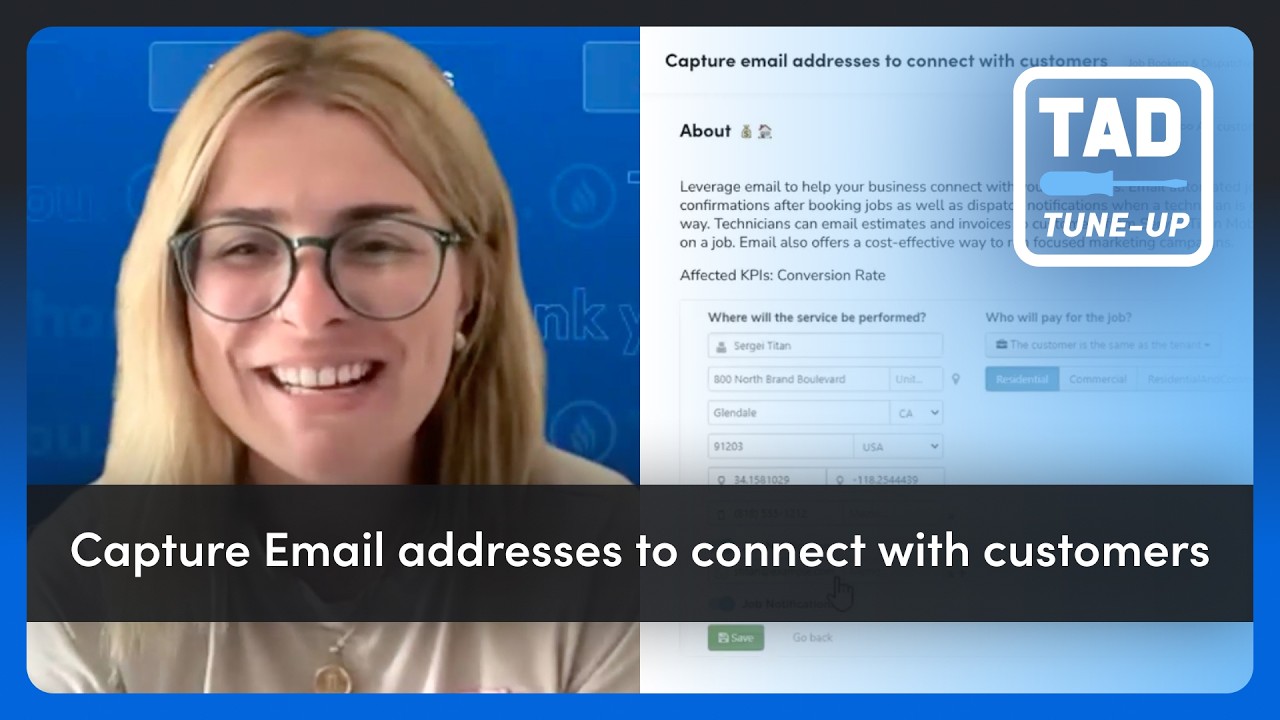
Build better customer data with every booking in ServiceTitan | TAD Tune-Up Series

The Biggest Change for Roofers Coming From Other Roofing Software to #ServiceTitan?