How to create an NFT!
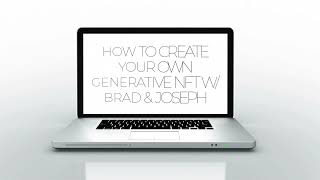
Joseph walks through creating generative NFT art with HashLips Art Engine: prepare layered PNGs in Photoshop, organize files with rarity numbers, configure the generator, run it to produce unique images and metadata, then upload to IPFS via Pinata for OpenSea.
Questions this video answers
1000 by 1000 pixels.
v1.0.1.2 (noted as B1.0.1.2 in transcript).
npm install (to install dependencies) and node index.js (to run the generator).
Up to 10,000 (collection size).
Lower number indicates a rarer item (e.g., '1' is the rarest).
Chapters
Sam. All right, so this will be tutorial on generative art created with the Hatch Lips regenerative engine. Since we are mid December, we got a little snowman that we're going to be working with. I don't claim to be a great artist, but I do want to show you guys how to create regenerative art so that you're able to create your own NFTs, whether they be on Solana, Ethereum or Cardano. And we're going to walk through how to do this via Photoshop. But you can use any photo editor that isn't important. We're just going to be creating individual layers that are going to be dynamically put together by a program that we're going to create. And you don't need any programming knowledge because the great people in our universe are already creating these for you that are free. First thing we're going to do is open these three tabs. So we got Node JS and you're going to download whichever one is correct for you. This will auto populate most likely. I'm on a Mac so you're going to see the user here. I already have it on my computer, so we'll skip that for me. But download that also. You can take a screen of this. This is the steps that I'm going to go through here. So if I'm talking too fast and you want something to go back to, you can always go through just get the screen and see where we're going. So I'm going to follow that to make sure I don't leave you guys behind. So the next place you're going to go is to visual studio.com or code.visualstudio.com to download your current build of this. This is where you're going have the generator that's going to build with your layers. I'm going to go to also GitHub and you're going to search hash lips hashlips art engine. So if you see I'll go back to hashlips profile. Here you go to hashlips art engine and this is what the majority of people are using currently to create. You're going to go through here to the latest release down here in B1. 0.1.2 is now he does update these rather often, but this is the current one and the one that I'm using to teach the tutorial. If there is a newer one and you're having errors doing all these things, go back to 1.2 and you should be fine there. So you can download Code here in the zip file. And when you have that zip file, just hack it and you will get. Actually, we'll do that right now. So this is the, the hash IPS art engine pack. You'll locate here. We have layers, background, bottom, lid, eye color, eyeball. This is where we're going to replace. So everything in here is what we're going to be building in Photoshop. You can look through here. They're all PNGs, very important. They all have number signs after them which will indicate rarity in the engine. So those are going to be important. We could just run this and show what we're. What hash Lips is using. But instead we're going to go into Photoshop and build a, a nice little snowman for us. So you can see through here. I opened up a 1000 by 1000 document and I pulled this image from online. Just looked up a snowman vector. So I have him. I'm gonna get. All I did was pull off every.
Single layer and just to pause for a sec. So you made a thousand pixels by a thousand pixels, right?
Correct.
And then you grab this image online. Did you get it? Like, did you pay for the licensing or is that recommended? I would imagine you want to own the art that you're using, right?
Yeah, you can, you can pay for the licensing. Since you're going to be changing so much of what you're using. It's not, it's probably a positive thing to pay for the licensing, but this was a free to use.
Understood. Yeah, I just want to make sure nobody gets into copyright issues because they don't. They miss a step or something. Okay, go for it.
So yeah, in Google you can actually go to filters and choose free to use vectors. A lot of vectors are paid to use and then there's actually separate single use and then commercial use that you'll have to pay for if you're trying to use somebody else's work. And you know, with snowmen there's tons of common use supplies, but if you're looking into, you know, let's say really unique dragons or something, if you want to use something like that, you might have to be paying for it. So what I did is come through here and separate out all my layers. So I have different color scarves, an orange one, green one and a red one. I have changed the colors of the arms to just black and brown. I have different colored noses. We've got a cucumber there and a carrot. And we have the snow, which I have just as white, but I Was thinking maybe we add another one and we'll do. Maybe a dog got excited, you know, over here. And we'll. We'll do that and that'll be the ultra rare ones for this and we go here. So after that, you know, obviously you're going to want to do a whole bunch of stuff and. And the more you have, the more creative one or unique ones you can create. But the purpose of this is that I want how easy it is to export all of this stuff because this was one thing that it took me a while to understand. You know, if I'm making all these layers and I'm good with Photoshop, how do I get everything into this folder in. In the fastest way? So you're going to export and then layers to files and we're going to use. Sorry if my computer slows down this.
When I'm doing a.
So we're gonna go into Downloads hashlibs folder. I'm gonna create a new folder and call it New Layers for the moment. Open right there. The file name prefix does not matter. You want to make sure it's on PNG Transparency is included and not visible layers only because you want all the layers that ran to be included in your run. Now this will take a little while, so this will be a good time for Brad to ask any questions if he has any. But this shouldn't take too long since I don't have too many layers.
Yeah. So how many images will it put out? First and foremost.
So when you're looking at the. It all depends on how many layers you have, how many categories of layers, how many folders and how many layers you have in each folder. So the calculation, I'm not positive of it, but it's. If it was 10 folders with 10 files in each one, it would be 10 to the 10th power, which I think is over.
So it's not necessarily a permutation, it's more like a combination. You remember that from math. I don't know what kind of math you studied in school, but you remember how it was. Like statistically it would be like 10 times 9 times 8. Or it'd be like.
Yeah, yeah, something like that. Exactly.
Yeah.
So that would be 100 images if it was 10 times 10.
Yes. Yeah, it's definitely not 10. Not 10 to the. Not 10 to. Times 10. It'd be 10 to the 10th power, but not.
Oh, I see.
Times 10 to the. Plus 10 to the 9th power, plus 10 to the 8th power, plus 10 to the 7th power, I think.
Wow, this Is really like a factorial then. Interesting.
Yeah, exactly. So it can create a ton even with this, we could probably create. And we only have two or three in each. In each category, we're probably looking at, you know, hundreds. Hundreds. So will they be the most unique and most amazing things with all these different categories? No, that's not what we're building right now. I just want to create the baseline so you guys understand.
Sure.
So this has created everything in our layers. We should have a folder here that says new layers.
Where is it?
So now we are in the hashlipstart engine folder. We have our new layers here. We have our old layers here. Our goal is to bring everything from our new layers and name them exactly how we want them named in our metadata and put them into folders based on the layer that they are. So the first layer we have here looks like we have two backgrounds. We're going to create a new folder, Name this background. Next layer we have here. This is the snow, it looks like got actually the names here from our organized Photoshop that we can use. New folder here. That will be snow. We got three hats, Hat, got two noses. We got a cucumber and a carrot. Two arms, black and brown. This is the scarf. I didn't name it. And that's why you don't see the name there. And then the base is going to be in its own folder, which is everything that was black in that image.
So we're gonna.
Create folder. If we keep these in here, they will show up. They are just. This is actually the full image. So we want to get rid of that completely. We could also put it in as a background and it would fill in the base, but we're just going to get rid of it. I'm going to check out what this is because I don't remember. Just to make sure I'm not losing anything. That looks like a blank layer. So we're going to get rid of that now we have our complete new layers. In our original layers folder, you see that everything is named and has a number sign and the number here. So the rarities work. The lowest number is the rarest item technically. But if you only have one, it'll be one of one, which would mean that 100% of the backgrounds will be black. Here you would add up these numbers. So it's 24,080. So this would be 20 of 80. So a quarter would have the high, the. And then what would be. No, this would be a hundred. So it'd be a fifth. Would have the high and then four two fifths would have low and middle. So we're going to go through here and do the same thing with ours. The base. There's just one item in there. It's not in there. Might have to find that. So we'll go through here to this. All we have to do is rename these really. Quick number so 10 and you can actually rename these again once you get into the program. So a lot of people or hashlips just recommends you just give everything a 10 rarity just to get it done and then deal with what you want rare later when you can actually see the images. But believe it or not, this is actually the most time consuming part after the art. The art is obviously the most time consuming. But here go in. So I'm going to start there. I would actually go through all these normally in here but we don't have to can go through and open. Open Visual Studio code. It's the other app that you just. Open a new file. Window. Yeah open up a new window. It will automatically open up your old or your recent file that you had. And then here you will open from directory. I have this in desktop. You just open up this entire folder. Now this will pull individual studio code. Let me get rid of this old one. Yes. I trust the authors do your own research but a lot of people are using hash lips so it is pretty trustworthy from my mind. Now you have over here the layers, the original layers, the new layers here and a whole bunch of other stuff we're gonna look into Circ this will be where you configure your information main you will not touch Index is actually the program that runs everything. And then you have a whole bunch of utilities in here to help regenerate metadata, to pixelate your images, to preview to see what the rarity is. And a bunch of information that we will not go through today. If anybody has any questions I could always tell you how to run these and go through them. But they're all pretty simple and you can actually see in the readme how to run them and what reason you would have to run them.
Can we see some of the finished product when it spit out or is it still working?
Yeah, for sure. We're going to go through and open up a new terminal here and the first time you open this you're going to run right here. You're going to do NPM install and this is going to install all the dependencies in your folder and bring them into so you can actually work on Here it's also installing nodes. You can actually work on it and run these files. It doesn't take that long. But while it's doing that, we're going to go in here and update, make sure all of these layers are correct. But now you can actually see the image that we have here. So it actually helps you do the renaming.
So.
So it's actually probably easier to come in here and do this rather than doing it in the folder.
Black. Gold hat.
That one rare. By putting a one, it makes it the rarest one you could have. And then we'll have. Red be the most common or no, black will be the most common. We'll do red is half as common as black. Make the cucumber uncommon rare. And we'll make carrot. Common. We'll go here and do the scarfs. They're already done. Perfect. And we have the dog snow, which will be extremely uncommon. We'll do one and we'll make this one a hundred. So only 1% will have. The pea stains through here. Close these out. And now that we have all of our new layers, we're going to go here, just delete our old layers folder, move to Trash and we're going to rename our new layers folder Layers. So once you have that done, the next thing you have to do is go into config JS. And here we'll walk through what you're actually looking at. So when you're updating this stuff, you want to update the metadata, you're going to have your collection. Everything that you're going to want to touch is in red. Makes they make it really easy. So you're going to change. Put this to Snowman Collection or Snowman nft. I deleted one of these guys. Description. Just write your own description here. We'll skip that. You're going to app when you're doing IPFs. This is if you're going to create a solidity contract and have all these uploaded via the contract. If you're uploading directly to OpenSea or Solana, this will be unnecessary because the metadata will be updated via OpenSea. But. Right. I usually just put update because you can't update it now because they're not uploaded to Pinata. We'll keep hash lips eternal URL here. But this is going to be wherever you want people to see your collection. Either a video, a Twitter or anything like that. And then this is the address for resells. So resale value of anything on OpenSea or on Solana. This will pay the artist or a Dispersion of different users so you can have a share 100%. If I wanted to make this multiple creators, I can pull this down, change them both to whatever percentages I want and change the wallets to associate. So every resale of the total, which would be 10%, which is, you know, up here. So 10% is 10,000. 1% would be 100 and that would go to these individuals on every resale. This is the most important part. So this is where you're actually deciding how many you want for the growth. Addition, size to. We're going to put 10 just because ready. 10,000 will be a lot at this moment, but you can go up to 10,000 if you have enough layers. If you don't have enough layers, it'll fail on the bottom. And you'll see that right now we only have, you know, a couple of pictures in each layer, so we don't have too many. But right now we want to go through the order of them. And this is going to be the first thing that's placed on the canvas. Second thing that's placed on the canvas. You want to make sure that this is correct. We all. And this has to be extremely important. So you see a capital here in background. Our capital is or our background is lowercase. So we have to change that. Go to the base next. And you can see that like, you know, when I deleted this by accident, it shows an error here. Anytime you see any red that comes up, just undo what you did to see what you. You screwed up and then move forward from there. We'll put the hat on his head. Actually we'll put the snow next. Then we'll add all of his other characteristics. We'll have the hat, scarf, Nose. And what are missing? Arms.
Arms.
So there we go. So this will create 10 of your additions. It'll start with the background, go down to the base. Snow, hat, scarf, nose, arms. And those have to completely match here. Anything. It will show an error when you go through. These are the widths that you're having. So this is the width and height. We made 1,000 by a thousand, so we're going to change these. But it's. Since it's still a square, it won't really undo whatever I did there. Since this is still a square, it wouldn't really change much. It would just be a smaller image. I haven't tried really large numbers, but I'm assuming it just takes longer to render. This indicates some text line and some background colors that you can also use. You can generate different if you didn't want to have a background image in your layers file, you could actually just create multiple colors and random colors through this as well. All this is in the readme file that they explained it way better. I just wanted to give you guys a head start on getting to go and open to answer any questions you guys have as well. So after all of that is created, you, you want to save it. Once you save it now, you can run it. Go Node index js.
Pray to whatever God you believe in. Offer a sacrificial goat.
Yes, of course. Now you'll see this new folder build come out with images.
That was quick.
Yeah, there's an issue here. Cannot read properties of undefined. So now there is an issue and I believe it's because there is no file in base. So we're going to remove base here. Because I didn't bring it in, I don't know where I put it. Remove that here for the time being so we can keep this going and go into config, take out base, save that again, and then run this again. I believe this should run Node index. Yep. Now it's creating all the additions with the DNA, which is your unique ID for the numbers. If there is a another one that already exists, meaning you didn't have enough layers, it'll say DNA exists, which means you need to create more layers on your images. And now it'll show all the images that you have. 3. So when you see this, you obvious, obviously you can see you need to work on your layers. You got a black here with a black background. That looks stupid. Gotta fix that. But generally like, you know, you have one good snowman. This is a good snowman. Looks like a snowman. You're like, okay, and now you're seeing, every time you do this, you run 10, 20, 100 and you start looking at them, be like, okay, once you get to like a thousand and you see every single one of your thousand, you're like, I like that. I'm comfortable with that. You're probably pretty good to say that. You know, it'll be a good enough project to run.
So then we can push it to 10,000 or everyone.
Correct. So you're just going to keep adding layers, keep adding colors, keep adding different features, put some eyeglasses on them, give him a feather in his hat. You know, make this the background snow following, put some mountains back there, all different kinds of things. But just being able to look through and see all the things that it's making and generating for you. Now you Just go into your Photoshop document and keep working on it.
But now this is how every project does this. Or are there multiple ways to do generative art?
Nope, this is how every project does generative art.
Okay, so if you're bored apes, if you're Kong, if you're whatever, you're all doing it the same way. It's just you're starting with different layers.
Correct. There's. So all the guys that are doing it with a character, let's say an avatar in front, are doing it this way. There's ways to do generative art with mathematical arrays. Like you're creating, you know, universe, like photos and stuff. They're doing it a little bit differently because they're doing mathematical equations in each of these layers. We're doing a PNG or GIF based layers. And if you want, if you're doing it this way, everybody's doing it just like this.
Okay, so what about On Chain projects like On Chain Monkey and Anonymize and a few others? They really want to be on Chain. That's important to them. They don't use ipfs, which is interplanetary File system, which is an offshoot of filecoin I believe that people might know about. You can listen to. Kevin Rose just did a really great podcast with the founder. So what do they mean when it's on chain? What is the distinction there?
So all that you're doing at that point, from my understanding, and I'm happy to be corrected wrong, is after you have all your images, these are all in a folder you're bringing these into. The easiest way to get all this art on Chain is to bring it into. It's called pinata. Can't remember the exact address. Pinata, your home for NFT Media. So you're going to bring this into pinata.
But this is on ipfs. So yeah, to be on Chain would be like, I'm going to upload this directly to the Ethereum blockchain and then it exists there. So like the storage and the gas fees will be higher, but then it exists forever even if IPFS goes down or anything else goes down.
Correct. Yeah.
So the distinction there, this is like really geeky nerd crypto shit. Like super crypto native stuff. Like if people want their entire project on chain, like an on chain game or an on chain mouse, or on chain breeding or all these different things that they built. The benefit of that is it lives forever as long as Ethereum lives. So it's not relying on any third party like an IPFS or Amazon AWS or OpenSea or anything like that. So it'll exist regardless of all those platforms and their longevity or any of their terms and conditions, or whether they get shut down or any of that crap. The downside is it's more expensive to interact on that blockchain because storage is very high, very expensive. Rather, storage is very expensive. It's not really great for infinitely scalable applications like for example, a social media network where you have a lot of images, you have a lot of posts, a lot of transactions happening, you need to purpose build a blockchain for that. Ethereum is really great for financial transactions and to some extent smart contracts, but it definitely leaves room for. And it's really good for. It's, you know, decentralized and nobody can really fuck with it. But it doesn't necessarily solve all the problems that come along with big data applications. Like that's a centralized server challenge that typically handles that.
Right.
Is that a reasonable explanation?
Yes, that makes sense to me. When you're working with, you know, IPFs, I think of IPS as a very stable blockchain as well. So I wouldn't at any rate.
And again, not casting aspersion against anything. It's just like you have the real purists that want to do it a certain way and that's the way they do it. And you have people who respect and appreciate that and are willing to pay more for gas and all that crap to do it. And you have people like, okay, well what's a cheaper, more efficient way? Introducing more variables and therefore more risk. But this is a different way to do it. So let's just look at Pinata and what this looks like to use IPFs.
Well, can I just jump in real quick?
Yeah, go.
When you're minting to the chain itself, you're actually creating that in the metadata, the solidity contract. So then you're actually going to chain. But that, that file, that network still needs to be stored somewhere. Pinata just simplifies that for us.
Okay, so it is pinata technically on chain or is it ipfs? It's IPFS distinction. That's what I thought. Okay, got it. So if you wanted to be really on chain, you would be, you'd do something different.
Pinata would be correcting contract, would go direct to chain. And then of course it's not editable at that point.
Right.
So you can't create.
So pinata is just a step to get it on chain. So, so what Piano does is allows us to preview our collection on OpenSea before it is on chain. So it allows you to go through your solidity process, use a, not the main network and Preview everything on OpenSea. But once you write your contract and you upload those images to OpenSea, then it becomes unchained from my understanding. So once you do that, you can't change anything except the amount of data, right?
Correct.
Is that okay? So what this looks like, it's pretty simple. It's just like a Google Drive. Sign in. And you're going to take your files and upload them here. I have one already set here. So you would take this cid, bring this back into here into the config. Where I said you had to update your IPFS updated here, save the file command S, I'm on a Mac file saved and then you would go into your utilities and update in or yeah, update info js. So we're going to go node utils forward slash update info dot J S. All right, so that is all done. Now we go to IPFS and re upload the metadata that's followed in your. I mean pinata and upload. Re upload your metadata into there and it will have all the upload metadata. So you'd go in here. This, this would be a folder if it was everything. And you go into the folder and upload everything up. And it's pretty simple this stuff.
Jj, you got that?
No, we're going to leave that in as an Easter egg. There we go.
Okay.
Yeah, we also, we talked about doing Easter eggs for each one of these videos from now on. So you can cut that, you can cut the dead time when he was figuring something out before. And then at the end we'll do an Easter egg. If you're watching to this part of the video, the Easter egg is. Well, you know, if you say, hey, I watched the video on pinata or on generative Art, I want my evidence. We'll send you a salon nft.
So the next step would be solidity. That contract would take me another 40 minutes to explain to people. So we're gonna have to schedule another time to do that. So the next step would be the solidity contract, putting everything, creating the secrets image which would be, you know, a lot of people are doing gifs of a couple with the shadowed out image, creating that secret image and then creating the contract, getting it all uploaded up and see. But from this point they, even before this point before Pinata, they can actually go into OpenSea use. Say if they just want to create a 50 collection, they can use Those images and put them directly up to OpenSea, no coding required. So they don't need to use Solidity at all. The bonus of using Solidity is when you have 10,000 and you want to have a single contract that you control with a single wallet that owns that contract and it makes it all a lot more just safe because everybody knows the contract that holds what you're working on and you can pull all that money into that single contract and hold all of the, into your white list and all your pre sales with that single contract.
Yeah, it seems like the more third party tools you rely on, the more vectors there are for issues and there's also like less trust in the community because like the real devs are going to look at it and be like oh, he's using blah blah, blah and like he could have done X. And when you code on Solidity on chain, commit it once you're confident in your shit, like people I think tend to respond to that better generally.
Right? Yeah. And then the, the last step would be creating a web, a web 3 program. So, so going through and actually go and making it so that people can mint via your webpage and, and get through that entire process and actually log into your webpage with their, you know, with their wallets and see and communicate within your, your ecosystem. I'm not quite there yet, working on it. I have developers that could probably communicate that a lot better than I can. But what do you think, J.J. what.
Do I think about the minting process now?
About what he was creating the DAP in Webpoint 3.
Creating the DAP itself is actually really simple. You can, here's the thing, if you're going to go fancy like a lot of these minting sites, a lot of these bigger companies that have three or four devs, that just takes a lot more HTML than it does any kind of web3 programming. JavaScript, the script itself to mint is, is honestly a simple JavaScript that talks to the contract mints, it takes your money, puts it in the wallet. Everything else is cosmetic.
Well, that's good to hear because I've been doing HTML for 20 years, so that shouldn't be too bad.
Yeah, a lot of it. Once you learn, once you learn the, the minting JavaScript contract itself, all you have to do is plug that into HTML and then you make it as pretty as you want, you can make it as secure as you want. I actually just did a mint yesterday I really liked and the developer is going to help me with a code on it. It actually incorporated A recaptcha with the.
Mint.
You know, stopped bots. It was. There was no bots. Minting it was fantastic.
That's smart.
I like that.
Yeah. The captcha. The captcha on the mint is a really smart idea.
Yeah. And I didn't even think that was possible, but apparently it is. And he's going to send me the sample code for it, so that was killer.
Yeah.
So I just want to put it to the group. I know you got to go, Joseph. So we're up here, but we'd love to have you back on and talk more about deploying to Blockchain and all that great stuff, if you're up for it. Obviously a lot of people are going to get value. Some of this is going to go right over people's heads or they're not looking to launch a project. But if we just understand some of the basic tools, this becomes less scary and more accessible for people, I think. Coming up, it's going to be really important just to understand how these tools work so that if you decide to do this in the future, even if you hire somebody to go do it for you, they can't pull the wool over your eyes because you at least understand the basics right. So if they try to overcharge you or they don't know what the hell they're doing, it'll be really clear out of the gate how much work it actually is for a talented dev. If they're taking shortcuts, if they're doing it the right way, and if they're overcharging you for the amount of work, a lot of the biggest projects they'll work if they have. Assuming you're bringing something to the table too. I'll just use Neo Tokyo for an example. That Dev Thrasher is really talented dev, all solidity, no additional tools that I'm aware of that they used. He got a couple million dollars worth of NFTs after the day was done. So if you're signing on to the right project and you have something to bring with the right audience and the right ideas, this can be really lucrative. But everybody's got to be incentivized properly and nobody, I don't believe anybody should be, you know, taking you, taking for a ride. So if you understand it, you're in a better position to understand and negotiate this stuff. So this is really helpful. We'd love to hear more about your story too, Joseph. Next time we kind of dive right in.
But yeah, yeah, no, I'll definitely. I'll let you guys know. Where we are in the coming weeks. You know, I'm still like, you know, my main. My main developer, sadly, you know, his set, not. Not sadly for him, but his other company, it's AI fintech project, they raised $5 million of funding. So his majority of his time has been taken by that project. So that's my biggest hurdle at the moment.
Great developers are in high demand right now.
Yeah, he's in high demand and he neglect. He put a lot of time in the project. He says he's with us for three years as an advisor, but getting him to put. To get into the code is. Is probably the most frustrating thing in the world. And it is the holidays right now, so it's pretty much impossible to get anybody to do anything. So we're in. We're way farther. We have, you know, we have both Android and iOS apps for both the wallets and the MVP for the fitness app that are done. There's a couple bugs. I can walk you guys through them at some point and show you guys where we are. But that's another video.
Let's pick this up. And I'd love feedback from the group. Like, is this valuable? Is this the kind of direction you want to see things going in? I've given you the basics as far as what these things are. Now let's talk about building them and what people are doing that's unique and interesting. And again, I'm never making a recommendation. I'm not saying go buy all this stuff. I'm just saying, hey, this is. This is what it is. And you can choose to do with that information as you like. Because I think being ahead of the curve is better than being behind the curve for sure.
All right, guys, sounds great.
Have a great rest of your day.
Thanks so much. Yeah, have a great Christmas. We'll.
Merry Christmas.
And let me know personally. And I personally want to thank you because I did not know about hash lips and I've been using just direct vector and SVG and hand coding it. So you just saved me like 20 hours of work.
Yeah, well, perfect. Well, like you guys, you guys taught me about fucking yield farming and what, like 35 minutes? So you saved me a shit ton of work. So I just wanted to give back.
That's right. Hey, we all get smarter together. That's the whole point. So from. From all of us here at Make More Marvels. Jj, Joseph, myself, Brad, really grateful you guys are here and thanks for watching and let us know what you think of the video in the comments below. We'll talk to you soon.
Take care.
Cheers. All right. That's great. So, jj, I'll edit that. Let me kill the record.
Sa.
More from Brad

The #1 Reason AI Isn’t Working for You (Yet) #AI #businessowner #founderenergy

What tasks would the best assistant ever be able to do for you? #BusinessSystems #BusinessOperations

Nobody expects you to use a harder way when there's a better way. #AI #businessowner

Which side of the table will you be on in 2026? #AI #Mastermind #BusinessOwner