Cómo montar un Acuario Cubo PASO A PASO 🐟 | Guía para Acuarios Pequeños y Tropical | KIWOKO
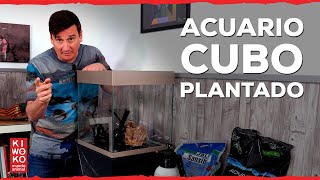
Step-by-step guide to setting up a 50-liter cube aquarium for tropical plants and fish. Learn where to place it, how to prepare the substrate, which plants work best, and how to decorate it so everything thrives.
Foreign Hi everyone. We have a new project. I'm super excited about building a cube aquarium. A 50L aquarium. These aquariums are very, very decorative. We're going to do it. Attention planted tropical community, medium level. This means that the fish and plants are going to be a little more demanding. But don't worry, because I'm here to help you in each of the spaces of the assembly. And especially if you have comments, you can leave them and I'll take care of solving them. Before starting, it is important that you follow these steps. First, place the aquarium in an area where there are no major changes in temperature. Forget about having it near a radiator or under an air conditioner. Another interesting point. As opposed to a window where direct sunlight does not hit it, I also recommend that it be near an electrical outlet, because in the end you will have to connect some devices. Having chosen the place, let's move on to a topic that I always like to highlight here. Aquariums are ideal on tables that are built for aquariums and are solid. Once you fill this aquarium, it will be around 50kg. So the aquarium has to be on a suitable table. Check that the glass is in good condition. Why? Because sometimes the aquarium may have a small chip. And after assembly, be careful. You have to disassemble everything because it is leaking. This has happened to people before. I prefer that you do all your tests before making the last addition. Finally, today we are going to talk about what would be the care of the planting part. I am going to work with the plants that are going to be ground cover. That is why I am going to place part of the decoration. I will give you some advice so that you choose the ground cover. Plant a simple and very important one here. Be patient because it can take several weeks to build an aquarium like this. To start, I am going to take out the roots that be careful. I have previously had inside the terrarium. Getting wet. They are already wet. They will no longer float. I am also going to take out the decorative rock. I have chosen this one. It is called Dragon Rock. It is beautiful. And let's move on to what would be the substrate. Nutritious. The plant substrate is great. It has all the nutrients I need. I'm going to use a part now that will be the base so that I can plant on top without having too much trouble. Now I'm going to spread the substrate so that I know where the areas are where the nutritious substrate is. Since we're going to have a lot of plants, especially carpet plants, this type of Carpet plants usually require a good nutritious substrate so that it can really spread quite easily in our aquarium. For this cube, I thought about making an island instead of building backwards. What I want to build is a small island. I'm going to use these rocks and this shape, and I'm going to use roots, because why do I want to do it this way? This way we'll always have a perimeter with carpet plants. And that's why I've used the nutritious substrate throughout the aquarium. If you're only going to build a part with carpet, then use the substrate in the carpet part. Since this is an aquarium that's going to be full of carpet plants down here, like an island, I'm going to place the rocks, I'm going to place the roots like this so that they give me this feeling of height. Here's an interesting topic. When you're going to build, always remember that you have to leave certain margins. If you're going to have a filter, you. You're going to have to leave a free margin. And especially here in all the parts where you have to clean the glass, because if not, you'll have a hard time cleaning the aquarium later. Look, I've more or less set up how I want to leave the island. Of course, as you can see, although the roots already have a little water, what I want is for them to stay put. I'm going to use a glue that's specifically for gluing both plants and decorations inside the aquarium to keep everything in place. And from there, I can continue building the rest of the decoration. So what I've done is taken a small ball of Perlon, and look how this root ends up floating. We're going to place it right at the base. And as you can see, it's already glued. And here's a little trick. I take a little dust from the same rock, throw it on top so that the glue mark doesn't show. I finish gluing all the joints, because what I'm looking for is for everything to be well compacted. Okay, now what I'm going to do is moisten the substrate a little bit as well as the wood before I start planting. This will help me so that when I start planting the ground cover plant in the background, it adheres much better to the substrate. Okay, here's the surprise. As a ground cover plant, I'm going to use one of the most versatile, which is the Elishe family. I'm going to use the bacilla, which is the smallest we're Going to use this in the front area. And then we're going to use the lioche acicularis. Sorry. It's going to go in the middle and back. This one tends to grow a little bit more and is more resistant. It's one of the most used for landscaping. I usually take a plate, some absorbent paper, and add a little water so they don't dry out. I take out the plants. In this case, we're going to go and clean them well. Now you'll see that I'm going to run it through a little water and we're going to take out small bouquets. I'm going to go wash it. I'm bringing it. And you'll see that what I'm going to place are pieces of small bouquets so that I can go quickly when planting. I'm also going to do something that I like to do, which is I'm going to cut the top part of all of them so that they all grow to the same height Here, as you can see, I'm taking out small bouquets so that it's much easier when planting later. We'll start with this species and then we'll go to the other one. I've taken out small bouquets. Here's what I'm cutting the tips so that they all go with the same tip at the entrance. This plant is one of the easiest plants to use when you want to cover it. In order for it to grow well, it will need a good substrate. I've chosen this option, which is an option that basically comes grown in vitro. They come protected. This way you won't have any contamination from snails, algae or anything else. Plus, it's very easy to clean it intact. I'm going to start placing the plants now. This area will be colonized by the middle of the tank. Okay. This is going to be a basically simple operation. It's like adding hair. This is going to be placing bunch, bunch, bunch, bunch. What I'm going to leave is a distance of less than 2cm between each of the bunches. Okay. I'll start with this one, the char, which is a little bit taller. And then the one that is the parvula, which is smaller. We're going to put it in front and that's it. Well, about how much to bury the plant. I don't know if you've seen it, but the brushwoods are more or less like 2 cm deep, and I'm burying them 2 cm deep. So don't worry. The plant has to fit in well. It has to have enough substrate so that it can hold on well. Otherwise it will be floating. And if the plant floats there, it won't grow. The best way to plant this type of ground cover is with the aquarium. As you can see, without water, the moment you add water, everything becomes quite complicated. So for me, the best option is always without water. The simple way, taking your time, It's a nice task. And basically, the better you have the plants. Obviously, the plants will grow. They will grow a little better. Well, now we're going to do the second course with the asparagus. I'm not going to prune it this time, eh? It's very fine. It's very pretty. And I prefer to leave it like this. This is going to be the one that's going to colonize the front area of the aquarium. Be careful. Later it can blend in a little, But I want the pretty part to stay lower than the other one at the beginning, which will grow a little more. Once we have planted bunch by bunch, which has taken us a while, I am going to add a little water. This is basically going to help me prevent the plants from drying out. And I am going to start with the anubias nanabonsai. These are going to go in what would be the roots and the stone. I am going to use these anubias Nana. What I am going to do is take out this wool. That in this case is not going to be useful. I clean it well. Look how beautiful the plant is. What we are going to do with these little plants is that in the end, they do not grow in substrates. What they really grow on is wood on rocks. And the roots are going to create groups, hugging, I repeat, the roots where we are going to place them. I am going to prune these roots a little. As you can see, I have already cleaned the little plant. Well, the plant is fine. And what I am going to do is basically plant these rhizomes on the wood. Today I am going to use a specific glue for plants. What we're going to use is a dot of glue. We're going to hold it against the plant and naturally, over the next eight to 10 weeks, the plant will start to grow with its roots and grip the trunk. Here I'm placing a portion of glue and in the same direction, I'm going to place a little bit of this glue here. Don't worry, this glue will still stick if it's still wet. I'm going to take advantage and place another plant here where I had already joined the root to the rock. This way I can hide that joint. We already have the last one. We're going to place it here. First we're going to put some glue, a little bit of glue on the root so that it forms a good base. And now here. Okay? Perfect. Okay. As you can see, I've already placed the Laoche, which is the plant that's going to cover the area in the background. I've made the small island. I've glued the anubias nana bond side between the root and the plant. I've used some specific glues, as you can see. And now all that's left is to fill it in. We're going to continue making content about setting up this aquarium, which is a planted tropical community medium performance aquarium. Pay attention to this, where I'm going to show you the best plants and fish for this type of ecosystem. I hope you enjoyed it. If you're interested in this content, subscribe. And if you want to learn more or ask us anything about this setup, leave us a comment. Thank you very much.
More from Javier

Cuando nadie reconoce tu dolor por la pérdida de una mascota: así es el duelo desautorizado 💔




¿Tu perro hace suficiente ejercicio? Mantenerlo activo es clave para que viva mejor 🐶💪

GATIFICANDO UNA PARED PARA MI GATO 😻🧗♂️ Ideas para aprovechar el espacio vertical en casas pequeñas



Por qué duele tanto perder a un perro o un gato: el vínculo que explica nuestro duelo 💔🐾