¿Cómo PREPARO MI CASA PARA LA LLEGADA DE MI GATO? 🐱🏠| Gatificando habitación para un nuevo gato
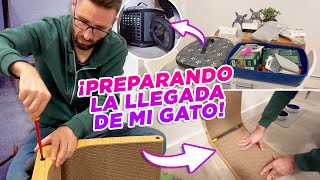
Carlos, a veterinarian, walks through how to set up a room for a new cat, covering litter boxes, feeding areas, scratching posts, and toys with prices and practical tips for each.
Foreign Hi, I'm Carlos and I'm a veterinarian. Well, today I'm making a video that's a little different from the one I usually offer here on the channel, because today we're going to prepare a room for the arrival of a new cat at home. Well, yes, we've finally decided to adopt a cat. And as I always tell you on the channel, we it's very important that when the cat arrives home, it has an area of your house, a room where it feels safe, that it's its refuge. And the day has finally arrived to cat ify the house, which we have written down in capital letters in the agenda. Well, as I was saying, I don't really know how it's going to turn out. But anyway, throughout the video I'm going to show you all the things that I consider basic to cat ey fy a house. At least at the beginning. There are a few things missing, but, well, they'll come in time. And I'm also going to tell you where I've decided to put them. Also, I'm also going to tell you the price that everything has cost me, because I want to make all this very clear. It's something that we bought ourselves. Although you may see some marks in the video, this is not a sponsored video, it's just that, well, since you're going to see how we're preparing it, it's normal for some marks to appear. This is the room where our new feline companion is going to stay. And it's also the room where Jose works. We chose it because it's next to the living room and it's also easier for the cat to get used to our rhythms and the sounds of the house and how life unfolds. And now I'm going to tell you where we're going to put things, because as you know, in a cat's environment, things need to occupy a certain place so that, well, he can also have his life a little more organized. Well, here you see me messing around a bit and I'm moving things away from the litter box. That's the litter box we've chosen. Now it's just a plastic box, although I have to tell you that it's not going to be the final one. The thing is, when we bought the other litter box, they told us in the end that I wouldn't be able to get there and that I wouldn't be able to be here when the cat arrived. I'm going to put it next to the closet because it's the furthest point from the rest of the room, and that way it's a little more private. In the future, we'll also put a mat underneath. It cost me 6.99, and as I said, it was the most basic one in the store. If there had been a cheaper one, I would have bought that one. The litter box that we're going to put in permanently, which, as I said, hasn't arrived, cost 24.99. And it's a vertical access litter box, which is also quite clean. This is the litter we've chosen for the cat. It's a litter that costs 16.99 for 20L, which is like 8.6 kilogram. It's a biodegradable vegetable litter and it's also a clumping litter. The mat that we are going to put underneath is 13.99, and it is so that the litter that the cat kicks up on its paws is retained in the mat and everything is much more hygienic. Well, this litter has some drawbacks that I have noticed. After using it, it is a little light and as you can see, I have added more or less a finger's worth of litter because it is what has been discovered that cats like the most. When they have more litter, they feel a little more unstable. I smooth it out a little to leave it all ready, and there our litter box will remain for our new feline companion. The litter, as I have said, is vegetable. And the good thing about this litter is that it pollutes a little less and can also be disposed of in the toilet. They therefore, when it is necessary to clean the litter box, we do not have to use bags. We produce less plastic. The scoop that I have used is the one in the shape of a ladle, which cost me €3, although it was on sale and it usually costs 5.95. It's a scoop that I really like because its ladle shape allows me to clean the litter very well without it all jumping around. You simply pick up the clumps and you can shake it and you only keep the part that you want to get rid of. The litter box is well placed. Good. And now we are going to place another very important part for the cat, which is the food area. For this area, I have chosen a silicone mat or a silicone tray. As you can see, it is very soft and it costs around 9.99. It is around 48cm by 30cm, which gives us a fairly large surface area to place all the cat's food bowls. I bought the silicone mat because I like to keep the area where the cats eat very, very clean, and this prevents food from spilling on the floor. And if something falls or spills, such as water, it only stays in this area. It has a small edge, like I'm showing you there, although it's not very high, it allows any liquid that has spilled out of the drinking bowl to stay in that area. Also, the good thing about it is that since it's made of silicone, the bowls stick very well, and even if the cat is a bit rough, which we don't know yet, they won't move. These bowls are made of ceramic and are specifically for cats with a low edge. They cost 3.13 each. In the end, we spent 11.37 on the three. I've bought three so far. So that the cat has a bowl for dry food, a drinking bowl and a bowl for wet food. Also, since it's ceramic, it prevents the appearance of the typical feline acne that some cats get with plastic bowls. Also, plastic bowls tend to absorb quite a few odors and I don't like them at all. As you can see, the mat is very, very light and doesn't take up much space, and it won't prevent the cat from having easy access to the feeders. I'm putting both of them there for now, the one for water and the one for dry food. The feed, the care and the kibble. Well, as I always say, I really like those designs because in addition to having a slightly dark inside, they also always look a little cleaner. This is just a little demonstration so you can see how the food is going to go. We're putting the food they gave us at the shelter, but we'll put it out when it arrives, of course, and then we'll start transitioning to the new food. And in this other one, the water will go. As you can see, it's a little further away from the litter box because cats don't like having the evacuation area, the litter and the eating area together. Feeders and food area ready. And here I am a bit of a di er because I'm going to assemble the scratching post. The scratching post is made of cardboard and is 68cm long and cost us €26.23. As you can see, it comes disassembled. It has the part where the cat is going to scratch on one side and the frame on the other. I have opted for the cardboard scratching post, which has this shape that you will see below, because we still don't know the cat very well. So we don't know if it likes to scratch horizontally or vertically. So. So as you will see, that is the part. Well, it is one of the parts that you can put horizontally or vertically and then it will have another part that makes an L shape. It is quite dense, corrugated cardboard. I really like the feel of the cardboard because I don't think the cat is going to destroy it with just one pass. And as you can see, it has a part that is a small addition to make it bigger. Okay, here I am putting it together. I although you'll see later when I assemble it that this isn't exactly how it looks. Well, before assembling anything, you should always read the instructions because many times we embark on an adventure and although it may seem easy, it really isn't. I preferred the scratching post to be made of cardboard because cats tend to really like that type of texture and it also seemed more eco friendly to me. The screws are made of plastic and although at first I thought, oh, maybe one of the screws might break when I'm assembling it, the truth is that it doesn't because fortunately cardboard is quite soft. Here, my assistant Jose is handing me the screwdriver. Although I have to tell you that the kit comes with a kind of piece that is used like a screwdriver, but since it's made of plastic and all that, I preferred to use a slightly more solid one. I also have to tell you that I didn't realize that piece was included until the end. As you can see, the screws are quite easy to install because you simply nail them into the cardboard, screw them in, and they make the same hole where they will end up. There you see me looking at the instructions a little bit more because, well, at first I was a little afraid that it wouldn't come together properly. See, this is how the long part would look, which is the one I'm assembling right now. We decided on this type of scratching post because otherwise I would have to buy two types because as I said, sometimes cats prefer to scratch horizontally or vertically. So to avoid having to buy two things, spend money on them, etc. This cardboard one worked out quite well for me. In fact, it's not the first time I've met a cat who has been bought a type of scratching post and doesn't end up using it. Because at home it's not really clear whether they prefer prefer to scratch horizontally or vertically. See? Okay, here I'm putting it in a vertical position because most cats I know, tend to scratch vertically. So at first, Jose and I decided, well, let's put it vertically and see how it works. Then there's something that surprised me, which is that little stick that came with the scratching post, which I don't know if it's a matabi. Well, let's see if the cat likes it. Those are little legs that go underneath, and those are some bumpers that I think are great. So that even if the scratching post has a large baseboard behind it, like in my house, it can have enough support. Because if a cat is going to scratch and it doesn't find it stable, it will most likely stop using it. Okay, with the magic of editing, I have the two parts presented here, and I'm going to show you how it works. Because the scratching post, which I hadn't noticed, has a small ball where the two pieces join like a little toy that also makes a sound. And I think it can encourage the cat to scratch because simply by coming closer to play, it could end up scratching. The truth is that I found it very curious. I've never seen a scratching post with this format. I think any cat would like this scratching post. But, well, I also have my doubts because many times, because we're being too innovative, the cat arrives and doesn't pay any attention to it. I chose the scratching post like this because I also thought it would be quite stable. And as you can see, it's quite big. Notice that I'm sitting down and it practically reaches my shoulders. So that's how it would look with the top part facing up. Well, in this case, I'm putting those stops in. But it's true that I see that it still needs a little bit. And that little bit makes me a little hesitant because of course I'm going to have to put something on it, because if the cat scratches and in the end moves, it's possible that it will get a mania or fear of it from the very beginning and stop using it. Those are the little feet, which are rubber feet, but you have to place them symmetrically. I don't have a very well developed sense of symmetry. And it's possible that some of them would be a little off. However, when I press it, it still leans back a little. And at that moment my head started working because I said, well, I have to invent something so that it doesn't have that movement, that rocking, as if it were a rocking chair. But anyway, it's not a problem with a scratching post design. It's probably a problem with my house. And to Adapt it. Since I'm a bit of a handyman. Well, really, I don't know. I'm also imaginative. I decided to add something to the bumpers with the same box from the scratching post. Ah. I cut out a couple of flaps and put double sided tape on them. Right now it doesn't move at all. And there you have it, the scratching post assembled. Well, look, the truth is that it's even pretty. I mean, it can fit in almost any environment. And well, here I am. Do you see how you see it when I move it because I'm pressing from above. The scratching post doesn't move. It doesn't move. It doesn't move on the floor. It doesn't move at all. And that's the detail of the toy ball again. Well, with the scratching post assembled, now we have to choose a bed area. Okay. The bed came free. It's a bit of a trial run because it's true that. Well, at first, since we don't know if the cat will prefer a covered bed or an uncovered one, it's not necessary to spend a lot of money on a bed. In fact, especially at the beginning, when the cat arrives, it's getting its bearings. So we decided to put that basket with blankets that we had at home. There's a specific blanket for the cat that we bought that would arrive the next day. The blanket we bought is Xtrave, made of very warm microfiber and it's quite large. 1.30 x 1.60. It cost us 9.99. Okay. We recorded this clip the next day. And as you can see, I chose a green color because cats see the color green quite well. Although, well, with the shine it looks a little silvery. But anyway, the truth is that I think the cat might like it. But for now we've left those blankets there so that when the cat arrives, if the blanket hasn't arrived yet, it's. It can have somewhere to lie down. I think it's quite comfortable, quite warm, and I think the cat might like it. And here you see me assembling the carrier. Well, the carrier. Well, the good thing is that a coworker of mine gave it to me. Right? And the truth is that it came in handy because now when you adopt a cat, everything is an expense. It's a removable and soft carrier. The top and bottom are rigid and the surrounding part is like foam. In case anyone is interested, I looked up the price on the Internet and the Same model costs 45.90. The advantage is that if you Disassemble it at home. It's very, very flat and you can put it in any closet. Well, since it's for transporting a cat that doesn't weigh much, this model will work quite well. It's a model that's easy to assemble with zippers. It has two zippers, one on top and one on the bottom. And it goes around the entire circumference of the lid in the seat. It's quite ventilated, and if the cat likes to look through the little holes, it'll be quite comfortable. The front part, the door, has a double zipper and is made of me. Jose said that it seemed small, but for a cat it's more than enough. Of course, this carrier doesn't have anything to hang it from. It only has that handle. So if you want to transport it, you have to hold it by the handle on top. Although, as I always tell you, when you're carrying a cat, try to put your hand underneath. I'm going to put it there next to the bed temporarily, because the cat isn't here yet and we'll have to go get him with the carrier. But since I want the carrier to be part of the rest area, that's why I've put it near the bed carrier in place. Here you see me with the cat's first toy. It's a green mouse with a bell that costs 3.99. It's quite big and quite sturdy. I touched it when I saw it in the store and it seemed to me that the cat wasn't going to bite into it and destroy it in the first round. Toy in place. But also. Well, I bought him a couple of springs. There were four in the pack and I've left two here. Four for 6.99. It's true that you might find them a little cheaper. I don't know how these weren't so expensive, but. Oh, well. A In addition to that a we bought some stuffed mice that came in, a lot of them. I think they made a mistake in the order and they cost 3.57. I've left a couple of them around and as the cad destroys them, if he destroys them at all, we'll get more. But there's one thing which is the toy that I'm going to play with the cat. It's a rod with a little mouse that cost $5.65. The mouse is also made of fabric, quite a tough fabric, and it has feathers on its tail. The string part is elastic. I would have preferred it to be a regular string because it deteriorates less, but hey, it could also give the cat a little more play. There you see the feathers and detail, which kittens usually like a lot because they fly in a slightly more graceful way, right? Well, I already knew when I tried it, although the mechanism is quite simple. And something very important when a cat is going to come to live at home is synthetic feline facial pheromones. I bought them in a diffuser so I don't have to go around with the spray. They last about a month and cost $28.99. As you can see, they can be placed in any electrical outlet and work as if it were a normal diffuser, like mosquito repellents. I placed it in the electrical outlet that was inside the room, although there are other electrical outlets, but also near the door, so that it can spread to the rest of the house. This way you don't have to worry about spreading the pheromones, because they will be produced little by little and will help the cat feel much more comfortable. Another important thing is to take care of our cat's hygiene. We bought a brush for everyday use. It's like a kind of carder, but with the bristles much further apart for $8.95, which is what it cost us. It also has plastic balls on the tips to prevent the brush from being too aggressive. Therefore, it can be used once a week without any problem, or even almost every day. And there you can see how my hair looks after being brushed by that brush. And finally, this is the food we have chosen. 2kg costs 21.99, although it is true that the 6kg format is cheaper. But at first, since we do not know very well how the cat will react, if it will like it or not, we have chosen this slightly smaller format. And we will also have to make the transition with the food that they have left us at the shelter. Those are the treats or prizes that we are going to give our cat. They are two sachets for 1.99 each. There was a two for one offer, so one was not free. We should not overdo it with treats, but it is always an incentive when we play with our cat. And also, as I always tell you, we must give it wet food. These are sachets of wet food that have 85 grams each and 12 sachets cost 14.99. The idea is to start putting it on at night when we have it, so that our cat can drink as well as eat, because the sachets have a lot of water and that helps Them stay a little more hydrated. It is also possible that in the first few days, when the cat is a little more afraid of us, it can help us get closer to it. Well, although the box is not very big, I am going to try to use the scratching post in case the cat wants to get into it. The box came out free, but anyway we are going to put it there just in case the cat decides to use it. After all, what we want with the box is for the cat to have different areas, different nooks, in case it wants to hide somewhere. And that makes it much safer. In total. Well, it has not been very cheap. The whole thing came out to €220.65, which is €239.48 in US dollars. Well, it's true that there are a lot of things, but it's also just the basics. Then we'll have to keep buying some other things, like a bed when we see where they decide to sleep. Or maybe a tree or some other scratching post to have around the house. As you can see, you don't need to have a very big space at home. In a room like this one, you can have everything perfectly arranged. In fact, we could have used the space under the bed and decided to leave it unused to see if the cat decides to use it later. Yoshi's work area is a little cornered, but as I said, it's temporary. In the end, the cat will get used to living at home. And when it gets used to us, we we'll move things around the rest of the house to their final locations. There we'll be able to space out the elimination area, the eating area and the toilet area much more. But anyway, those are steps we'll take when our cat has arrived home and we've seen that it's adapted perfectly. And next Sunday you'll have a very special video because you'll finally meet our new feline companion. So don't miss it. Well, what did you think? Did I miss any basic essential elements that you see for a cat to come live at home? Hey, did it seem expensive to you? Did you expect it to be more or less that price? Well, leave me a comment so I can read it and find out everything. Also, if you like the video, give it a like. And remember to subscribe to this channel if you haven't already. We also have a secondary channel here on YouTube called Questions and Answers from a Veterinarian. Come and check it out and subscribe too. But before we go, we have to meet Milu who was nine months old when this photo was taken. They tell us that she is an active cat, but very quiet. She practically doesn't meow. She greets us with her human companions, Ines and Christian from Bogota, Colombia. Here we have the multi species Bale family greeting us from Mexico City. They are Sam, the oldest dog, Terry and Kasmyra, this little one who was rescued from a car engine. Greetings to everyone. And we say goodbye by greeting the kitten Telma, who lives in Ecuador with her human companion, Jay Arias. Thank you very much for following the Happy Pets and Families channel and we'll see you in the next video. VIDEO and now I'm the one assembling the furniture. What I don't know is this. What the heck is it? What's this bald thing like?
There you go. It's not unstable or maybe a little bit. No, I don't like that. I don't really like it being elastic like that. And I do like this. It has its little feathers and things, so that way the cat can follow it better.
More from Javier

Cuando nadie reconoce tu dolor por la pérdida de una mascota: así es el duelo desautorizado 💔




¿Tu perro hace suficiente ejercicio? Mantenerlo activo es clave para que viva mejor 🐶💪

GATIFICANDO UNA PARED PARA MI GATO 😻🧗♂️ Ideas para aprovechar el espacio vertical en casas pequeñas



Por qué duele tanto perder a un perro o un gato: el vínculo que explica nuestro duelo 💔🐾