Los mejores consejos veterinarios para tu perro
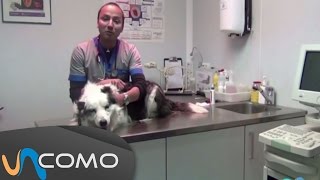
This is a YouTube video titled "Los mejores consejos veterinarios para tu perro" created on December 17, 2014, providing detailed veterinary advice for dog owners. The content is a monologue-style instructional guide covering various topics such as measuring a dog's body temperature, administering injections, microchipping, ear cleaning, anal gland maintenance, oral hygiene, nail trimming, and tick removal. The speaker offers practical tips and explanations aimed at helping pet owners care for their dogs effectively.
Hello. Now let's talk about the body temperature of our pets. Our dogs. Many people always ask what the normal temperature is for dogs. Whether it's the same as ours or a little different. We'll tell you it's different. Dogs have a slightly higher basal metabolism, so their temperature will be higher. A dog's normal Temperature is between 38 degrees and 5 degrees. Even up to 39 degrees and 5 degrees. Very different from ours. At 39 degrees we're already in bed. At 39 degrees they're at a normal temperature. At 39 degrees and 5 degrees it can be considered a fever and could be a sign of illness. How do we know what our dog's temperature is? The only reliable way to know their body temperature is with an instrument that we're all familiar with, which is a thermometer. In this case, the thermometer is the only correct way to get a reliable reading. Rectally. There's no other way. It's in the rectum. The best times to take a temperature and for it to be reliable are early in the morning or late at night. Why? Because, for example, if we do it in the summer at three in the afternoon, it's very hot, or maybe the dog has exercised a lot. We take the temperature and it's possible that it'll be 40 degrees. Anyone would say that it's a fever, but it could simply be that the temperature is higher than normal due to external conditions and the result of the exercise. Therefore, the most reliable thing to do is always to take it first thing in the morning and last thing at night. Many people believe that if a dog has a dry nose, it, it means it has a fever. I call this an urban legend because it's not true, right? The only reliable way to know if our dog has a fever is with a thermometer. It's a thermometer that we can get at any pharmacy or even nowadays at any supermarket. And the only way, I repeat, is rectally hem. The correct way to put the thermometer on our pet is, uh, before inserting it is always to lubricate the tip a little. Uh, if we don't have Vaseline at home, then simply, uh, with hand soap, as I'm going to do in this case, you can, you can lubricate it. And uh, then we simply insert the tip into the anus, no more than 1cm and wait for these electronic thermometers to give us the reading. Some take 30 seconds, others take a minute. If our Temperature is over 395. And there are other symptoms, such as our dog being a little more listless or eating little. Then it's possible that he has a fever and it would be good to take him to the vet for a more thorough examination. Well, in principle, this is all I had to say about temperature. And I'll see you soon in the next video. Thank you. Now we will explain how to give our dog an injection. There are many types of injections, including intramuscular, intravenous or subcutaneous. The one we will explain today is the subcutaneous injection, which any owner can easily do at home. It is very important for the owner to know how to give this type of injection, especially because there are some dogs that are diabetic and need to be injected every day, or patients who are terminal and cannot be taken to the clinic. It is very important for the owner to know how to give this injection. Where will we give the subcutaneous injection? We will give it to the dorsal area of the neck or the area between the shoulders. This is an area that is very poorly vascularized, meaning that it has very little sensitivity. Once we have determined the site where we are going to give the injection, we lift the skin, fold as much as we can and make sure that there is space under the skin. We will first disinfect it with cotton or gauze with alcohol, and then we prick, insert after removing. It is very important to massage to prevent cysts. When we have a patient that we have to prick every day or with very long treatments. One tip is to divide the application area into several quadrants so that we do it in a different area each day and allow time for the other areas to rest. Hello. Well, today we are going to talk about the microchip. The microchip is an essential tool that we have for identifying our pets. The microchip is an electronic device that is the size of a grain of rice and that is included. Right. It is inside these syringes that have a slightly thicker needle than normal so that it can be inserted under the skin of our pets. The microchip belongs to a group of radio frequency devices that are called passive. What does this mean? It means that it is only activated when they are on the radar or in the field of a specific scanner. In other words, the microchip does not emit a signal. Many people ask if we implant a microchip in our dog and then we can locate it via satellite. And it must be explained that this is not the case, because if it were this way, it would have to have A battery that would emit a signal for about 18 or 20 years. From a technical point of view, it is not currently possible. Therefore, the microchip will only be activated when we read it with a special scanner. These scanners are only available to all veterinary medical personnel. Police, firefighters, shelters and all veterinary clinics. Which are the ones authorized to have these radars. From an international point of view, the microchip must be implanted in the neck area. In the dorsal area of the neck, or behind the left ear. Only in these two places. We cannot put it in the leg or in the abdomen or anywhere else. It only has to go on the top and on the left side. The goal is that when we find a dog or someone finds a dog. When we scan it, we can't waste too much time. Because there are dogs that are very large, that have a lot of surface area. So we're only going to look for it in the neck area or behind the left ear. Like in this case here. Here, our friend Yao, who has it behind his left ear. The microchip simply gives us a number that goes into a database. And that database contains the owner's details. So if we lose a dog, we scan it with the reader. The number comes up. We go to the database and locate the owner. That's the purpose of the microchip. Well, at first I hope it's been useful to you. And remember that microchipping is mandatory. It's the only way we can find our pet if it gets lost. Thank you very much. Hello, friends. Well, here we are again with Yao, who is our model that's helping us make these videos. Okay, now we're going to explain a little bit about cleaning the ears or the ear canal. It's very important to learn how to do this procedure correctly. From a preventive point of view. And if in any case, we have an ear disease or otitis. From a curative point of view. How do we put some drops in? It seems very easy, but many people don't do it correctly. We simply take the product we need. Whether it's to cure otitis or simply to do it preventively. It's very important to know that our dog's ear canal has a vertical section and then a horizontal section. The ear canal is L shaped. So the mistake most people make is to put the drops in and clean. At this point, we would only be cleaning part of the canal. We want the drops to go all the way in. So the most important thing is to lift the ear canal, which is all the cartilage and put the drops in as deep as we can. And the most important thing is to massage it. This is the most important thing. They always like it and are very happy. And it is repeated exactly in the other ear. Why? Because many times these infections are bilateral, meaning they can spread from one side to the other. Once we have put the drops in, we simply use any gauze or special handkerchiefs that come with special instructions to clean as far as we can reach with our fingers. We must not insert cotton swabs because we can damage the ear canal. For dogs that have, like our friend Yao, their ears that sometimes droop a little, or other breeds that have droopy ears, we have to do this at least once a week. Why? A dog's ear canal, if the ear is drooping, will not be ventilated properly. When it is not ventilated properly, the temperature increases. More wax is produced as a form of defense mechanism for the ear canal. And that wax, that excess wax is a breeding ground for the growth of bacteria and fungi that can multiply and cause an infection. If, when cleaning it, we notice that the ear canal smells bad, is red and hot, always remember those three bad smell, redness and increased temperature. It is possible that we have an infection. In this case, we must take it to your trusted veterinarian to certify if what we have is an infection or not. Well, that's all. I hope you found it useful and I'll see you in the next video. Hello, friends. Now we will explain what has to do with the maintenance and cleaning of the anal glands. What are the anal glands? Many people don't know where they are. They don't know what they are. Anal glands, like their perianal glands, as their name suggests, are near the anus, right? They can't be seen. They're on the external finter of the anus. And if we locate them, it's very easy. I always explain it to people. Imagine that the anus is like this circumference and the anal glands are always at 4 and 8 o'. Clock. Hmm. So it's very important that these glands are always empty. What is the function of these glands? These glands have two types of functions. One is lubricating, which is when the fecal bolus comes out, they help lubricate it a little so that it comes out easier. And secondly, they produce many pheromones that are used for territorial marking in dogs. These pheromones also give our pets their characteristic odor. That's why, if you look closely, when dogs meet at the park or meet other dogs. The first thing many of them do is try to smell each other's anus. Right? That's where all these hormones are concentrated. These glands that don't empty regularly can cause two types of problems. On the one hand, they can cause our dog to have a very, very strong odor. Many people tell us, hey, my dog smells very strong. Well, it's possible that it's because of these glands. And also if they're not empty, they can become obstructed and can lead to a slightly more serious problem called anal gland abscess. What happens if this gland doesn't empty? It fills up little by little. Since it's so close to the anus in this area, it's very easy for it to become contaminated. An abscess occurs which is simply an infection of the sac and can cause a severe fever. And sometimes the only solution is surgery. Therefore, it is very important to know how to empty them. To empty them, we simply need gauze, which is very important when emptying the anal glands. Don't put your face in the way. The mistake is a very, very common mistake, which is to see if we are doing it right or not. We put it like this. Squeeze, and it comes out with a lot of force and can get into our eyes. So that's why we put gauze on it. And it smells a lot. So just to remind you that the anus is like this circumference, like a clock, and it is between 4 and 8 o', clock, you simply put gauze on it, apply pressure, and you will notice if they are full. Depending on the size of the dog, each gland can measure between 1 and 3 centimeters. Simply squeeze, and that's it. It's very important to do this regularly, and we generally recommend doing it once a month. This way we'll prevent these abscesses from forming in our dog from smelling too strong. And above all, preventing anal gland abscesses, which often require surgical correction. It's also important, and I'll take this opportunity to point out, that there are some breeds that are predisposed to having abscesses of this type of glands. Some breeds, for example the German shepherd, some cocker spaniels, also tend to have constant infections. But it's due to an autoimmune issue. Yes. If that's the case with our dog, where the anal glands are always infected, the only solution is to surgically remove them. Well, let's start with that. That's what I wanted to tell you about anal glands and remembering to do it once a month will be enough to prevent these abscesses. Thank you very much, friends. Now let's explain the topic of oral hygiene for our dogs. Many people also ask us, do I have to brush my dog's teeth? Of course we should brush our dog's teeth. Why? Because just like us, they can get cavities and dental plaque, and that can affect the oral health of our pets. It's very important to know that toothpaste has to be special for dogs. There are special toothpastes on the market. What's the difference? The difference is the fluoride content, which can often be a bit toxic for humans. Also, since human toothpastes have a large chin, dogs don't know how to spit, so they end up eating the toothpaste. In addition, they have a very, very, very developed sense of smell, and they are bothered by the toothpaste comp content that human toothpastes have. So the toothpaste has to be for dogs. As for the toothbrush, the important thing is that there are many brushes on the market. And here's an example. Basically, the size hem the teeth of a Saint Bernard are not the same as those of a Chihuahua. In this case, human toothbrushes can work for us. The important thing is that the bristles are medium and soft. They should never be hard. There are also other toothbrushes on the market that are a kind of plastic thimble, right, that you put on your finger. And it may be much easier to do the movements one way, a very easy trick is to take a gauze, wrap it around your finger, and put the toothpaste on the gauze, and we can start cleaning. Once we get used to it, we can then use our toothbrush. Uh, it's always good to start with the side teeth. And once we have our pet accustomed to it, we can start with the incisors, which are the ones that bother them a little more. Uh, if everything has gone well, with time, we will be able to clean the inside of the teeth. Now. Now we will try to do a demonstration. Uh, brushing has to be daily, and in the minimum of cases, it would be three times a week. Keep in mind that after eating, after a few minutes, bacterial plaque begins to be seen on the surface of the teeth. So once a day would be ideal. Uh, and it is also very important that people know that even if our dog's teeth are cleaned, uh, periodontal hygiene or oral cleanings that we call tartarectomies must also be done regularly. There are some breeds that have to Be done every year. Others that are done every two or three years. It is important to know that these ta trectomies are performed under general anesthesia and are the only way to remove all the tartar, the dental tartar. Well, I hope you can get your dogs used to it because you will save yourself a lot of pain and headaches. Thank you. Until next time. Hello, friends. Let's explain how to cut our pets nails, our dogs and cats. First of all, we obviously need special nail clippers. They have to be special. Try not to do it at home with the scissors. We have to cut paper towels. No, they have to be special scissors which we can get at any clinic or veterinary store. They come in different sizes, obviously hem. But the important thing is that they are for dogs and cats. I will try to explain them here. The big fear and the big question that our owners have is that they are afraid to do it at home because they could hurt the dog. So what we have to keep in mind is the following. Let's suppose that this is a finger. I'm not a very good drawer. Here we have the pad which would be the bearing. And here we would have our nail. What is the normal measurement? The normal measurement of the nail, which is very important, has to be horizontal. When the dog is supported, it has to be horizontal. It has to be a horizontal cut. There is always tissue inside our nail which is living tissue, where the vascular bundle is right, Artery, veins, nerve. And that is what we have to be careful not to cut. Why? Because if we cut this area here, it will bleed. It will bleed. Always make sure we're the living part of our nail ends and cut about 3 to 5 millimeters below. If we happen to cut and we have caught the living part of our nail and it bleeds, there is no need to panic at first. The blood is very scandalous. The nails tend to bleed quite a bit. But you have to remember that it is impossible for the dog to bleed to death due to this bleeding. So all we have to do is apply pressure for about 5, 6, 8 minutes until the body stops. It will form a clot and the problem will be solved. And then always disinfect. The nails have to be cut. Generally in small breeds that do not weigh much and do not usually wear themselves out. A large breed dog generally weighing more than 20 or 25 kg initially, that does normal exercise every day. There is no need to cut the nails. So this is something you can do at home. But always keep in mind that you have to pay attention to where the quick part of the nail is if the nail is dark in color and you don't feel safe, it's best to take it to a professional or a technician who will know how to do it. And if there is any type of bleeding of this type, clinics have the necessary medications to stop this bleeding. Well, thank you very much, and we will explain another topic in the next video. Hello, friends. Today I'm going to explain how to remove a tick when we find one on our dog. Now that summer is coming, we're going to see this every day, and many people find themselves in this situation, get very nervous and don't know what to do. It's actually quite simple. Here we have as an example, two dolls that imitate ticks. There are two types of ticks. Some that are going to be obviously here, are enlarged many times. There can be some that are very small, very hard, that are very fast, like the one I have right now here in my hand, which is when they climb onto our pet, then it sticks to the skin of our pets, begins to suck blood. And when a tick is full of blood, well, it takes on this appearance that many times, as when we see them, uh, this is called. When the tick is this size, we call them. Tell Elinas that a tick, uh, at this point can absorb almost, uh, 1 milliliter of blood, which is a lot. And secondly, a female can lay, uh, even 2,000 to 3,000 eggs. So, well, it is important to keep our pets protected from ticks. Let's suppose that this green here is the hair and skin of our animal. And so the important thing is to make sure that the legs are pointing down, that is, that they are pointing towards the animal's skin. Many people make the mistake of grabbing the tick and pulling it straight off. This is when you pull off the head, which is where there are structures called the chisera, which are attached to our skin. If we pull it off this way, that piece of the head is going to remain attached to the skin. And that's when we're going to get the typical abscesses that happen when a tick is pulled off incorrectly. So how do we remove the tick correctly? If we have some tweezers at home, even one of those hair removers that women use to fix their eyebrows. The ideal thing is to grab the tick as close to the head as possible, hem as close to the head as possible and try to make a movement hem like this. Why? Because it's stuck. It's stuck. So what we have to do is try to get it out. Never pull off. Suddenly just turn and get out. Be careful with ticks, the large ones that are already full of blood, because they are very fragile and can break when you grab them, either with your fingers or with tweezers. So it is always important to grab it as close to the head as possible. And always remember to do the movement right. Never do it this way, okay? After removing a tick, it is always important to disinfect the area with an antiseptic product that you have at home. So always remember that if, when removing the tick, you grab it by its most distal or most external part, so to speak, and you pull it in one go, you run the risk of the head getting stuck inside. In other words, part of the head getting stuck inside the skin. And this can cause an infection. So always remember that their legs always have to be down because this is the direction of these chelicerae, which are the structures that are already inside. And we have to make this movement to be able to remove it. The best thing to do is think of it as a hook. Hmm. How would we remove a hook without tearing the place where it is anchored? But remember that the best thing to do is always preventive medicine and all the products that you can put on your animals, since ticks can transmit many diseases and some can be fatal for our dogs. So always preventive medicine. The best thing to do is to put collars, pipettes. There are many products on the market, and ask your veterinarian which is the most suitable. Oh, well, I hope this has been useful, and I'll see you in another video.
More from Javier

Cuando nadie reconoce tu dolor por la pérdida de una mascota: así es el duelo desautorizado 💔

¿Tu perro hace suficiente ejercicio? Mantenerlo activo es clave para que viva mejor 🐶💪

GATIFICANDO UNA PARED PARA MI GATO 😻🧗♂️ Ideas para aprovechar el espacio vertical en casas pequeñas


Por qué duele tanto perder a un perro o un gato: el vínculo que explica nuestro duelo 💔🐾