Gathering Information with JotForm
Catherine Sanders Reach shows law firms how to use JotForm for client intake, from building forms and importing PDFs to encrypting sensitive data and exporting to practice-management tools like Clio. She covers conditional logic, file uploads, signatures, and why the free tier's limitations make a paid plan worth it.
Chapters
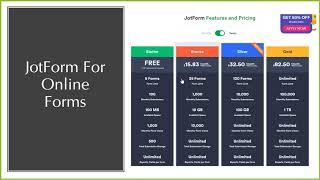
Okay, so welcome everyone today to the North Carolina Bar Center for Practice Management series. We're calling learning objectives, and this is kind of how to gather information easily with JotForm. And JotForm is a survey tool, but it has a lot of use cases, I think, for law firms. And so we'll kind of dive right in. I guess one of the things to be aware of is is that JotForm is not the only tool on the market. There are a boatload of ways to get information from your clients. Excuse me. Not only through survey tools like Microsoft Forms or SurveyMonkey or Google Forms, but also in practice management applications, customer relationship management, document automation. There's a lot of ways to get information. So this is just one kind of easy way. It's pretty simple. It integrates with a lot of other products. And one of the things it does is it will let you take a PDF and turn it into a form, which if you've ever tried to do that with Acrobat or Nuance or another product like that, it's kind of difficult. So I'll show you. So kind of basic overview of JotForm is that it is free but for limited use. And the limitations really come in at the number of forms you can create and the number of submissions you can receive and the amount of space they give you. Functionally, it's all the products are the same. So I guess this is one of the products that if you only needed 5 forms, then you could get away with this because they're not keeping any particular functions beyond that in the free mode. So you could, you can do pretty much anything. You're just limited to this space and the number of forms and the number of responses. So I'm actually gonna dive in, 'cause I think that's always the best way to show you these things, to JotForm. And here it is. So I've already created a username and password, and like many of the products on the market, you can see that you've got, kind of tells you where you are and where your settings are in the upper right. And so, you know, these are the forms that I've created and used, and what we're gonna do is create two types of forms. One is based on a PDF form that I already have, and one is just a brand new form.. So if I click on Create Forms, you've got a couple of different options here. You've got 1, Start from Scratch, 2, Use a Template, and I'll show you what templates look like. Basically, you— there's a ton of pre-made templates that you can use. Not a lot for law firms. They've got some business forms and templates in here, and you can see from these that they're quite pretty. You can, you can add graphics and lots of other things, but we'll go through that. You probably don't need very pretty forms. And then the last option is to import a form, and that's what we're going to start with. So then you can import a form from a web page, clone an existing form, or import a PDF. So one of the things to think about is if you are doing client intake, if you send them a Word document and ask someone to fill it out, that means that they need Word, that they probably have a printer because trying to fill out a Word document is really difficult. So in a perfect world, we would send them a PDF form, but even then, a PDF form requires some sort of PDF reader, which is free, but if you try to do it on your phone and fill out a complex PDF form, it's really difficult because it's very small. It doesn't really translate well. So this is where we're going to use JotForm to create this PDF form. So it's going to pop up and it's going to basically say, what would you like to use? Upload your PDF form. And so I had a Word document that I just converted to PDF. I didn't do anything special to it, and it is crunching through the PDF. And so what it does is on the left-hand side is your form, and on the right-hand side is the original PDF. And if you scroll through, you can see that it identified fields in my PDF document. So if I click on Company Name, it shows you that it's taken my PDF document, turned it into a form, and it's identified— and this, I have to admit, I'm going to show you where this doesn't work so well. Because this is a simple form and it's very clean, it easily identified this as Company Name and creates a text box. And so, and then if you click on these, it basically draws you a little line and shows you where this is. So that's super simple. If we keep scrolling through this form, there were some big kind of text sections that people could fill out. And again, it identified these really well. Oh, so one thing to note, see how there's a signature here? It recognized that this is a signature field, and people can actually sign with their mouse or their finger on their phone or on their tablet. Tablet. So that's something that it adds a lot like a DocuSign document or an eSign document. And then because this is date, it recognized that this was a date field and so on and so forth. So it's, this recognized it was email. So if I tried to fill this, this in, and I'll show you that, it actually forces someone to put in at least an symbol. So they have to put in what looks like an email. Address. So again, it's very smart when it goes through and figures these things out. And then I keep scrolling down, and again, it's, it's gotten all these things, created these text fields. What it didn't recognize is this copy of the contract. So in this particular form, I want someone to attach a copy of a contract. Well, if you send this to them as a PDF form and they try to fill it out, then they're going to have to save the information on the PDF, and then they're going to have to attach the document separately if they remember to do it. So the cool thing about JotForm is it has a field to let someone upload a document. And so I'm going to add that field to our, uh, our form that was created out of the PDF. So I'm going to go to add form element. And then we're gonna scroll down to file upload, and I'm gonna put it in the form where I want it to be, and I'm going to make it look like— and that's it. If I want to see other options, I click on these properties. It's going to open the file upload properties. If I wanted to, say, restrict the number of files that were uploaded— so right now it says, you know, a maximum of 10,854. I think I would rather not get that many, so we'll say there's a maximum of 3 files they can upload. File types, if you know you're asking for a CAD file or some sort of unusual file, you can add to file types. If you click on multiple, right now we're allowing them to add multiple files, but I can limit the number of files here. That's the file size. Sorry, we'll go back to 10,000. This is where you make the change for the number of files. So we'll let them upload 3 files. And so again, for each one of these fields, when you add it, you add it through the form element, and then you can go into the file properties. Once we're finished with that, again, we've got this comparison between my PDF document and the form that it's created. And that's pretty much it. And so next thing you're going to want to do is preview the form. So up here in this button and click Preview, and this lets you see what, um, what someone would see when they get it. So they're going to see this They'll click Start Filling. If you want to test this out without having to actually fill this all in, they give you a little button, Fill Form. Yes, and we'll be emailing the client a link to this form, but I'll go through that. There's a couple of different ways that we can do that. So Start Filling, click on Fill Form, and it's filled out the form for us except for the signature, and I'm just gonna put my initials in here. I'll add a file, which is, you know, just like people are used to, and then I'll click submit. And once the attendee or the person who is, you've sent the form to and they filled it out, they'll get this thank you note and they can email themselves a copy of the PDF or they can download the PDF right from here. You can also send them a copy of the PDF that they filled out. But if I download the PDF, and this is as if I were the person having taken it, and I click it to open, then I get a finalized copy, obviously without the contract, but I get a finalized copy. So that's, that's what your client would see. So we'll turn off preview. And if you need to make any edits, you can do all that. So the next button over is Settings, and we'll go through Settings a little bit more in the next demo, but there's a lot of things you can do. Change the title. You've got a lot of options here. You can enable the form or you can disable it on a certain date or, you know, different things like that. We'll keep this one enabled. And then the last step is to publish your form. And you've got a couple of options. So one option is just to copy this link and put it in an email to your client. You can send it to specific people via email directly from the system, or you can share it on social or things like that. Probably not something you're gonna do. Probably your use case is gonna be that you copy a link and email it to them. One thing you do have an option is to embed this form into your website. Unless this is a— I am not a huge fan of having attorneys put a really complicated intake form on their website unless they have a way to make it only available to someone who has a login, and I'll show you what I'm talking about with the next demonstration, but if this was something, if this was a, some sort of survey where you wanted people to give you feedback about your services or something like that, you could email the link to them or you could put it on your website. If you have more than one people or one more, one more, one more than one person in your JotForm account, you can assign the form to others. And do other things like that. But if it's just you, this is probably all you need. So that's basically it in terms of the ability to take a PDF document or Word document, convert it to PDF, upload it, turn it into a form, and then share it with someone. So that's pretty easy. But it's not always this perfect. I have to admit that because this is a simple form, it was very clean, it didn't have any problems. If you've ever tried to use Adobe Acrobat to take a complex Word document and turn it into a form where it recognizes all the form fields like this does, you'll know that none of these products do the greatest job with that. So I'm going to show you a different one so we can see what that looks like. So one question that we're going to get to is, is there a limit to the input? Can I ask a question and have the client provide a 2-3 page response? There is a way to have a long format response, and I'll show you what that looks like. So I'm going to delete this one. Which you just go to the form that you created, click on more, and then you can see the revision history. You can rename it, you can clone it if you want to create two but have two different versions, things like that, or you can just delete it. So I'm going to do this all again, but I'm going to show you a form that I actually found online on a law firm website. They're not in North Carolina. And it's a complex form and it was a Word document that I converted to PDF. And I'm just gonna ask you to imagine if you sent this to somebody to fill out at home during COVID where they're not in their office, they may not have access to a printer. You know, things are a little bit more complicated now. So what this has done is it did the best it could, but as you can see, it's missed quite a number of fields. Somehow it managed to get middle or maiden, but it doesn't have the address. And so you can go and add the form elements. So if I want to add name here, and then I can drag and drop. That's the first name. I can make this form work, but this is— to do this for each and every one of these fields, especially as many as it's missed, is kind of a pain. And also, this is a long form, um, asks a lot of questions, and one thing that it asks is for your date of birth, driver's license, and Social Security. So now we're asking some pretty confidential information. We want to make sure that we protect this as well as we can. So I'm going to go back and do this in a different way, which is just to take the— this form and turn it into a new form. So I'll delete. So we're gonna go to Create Form, and instead of importing the form, this time I'm gonna start from scratch. And Gonna— there's two different layouts. You can use classic form or you can use card form. The card form, if you were doing a 3-question survey, sure, use the card form, but the classic form is probably what you're gonna want to do if you're requesting a good bit of information. And so it starts out, you can add your logo, and if you have your logo as a file, you can upload it. Which I do. Because I'm using the free version of JotForm, it's going to have JotForm branding in the bottom of my form, and there's not much you can do to get rid of it unless you pay for it. So even though you can have a nice customized-looking form, it will have that JotForm logo in the bottom of the form, and you have to pay for the first tier up to get rid of that branding. So the next thing we're gonna do is build this form. So all of the— this is a header that's automatically put in, and so we're going to— you can copy and paste from your existing form document, which is what I'm doing off screen, but keep in mind it's much easier to put it, put copy and paste into this, the properties rather than directly into the form because it messes up the formatting. So we are going to put in all this text in the subheading. And again, I'm just copying and pasting from Word over into this. And so we're okay with all the defaults and that looks good. So we will move on. To starting to ask questions. So it's really, really easy to do. You just start dragging from the form elements into your form. So the first question is full name. So there's a couple of things we can do here, um, and we've got this full name properties over here. So one of the things is you've got first name and last name, but what if I want middle name? So what I want to do is go into Options and turn on Middle Name. And now you see that I have Middle Name. If I wanted to add a prefix as a text box, or we can have a dropdown and we can add different prefix choices. You can add suffix, you can do all that stuff. And then In hover text, we can say something like, um, maiden name if no middle name, and so on and so forth. So you can customize this as much as you want. And then if you want to see what it looks like, you just go up here to preview form. And when we hover over it, it says "maiden name if no middle name." So that was the hover. That's just a little like screen tip. And then we could have added choices there. And then we'll continue to go on. And again, most of the, you know, fields that you would use are already here. So I'm going to drag over address. If I want to see that pane where I can make adjustments, I just click on Properties and it pops it up. So we can add other sub-labels and things like that, change the text of the question itself, but that's pretty simple and does it all for you. So you can make pretty quick work of this. So in the next one, we're going to add a phone. And if I want two phones, then I can say, um, home phone, and then we can add mobile phone. And then we will add email. One of the things is that email actually, this field automatically again forces the person to use a real, well, it doesn't have to be a real email address, although there is a validator you can use if you really wanted to go for that, but at least it forces them to put it into a format. So if they type, if I type in Catherine reach Gmail and I forget the or if I forget the.com or the.edu or whatever it is, it will not accept it until at least you put it in a real email format. So here's where we get to add some of the text elements. So we've got short text, long text, and paragraph. If it needs to go beyond a paragraph, I would suggest having someone use the upload field and upload a document. In this case, In this case, we're going to add short text. And you can— oh, that's another thing. For each and every one of these, you can make this a required field so they cannot move— they can't submit the form without it being filled in. So I can make that a required field and it shows a little red asterisk. So you probably wanna do this for all of them, quite frankly, so that you make sure everything is filled out. If you wanna make a copy of this, you just click on Duplicate This Field. And so after you've made all these changes, you can duplicate it. The next one we'll add as a long text. Actually, this one is, um, we want people to be able to upload the documents. So list the documents that you think would be helpful to understand your issues, but then we're also going to ask them to upload those documents. So we probably don't need this one. So now instead of saying what documents do you think would be helpful, if, if we want to actually ask for them to submit the documents to us, we can. Then we're going to add a dropdown menu. So a couple of different things. Dropdown menus are going to be pick one, single choices pick one, multiple choices pick two. If people know how to select multiples from a dropdown, they can if they hold their Control key. So if you want to avoid that, you want to do a single choice. The big difference between dropdown and single choice is that all the choices show if you do single choice and they pick one, whereas a dropdown is just a shorter looking field. So I'll add this one. And we'll add some properties. And then in your options— and this is actually me copying and pasting And now all of that's filled in for you. Clean it up. Yes, so that— okay, one of the questions I just got, and absolutely, is this is a lengthy form, and it is, or you have a lengthy form. Can't— is there a way for someone to fill out the form, start filling it out, and come back to it later? Absolutely, that's a setting. So I'll show you that. So you get the general gist of things. The last thing that I want to show you is the ability to do skip logic or conditional logic. And basically what that does is if you have, if yes, a lot of times people don't add that conditional logic, so they'll have, you know, a question, if yes, skip to question whatever. I don't think that's good survey methodology because really you want to have them skip to the right thing. We're going to add a yes/no question, so that's going to be a single choice. And the question is— All right. So now, have you ever been represented by an attorney before? In the Word document form, they had, if yes, please state the circumstances. So what I'm going to do is I'm going to go back. I'm doing this mostly to make it easier for me to do this conditional logic, and you'll see what I'm doing here in a second. So then we're going to add another short text. Okay, and I'll show you why I did that. So if you have skip logic, the easiest thing to do is put all of your questions, all of the options in, because if you If you don't, you'll have to go back and add them, and that's kind of a pain. Can you make the answer boxes larger? Yes, there's two ways I can do that. So I can go in here, and I can actually change the size by width and character limits, or I can just use the long text or the paragraph boxes. And this, I'll show you, It looks like this when you're viewing it, but it's actually a little bit friendlier when you're taking it. So, and then we're gonna ask a question that is, now we're kind of asking personally identifiable information. So in this case, they're asking for the driver's license number. So that's going to be— there's no validated field. You could put number and that forces someone to put numbers, but in some states there are letters, so you don't want to do that because if you use this number field, it will only take numbers. And so again, we're going to use the short text because that's pretty much anything, and we're going to say Then we're going to put a sub-label. If license— [NOISE] So what we've said is, if the license is issued outside of North Carolina, please identify the state below. And then we're going to add another short text box. And as you can see, you can move these around. Click into Properties. And then if I go into Options, or rather advanced. Oh, I can't remember where it is. This always happens. Somewhere in here you can actually say that you want to do a dropdown for states, and I just can't remember which one of those it is, but you can have it dropdown Maybe it, maybe it's the dropdown. Let's just check. Yes, it is this one. So we'll remove that one. And then again, you want to make it as easy as possible for people to fill things out. We'll go to preview, and they can pick their state. So This form also had a request for a Social Security number. So anything you ask that's personally identifiable information, we're gonna encrypt this form before, so that when someone fills it out, it's encrypted in transit and in storage, and the only way you can decrypt it is on your own desktop. And so the last thing we're going to do is add a signature file. So we are going to add a new page because they're pretty much finished with the form at this point. Where's my new page? There we go. All right, I don't know why it's doing this, so we'll just put another header in here. And then I want to add a signature block. It says they've agreed to sign, or they're signing it, and then the date. And I'll delete— so then again you can preview the form, and because I don't feel like having to go and fill all these things out, I'm not going to go through and make them all required fields, but You probably should because otherwise people will skip them. So then you can review, make sure that everything looks the way you want it to, make sure you haven't missed any questions, and then again you can use the fill form and it'll fill that all in so we can see what it looks like when someone sends it to us. We'll browse for a file and and pick today's date. Click Next and Submit. So that's, that would be the user experience. I'm going to go back into the form editor and show you a couple of things. So remember we said we wanted to add the skill logic or conditional logic. So in order to do that, that's why I said you, you need to put everything in there first because I'll show you. In settings, if you want to do conditional logic, uh, go to conditions. And so we want to do a show/hide field. And so if have you ever been represented by an attorney before, is equal to yes, show that question and save. That's why in order to make your life easier if you're going to do conditionals is that you basically go, if they say yes, then show them this question, and then that, that will work. And so you can add a lot of conditional in there. When we talk about how you receive the results from the— after someone takes your survey, you can get it via email, and then you can also set it up to where they get an email with the finalized form as well. And so then on the thank you page, after they finish taking it, then you can have it either show a thank you page or you can have it redirect to your website or some other place that you want them to go. And the form settings, you ask about whether they could come back and take it later. So if you go into form settings and click on more and scroll down, Continue forms later is disabled by default. You can enable it and it creates this automated email, but you can actually customize this to say whatever you want to. And they'll want— if they bounce out of the, the form without completing it, they'll get an email that says, or it'll pop up on their screen that they can come back to it. So the other thing I want to show you is how to encrypt this form. So we're asking for confidential information. It's not just confidential, it's protected class information. So what we're going to do is encrypt the form data. So I'm going to click on yes, I want to encrypt it, and then it's going to ask me to log into JotForm again. And most of you probably don't have a public key, and you may not have— unless you've done this before with JotForm, you don't have an existing key. So we're going to say create encryption keys for me. And this key you have to have on your computer to unlock the response to this form. It cannot be unlocked by anybody but you with this key. So that's something to keep in mind. If you lose the key, you will not be able to open the, um, the forum results. So once this happens— can the same key be on multiple PCs? Yes, because what I'll show you, you download the private key And I'm going to open it. It actually doesn't— it's in my Downloads. So I'm going to go to Downloads. And there's the key. And then I can put it— like, if I have a folder on my desktop for forms like this one, I'll just drag it over here so I know exactly where it is. All right, so that's, that's encryption. And then one thing I want to do— this is a long form, and so if you go back into build, there's these a whole bunch of things called widgets. And so widgets allow me to do all sorts of things. Some of them are duplicative of what's already in your basic But some of them are not and are useful. So the widget that I think for a really long form that's useful is the progress bar. So if you know the name of it, you can just search for it. And I'm going to drag the progress bar in here. And we'll say only— it gives you choices— only required fields. Now we want every stick at the top, yes. And we can close this, and when I go back to preview the form it gives them a completion notification. So as they go through, they see there's 13 fields completed, 0 to 13, and goes on. So it just gives them a sense of how far have I gotten. And again, if they bail out, then they can go back and finish it. So we're filling in this And you'll note it pops up, this form is encrypted. I'm gonna submit. And so the form has gone to you. You will get an email that you got the form. You will also see in your primary JotForm interface your two submissions. If you want to see your submissions, you just go over here and click More and click on View Submissions. But these are fake submissions, so they're not encrypted. Let me show you what would happen if I actually filled out the form. Form. And again, make sure that it is encrypted. Yes, it is. So we'll click on Publish. I'll copy the link. Mm-mm-mm-mm-mm. And as you can see, it's telling us as we finish it. And browse the files. Now one thing to be aware of, the files that they add through the form are not encrypted. So if they're gonna send you very sensitive files, probably best to have them password-protect it or gather those files in some other way. It's a downside that JotForm is aware of, and they're looking at how they can make that happen, but right now it is not an option. So remember we did this, um, "Have you ever been represented before?" "Yes." Here's our conditional, and we'll say it was "Final Agreement." We'll sign it. Date it. Submit it. And then I'll get an email that I've gotten an encrypted response. And until I decrypt it, it's going to look like gobbledygook. It, it is still gobbledygook except for whatever I've chosen in the drop-down menus. So the way you decrypt it is you go back into JotForm and you go and you view your submissions. And for whatever reason, it's decrypting it, but usually it pops up and requires you to put in your key, which is that little file that you saved. So I'm not sure why it's not unless it's just kind of saved it for me. You can also download the the response as a PDF, and you can also export it as Excel. You can export it as a CSV, and that means you can reuse the data. You can search across the submissions to this form, and then there are— there's a whole reports feature that you can go into and look at this in the report builder. So if you actually wanted to see how many people are answering a particular question in a particular way, this is again more for surveys than gathering information. Um, You can just drag and drop the different— again, this is much more for if you were doing a survey versus getting information from a client. Since it's free, You can go and play around with this, but you know, basically start for free. It's pretty easy to use. Customizable— honestly, while it does take a while to create the form from scratch, it'll take a while to create a PDF form, and this will be a lot more friendly for mobile users. And then you can get reports. There's also a lot of integrations, so if you use other products like Google or Clio or something like like that. There's a lot of integrations directly to other products. And then if you wanna use integrations with Clio or PracticePanther or one of the practice management applications, you can actually take information through JotForm and push it directly into Clio through Zapier. And so there's, you know, this is, This was just a kind of basics overview of what you can do, but there's, there's a lot more you can do with this if you get creative. It will take a while. Creating any kind of good input system takes a while. One of the things I should mention is that the fact that you've got The information that you can download in a CSV, or a comma-separated values file, or an Excel file means that you can reuse it in Word documents. So for instance, if I go in here and view the submissions and export them in Excel. If I have a Word document, which I will drag over here, and you have a letter that you want to merge that, that data from the spreadsheet into this and generate a bunch of letters. All you have to do is— let me go and make sure that that spreadsheet— one of the helpful things to do is open the spreadsheet and make sure you know what's in it. So we've got different headers. So know what your headers are, and then you can go into your Word document. And I did this before. Go into Mailings, Start Mail Merge, do a step-by-step mail merge. We're gonna do a letter, and then we're gonna use the current document. And we're gonna find the spreadsheet. And so I can turn any of these— I can fill them out with the information in that spreadsheet. So I'm going to say, "Dear," And these are all— these are the fields that I collected in a survey. They're not going to be in this because you got it from a spreadsheet, so you just open this and it shows you what merge fields you have. In there, and then, and so on and so forth. And then once we've done that, we're going to preview the letters, and it fills in the information from the spreadsheet that was basically generated from the responses to our survey or our form and fills it in. So you can basically generate a letter based on the information they gave you through the survey, and it can be lengthy text. So that's another way to reuse the data when you gather it like this, which is a lot harder to do in Acrobat. It's not impossible, but it's a lot harder to reuse the information like that. When you create those forms. So that was a little kind of an aside, but I love the ability to be able to reuse the information once you get it, um, however you want to. You can input it into a document, you can manipulate it in a spreadsheet, you can do whatever you want because the data is all parsed out. So with that, this is how to find me. This is how to ask me questions about it. It's certainly something that it's worth pursuing or getting somebody on your team to work on because then you're going to have these really nice forms that have a lot of extendable functionality and they'll be really easy for your clients to use.