secureandsharedocuments
Catherine Sanders Reach shows how to secure documents in Word and Acrobat Pro: remove metadata and hidden content with Document Inspector, encrypt files with passwords, set editing restrictions, add digital signatures, and share safely via OneDrive with granular permissions and expiration dates.
Chapters
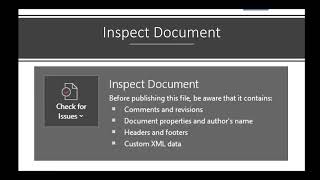
So welcome everyone to today's learning objectives, and we are going to be talking about protect and safely share documents. And so basically we're going to go through how to secure documents in Word in a couple of different ways, how to secure documents in Adobe Acrobat in a couple of different ways, and then finally looking at ways to share documents. I'm not going to go into email encryption today. If that's something you're interested in, definitely let me know. The reality is there's a lot of products on the market that are add-ons. There's some very expensive products on the market, and then there's different versions of the Microsoft 365 platform that have encryption. Kind of depends on what your needs are. So that's, that's kind of a whole program unto itself, but this one is just kind of basics, and hopefully you can find some uses in this for you. So first we're going to talk about securing Word documents. And the first thing I want to do is go over how to remove metadata. Now I have an article that has all the instructions you need on how to remove metadata, but I want to show you a couple of documents that have metadata just to explain what it is and then how to remove it. So, so this is your typical Word document, and in it you'll see that there's some things that you may use on a daily basis in terms of Track Changes. And whenever you open a Word document that has a panel over here on the side, it means somewhere in this document, and you may have to scroll through to find it, or some comments. So those are two things that technically are not metadata in, in the literal sense, but they are things that you want to be able to remove from a document before you send it or share it. Unfortunately, there have been a lot of people who have kind of been caught out with comments about, you know, discussions about, well, we can settle for $10,000, but, you know, we'll take whatever they give us first before we negotiate down. You know, things like that. These are the things you don't want in your document that you don't want to share. The other thing that you may have in a document, well, you definitely have in a document is the technical metadata itself. So if you go over and again, I just clicked this little arrow under File. And then if you go into this button, and I'm using Microsoft Word on the desktop, it's the installed version, but through Microsoft 365, subscription product. So if I click Info, and this is pretty much how it should look no matter what version of Word you have. It may look slightly different. It may say something like Properties, but in the older versions, but this is, you know, one of the things I want to show you. So we've got all these file properties. We've got the size, the number of pages, words, total editing time. When it was last modified, when it was created, the author, and the last modified. Now, one of the things about all of this information is that it's not necessarily 100% true. If I go back and look at this document, I can tell you that while I did personally create it and I did last modify it, it took me a heck of a lot longer than 13 minutes to write it because it's an article. But what happens is when you open it, when you hit Save As, other things, it starts kind of reverting over the old metadata. On the other hand, if you want to look at another file just to see other kinds of metadata, we can look at this one. And this says it was written by Stephanie and Darlene. But if you look at the metadata, says the author was Josh Eaton, and it was last modified by me. And again, total editing time. The title, if you'll notice, this is another bit of metadata that can get you caught unawares. If you start with a document and you save as, and you save the file name, the file name and the title may be different. So in this case, the title is HR 101, and it's pulling from the first line of the document. But the file name is metadata.doc. So that's another thing you don't necessarily want. This one actually has comments, document automation by efficient.legal. So they added that metadata in there, which you can do. As you can see, when I mouse over this, I have a place that I can actually write things in. And then what happened was I think this, um, Josh Eaton actually probably created the template and sent it to me and I copied and pasted. So again, the metadata is kind of all over the place, which is why you want to make sure you get rid of it. So We're going to close this one. And going back into this other example, again, we've got all that, the file properties, and we've got the track changes and comments. So we want to be able to get rid of all of that stuff. And whatever else we don't even know is in there. And so the way you can do this again in Microsoft Word, and this is the Microsoft 365 version, but it's very similar. This, um, tool has been in there for a while. As you go back into your File menu and then you go into Info, and you've got this whole section called Inspect Document. So if I go and check for issues, you'll see I have a couple of different options here. We're going to focus on this one called Inspect Document. When you do that, it's a multi-step process. It doesn't just automatically remove everything. First, it wants to tell you what's there. So in this one, I actually snuck in some hidden text. We've got comments, revisions, versions, document properties, which we saw, task pane, add-ins. You can do all sorts of things in there, in your document, have macros. And one of the things with the macros that you should be aware of now is if you send out a document with a macro embedded in it, which if you have a document that was a form document or something like that, those are all macros. And it's probably going to get rejected from the, um, the person who you sent it to via email because, um, now everybody's pretty aware that macros can actually carry a payload because it's running a little piece of software within the document. And that's a way that, um, viruses are being transmitted. So you want to get rid of that just for the pure fact that when you send it out likely the recipient doesn't need the macro, and it'll probably be blocked by their spam filter anyway. So, um, let's go. And so what you can do is you just click on Inspect. Oh, and this ink thing, that's if I had a tablet and I'd actually written it on the tablet. So I might have written, you know, done little annotations with a pen on top of the, um, So we can inspect for that too, and you can toggle on and off any of this stuff. For instance, I want to keep my headers and footers and watermarks, so I'm going to uncheck that box. I don't want to remove that. So you just kind of go through, figure out what you want to keep, click on Inspect, and it basically comes up with a little exclamation point. And says, okay, we found these things, we didn't find any of these. And then I'm going— and again, I wish this was a little bit easier to do, but we're going to remove each one of these. And then once you do that, if you really, really want to be careful, you can click Reinspect. And you can see that everything comes out with a green checkmark. We're all good. And then you click on Close. Then when we go back into the document, you'll see that all of the track changes that we had in there are gone. You don't see that panel anymore because it's removed the comments. And if you go into the properties, you'll see that while it still has the number of words and the size, it's removed everything else. So if you read the article that I wrote about A Tale of Two Templates, one of the things to be aware of with metadata is there was a judge who was asked to recuse herself because they looked at the metadata of her opinion and it was suggested that the special master in the case had written the opinion. Well, that was not the case, but what she did was she opened up a document that had the formatting that she wanted to use and just wrote over it. And so some of that metadata in terms of the author carried over. And so that's the kind of thing we want to avoid, even the impression or the perception of somebody doing something wrong. We don't want to have any questions about it. And again, you definitely want to remove those comments and track changes. If you want to keep all that stuff intact in the document, just save it as a different document and do an _inspected or something like that. If you want to make sure that all that stuff is extant and you create a copy that you can send to someone. If you do that also, the other thing is that, you know, if you do a Save As Copy and then you do Inspect Document, and then we're going to say inspected. That when I save this, Then I know for sure that this has been removed. Unfortunately, all the other information, okay. All right, so that's Inspect Document. Now one thing that I did, I just recently wrote an article about using the Quick Access Toolbar. I find that the Inspect Document is a little bit hidden. And so there's this thing, and I'll send y'all the article later today, but this Quick Access Toolbar, I've I find extremely useful because you can add little things to it that make it easier to find. So they're not all buried up in the ribbon. So you can add the Inspect Document to the Quick Access Toolbar. So you're going to go back to File and then to Info. And then on this, I'm going to right-click. Okay, we can't do it that way. So I'll show you a different way. Go in here and then go More Commands. And my computer is acting a little slow today. Extremely slow today. I have a video that I will show you. I don't know why it's misbehaving. Well, actually, there's, there's another way to do it. There's always another way to do things. So you go into Options. Well, Word is just being completely hideous. I'm going to close this down. We'll do it in a different document. All right. So that, that's Inspect Changes, and I'll show you how to do the, or Inspect Document. I'll show you how to add things to the Quick Access Toolbar in a second. So next thing we're going to do is protect the document itself. So there's a couple of different things you can do to restrict access to the document itself. Before you even think about sharing it. And so you can create a read-only copy of it and you can password protect it. And so let's go into a document and do these things. And we'll go ahead and just pick one of these documents. All right, so back in our File menu, under Info, there's this whole area called Protect Document. So we're going to click on Protect Document, and you can say Always Open Read Only. Now you'll note in the fine print that it says prevent accidental changes by asking readers to opt into editing. So that doesn't actually keep them from changing it. It just, they have to, they basically comes up with a little toolbar that says this is read-only, but they can change that. So it's not really protecting the document. If you want something that is not editable, then there's a couple of different ways to do it when you're sharing it, but not within here. You can click on restrict editing and I'll show you that in a second. But the other thing, the first thing we're going to do is go with encrypt with password. This is if you're going to send the document to somebody and you want to password protect it. When they open it, they'll need the password. Um, if you've ever done any of my classes before, you know I'm a huge fan of, um, the password managers like LastPass and KeePass, Dashlane, things like that. So if you go, okay, well, if I encrypt every document I send out with a password, I'm gonna have to remember all those passwords, and likely the people I send it to are going to get— forget the passwords. So couple of different things you can think about here. One, if it's a client that you're working with, establish what your password is for documents in advance of, of, so you're not sending a password every time you send a document and basically come up with a password. Then you can use your password manager to record that password in the Vault, or You can create a spreadsheet and password protect it on your computer. So I'm going to give this one a password. In a perfect world, you would actually use a good password. I did not. It says if you lose a record, the password, it can't be recovered. So keep a list of passwords and their corresponding documents in a safe place. Something to be aware of, well, The password can be recovered, not easily, but you can break password protection on a Word document. It's not perfect security, but it is good security. And if you look at Rule 1.6 for confidentiality and think of a reasonable care standard, is it reasonable to assume that your attempts to protect the document with the tools that you have available is good enough? I'd say for most stuff it is. If the document has exceptionally sensitive information, you may want to think about using some other means to protect it, but this is, I think, good enough security. And then it's going to make you put the password in again. And you click OK. Now you see that it definitively tells you a password is required to open this document. And if I go back here and I sent this to somebody, they would need that password to open it. So that's pretty easy to— and the password protection is encrypting the document. So when you send this via email, the document itself as the attachment will be encrypted. So other things that you can do is you can protect— and I'm going to remove the password protection. This time I'm going to protect just portions of the document. And one of the reasons you might want to do this is because— and this was an actual use case. I used to work at the American Bar Association, was helping our corporate counsel's office. And one of the things they wanted to do was have standard forms or contract language that they wanted everybody to use, but they wanted some editable portions of the document, but generally wanted people to be able to work with the documents in some way, but not be able to edit certain portions. So what we're going to do is we're going to protect protect just certain bits of this document. So again, you can go— the easiest way to do it is go into File, Info, Protect Document, and this time we're going to click on this button that says Restrict Editing. And so what we can do is looking through this little list, you can limit formatting to a selection of styles. The likelihood of you're ever actually using that is slim. But you can if you want to. Then this is the part we're going to focus on is editing restrictions. Allow only this type of editing. You can say they can track changes, they can add comments, they can fill in the forms, or this is where you make the document read-only. So if I choose track changes, if you make changes in the document protection Word rule exceptions this document, I had already added some protection, so I'm making changes to it now. So one of the things with Track Changes to be aware of is if you don't want someone to turn off Track Changes, go up into your Review tab and in Track Changes, click on this little arrow and click on Lock Tracking. And you can actually add a password so that someone can't turn off the Track Changes. So that's another way you can kind of protect the document. In this particular case, what we're going to do is we're going to make it read-only. Then you get those exceptions, and that's what, what I had already applied. So I can go through and say, okay, I want this paragraph to be editable, and I want this paragraph to be editable. And then you can add specific users who can make, um, changes, or we're just going to click on everyone. So anybody who gets this document can make changes to the highlighted text, but nothing else. Everything else is read-only. So then once you're done with this, you click Yes, start enforcing protection. And again, you're going to be asked to create a password, and then it'll start enforcing that protection. And the protection we added is this document is read-only except for the portions that are highlighted where people can make edits to them. So again, if you've got standard contract language or something like that, you want someone to have some negotiation in terms of the language that's used. You can either turn on track changes and lock them so you can see anything that they might have changed, or you can give them permission to just change one thing. You can still turn on track changes if you want to. So those are some of the options for restrict editing. One thing you might have noticed when I went over into this info button is under this protect document, there's this mark as final. All that does is mark as final to indicate It's complete. This is the final document. Once you mark that, typing editing commands, preview marks are turned off, and the document is marked as final because it'll have an icon. You'll note that it says this document has been marked as final to discourage editing. Without setting that read-only, it's not actually See, so I can edit it anyway. Basically, you're going to want to use this restrict editing and make it read-only, or when you share it, and we'll look at this, keep the sharing options as read-only. So anybody have any questions about this so far? All right, hearing none. The next thing we want to look at is we looked at protecting a portion of the work. Now we're going to move to Adobe Acrobat. Now, in this particular sense, we're going to be using Adobe Acrobat. I have Pro DC, and it's about $14.99 a month or something like that. It is the paid-for version. There are plenty of, um, competing products in the market that can do similar things. This is just the one that I have on my desktop. So one a lot of lawyers have on their desktops. If you have Reader, keep in mind that you can't do the things we're about to do. The Reader is the free product that lets you read a PDF. You can do some markup and things like that, but the paid products— and there's Nitro PDF and CutePDF and CodePax PDF— if you want a list of alternatives to the $14.99 per month Acrobat Pro DC. I will send it to you. I wrote a blog post about that, and most of them have the ability to password protect and encrypt the document, and that's what we're going to look at. So we're going to look at any random PDF. And the first thing we're going to do is we're going to password protect and encrypt the document. It's very similar to what we do in Word, um, except that I like to use the tools. So I'm going to type in encrypt. And you'll see you get two options, the advanced options and the encrypt options. So we're going to click on this and encrypt with password. Just a note, they've, they've simplified this. So if you put, if you type in protect instead of encrypt, it's just going to pull up this. When you click on this, Says requires the user to enter password for viewing or for editing, and you can type in the password. However, that does not encrypt the document, which is why we're going into the advanced options and encrypt with password. That's going to pull up this, this kind of wizard, and then you get a lot more options. So I can say require password to open the document. And put in my password. I can also say restrict editing of this and printing of this document without it, so you have to have a password to print. We're going to let people print. I mean, I can't imagine, but you can lock this down. So let's say we're going to get really— I'm going to leave this where they don't have to have a password, but all they can do is read this document. So no printing. No changes. We're going to enable it for— leave this checked. They cannot, without checking this box, copy text, images, or other content. I'm going to add a password. We'll add a better password than that. It'll tell you again, this is the kind of stuff you want to keep in a spreadsheet and your password manager or something like that so you keep up with it. And then you'll note under here, Compatibility Acrobat X and later, encryption level 256-bit AES. That is modern standard for encryption levels. If I choose to make it compatible further back in a PDF lifespan, the encryption level drops down to 128-bit RC4. That is not good, encryption anymore. So leave it at X and later. Encrypt all document contents. Encrypt all document contents except metadata. Encrypt only file attachments. Now, I don't know how many of you actually attach files to PDFs. You probably don't do that a lot, but it is something you can do. And so you want to think about that. I'm just gonna stick with Encrypt All Content and click OK. Okay. So if I encrypt all documents, apparently they can't do anything with it anyway. Well, now it's being— Oh, that's because I need to add this. So it also reminds you that security settings won't be applied until I save the document. So I can go on my merry way until I need to save this and close it. So now this file is password protected and encrypted. Or you can just make it read-only in that, in that dialog box. So the next thing we're going to do is remove the metadata. On the enable copy, when does snip still work? So this is some— I'm going to show you a full monty on how I think you can protect a document as best possible. So someone asked, in the example of the enable copy, when the snip still works. So can you take a screenshot of it? Can you use the snip tool? Can somebody basically create a copy of the document, and they can. So I'm going to show you how to protect the document as fully as humanly possible using kind of a 3-step technique in just a second. But first, let's look at removing metadata. So I'm going to go again with— Adobe Acrobat, you've got Tools. And so if you don't remove— remember where the tools are, you can just start typing in the word. And we're going to click on Remove Metadata. And I actually created my own custom button, but the button is called Remove Hidden Information. So when I do that, a lot like Word, we've got It found metadata, it found bookmarks, comments and markup, hidden layers. And so let's, let's kind of look at what it found. So one thing is that it has bookmarks. I can't imagine why you would need to remove the bookmarks, but just know that it thinks it's metadata. Most of the time we want the bookmarks to be left in there, so that's something you don't necessarily want to remove. The other thing is that— whoops, what's this? Oh, interesting. So if you go over and you open up the Comments panel, you'll see that PDFs can be marked up too. And so if I share this with someone, they can strikethrough text, They can add comments, you know, things like that. So again, we've, we've got some other things in here that, unlike Word, really doesn't show you unless you actually flip through the documents or turn on this comments panel. So it's always a good idea to remove this stuff if you don't want someone to see it. And then if you go into File and you go into Properties, Just like Microsoft Word, there are file properties. So in the description, you've got the file name. You've got the title, which again, you'll note is different. The author and how it was created, the file size, number of pages. Not as much information about it as, as, you know, Word document, but still a good bit in the file properties. And if you click on additional metadata, then it's not really particularly exciting. That's just, you know, the same stuff that we saw before. But if there were— if someone had put a copyright notice in a PDF or something like that, it would be there. And under advanced, a bunch of stuff that I frankly don't understand. I've never felt like it was that big of a deal. So anyway, and then here you can also see, you know, what security has been put on this document and things like that. So we're going to close that and we're going to go back over and we're going to say, um, you can either type remove hidden information or metadata, either one will pull it up. It's going to go back through it, and just like the Word tool, you can uncheck these boxes. So If we want to keep the bookmarks, then I can uncheck that box. If you want to see what it considers metadata, it pulls it up here and you can do a little preview of it. Or if I want to see what comments are in there, it'll Show or Preview. So then I don't even know what the hidden layers are. I think because I had added some other stuff. Anyhow, once we say keep the bookmarks but remove everything else, you click on Remove. It says you'll also remove digital signatures, reader extensions, review and form workflow, document information, blah blah. Okay. And now it's done. And that's, that's as simple as it gets in the The tools, if you want to add that little button like I have for remove metadata, then you go into the tools, you go to Customize, Create Custom Tool, and then you click Add. And you can edit the custom tool by clicking on it, and you've got all the different options. So if I wanted to create a custom tool for Bates numbering. Now I have my bait stamping tool. So that's how you add the custom toolbars in Adobe Acrobat. So the next thing is we're going to add a watermark to this. And we're, we're building up. And by the way, note that if I click on Comments, there's no comments. So once we went through that process of removing the metadata, that information is gone. If we look in the file properties, all of this stuff is gone too. So this, of course, is the last step in this process. But what I want to do now is kind of show you how to create watermarks and then digital signatures, and then we're going to put it all together. So to create a watermark, We're going to add a watermark. Once you do this, you're going to get this, um, you can put final draft, whatever you want. And then if you want to make it look more familiar, you can rotate it 45 degrees, and then you can say the appearance options, show when printing, show when displaying on screen. Um, click OK, then you can actually kind of, um, make it a little bit more transparent by going Appear Behind Page. And somewhere on here, yep. The opacity slider, we can make it a little bit— obviously you don't want to make it completely disappear. There we go. So that's kind of what your standard watermark looks like, but you have a lot of options. And then you can have it go on different pages and things like that. So we're going to say okay. You'll also notice that sometimes there's batch file capabilities in Adobe Acrobat. If you ever see apply to multiple files, that means you can add more files and apply the watermark across a whole set of files. We're just going to do this one for now and click OK. So now the reason that it's showing up the way it did is because this is a PowerPoint and I set it behind. So if you need to make edits to it, you just go click Update. We're going to have it appear on top of the page, click OK. And then, then you can see it. So sometimes you have to mess around a little bit depending on the source document and how that, that document— in a Word document you can put it behind, and this, because it was a PowerPoint, you have to put it on top. So once that's done, you can click on Close here. The last thing we're going to do is digitally sign or certify a document. And so this is probably the most complicated part. That said, there's a simple way to do it, and it really depends on, again, what you've got, what you need to share, how complex of a document it is. So we're going to go into Actually, I'm just going to go through this, this document and convert it to a PDF. So we kind of do the full round robin thing. All right, so I will ignore the instructions not to edit it. If you have Adobe Acrobat, it adds a little button to your toolbar in the ribbon. We're going to create a PDF out of this document. And we're going to save it in the appropriate folder. And I'm going to go through and I'm going to do all of these things. I'm going to remove the metadata. I'm going to add a watermark, and then I'm going to add a digital signature. So here's the document. And we're going to go through and we're going to add a watermark. Actually, we're going to remove the metadata first. So remember, we just— I had created a custom tool. Click on Remove Metadata. Click Remove. That would get rid of any markup that's on the document. The next thing that we want to do is add some protection to it. So I'm going to type in protect and encrypt, advanced options, encrypt with a password. One thing I do want to note is you can actually create policies. So if you noticed under advanced options, security properties, security envelopes, manage security policies, you can actually create security policies that do certain things. So if you want to say encrypt with password, this one locked and locked, which basically disallows commenting, filling in forms, password required, not allowed copying, all that kind of stuff. So you can create— you just click on new. And then say use passwords, click next, create the policy name, describe what it is, and you go through the same little wizard. But that makes it easier to apply different things without having to go through this wizard each and every time. But we're going to do that again, but we are going to encrypt with password. We're going to restrict editing. So this document, we're, we're going to share it and we're not going to password protect it, but we're going to make it basically view only. So we're not going to allow printing, we're not going to allow changes. We're going to add a password. It's not actually— this isn't done until we save it. So I'm going to add my watermark. And again, we're going to— and you can change the font and the font color and all sorts of stuff. We're going to give it a 45-degree angle. We're going to knock it back a little bit so it's not obscuring the text. This one, we can make it appear behind the page. You can actually flip through the pages using this little tool so you can see what it looks like. So if you go, uh, this obscures the text a little bit too much, we'll make it a little bit more transparent. We'll say okay, and then we'll have our watermark on the document. And the last thing— so now we've removed the metadata, we have made it where people can't copy anything out of it or even print it, so making it view only. We've added the watermark, and the last thing we're going to do is add a digital signature. And so there's a couple of different things that you can do to create a digital signature. But I'm just going to type in— in this case, we're going to use Certify. So I'm going to type in Certify, and we're going to use an invisible signature. You can create a, a visible signature, but in this case, what we're trying to do is keep somebody from being able to alter the document. And if they do, we'll know. So I have already created a digital signature, but you can do this in two different ways. You can use a third-party, um, tool like VeriSign to have a verified third-party, um, digital signature, or you can just create a digital ID that's tied to your computer. So if you want to be able to do that, click on Configure New Digital ID. Use a digital ID or create a new digital ID that's self-signed. Save to a file. Click continue. You put in all the information that it needs, including the best encryption you can use, digital ID for digital signatures and data encryption. Continue. We'll give it a password. It'll tell you that I'm using a weak password. And then when I add this, again, you can give it different options. So if it's just a form, they can fill it in and add digital signatures. In this case, we're going to say no changes allowed. I don't know what hidden behavior— okay. Because I put that watermark in there, it's saying document contains hidden behavior, and I basically assert that I understand. Now I can click sign. We're going to save this and give it a new name so we know this is So what happens now is you've got the document, it has the metadata removed, we have a watermark on it, we've, we've basically made it where nobody can even print it. And on top of that, we've added a certification. If you click on the signature panel, you can see that this basically says No changes are allowed, certified, has not been modified since it was certified, signed by the user, last checked, all this stuff. When someone opens this document, they're going to see this blue bar. If you sent a document that had this much protection on it to someone else, they can't print it. If they screen grab it, it's going to have the watermark on it. If they try to copy it in any way and send it back to you, it's not going to have your digital certificate on there and certified. So basically, I, again, I guess somebody could really, really, really work hard at creating this, and I still think they can't get past the certification process. So this is as locked down as I know how to make a document. Obviously, that is, pretty extreme, but you do have those options. There's also— you can digitally sign this using— like, if we wanted to digitally sign instead of certify, you just say sign. You can use the same. So we're going to go and I say this was a document I actually wanted to add my signature to. I click on where I want it to be. We'll add this one. Actually, let's find. See where it says Appearance, Standard Text. I actually edited it and you just click on Edit and I actually have signed my name on a piece of paper and turned it into a JPEG, which is an image file, and made an image file so it looks a little bit nicer. When I sign it, it puts my name up here again. It has this, um, signature panel. It's going to have this blue thing on there that anybody who gets this document is going to see. It has my signature on here, um, with all the details, and it also But it doesn't lock it. It just adds my signature to it as a valid signature. So I like the certification a little bit better in terms of the security. So any questions about this? So last bit real quick is securely sharing documents. A couple of different ways you can do this. We won't even bother with Acrobat, but in Acrobat, if you have the DC version, and only if you have the DC version, you can click on this share with others, send a note, tell them they can comment, put due dates on it, and share it. And it's actually stored in the document cloud. That's what DC stands for. Hands for. And so when you do that, um, they do have e-signatures built in, but if you're just sharing the document, you can do it straight from there and it puts it in the document cloud. It also tracks what's been shared, so that's convenient. And then you can open the document and see who it's been shared with, remove the shared file if you don't want someone to have access to it anymore, you can remove it. And there's 3 different buttons. One is just email. This one just emails the document like normal. These 2 share the document by putting the, the thing in the DC and sharing it from there. If you are using Microsoft 365, there's a couple of different ways you can share a document. So I'll show you from— directly from a Word document. If you don't need to share multiple documents, you're just sharing one, I find this the easiest. So once I'm finished with the document, I want to share it with somebody, you just click on Share and you get a couple of different options. So click on these settings: Anyone with the link, people just in your firm who have the same domain name, people with existing access. This is if you need to resend the link. And then specific people. If you choose specific people, then you have the option to allow them to edit. Open review mode. What this does is if you say open a review mode only, basically it makes it read-only, but they can add comments to it. So you toggle that on and off. If you don't allow editing, they can't edit. You can also block download. So lots of different options here. If you choose anyone with a link, you have the option to allow for editing, read-only mode, set an expiration, and set a password. The thing that I will point out here is that if you're working with business clients who have— if you're pretty confident they have Microsoft 365 accounts as a business user, go ahead and share it with specific people. If you're working with consumer clients and you're not entirely sure whether or not they have a Microsoft 365 account, use Anyone with a Link and add more protections to it. Then you can email it to them with the additional protections. And if they forward the link, as long as you don't put the password in the email when you send it to them, You know, it's pretty protected and you can set the expiration date. The other thing is I can't revoke permissions from anyone with a link. So if you— if in this case we're going to click on specific people, click Apply, I'll send it to myself. And if you send it outside of your firm, it's going to remind you. And then you click send. And it's as easy as that. So other things you can do. If I want to share an entire folder and I'm using Microsoft OneDrive, I can share an entire folder. Now the permissioning is pretty much the same thing. If you're not using Microsoft OneDrive, that's fine. The— if you use Box, Dropbox, Citrix ShareFile or whatever, these options are pretty much, very much the same in all of them. So we're going to go into OneDrive in the browser because I find that's the easiest way to be able to see all the bells and whistles that I want to show you. So if I want to share an entire folder with someone, I just go to the folder and click on this little button right here. And again, you've got those same options. Is it specific people, people with existing access, anyone with the link? We'll say specific people. Allow editing or not? We'll allow editing. And send. Again, if this person were not a Microsoft 365 user, they were consumers and you weren't sure, you can always click on anyone with the link. And then it's disallowed editing by default. You can set an expiration date, you can set a password, and click Apply. Obviously you don't want to email the password when you send over the file. Um, that's why I said it— I think best practice at this point is establish with your client up front what their password is going to be. I would use some sort of formula like the person's last name, the date that they started their matter, and, you know, a couple of symbols or something like that, something that you can recreate that'll be unique, but that you can, you know, kind of easily set up with them. The other thing I wanted to show you is how you can actually have them send you information securely. So in this case, we're going to request files. So again, this is something that depending on the product that you use for online document storage, you may have it. If you have Microsoft 365, you already have the ability to do this whether you use OneDrive or not. So if you go, well, I don't really want to use OneDrive, but I do for sharing documents, then you can do it. You don't have to have set up the synchronization and all that kind of stuff. So again, we're going to go back into, OneDrive and a couple of different ways. If I've got an existing folder that I want, um, somebody to be able to put files in, say I've already created the client file and we can actually click into, um, well, there's no subfolders in this. If there was a subfolder I'd created for the client, they could do it. Um, click on this little, uh, button right here and then go up to the top where it says request files. And when I do it, what files are you requesting? Um, click next. Anyone with a file can upload, anyone with a link can upload files, or you can send it to someone's email. And then we'll click Send. What it looks like to the client. Or whoever you sent this to, please ignore what you're about to see. All right, so there's me sharing the document, and there's me sharing the folder, and they just click open. And here's requesting files. I've requested files, please upload closing documents. They click on there, they pull it off their hard drive and upload it just like they would if they were, you know, using a form on the web. So that's it. Sorry, I did actually go a little longer. I'm sorry that Adobe Acrobat just decided to completely bonk on me. But this is, this is basically all that I know in order to use the tools that you already have on your desktop to apply additional security and share documents. And I have a comment, so I can get to that in just a second. So I'm going to stop recording. And once I do that, if anybody has any questions that they don't want to be recorded asking, we will. So thanks very much.