Tips and Tricks with Microsoft PowerPoint
Catherine Sanders Reach teaches legal professionals PowerPoint techniques including Slide Master formatting, Design Ideas for quick improvements, image editing, SmartArt diagrams, Morph transitions, and Zoom navigation. She covers collaboration features, exporting to video with narration, and best practices for fonts and image quality.
Chapters
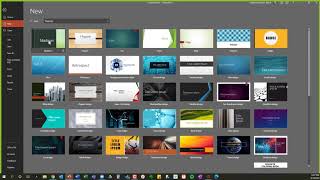
So good afternoon and welcome to the Learning Objectives webinar series from the North Carolina Bar Association Center for Practice Management. I'm Catherine Sanders Reach, and today we are going to talk about tips and tricks with Microsoft PowerPoint. And so I think that PowerPoint is a really powerful product. It can do a lot more than just presentations. We will send you out materials to accompany this so you can learn on your own. You know, once you start messing around with it, it'll take you some time, but then I'm going to show you how to reuse slides that you created. So once you've created a slide you think is really powerful and great, you get to reuse it and reuse it. So this is kind of what we're going to do. We're going to talk about getting a slide deck set up and then manipulating images. We're only going to go through one type of animation. It's called a morph transition. It's new to PowerPoint in Office 365, which is, by the way, what I'll be demonstrating demonstrating using today. A lot of the kind of new cool stuff that you get with PowerPoint is only available through the Microsoft 365 version of PowerPoint, but a lot of what I'm going to talk about has been in the application forever. So if you have an older version of PowerPoint, you'll be able to do most of these things. Then we're going to talk about setting up your actual show and then sharing slides with other people. And then the last thing, and this is exclusive to 365, is real-time multi-author collaboration. On slide decks, which is a pretty neat thing to do. So one of the fun parts about today is that I'm going to go completely meta because you're looking at a PowerPoint presentation slide and now you're looking at PowerPoint. And one of the things is— so this is really boring, right? It's got a white background, black text, and a list. And so You know, you can definitely spice it up. One of the things I tend to remind people is don't get too creative with this because you can overwhelm people. You can get too cute. I've seen people who've added a whole lot of kind of images, colors, different fonts, things like that. Keep it simple. Maybe not quite this simple, But, you know, keep it simple. Now one thing I want to show you right off the bat is getting your PowerPoint set up. And so I'm going to open a new slide deck. And when you open a new slide deck, it looks like this. But if I go up to File and click on New, then what I see is I've got a blank presentation, and then you've got all of these themes that you can pick from and templates. And a lot of the templates are probably not going to be appropriate for lawyers, but if you click on this themes button here, you can see that they've got a lot of things already set up for you. You can change the colors and, and make some changes to the theme, but the theme tends to not have any text or suggestions already built into it like some of the templates do. It's just plain. That said, they tend to be a little bit too restrictive for me, so I don't typically use them, but if I click on this one, it's gonna show me I have different options. So if I wanted to change the color scheme, I could do that, and then I click Create, and that's gonna give me this theme that I can work with and add things to it. So that's, you know, you can go ahead and pick a theme. However, If you don't do that, if you don't go to File, New, and pick a theme, and you open up a PowerPoint and you go, okay, I want this to have a design, go to the Design tab, and there's some design options here for you. You can look through that. As you mouse over them, you can see what they look like. Like, I think this one's hilarious. You would have a wood floor. So some of this stuff is just a little campy to me, which is why I tend to ignore the design themes, but There they are, and then you can browse for themes as well. So we are not going to save that one because I'm just going to show you some other things. So going over to an existing slide deck. So this is a slide deck that I already created, and I wanted to show you the slide master. So one thing that I found is that people, they may pick a design theme, but you want change the font on the slides, well, you don't have to go through each and every slide changing the font. You have a way to control this using something called a slide master. And so the way you find the slide master is you go to View and then you have this button here under Master Views called Slide Master. And if I click on this, there's a bunch of different layouts that PowerPoint uses. And so if I click here and say I want to change this font. I'm going to change it to something really horrendous just so you can see. And then once I get out of this view and go back to my, my home screen, Then you'll be able to see that. We close the slide master, and now the font has been changed for those two different type of slide designs to this horrifying font. And of course you can change it back, but that's just to show you that the slide master gives you the opportunity to make global changes across your slide deck without having to go to each individual slide and make those changes. Another thing that I really like is this opportunity to reuse slides. Here, I'm going to undo this. This is just too horrible. So I can obviously undo. The undo is your friend. I put mine up in my toolbar so I always have access to it. But the next thing is we're going to go to reuse slides. So I'm going to open a different slide deck. And if I wanted to add slides to this slide deck that I had already created, I could go open a slide deck and copy this and then go over into this slide deck and paste it. Problem is that you can see that because this design is slightly different from this design, it cut things off. It doesn't look quite right. So what we want to do here instead is this— use this tool called Reuse Slides, and it's right right here in your toolbar in the Home tab under Slides. I'm going to click Reuse Slides. Now what's interesting is it kind of knows what slide decks we've been using lately, so it's going to pull all those up. But if it's not a slide deck that you have used recently, you can actually search through OneDrive, SharePoint, and on your computer for a particular slide deck by keyword. So I'm going to type in a keyword. And it pulls up all of the slide decks that have that keyword in it. And then if I click on it, that opens that slide, and I can just click on this slide and it adds that slide exactly as it was. Now I can go back and change it because obviously I don't have dark text, but it keeps you from having to completely re-engineer every slide every time. And then again, you can go back, and we'll take this one as an example, and click on it. And remember when we tried to copy and paste it from the old slide deck, it didn't pull all the elements over. By doing the Reuse Slide, it pulls the slide exactly as it looks, so you don't have to do anything with it. So I'm a huge fan of the Reuse Slides. I think it's a really useful thing. Another thing that I want to show you is Design Ideas. I'm not a designer. I have no graphics background whatsoever, and so the Design Ideas that's built into Microsoft 365 version of PowerPoint is invaluable because it makes you look like you know what you're doing. So I am going to go over to a different slide deck, and I am going to find a slide Alright, so this is something that a lot of people do is that you have a slide where you start out kind of building your slide deck and you often have a bulleted list. And a bulleted list is kind of boring. So there's a number of things that you can do to spice up a simple list in PowerPoint. And PowerPoint will give you some suggestions about how to make it look. So if I choose this slide and I've got a, you know, list of things and I want to make it look a little bit more interesting, then there's a button up here in the Home tab called Designer Ideas or Design Ideas. And if I click on this, it starts making suggestions about layouts and how to make this look better. So, you know, pretty simple. Now you've got this list that I've expressed in a different way. It's added these little icons. And what's really cool, and this is the artificial intelligence at work, cool or creepy, whichever way you want to think about it, is that it's identified based on those words, iconography that works with it. But if I want to change one of these icons, I can insert a new icon. What I've done here is I've clicked on it, right-clicked on it, and you get a lot of contextual menus that you can use. But say I want to change this I'll go up into Insert and I'm going to click on Icons and I can put in a different icon. Whoops. Move that. Here we go. That was what I was supposed to do. I'm not even used to I don't know entirely how the new way of doing things is. So now I've changed that inappropriately. The Design Ideas knows better than I do. So I love Design Ideas for every single type of slide because you can go to your, you know, you start out with your outline and then make it look better. If you put images, it'll suggest images, and we'll look at that a little bit. I'll show you a different one. So this is another slide deck. I'm going to go to a slide here just to show you. This was something that it gave me the design ideas. So this is a bulleted list with an image that I put in there. So if I click on design ideas again, it will just give you a whole lot of options. Almost infinite amounts of options. And then you can choose one, and then, you know, you can always do things like go ahead and increase the font a little bit, because, you know, one of the tenets of PowerPoint is if you're presenting a PowerPoint presentation live, the minimum font size that you want to have is 18, and that, frankly, is still a little bit small. When you're presenting, it's best to know if you can find out in advance what kind of equipment you're going to be given. If you're presenting in a conference room with a flat-screen monitor that's mounted to the wall that's, you know, 86 inches, you can get away with a little bit smaller font size. It's going to be clean and it's going to look good. However, if you are going into a courthouse and they've got a projector and a screen that's pulled up on a stand, I would go with the high-quality images, big font, you know. And so again, it's going to make a difference kind of where you are, what equipment you have, how you're displaying it, as to what you're going to do in terms of font size and imagery and things like that. When you're doing a Zoom program, and you're using PowerPoint, because everybody's looking at their own monitor, then you can get away with smaller fonts. That said, they may be looking at it on their phone, so you just have to kind of keep all this in mind as you're putting these things together and keep best practices in mind. And again, I have a handout for you that has some kind of best practices that I've put together. The next thing I want to show you is adding sections to a slide deck. If you have a really long slide deck, this is really helpful. So I'm gonna go over to this slide deck. So this slide deck has 49 slides in it. That's a whole lot of slides. And so what I've done is cut this into sections so it's easier for me to move things around. So in order to see the, the sections, I'm gonna go into a view called Slide Sorter, and Slide Sorter is my best friend. I've got so many slide decks, I'm often adding things, replacing things, moving things around, and so Slide Sorter lets you drag and drop slides into different places, kind of dedupe, get a holistic view of your slide deck. But the other thing it lets you do is add sections, and so If I click on these and I just want to focus on this section, I can. And so right now I think I'm going to add another section. So I'm going to look for slide 12. I'm going to put my cursor here and I'm going to get this kind of red vertical line between these two slides, and I'm going to right-click and I'm going to add a section. And then you name the sections, which is again awfully useful. So we're going to call this section Cloud and hit Enter. And now you can see that the slides that were after that but before the next section have been grouped together in this new section called Cloud. And I'll show you some other really useful and cool tools that you can use because you've used sections, but I think adding a sections. Also helps you kind of keep organized, keep the bigger picture in mind, what the workflow looks like and all that. And then again, be able to kind of go, "Okay, I'm happy with those slides, I'm happy with those slides, but I need to review all this and move things around." And then when you want to get out of Slide Sorter, you just go back to Normal. And you're back into your normal slide deck. Another thing that I didn't even put in my notes, but my notes. So sometimes you're going to open a slide deck and it's going to look like this. There's a little button in the toolbar down at the bottom of the screen called Notes. If you click on that, it'll open up a notes field for you and you can just kind of drag and drop it. So I put a lot of speaker notes for myself, references, you know, instructions, all sorts of things. Sometimes these notes I want to share with people, sometimes I don't. It just depends, but as I'm putting together a slide deck, I'll write notes about what I was thinking about. When you use the full screen mode like that, the other side that you don't normally see is this. So there are my notes. Which I find, again, very useful. So that's kind of getting your PowerPoint set up. The next thing we're gonna do is look at how to manipulate images. And so, again, with Microsoft 365 version of PowerPoint, you have a ton of images. And if you've got slide decks that you've been using for a long time and you have any Screen Beans still in your slide decks, It's time to get rid of those and look at the new options. There's a lot of really high-quality graphics and photography that you can put into your slide to make it look really professional, and you don't have to pay anything for it because they're already there. So I'm going to go into this slide deck. And add a new slide somewhere. And when you add a new slide, you can just click on New Slide here. If you click this down arrow, it'll give you some different layouts. So I tend to choose blank layout or title and content layout depending on what I'm doing. So I've added a new one. If I decide I want to change that layout, I can actually go up in here and choose the different layouts. So we've got this blank slide, and I'm gonna go over into Google Image Search and look for a logo. So I'm gonna look for the LinkedIn logo, and if I right-click on one of these I can say copy image, and then I go back into my PowerPoint and I just paste that in. So it's easy to grab images off the web either through the Bing, Google search, or the Google image search without having to copy and paste it or select it or do a screen grab or anything like that. You can just grab a logo, copy it, and paste it. So the other option you have, and you've got many, is go to the Insert tab, and under the Insert tab you're going to see a whole lot of different options under Images and then Illustrations. And so under Pictures, I can look for pictures that I've saved to my computer. I can look for stock Images, and then Online Images. Stock images come with PowerPoint now, and online pictures is basically the same thing that I just did going into Google Images, except if I click on this one, what it does is it pulls up Microsoft Bing search engine. Go figure, because it's a Microsoft product. One nice thing about this versus Google Images is these pictures are all— so if I type in LinkedIn here, You'll note that it knows that it's only searching for Creative Commons licensed imagery. That doesn't mean that you're allowed to use it necessarily. You'd have to, you know, make sure that you have permission to use any images. But you're a little closer without doing tons of inspection than you were with just searching the web and finding an image. If you want to use imagery that you're 100% sure you can use, go into pictures and use stock images. These stock images are given to you royalty-free through Microsoft, and you've got stock photography. So if I search for something like mountains, then I've got all these really high-quality photograph-level images that I can use. Or you've also got, because that's not enough, you can go into icons. So we saw a little bit with icons. So there's icons for all sorts of things, and again you can search through it. And the new version of ScreenBeans, which is Cutout People. So if you have ScreenBeans and you really love your ScreenBeans, you can, you can use Cutout People. And insert them, and now you have a little higher quality graphic than you did before. So one more thing you can do, and we'll look at this a little bit more, it's frankly a little bit silly, but just indulge me, is 3D models. And again, this is new to the newest version of PowerPoint through Microsoft 365. You're probably not going to have any 3D models on your device unless someone's built one for you. But if you do presentations or, you know, persuasive arguments at court, you may have somebody building you 3D models and so you can insert them. But they've also got a lot you can play with. And the kind of cool thing is I can go in, I can pick one of these And once you add it, you can manipulate the image, make it look like what you want, move it around, turn it, so you have 3D images. Frankly, I haven't figured out a reason to use one yet, but I can't wait till I do. So now that we've got some images, let's talk about how to actually edit those images. So I have a bunch of things that I've been playing with for you. Alright, so here's a slide where I just grabbed some images. Now you'll notice that the Design tab pops up and shows me how to make these look a heck of a lot better without any effort whatsoever. But if I decide that I need to do something without the help of the design, I can go in and do different things to the images. So obviously I can drag and drop them around, but I can also edit them. So once I go into an image, I can click on Picture Format up here, and I have lots and lots and lots of options. So I have color corrections, I can change the color entirely. I can add artistic effects. And the cool thing is, as you mouse over these, they are going to show you a preview before you actually commit to the change. So, you know, I can mouse over and see what it would look like if I would change the color. I can compress the pictures. If you're adding a ton of images to a PowerPoint, I recommend that you compress the pictures because you're going to end up with a huge file. PowerPoint files typically are really big anyway, but once you start inserting a bunch of graphics, possibly audio and video files, you're gonna wanna make sure that you can at least create the smallest file possible. So I'll compress the picture, and then you can see that it's just this one, or I want to compress more. I can compress it to different resolutions depending on the image that I've selected. So that's something to be aware of. And then if I want to change you know, to a circle or add a border. They've got kind of all these options already kind of pre-existing. Or I can change the border colors, the effects with a glow. These are just, you know, again, you can get a little crazy and it can also look really cheesy and unprofessional. So be careful with that. But sometimes, you know, you you do want to make some changes to the images that you have. And then other things you can do is, um, I want to move these all together, but if I move this one under the LinkedIn icon, if I want the LinkedIn icon to be behind the Facebook icon, I select the LinkedIn icon, I right-click again, and then I click on Send to Back. And now you can see that this is underneath the Facebook. I can move the Instagram. I'll send it to the back. But now we know that Twitter needs to be sent to the back. And so on and so forth until we get everything the way we want to. We don't need an extra Twitter. Okay, so now I've got these graphics together. Say that I wanted to use this in a Word document or on my website or somewhere else, obviously you don't want to have to have all these separate images and redo them. So one thing you can do is I just use Ctrl+A to select all of them. I'm going to right-click again and then this option, because you've selected them all, comes up called Group. And I group them and now I have created out of 4 individual images one single image. Once I do that, it just makes it easier to manipulate it and keep it together like this. If I need to add more images to this slide— if you decide that you don't want it, then you right-click again, you go to Group, and you say Ungroup, and now all of your images are separate. So that's some of the, the editing tools for individual images that you pull up, that you you can do to mess around with it. The next thing I'm going to do is show you SmartArt. And so I'm going to open this slide deck. And we kind of looked at this before, but say we have this, this slide with a bunch of a list of things. And again, you can go into Design Ideas and and see if the design ideas can make this list look better. Frankly, I don't really like any of those design ideas, so what I'm going to do is I'm going to select this list, and then I'm going to go up to the paragraph grouping and convert to SmartArt. SmartArt is a way to make a boring list into something more visually interesting, but there's a lot more options. So they just give you kind of different ones. And again, if you mouse over it, it gives you a preview of what it looks like. So you can kind of check to see if you like that. Now obviously you'll start saying, oh, because it was a pretty long list, this is going to turn my font into, you know, way too small for anyone to read. So that's why having these previews is nice. This one's nice, but I'm going to have to find an image for every single one of these. And if I go through, I go, okay, these are all boring. I want to look for more. So click on More, and then you'll see that you have SmartArt graphics that are appropriate for lists, for processes, for cycles, for hierarchies if you needed to do a workflow or you needed to do an org chart or something like that. And, you know, so lots of different options here under this one. I'm going to choose the vertical curved list and click OK. And so one thing you can kind of resize it immediately, get that font size a little bigger. It just automatically makes the font size bigger when you make it bigger. The other thing is that it creates this text pane. So if I go, okay, I just, I just want it to say Firm Management and not HR, I can edit the bullets here and I can add additional bullets. What it's going to tell you though is you don't have enough room without expanding this graphic to add any more. So we'll go back to the list. So you can, you can make the edits to these without actually having to go into each graphic. You can do it there. If this little text pane doesn't pop up when you add the SmartArt, When you create a SmartArt design, it actually pulls up a whole new menu up at the top of the screen. And so I'll just click Text Pane. And again, that Text Pane is there. You can demote and promote different items. So I can make the Firm Management a bullet or a subpoint of Marketing by using the demote. And I can move things left to right. I can move items up and down. So if I wanted to move this up, so it makes dealing with your list a little bit easier. And then, you know, we tried to add the bullet. The other thing is this looks pretty nice, but it's pretty boring. So what we want to do is look at our options for making this a little bit more attractive. So one thing that I find is real easy is just change the colors. And so you can make different colors I like this one. So now you've got a little bit more visual interest because you've changed the colors, and if you really want to go wild, you can make them beveled edges. You can change how it looks. Again, this is not something you want to get too fancy with, but I kind of like this because it pops a little bit more, so we'll choose this one. And now I've taken what is a relatively boring list of information and just turned it into something that looks a little bit nicer. Still makes the point, still still has probably way too many words for a slide, but at least it's not as boring as it was. So another thing that you may find useful is creating a timeline. So I've just created like a, a sample estate planning timeline. And so what I'm going to do is use SmartArt to turn this into a timeline. So I'm going to select the text, I'm going to convert to SmartArt, I'm going to look for more graphics. And in here there are processes, and that's probably what we're gonna look for in terms of the timeline, or maybe the list, or the relationship. The timeline always hides itself from me when I look for it. And there are obviously a ton of these that you can choose from. Sorry, I promise I found all of these things yesterday. But there is a timeline one, and I've actually got it in your materials, so I'll just move on. But you can add it. You can manipulate it like we did the other one, and it just does a simple timeline for you. The other thing you can do is if you like this image and any image you've been working on, is that you can— remember I said you could save anything as an image? If I right-click on this, I can save as picture, give it a name, and it saves this as a PNG graphic, which I can then insert again into a website. I can insert it into a Word document. I can insert it to anywhere that you might want to use this on as a repeated graphic. So if you wanted to create your firm's logo and you didn't have anybody to help you and you didn't want to do a bidding thing through 99designs or something, you could actually use PowerPoint to create an image that you liked and save it and use it wherever. So that's why I said PowerPoint is good for not just presentations but also manipulating, editing, and creating images and then saving them again. So the next thing I want to show you is something that I learned that I think is really cool, and it's called the Knockout Text effect. And so just to show you what the Knockout Text effect looks like, you have a background and then you have text overlay, but I have created a transparency so you can see the background through the back of the text. Again, just to make things a little bit more visually interesting. And so if I insert a new slide, I'll show you how to build this. So what we want to do is first we're going to pick a background. So we're going to go to Insert and we're going to go into Pictures and the stock imagery that they give you so we don't have to worry too much about it and pick something. This one's pretty. If the image doesn't fill up the whole slide, you can just take the little handles and drag it. Depending on what you're using this for, it may skew the image. Since we're using this for a background, it's not that big of a deal. And then what I'm going to do is I'm going to insert a shape on top of this. And so again, I go into Insert and Shapes, and I'm going to pick a shape, and I'm going to put this right over that. They usually automatically come up as blue. You can go up to Shape Fill and change it. What I'm going to do is show you how to do something cool. If you want to kind of have cohesive colors within your images, then you can use something called the eyedropper. So I can pick from a color wheel and see what it looks like, or I can go More Fill Colors. I can create my own fill color through that, but I am going to instead use this eyedropper. And so what the eyedropper is, is I select the eyedropper and as I move it around the screen, I can pick up colors that are in this image to turn this shape into that color. So if I want to kind of make it look more like the background and I click on the eyedropper, it picks that color. So I think that is an interesting little effect that you can do. The other thing is in the shape fill, if I go to— and I don't know why they make this stuff so hard to find— more fill colors. Down here I can actually increase the transparency of this. So if you need to have a transparent background, so something pops a little bit more, you can do that. So to add text to this, you could just double-click on it and add text, but we won't be able to get that knockout effect. So what I'm going to do is I'm going to go back to my Insert menu and I'm going to click on a text box and I'm going to say, um, whatever I want to say. We'll say "Silence is Golden." And then I'm going to drag this on top of this image, and you can see that where I've dragged it, it's a little off-center, so I'm going to center the text so I can drag a little— whoops, get the right thing— drag this over. I can also align the text in the middle of the text box. And then we can increase the font size. We can change the font if we want to. I may have to do a little bit of manipulation to get that to be like I like it. Drag that. Okay. So I'm pretty happy with that. So what I want to do is I want to take this black text and I want to make it transparent so that this background shows through. Through it. And again, this is just something that makes things visually interesting and has impact and takes a little bit of effort but not too much. And so the next thing I want to do is I'm going to select the shape and then I'm going to hold down the Ctrl key and select the text box as well. So we've got the shape and the text box selected. You go back up into the menu and you have a new tab called Shape Format. And then I'm going to go over to Merge Shapes and I'm going to click Subtract. And now I have this really pretty image where it's shining through the text. And of course you can make something look a lot more professional than I just did. That was just a quick demo, but lots and lots of options and Knockout Text Effects I think is really cool. So the next thing I want to show you is animations. And so we're going to look at morph transitions. There are a whole lot of animations available to you in PowerPoint. I would suggest you don't overdo them. And so this is what a morph transition looks like. So I created this Knockout Text effect. I'm going to just click to go to the next slide. And I basically was able to create this little animation through the morph, but without having to go through the kind of rigmarole that you used to to create a smooth animation within PowerPoint going from one slide to the next. This is actually really easy. So I left this one for today. I did this this morning. It's very goofy, but I'll show you. So this is obviously big fish eats little fish, bigger fish eats big fish. And this is, this is just like I said, a little bit silly, but that's all created with the morph transition. So I just added a background, added some 3D art, and then I created the morph. But I'm going to do this on something that may be a little bit more conducive to what you're doing. So I'm going to take this slide that we created with the SmartArt graphic, and say I want to highlight something or change the shape or in other ways call out some of this information. So what I'm going to do is I'm going to copy this slide and I'm going to paste it And then on the second copy of the slide, I'm going to go up into Transitions and I'm going to click Morph. Then whatever I want to highlight— say I want to change the shape of this to an arrow— and then we're gonna Expand it a little bit, and we'll change this one to an arrow. Okey-doke. So now we've highlighted two different elements of this particular list, and to see the, the animation in full sway, I'm just gonna go and click. Isn't that cool? And that's just the morph feature. It animates the changes, and you can do a whole series of these. You just keep copying the last slide, making the, you know, copy the slide, paste it, add the morph transition, make the changes, and you can create a whole series of kind of smooth animations without having to do the animations that are built in, which can, you know, there's some interesting options that you have up in here, but they tend to be pretty cheesy. You can do custom paths and loops and shapes and things like that, but I just think the morph is a lot easier and looks a lot smoother. So, okay, the next thing I'm going to show you is when you get to the point where you're finished with your PowerPoint and you're ready to show it to people, If you've got a slide deck, and say we've got this slide deck here that has 49 slides, and I realize that I'm giving a 15-minute presentation when I normally have an hour and a half to do this, so I'm going to have to cut some things out. And I don't want to have to redo the slide deck, and I don't necessarily— if it's something that you do quite frequently, you may just choose to hide slides rather than remove them and create a new slide deck. So I can go through and in the left navigation panel I just select a slide, right-click, and click Hide Slide. And then it turns gray and you see there's a little line through the number there. And then I'll hide this slide. And then once you go into showing the PowerPoint It basically just skips that slide and goes straight to the next one, and you don't actually have to remove it. If you want to add it back, you right-click again and you click— and this is not intuitive— Hide Slide again, and your slide is back. And then you can go and unhide your slides. So that's hiding slides. Very useful. And like I said, if you've got a little less time than you normally do but you don't want to completely recreate the slide deck. So another thing that you can do if you're pressed for time or you find that you go long and you need to condense what you're saying is this feature called Zoom. And if you've ever looked at someone giving a Prezi presentation, Zoom is really powerful, so I'm going to show you a zoom slide. So if I do presentation mode, if I click on this, it zooms into that slide. Or I can click on this and it zooms into this slide. Now I had a secondary slide. There's our beautiful morph transition. And so on and so forth. So you can either go through a series of slides jumping off, or you can do one. This is where the summary or the sections come in. This is how you leverage the effort that you took to create the summaries. So I'm going to open a different presentation, and what we're going to do is I'm going to show you how to do this. So this again, I can go through the different slide decks or slides, and then when I'm done, it'll— you can see that I can get back. It helps to memorize the, the slide number 1. So if I do this and I realize, okay, I don't have time to get through all this, I just type 1 on my keyboard and go back, and I can switch to a different section. So these 2 slides, press 1. Now Sometimes you're nowhere near your keyboard. Sometimes you're nowhere near a computer. Sometimes you've just got a presenter mouse and there's not that— this is when you have a little bit more control, have your laptop close to you. But it is a cool feature and since a lot of us are doing presentations from our desktops, it works really well. So in order to build this out, I will just delete this slide and show you how to do that. So I'm going to insert a new slide. I'll do a blank slide, and then I'm going to go into, again, our friend the Insert menu, and in the Links group there is a Zoom button. And again, this is a kind of newer feature, and you have 3 different options. You have the Summary Zoom, which lets you organize your presentation into sections. Now I already did that. I created sections in the slide deck to make my life easier. I can also use Section Zoom, and it's just going to create links to my sections, or I can do individual slides. And so if I click on Section Zoom, then it's going to give me the first slide at the beginning of each section that I created, and I can select the ones that I want to be able to zoom to and insert. That's probably the most irritating thing about this whole process is that it groups all of these together, but just click on it and drag it and drop it. And if you want to, you know, you can select them all and change their shape and things like that, but I'm usually okay with this. And then now we can go straight to a section, and then that will take us through all the slides in that particular section. And then if I want to get back to it, I just remember the slide where my sections are and go back to it, and I can jump around the slide deck a little bit more than, you know, the usual way, which is flip, flip, flip, flip, flip back and forth to find a particular slide or memorize the slide numbers and have them written down. So this just gives you a little bit more flexibility when you're doing a slide presentation to move around the slide deck. Another thing that I want to show you is when you're giving a live presentation, you can actually add subtitles to that, and the way you do that is you go go into Slideshow and you click on this button called Always Use Subtitles. And then under the subtitle settings, you can change the language. If you want it to do subtitles in a language other than yours, it will actually do translations. Now, that said, any automated translations could leave you in a world of embarrassment, so I'd probably skip that, even though it would be cool to see me speaking or, you know, having captions in French. I would not want to do that in front of a French-speaking audience. So we'll stick with English, and you'll see that it's not perfect even then. And then you will need to have a microphone if you're going to use the subtitles or captions. And so depends on, again, where you're giving this presentation. If you're giving the presentation to an audience live, you'll need some sort of Bluetooth headset or earbuds So basically your computer here can hear you. And then where do you want your captions? And we'll say below slide. And then when I go into presentation mode, and I can show you that we're going to use these summary slides, you can also see that it's— you have to speak kind of slowly because it's not going to keep up with you exactly, but it does keep up pretty well. And as long as you've practiced effectively, then your words can be typed on the screen as you're giving the presentation and help people who may be hard of hearing or have other reasons to not be able to hear you as well. And then you can turn that off. So a couple of quick things on sharing slides. If I wanted to share this as a presentation that's a video, you can actually save a file, a PowerPoint file, to video with narration. So I'm going to go to this slide deck. And we'll start at the top, and what you do is you go to File and then Export and Create a Video. Where it says Don't Use Recorded Timings and Narrations, what we're going to do is we're going to record the timings and narrations. And what happens is you get this screen that lets you show your speaker's notes on different slides. You can record it. Under Settings, you can choose which camera and microphone. I choose to keep the camera off. So down here you have microphone on, camera off. Choose the devices that you're using, and then you have other things. You have a pen So you can annotate, you can laser point, and so let me use the eraser to erase that. And then once you're ready to go, if you've got a script, that's extra helpful because you won't have to re-record this a ton. And then start the recording. Gives you a countdown. And welcome to the North Carolina Center for Practice Management presentation on PowerPoint. While I do things in North Carolina, I've done things all over the states. And then once you stop it, you get out of PowerPoint mode. Whoops. And then you create video. You give it a name and you save it. Now once you save it, your— the fan on your computer is going to start running because it's crunching through. And then you save it and you've got a little MP4 that again you can put on your website or you can share on YouTube. So if you, you know, you combine all these lovely graphics, animations, voice narration, all of that, you can create a really nice-looking video with PowerPoint. And then if I want to save this slide deck with my notes available, So most of my slide decks, I have notes that I'm happy to share with people. So what you can do is go to File. There used to be a functional export to create handouts. I, my, my, what I found is this doesn't work anymore. It requires so much processing power that even though I have a pretty decent computer, it crashes and burns. So my workaround is that I'm going to go back. I'm going to go to File and I'm going to print and I'm going to print it to PDF, but you could print it to a printer. And then again, remember we had sections, so that gives you an optional printing. So if I only wanted to print the practice management section, it'll just print those pages. I don't have to go figure out which slides to print. And then under Slides, we're going to go to Notes Pages and you can see that it sets it up and if there's notes it puts notes in there. So that, I think— oh yeah, sharing. If I want to share this with somebody, I click on this button here. I hope y'all are still there because I've gone offline. Oh no. I hope you're all back. If I click on share, I can share with other people, and then when I have shared it with other people, I'm in OneDrive, I can see that the file is shared. If I click on it, I can see I can see who it's been shared with if I shared it by name, and I can also go and look at the version history. And it's harder to revert back, but there it is. So— It helps if I get to the right slide. So that is it. I'm going to stop the recording and, and open the floor for questions.