A short Photoshop tutorial by Danny Walsh demonstrating how to create a realistic pile-of-paper/newspaper effect using three duplicated layers. Covers document setup, basic layer manipulation (move, rotate, duplicate), removing the background for transparency, applying layer blending (e.g., shadow), and exporting as a PNG for web.
Chapters
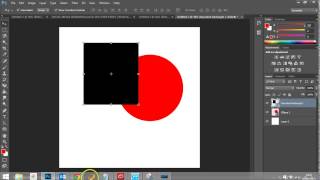
Okay, so in this tutorial, I'll just show you quickly how I did the pile of paper effect that you just mentioned in the email. So this is Photoshop, and obviously you can create a new document. Pixels, width and height. 1200 by 1200 is really good for Facebook stuff as it takes up the full space allowed in a newsfeed post, but that's a different story. So you. So you would create your document however big you want it. And you'll notice here that you get the background now right at the bottom. What you can do is actually add new layers. And if you think of a layer as like a piece of paper, the background is the bottom piece. Then layer one would be on top of that, layer two would be on top of that. And if we add something to these layers, for example, I'll put sort of a rectangle square on this layer, and on this layer I'll put circle and I'll make that red. So see, so what we've got here is in effect, three pieces of paper. The bottom piece of paper is the white background, which won't move unless you right click it and say layer from background. So we've got three layers. So the bottom layer, we could drag it and it would become the top piece of paper, could move it down and it would be the piece of paper in the middle, or you could move it to the bottom back where it was. So same applies to the other layers. So that piece could go above that piece, that piece could go above that piece. And what you're creating is this obviously layered effect to enable you to do all sorts of weird and wonderful things on Photoshop. So if we were to borrow a Lancashire Evening Post image, right click copy from Google, the one that you want, go back and we can paste that into Photoshop and make it the size that we want and press the tick. Obviously this isn't the best image, and I know it's not the one that you use, and it's probably from a few years ago, judging by some of the stuff on there. But what you can basically do, just let me delete the examples, is once you've got the layer in position, you can actually right click and duplicate the layer. So you end up with numerous, in this case, three. And then the top layer, nudge it round a bit, and the bottom layer, nudge it round a bit more, and you sort of get the effect of a pile of newspapers. And that's basically how I did it, just using three layers and adjusting the rotation of each one. And if you want to get rid of the white background so it's completely transparent. For your layer slider, just click on the background layer and press Delete. If it won't go, there's a little bin. You can press that at the bottom. Once you've got your sort of final image, you can right click individual layers and add some blending. So you could have shadow, for example, maybe on the bottom layer. You know, you can experiment with this stuff and come up with whatever you want, but the blending layers are really useful. Sort of give you that extra bit of border or something, just like shadow, just to give you an added effect on the website. So something like that. And then file save for web. And to preserve the transparent background, you want to make sure that it's a PNG image. And as you'll see when the preview loads, that it gets rid of all the background. And you can, if you want, you can change the size. So we could say, well, 600 instead, and the image will resize for you at the point of pressing save. And then you just save it in the normal way, wherever you want it to be, and find it when you put it on your website and layer slider. Hope that's helped. I'll see you on the next video.