How to Shoot Real Estate Videos | Job Shadow
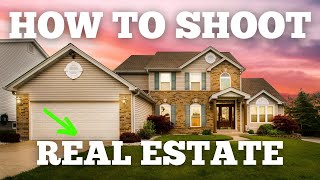
In this instructional walkthrough, the host (Speaker A) guides Naomi, a fellow Howdy Media employee, through the complete process of filming a real‑estate video tour using a Sony FX30 (or a smartphone on a gimbal). The tutorial is organized room‑by‑room, starting with exterior/front‑of‑house shots and moving through the entry, kitchen, living room, bedrooms, bathrooms, and backyard. For each space the host explains practical camera settings (ISO, exposure, 18 mm focal length), lighting tricks (open curtains, turn on interior lights), composition choices (angles, windows, detail shots), and movement techniques (the “ninja walk,” heel‑to‑toe walking, using the gimbal joystick). He also offers production tips such as thinking about editing while shooting, clearing obstacles, and capturing extra detail shots of features like brick or a fireplace. The tone is conversational and supportive, aiming to give beginners a repeatable workflow they can apply whether they use a professional camcorder or a phone‑based setup. The video ends with a call‑to‑action for viewers to subscribe and share their own real‑estate video experiences.
Chapters
Hey, welcome back to another video. Today we are currently headed to a real estate listing that Naomi has, which is one of our fellow Howdy Media employees. But what we're going to be doing, we're going to be showing her exactly how to film a video walkthrough. Um, we're going to be using the Sony FX30. This can apply if you're using an iPhone with a gimbal or however you have it set up. If you're wanting to make walkthrough videos with your phone, with a camera, for your listings, whether you're starting a business or if you are the realtor. Um, this is a good opportunity for you to see behind the scenes exactly how it works. And we're going to be going step by step, room by room. I'm bringing you guys along to witness the whole thing. I hope it helps. Um, this is something that I wish would have been available whenever I was first starting. And so I hope it brings tons of value. All right, I'll see you guys at the house.
All right, we're here.
All right, we're getting set up for the first shot here. Um, we have a trailer in the middle of the driveway. You're gonna have to kind of work around, um, We're gonna get a middle shot, a side shot, and that's pretty much it. So, um, okay, so for the videos, usually you don't have to get as many angles, um, as photos. So what we're gonna do, we'll just start, and this is kind of weird because we got a tree right here in the middle, but what we're gonna do, the first one we're gonna shoot is just one from dead on. So what you're going to do for this first shot— and careful with your shoes— you're going to hit record, go and take 2 or 3 steps forward, and you're just going to get a shot of the front of this house. So that would work if it was— yeah, so just hit record. Okay, now the tally light is on, and now you're just going to go forward 3 or 4 steps, nice and slow. How is that? Well, did you— or the footage?
Probably not great because I'm on wet ground in high school.
That's why I was asking about the hill. Um, you could do it from the road. And zoom in maybe so it's not so difficult. We're gonna, we're gonna go right here and just get a bit, because this is probably honestly going to be your best shot of the house. And so yeah, what you're going to do is do the same thing. You can either go straight forward or you can go from right to left.
I'm probably going to go from right to left. Normally I would just go—
yep, perfect. How's that exposure look? Is— you're going to kind of just get a strong base. And then you're going to start over here and then just like shift your body without stepping. You can also take a few steps sideways very slow, almost like marching band. Did you ever do marching band? Dang it, I'm really band nerd. So like you, you basically keep your shoulders like this and go heel-toe sideways, and that's how you do that. Which you're in high heels, so I don't know how you'd— Okay, perfect. Okay, so this shot, I'd probably— Oh, you think this is as— Yeah, from here is pretty good. Okay. Okay, so you're gonna do the same thing. I'd probably go, uh, I'd probably go from out to in on this one. And if you want to go in the video from in to out, then you can reverse it. So just go in like 2 or 3 steps here, get a nice wide shot of the whole property. Okay, perfect. All right, the last shot. We're gonna get a shot for the transition into the house, or we don't have to do that with this one because it's a little awkward. But we're gonna get just a shot of this. So like, stand right here and go from right to left, getting this whole patio area. Perfect. Really, the biggest things are to think about how you're going to be editing it, which is going to be more helpful after you edit the video too. But be thinking about the edit the whole time while you're shooting. Okay, first step, turn on all of the lights.
Yeah, so on that, I mean, hopefully open the curtains or the blinds, that's— house is shaded.
It, it would help if you open the curtains. Um, I didn't want to touch anything. That— I mean, that's, that's okay, that's good enough. Same thing with that. It lets a lot of light in doing that. Okay. Yeah. So all the lights are on and we're good to go. We're just going to start from whenever you walk in. So like this little area here, it's really— I mean, we only get entryways if it's like bad to the bone. Other than that, I would just start in the kitchen. Okay, that makes sense. Um, it is also the brightest room, so it'll be easier to expose in here. Okay, so grab the camera over here. So for this, I would say we kind of come in from this angle here on the side, showing like, hey, this is the kitchen and the dining. We'll do this shot We'll do, we'll do a shot from in here going this way, and then we'll do a shot coming in from this side. That way they can see. Yeah, because there's nothing over there. So we'll do one shot there, one shot here, maybe a detail shot or something like cool sweep from this angle, but that's the game plan for the kitchen.
And same game, just kind of two steps in.
Yep. So double-click that little— the gimbal button or the trigger. Point it down just a hair. Yeah, and you can use that joystick to do that too. So now you're ready to go. Hit the record button. And then slowly just go in. Perfect. Even slower. Yep, perfect. Okay. Now let's go to the kitchen. We'll get a couple shots of the kitchen. So just do a wide shot sweeping and getting as much as you possibly can to get the vibe of the room. Okay, uh, now we'll get one, yeah, going this way towards the kitchen here, and then I have one more after that I want to, want to get done. Okay, perfect. So the last shot with kitchens, I like to do a lot of detail tilt shots. And so zoom in to 18mm on the camera and then get like right here, and we're gonna just gonna kind of get the sink, go from left to right, get— getting the— yeah, probably the sink area. So it's just gonna be like right here.
Kind of like this.
Yeah, so this one will be easy. So for like, walk through, walk through the walkway. Like it, like almost like it feels like they're walking into the room. Okay. Yeah, yeah, yeah, that was good, just slower. Yep, good, perfect. Since this is such a big room, you may get one— you can— you have two options. Or 3 if you want. You can get one from this side and go this way, or you can do a shot dead on center with this fireplace because it's kind of a cool, like, thing. So those would be the other 2 shots I would get here.
I definitely want to get—
And you may, you may even zoom in. I don't know if it's on. Nice question. Yeah, zoom in, make sure it's exposed properly. So it's on the negatives, so you want to raise that ISO up. Okay, perfect. Okay, so whenever you're filming something with a gimbal like this, the best way to get a good result is to do what's called the ninja walk. And just to explain it really quick, you're gonna keep your shoulders locked and you're gonna bend your knees and hold the gimbal right out in front of you and walk like you're creeping up on somebody, trying not to make any noise. This is going to make it easier for the gimbal to stay smooth, etc. That's what Naomi here is doing. Anyways, just wanted to give you that quick tip. We're going to get this last shot of this room, and I'm going to step out of the room so I'm not in the shot. All right, so the next room we're going to get Naomi We'll get this room. The good thing about the rest of the house, now that the kitchen is done, this is gonna— we're just gonna pretty much get one shot of each room. So you want to pick the corner that has the most view, this, this corner, and you're just gonna get one shot going in forward.
Do you think this corner or do you think that corner?
I would say this corner because it has windows.
Yeah, me too.
It looks a lot better with windows than without, instead of just a white wall. So we're going to get one shot going this way, getting that whole room. Okay, got it. All right, we'll move on to the next room over here. Okay, so we have a bedroom here, bedroom here, bathroom. Is this the master? Yeah. Okay, we'll just knock out each guest room. So all we're going to do for the guest rooms They're only going to get one, one shot, so just a walk-in shot from the outside of the door will be plenty. Perfect. Go a little bit slower. Do it one more time. So here's a tip to Go— so you're going toe first. Go heel.
It's like the opposite of how you sneak up on someone.
Well, it's smoother. It's smoother. Yeah, so go heel first. Try it one more time, just going heel first, like, like you're, like you're rolling your foot from your heel.
Okay, yeah, that's unstable feeling.
It's easier with shoes. I've never done it without shoes. Okay, well, so, so for this one, step in a little bit more. Yeah, so since there's a wall here, we're going to have to move in towards the room and act like this is the entrance. And so, yep, perfect. Nice and slow. You don't have very much room to move here, so it's gonna be nice and slow. Perfect. Yep. Okay, same thing with the bathroom. You're gonna get one shot. Since this is a smaller bathroom, you're gonna have to kind of get creative. Oftentimes, if I don't have very much room, I'll kind of have to go from above and almost do like a twist Showing it would be this exact move right here. I would go from here down to showing the sink because then you're twisting and getting the whole thing in one shot. Yeah, that'll work, that'll work, that'll do, donkey. Was there a tool case in here? Yes.
So I was going to say, we can move that out. And now, that's not— I will leave it. I'll show you this.
Whose is this?
Is it the owner's?
Um, yeah, her son is a farmer. Okay, quick tip: move anything out of the way that's in the way, people. Okay, same thing, we're just going to hit one shot. Make sure it's exposed at least at 0.
Is it 0.7? And I think it looks good.
Plus 0.7 or minus? Plus 0.7. Yeah, that's good. That'll give you enough room. Okay, and then we're gonna get one shot of this. Kind of the same vibe. And if you have to, use the joystick to go down and get like at a weird Yeah, it's almost like a drop and twist. We're gonna go to the backyard, we're gonna get that, and then that's gonna be it. And then everything else is done post-production and editing, which is fun. Very fun time. Very fun time. Goodness, look at those freaking acorns. Suckers are huge. That's an acorn right there. This is a pretty nice backyard. Okay, so the first shot we're gonna get I would say not, not going from dark to bright, but from bright to dark. Meaning you want to stand in the sun and go towards the shade, only because— so the backyard, I usually get 3 or 4 shots. So the first shot I would do here is I would get in this corner to give an establishing shot of everything. That way they can kind of see, hey, there's a patio there, there's a shed here, there's a lot of open space over here on the left. And so that's going to be their first reaction or scene to the backyard.
Iris needs to go—
so lower your ISO first, lower your ISO first all the way down, especially we're outside. And then based off of the screen and what you're seeing, yeah, that's gonna be like— you don't want to go any higher than that or else it's gonna look blown out. So go ahead and hit record. We'll just do— well, we'll do a left to right here because it's kind of— the subject is over there on the left, and so we'll go left to right including the shed, including the porch, everything. Yeah, yeah, perfect. So that would be the first shot. The second shot, I would get right here, just showing like a little bit more under the patio. It gets very tricky outside because of all the shadows, the trees and the porches. It gets very tricky. Okay, so now you have that. You can honestly, because of these bricks, I would do a detail shot with this one. Zoom in on the lens, get kind of close, and just go from an angle here and get a shot of the brick just to show like, hey, it's a cool little feature. Yeah, so go 18 all the way in, go from this angle right here. Yeah, and then do the same thing from left to right. Just a slow— like, slow. Keep that in the center and then come around it. Keep that the subject, but the movement is from left to right. So, so keep, keep, keep this in the middle. See where that little middle thing is? So you're going to basically track the middle of the brick, but you're going to be moving. Yep, yep, yep. Turn your shoulders, turn your shoulders. Yep, perfect. That's what I was talking about. We're gonna go to the backyard, we're gonna get that, and then that's gonna be it. And then everything else is done post-production in editing, which is fun. Very fun time. Very fun time. Okay. Goodness, look at those freaking acorns. Suckers are huge. That's an acorn right there. This is a pretty nice backyard. Okay, so the first shot we're gonna get, I would say not, not going from dark to bright, but from bright to dark. Meaning you want to stand in the sun and go towards the shade, only because So the backyard, I usually get 3 or 4 shots. So the first shot I would do here is I would get in this corner to give an establishing shot of everything. That way they can kind of see, hey, there's a patio there, there's a shed here. There's a lot of open space over here on the left, and so that's going to be their first reaction or scene to the backyard.
Iris needs to go—
so lower your ISO first, lower your ISO first all the way down, especially we're outside, and then Based off of the screen and what you're seeing, yeah, that's gonna be like— you don't want to go any higher than that or else it's gonna look blown out. So go ahead and hit record. We'll just do— well, we'll do a left to right here because it's kind of— the subject is over there on the left, and so we'll go left to right including the shed, including the porch, everything. Yeah, yeah, perfect. So that'd be the first shot. The second shot, I would get right here, just showing like a little bit more under the patio. It gets very tricky outside because of all the shadows, the trees and the porches. It gets very tricky. Okay, so now you have that. You can honestly, because of these bricks, I would do a detail shot with this one. Zoom in on the lens, get kind of close, and just go from an angle here and get a shot of the brick just to show like, hey, it's a cool little feature. Yeah, so go 18 all the way in. Go from this angle right here. Yeah. And then do the same thing from left to right. Just a slow— like, slow. Keep that in the center.
Okay.
And then come around it. Keep that the subject, but the movement is from left to right. So, so keep, keep, keep this in the middle. See where that little middle thing is? So you're gonna basically track the middle of the brick, but you're gonna be moving. Yep, yep, yep. Turn your shoulders, turn your shoulders. Yep, perfect. That's what I was talking about. Okay, so that's it for the patio. Good thing there's sidewalk over here. Uh, do you want to get this in the shot? That's preference. Okay, so our last shot for the backyard, I'd probably just say a shot from over here getting all of this. And if that was cleaned up, we'd probably get a shot like from over here going this way, but yeah, which is fine. And this will be the last one. It is. A hot, humid day. Gosh, freaking no clouds in the sky. Okay, did you get that?
Yes.
Okay, perfect. Well, I think that's, that's everything. We finished up all the shots of the house. Is there anything else you want to hit up before we lock up and turn the lights off?
Okay.
All right, so we just finished up. Hopefully this helped you guys out tagging along. We're gonna do some more in-depth stuff at some point. It's just I want to do it on a bougie house at the next one. Hope you guys enjoyed today's video. If you liked it, make sure to hit the subscribe button and and the like button. Um, also leave a comment down below. Have you shot real estate videos before? Um, if you have, how long have you been shooting them and what camera do you use? I'm, I'm super curious, but we're looking to make more content like this. Stay tuned for all the new episodes and the new podcast, all the things. You don't want to miss it. Uh, yeah, we'll see you in the next video. Peace.
More from Daron





Entitled Woman Tries Suing Man For LEAVING Her Mid Date, Instantly Regrets It

This Is Why More People REGRET Buying Their Electric Vehicle Than Ever Before