Use Your iPhone Like A Professional Videographer (Includes Settings)
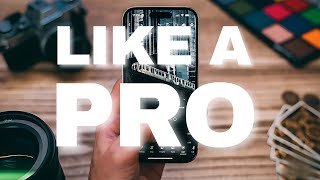
Learn iPhone camera settings and shooting techniques that make video look professional. Turn off HDR, shoot at 24fps, use a key light at 45 degrees, and stabilize handheld shots with the ninja walk. Edit in CapCut or iMovie.
Chapters
There's people in this group, this very group, that have over 100,000 followers on Instagram alone, and she used an iPhone 12 for the past year. That's all she has used. A lot of people think you need to have the top-of-the-line equipment and cameras. Those things help if you know how to use it, okay? The biggest tool that we all have access to, and it really doesn't— like, people use their iPhone Xs. I like— these are like 5+ year old iPhones for this stuff, okay? But everyone has one. It's an iPhone. And today we're going to be talking about a few of the basic, um, settings that you're going to want to put your camera on to make it look pro. Okay, and there's some in the Settings app, and there's some within the camera app itself. So if you have an iPhone, or if you're on your phone listening right now, make sure to take out a notebook and take some notes. Let me pull up the comments here on my handy-dandy iPad. Thanks for joining, by the way. Thanks for watching our weekly live stream. Um, if you're new here, let me know. Put it in the comments. I want to know if you're new, how long you've been a part of the Insiders Group, if you've learned anything before on the Insiders Group. Let me open it up. Boom. What's up, chat? Yeah, but today, if you're tuning in, we're, we're talking about how to make your iPhone footage look professional. Okay, so with the phones being as good as they are nowadays, you can definitely get away with using even a 3 to 5 year old iPhone. Okay, the cameras and the features that you have access to, a lot of people don't even know they exist. Okay, so I'm going to do my best. All I— all we have is this camera setup. We don't have any screen mirroring going on or anything, so I'm just going to straight up show you this stuff and you're going to be able to see me. I'm going to show it to the camera. I'm going to try to explain the best that I can. To make sure you can understand it. So there's a few things when it comes to cameras as a whole. Some of this, uh, jargon that we use also applies to every single other video camera or video recording device. Okay, so let's start off by opening your camera app. Hey y'all, I wanted to hop on here really quick and remind you guys about our 24-hour podcast setup services. So if you have a space in your office, in your church, at your house that you want to transform into something similar like this, we've perfected the technique. We've got the whole list of everything you need. We'll personally look at your space, we'll do some interior design work set up all the cables, make a trip out to your location and set it all up for you and train you how to use it. So if you're interested, I'm leaving a link in the description for you to check out. Hope to work with you guys soon. Okay, so you're gonna open up your camera app. Boom. When it pops up, there's gonna be a couple different options. Okay, so you want to switch it over to video mode. Okay, now you're in video mode, and this is where the red circle is. Once the red circle pops up, it means you're ready to record. Once you hit it, a little square, the stop button will pop up, and that means you're recording. A lot of people sometimes think they're recording, but they're not. So make sure to hit the record button before, just to make sure you're recording. So in the top right-hand corner, there are— let's see here— two options. Okay, there's two options, uh, and it depends on what your phone is set to, but mine is set to 4K, which is the resolution. Um, and the only resolutions you really need to even worry about is HD, which is called— they call it 1080p. That's how many pixels cover up the screen or the file image. And then there's 4K, which is literally 4 times the amount of pixels as HD. So you want to make sure whenever you are filming your stuff for social media, most of the time it can be in HD if it's going to be a quick reel. If it's going to be a quick, like, TikTok, you can get away with HD and nobody will know. Here's why. It's because whenever you upload, it's— the platform is going to compress your footage either way. So if it's a 4K file— oh, my wife's calling. Let me text her back. Mama Livestream. Um, so you can do either HD or 4K. Okay, so if you're wanting to get a, a crisper, cleaner image, you want to do 4K. You do have to know it takes up more storage on your phone. So you have 4K. If you tap 4K It'll become HD. That's the one you want to have it set on if you're doing regular social media stuff. So there's going to be a little number next to it, and it's going to either say 24, 30, or 60. This is your frame rate. This really can stay on 24 or 30 frames per second. It really doesn't matter a whole lot until it comes to filming in slow motion. So if you're filming like, uh, they call it the cinematic frame rate, which is 24 frames per second. If you want it to look a little bit more cinematic, like it's a part of a movie or a documentary, that's where you're going to shoot 24 frames per second. Um, now frames per second, what does that mean? Let's break it down. It means exactly what it says. So frames per second. So your camera or your iPhone is physically capturing that many frames in 1 second. So it's taking— if you're in 24 frames per second, it's taking 24 pictures in 1 second right after the other, which creates a moving image, which is video. So if you do 24 frames per second, you're taking 24 pictures per second. Now, same thing applies to all of the other frame rates. You have 24, you have 30, you have 60, and you have 120. Those are the most normal ones. You can go higher and you can go lower, but those are the most standard industry frame rates. So for you, the content creator, the business owner, make sure it's either on HD or 4K depending on where you're posting it. If it's going on YouTube, I would recommend do 4K, um, cuz 4K, YouTube can support 4K. So make sure it's on HD if you're just gonna be posting, um, an Instagram reel or a TikTok. And 30 frames per second, I would say, is a good number to stay on. For 99% of the time. So that's the first setting I wanted to cover. The next setting is getting your exposure right. So whenever you tap the screen— let's see here— whenever you tap the screen, there's a little yellow box and you can drag down or up, and it bumps up and down the exposure. So if it's too bright, you can lower it. If it's too dark, you can raise it. Now oftentimes iPhones overexpose just a hair, so I always knock down the exposure. You'll tap it— the little, the little yellow box has a sun next to it— and you'll just slide the sun down. That's all you're doing. So make sure you're in HD, 30 frames per second, um, and expose correctly, and you'll be fine. The next settings are all going to be in your Settings app. The little gear icon is right on my home menu. You open it up, you go there's a camera button. So click camera. It's going to open up all of these settings, okay? And depending on what generation phone you have, the, the settings are going to be a little bit different. So mine, you have the regular record option, you have the slow motion option, which means a higher frame rate, okay? Recording cinematic— cinematic mode is a newer mode that Apple came out with the last couple years. And it puts— basically, you see this background blur behind me? It basically does that artificially, so it recreates it to make it look like there's background blur. Now, it's not always very accurate. It's getting better, but it's not quite at the spot where it looks as good as an actual lens. So On record video, you're gonna— and these are the— these are just the settings that it automatically opens up to. So if you wanted to stay at HD30, put it at HD30, which is 1080p. Um, then you can scroll down. There's show PAL formats. You'd want that off. Okay, take a screenshot of this so you can match it on your phone in the future. Um, enhanced stabilization, uh, depending on which phone you have, again, the stabilization you can turn on and off. Uh, the new phones, the 15s and the 16s, have what's called an Action Mode, and it's in the camera app. You can just turn it on. It crops in a little bit. So you don't get as wide of an angle, but it is insane. You can be literally sprinting, holding your phone, and it will look like you're on a gimbal. Um, thanks for hopping in the livestream. If you're on right now, comment down below who you are and where you're from, man. Have you used iPhones to do any projects recently? Okay, so you scroll down a little bit more, there's this HDR video option. Turn the HDR off. It's okay if you're just using it for memories, but if you're going to be posting it on platforms, make sure to have HDR mode off. Because I don't know if you've ever noticed, but whenever you're scrolling on Instagram and there's HDR video Your phone gets really, really, really bright and then everything else looks very dim after that. So to me, it doesn't really look that professional because the iPhone is, um, it's, it's good for like capturing memories, but if you're going to be using this professionally at all, turn it off. You don't need it. Same thing with photos. Um, Let's see, you can scroll down. Okay, let's go back to the regular camera options. So if you scroll down, there's going to be this box that says Composition. Okay, with Grid, you can put a grid on it. You can put a level on your camera. Turn both of those on because here's what it does. It adds a literal grid. We'll do this. It adds a literal grid and a literal level on top of your screen. Okay, so if you're ever like, man, I wonder if that's going to be straight, make sure to turn these on and it will make sure your picture is completely straight every time. So that's one of the things that you can do. To up your quality, up your production level. So there's a couple— let me see if I can get these comments going. Let me see. There's a couple other things that you can do in order— and it's not letting me see any of the comments. What over here? Do you like jazz, Matthew? I do love jazz. Do you like jazz? That's a real question. And do you like the Bee Movie? You like jazz? Crazy. Absolutely crazy. I don't even know what I was talking about anymore. But those are kind of the settings. Make sure to go back and screenshot it if you want to use that in the future. Okay, let's go back into our camera app. Now that you have all your settings right, you know what frame rate you want to be shooting at, you know what resolution you want to be shooting at. So there's regular video mode, and then to the left there's cinematic mode. Now depending on what phone you have, you may or may not be able to film in 4K. Um, and there's also a little F button that stop— that, that shows up in the top right corner. If you hit that button, you can choose what's called your aperture. Now, this is exactly set up how a normal lens would be set up. So if it's an f/2.8, which is probably what yours is going to be set at, it's like a pretty normal— it's going to be a nice background blur. It's not going to be too much. The more you go to the left, which means the lower— if you're at f/2, it's going to be more blurred in the background. If you bring it up, say you go to f/16, there's going to be hardly any separation or blur between the subject and the background. So I would stick around that f/2.8 to f/3.5 mark. It doesn't really matter as far as like the exposure stuff. Goes on the iPhone because it auto exposes most of the time. But if you're working with a regular camera, that is definitely a big factor because it's physically opening up that lens eyeball. So that's your cinematic mode. And on the newer phones, the magnification is significantly better. So you see how they have multiple cameras So one of them is a wide, one of them is a standard, and one of them is a— they call it telephoto lens, which also can be used as a macro lens. So if you get real close to your hand, it should be focusing. And Mike's trying to AirDrop all kinds of stuff. I'm trying to drop one thing. Well, I don't want to see it on my phone. I don't want to see it on mine. Anyways, Mike is pulling some shenanigans. Speaking of shenanigans, this is a little bonus. If you saw my Instagram story, this— it's kind of hard to see. Go look at my Instagram story because my announcement for the live stream was made by AI. That is not my face recording. That's a fun fact. It's an app, Captions. Go and utilize it if you don't already. It does cost some money, but go and utilize it. Okay, so once you have everything figured out with your, your camera, let's talk about some movements in order to maximize like the smoothness, make sure it looks professional. So one thing you want to avoid is moving your elbows. Okay, so you want to keep your camera directly in front of you or wherever it's at and only move your body. So like, you want to pretend that your elbows are stuck and your shoulders are stuck and you're only moving by your body. You can move with your waist, you can do what's called a ninja walk. If you don't know what a ninja walk is, go look it up online. You usually don't even have to with the iPhones nowadays because the stabilization is so good. But if you do the ninja walk, it's like you're kind of creeping. This is how to get the smoothest footage. That's what we do for all of our real estate stuff. So if you're filming a real estate walkthrough, make sure to do the ninja walk and it'll be great. So there's how you walk, um, and there's also another big factor, which is your lighting. With iPhones, it's, it's important, but it's also not important, if that makes sense. Uh, right now I have perfect exposure. I'm, I'm dialed in. I'm in the studio. I have controlled light. I have a single key light on me. Uh, and it, and it looks great. It doesn't always happen like this. Now, if you have any sort of lighting, even if it's like a cheap ring light, definitely utilize it. If not, make sure to go by a window and stand right beside it during the day. If you have some curtains, make sure they're white to diffuse the light. You want to find the softest light that you could possibly find that is well lit. Um, that's why if you see any photographers or videographers bring lights out and they have a big like box around their light, that's what it's doing. It's diffusing using the light. And so it's just to make it look soft, kind of like this. Um, we use it for everything that we do just because we are a video production company. Um, but that is going to be very crucial as well. If you're in a dark-lit room, your footage is going to look grainy. You're not going to really be able to tell what's going on. Your camera is going to be trying to overexpose for certain areas of the frame. It's just, it looks gross. And with the size of the sensors on the iPhones, they're, they're really small. So what does this mean? It means there's less light that it's able to absorb. Um, if you use a regular camera, the sensors are usually around an inch to 2 inches, if I had to guess. Um, they don't— that's not how they measure it, but They're a lot bigger, so they cover a lot more space and there's a lot more light that is able to hit that sensor. So that's how— preferably pick great lighting because with— if you have great lighting, if I threw my iPhone up right now where my camera is, it would look pretty much the same. Like there would be small things that you would be able to tell the difference of. If you have a trained eye. If you don't, I've made videos, I've used iPhone videos in professional videos and nobody ever noticed. Like, it's definitely kind of insane how good these cameras are getting. Um, let me know, do you use your iPhone on a daily basis to make content, to post things and make videos? Have you used an iPhone? If you don't, what do you use? I want to know. I want to know. Let me see, there's a couple more things. Um, ninja walk, we got lighting, getting the right exposure, cinematic versus normal mode, understanding your resolutions, your frame rates, making sure the settings in your camera are set to the right settings. Um, there's all sorts of settings that people don't even realize you're missing until you're like, hmm, I wonder how somebody uploaded it so clean. Uh, a couple resources and apps and software that you can use actually on your phone are obviously iMovie to help edit videos. You can use CapCut. There's Adobe Premiere Rush. I believe that one's free. You might have to have an account, but I think it's free. Um, there's also another app that you can use that I've heard good things about. It's called Snapseed. If you've ever used Snapseed, let me know what you think about it in the comments. But make sure to play around with some of those. If you have any questions, put it in the group. This is what the Insiders Group is for, for you to learn, for you, for it to be a resource in order for you to level up your personal brand online, to level up your production quality, all from even an iPhone. Because there's people in this group, this very group, that have over 100,000 followers on Instagram alone, and she used an iPhone 12 for the past year. That's all she has used. So it's really not about the equipment. It's about what's in the videos. That you're posting. Like what is in the content that's gonna make people resonate with you, that's gonna make people realize that you're the authority in that certain subject or that topic, that industry, whatever it is. The meat and potatoes, the content, the education, the information that you relay through your content is way more important than, having the best cameras around. Now, there are a time and place for cinema cameras like we use, um, if you're going to be putting something on TV, if you're going to be putting something up on a bigger screen, on YouTube, running a commercial, um, if you're wanting to look like a legit company, that's when you bring in a video production crew and we can knock it out for you. Because these cameras, they cost like multiple thousands of dollars. I probably am filming with about $5,000 of of equipment right now. Um, and so a little over the top for livestream, I know, but I have access to it. And so I like to utilize it. If you're ever needing any video production stuff for your company or a project you're working on, we are a resource for that as well. Um, we offer consulting services for this exact thing for social media. Uh, we, we figure out strategies. We can build podcast studios for you. We are your, your media people. Um, so yeah, that's kind of what we're doing. Our heart behind this group, our heart behind, um, social media as a whole is to just let people know that we're trying to serve you. We are wanting you to do better because whenever you implement the things that we teach you, it makes us look good and you will be referring people to come learn from us as well. And so it always helps out. Julian says, what angles are better for natural lighting? Okay, so when it comes to lighting and angles, um, you really want it to be pretty head-on. If you can angle it about 45 degrees to either your right or your left, which is where my light is at, it's directly 45 degrees to my right. It's gonna enhance the whole picture. So like, if I turn— if I turn my whole head— or let's move the light. If I move the whole light, all of a sudden you get tons of shadows right here. Okay, my nose is blocking a lot of the light coming to this side of my face. If I move it back— oh, and not in frame— it's a little bit more evenly spread. There's still a little bit of contrast on my face, which is good. Uh, so I would either say 45 degrees to the window or head-on with the window. I like to use 45 degrees because it gives it a little bit of contrast when it comes to like the shape of your face. And if you have other lighting elements in the background, it just makes it a little bit more appealing to watch. Um, Julian, do you use your iPhone a lot to make content? Let me know. Hope you're doing good, by the way, Julian. The reason I keep looking over here is where my, it's where my computer is. All right, we got about a few more minutes of this week's livestream. Um, I'm gonna encourage you to be active in this group. Uh, utilize it, engage, comment on people's posts. If you're a photographer, put some pictures up that you've taken and share it with the group because this is a group for business owners who are trying to expand their reach online, which is why I do things like this. And I try and help and educate you how to use certain tools. Um, today we were talking about the iPhone. If you just joined, make sure to rewind it after this is over and go watch the rest. But it's full of business owners. It's full of creatives who are wanting to make money off of the stuff that they make. So that's kind of who our target audience is. And if that's you, thanks for being a part of it. Thanks for being a part of the Insiders Group. This is pretty, a pretty new thing, and hopefully within the next year or two it can be well established and we can have other people start coming on, um, teaching from different places. I do, I have been wanting to shoot a promo for a friend. Do it, man. Um, if you use your phone, make sure to really focus on good lighting. Um, and you may even go out and buy a fog machine or something to make it a little more interesting. Um, fog machines definitely make a difference. We used the fog machine for a while. We have one in studio. We used it for the Howdy Podcast. Um, but we deci— I, I decided to stop. It was too much. It was too much. Yeah, man, once you make that Make sure to share it in the group because I would love to see your work. Absolutely love to see it. So if there's any last minute questions, if there's any, um, last minute things that you're like, man, how can I make this better? Um, if you're watching this live, now's the time. If you're watching it after the live, now's the time. Comment and I will make sure to hit your question on the next livestream. We're going live once a week from now on, and it's going to be at 1 o'clock every single Friday. It's more sustainable that way, and I don't want to promise something and not be able to hold up to it. So it's going to be every single Friday at 1 o'clock unless I am out of town, and even then I'll probably try to hop on. But we're going to be putting up polls. If there's something you want to learn about specifically, make sure to put it in the group chat. Um, yeah, that's pretty much it. Go practice with your iPhone if you haven't. Um, practice with cinematic mode, practice with different resolutions, practice, uh, editing. There's also one more thing before we go. In your Photos app, we'll just take this video of my AI twin. There's, in the newest update, there's an edit button. It has 3 little lines with sliders. This is where you can edit basic, basic stuff. You can trim videos. It opens up the editor. You can drag the ends and make the clip shorter. You can also adjust exposure, contrast, highlights, shadows, brightness, black point, vibrance, all of the things. You can throw a filter over it if you want. There's a lot of things you can do within the Photos app, so, so make sure and utilize that too. Yeah, I forgot to mention that earlier, but— all right, it's 1:33. Hope you guys have a wonderful rest of your Friday. I'm gonna go ahead and hop off. I have some editing to do, so we'll see you next week. And in the meantime, make sure to stay active. In the group. We will catch you on the flip side, boys and girls.
More from Daron






Entitled Woman Tries Suing Man For LEAVING Her Mid Date, Instantly Regrets It

This Is Why More People REGRET Buying Their Electric Vehicle Than Ever Before